
Related Manuals for Electrolux EUN2244AOW


Summary of Contents for Electrolux EUN2244AOW
- Page 1 EUN2244AOW Freezer User Manual Congélateur Notice d'utilisation Gefriergerät Benutzerinformation...
-
Page 2: Table Of Contents
11. TECHNICAL INFORMATION................. 18 WE’RE THINKING OF YOU Thank you for purchasing an Electrolux appliance. You’ve chosen a product that brings with it decades of professional experience and innovation. Ingenious and stylish, it has been designed with you in mind. So whenever you use it, you can be safe in the knowledge that you’ll get great results every time. -
Page 3: Safety Information
ENGLISH SAFETY INFORMATION Before the installation and use of the appliance, carefully read the supplied instructions. The manufacturer is not responsible if an incorrect installation and use causes injuries and damages. Always keep the instructions with the appliance for future reference. 1.1 Children and vulnerable people safety This appliance can be used by children aged from 8 •... -
Page 4: Safety Instructions
Do not use water spray and steam to clean the • appliance. Clean the appliance with a moist soft cloth. Only use • neutral detergents. Do not use abrasive products, abrasive cleaning pads, solvents or metal objects. Do not store explosive substances such as aerosol •... -
Page 5: Operation
ENGLISH • Do not change the specification of this • Before maintenance, deactivate the appliance. appliance and disconnect the mains • Do not put electrical appliances (e.g. plug from the mains socket. ice cream makers) in the appliance • This appliance contains hydrocarbons unless they are stated applicable by in the cooling unit. - Page 6 Temperature warmer button together Mode and temperature colder buttons for a few seconds. Change is DrinksChill reversible. It is possible to change predefined sound of buttons to a loud one by pressing 3.2 Display A) Alarm indicator B) Freezer Eco mode...
-
Page 7: First Use
ENGLISH the bottles placed in the freezer for fast 1. Press Mode until the corresponding cooling. icon appears. The FastFreeze indicator is shown. 1. To switch on the function press 2. To switch off the function before its DrinksChill . automatic end, repeat the procedure The DrinksChill indicator appears. -
Page 8: Daily Use
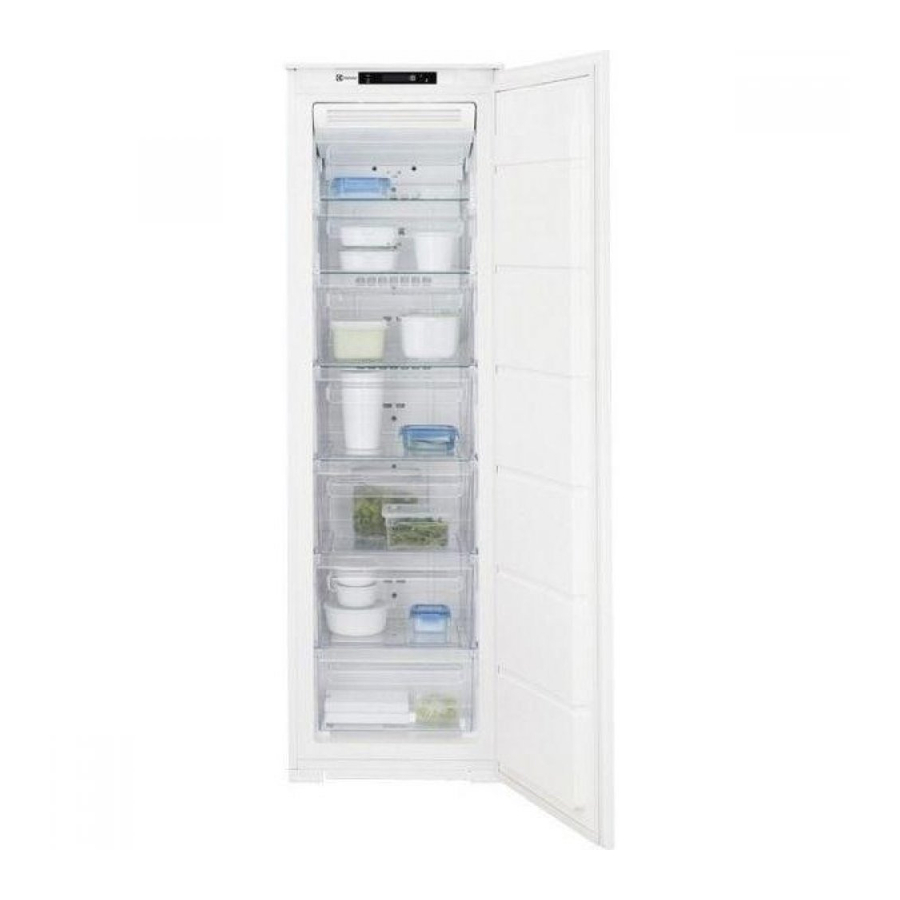
5. DAILY USE 5.3 Thawing WARNING! Refer to Safety chapters. Deep-frozen or frozen food, prior to being used, can be thawed in the 5.1 Freezing fresh food refrigerator compartment or at room temperature, depending on the time The freezer compartment is suitable for available for this operation. -
Page 9: Care And Cleaning
ENGLISH • A sudden cracking noise from inside • do not allow fresh, unfrozen food to appliance caused by thermic dilatation touch food which is already frozen, (a natural and not dangerous physical thus avoiding a rise in temperature of phenomenon). -
Page 10: Troubleshooting
7.2 Periodic cleaning 7.3 Defrosting the freezer The freezer compartment is frost free. CAUTION! This means that there is no build up of Do not pull, move or damage frost when it is in operation, neither on any pipes and/or cables the internal walls nor on the foods. - Page 11 ENGLISH Problem Possible cause Solution The appliance is noisy. The appliance is not sup‐ Check if the appliance ported properly. stands stable. Audible or visual alarm is The cabinet has been re‐ Refer to "Door open alarm"or cently switched on or the "High temperature alarm".
-
Page 12: Installation
Problem Possible cause Solution Water flows on the floor. The melting water outlet Attach the melting water out‐ is not connected to the let to the evaporative tray. evaporative tray above the compressor. Temperature cannot be The FastFreeze or Shop‐... - Page 13 ENGLISH min. Climate Ambient temperature 5 cm 200 cm class +16°C to + 43°C Some functional problems might occur for some types min. of models when operating 200 cm outside of that range. The correct operation can only be guaranteed within the specified temperature range.
- Page 14 6. Install the lower spacer. 7. Install the door. 8. Tighten the spacer and the upper pin. 2. Drill the unit using a Ø 2.5 mm drill Do a final check to make (10 mm max. penetration). sure that: 3.
- Page 15 ENGLISH 10. Remove the correct part from the hinge cover (E). Make sure to remove the part DX, in the case of right hinge, SX in opposite case. 6. Push the appliance in the direction of the arrows (2) against the cupboard on the opposite side of the hinge.
- Page 16 18. Open the appliance door and the kitchen furniture door at an angle of 90°. 12. Install the vent grille (B). 19. Insert the small square (Hb) into 13. Attach the hinge covers (E) to the guide (Ha). hinge.
-
Page 17: Noises
ENGLISH 24. Press the part (Hd) on the part (Hb). 8 mm 22. Place the small square on the guide again and fix it with the screws Do a final check to make sure that: supplied. • All screws are tightened. 23. -
Page 18: Technical Information
SSSRRR! SSSRRR! HISSS! HISSS! BLUBB! CRACK! CRACK! BLUBB! 11. TECHNICAL INFORMATION 11.1 Technical data Dimensions of the recess Height 1780 Width Depth... - Page 19 ENGLISH Rising time Hours Voltage Volts 230 - 240 Frequency The technical information are situated in internal side of the appliance and in the the rating plate, on the external or energy label. 12. ENVIRONMENT CONCERNS Recycle the materials with the symbol marked with the symbol with the household waste.
- Page 20 11. CARACTÉRISTIQUES TECHNIQUES............38 NOUS PENSONS À VOUS Merci d'avoir choisi ce produit Electrolux. Avec ce produit, vous bénéficiez de dizaines d'années d'expérience professionnelle et d'innovation. Ingénieux et élégant, il a été conçu sur mesure pour vous. Grâce à cet appareil, vous savez que chaque utilisation vous apportera satisfaction.
-
Page 21: Consignes De Sécurité
FRANÇAIS CONSIGNES DE SÉCURITÉ Avant d'installer et d'utiliser cet appareil, lisez soigneusement les instructions fournies. Le fabricant ne peut être tenu pour responsable des dommages et blessures liés à une mauvaise installation ou utilisation. Conservez toujours cette notice avec votre appareil pour vous y référer ultérieurement. -
Page 22: Instructions De Sécurité
N'utilisez aucun dispositif mécanique ou autre appareil • pour accélérer le processus de dégivrage que ceux recommandés par le fabricant. N'endommagez pas le circuit frigorifique. • N'utilisez pas d'appareils électriques à l'intérieur des • compartiments de conservation des aliments de l'appareil, sauf s'ils sont du type recommandé... - Page 23 FRANÇAIS 2.2 Connexion électrique • Si le circuit frigorifique est endommagé, assurez-vous de AVERTISSEMENT! l'absence de flammes et de sources Risque d'incendie ou d'ignition dans la pièce. Aérez la d'électrocution. pièce. • Évitez tout contact d'éléments chauds • L'appareil doit être relié à la terre. avec les parties en plastique de •...
-
Page 24: Fonctionnement
2.5 Mise au rebut • Le circuit frigorifique et les matériaux d'isolation de cet appareil préservent AVERTISSEMENT! la couche d'ozone. Risque de blessure ou • La mousse isolante contient un gaz d'asphyxie. inflammable. Contactez votre service municipal pour obtenir des •... - Page 25 FRANÇAIS répétez la procédure jusqu'à ce que L'alarme sonore peut se le voyant Eco s'éteigne. déclencher au bout de quelques secondes. La fonction se désactive Pour réinitialiser l'alarme, lorsque vous reportez-vous au sélectionnez une paragraphe « Alarme haute température différente. température ».
-
Page 26: Première Utilisation
3.8 Mode FastFreeze Pour réinitialiser l'alarme, appuyez sur n'importe quelle touche. Cette fonction s'arrête automatiquement L'alarme s'éteint. au bout de 52 heures. L'indicateur de température du congélateur affiche pendant quelques Pour activer cette fonction : secondes la température la plus élevée 1. -
Page 27: Conseils
FRANÇAIS autre aliment à congeler pendant cette le compartiment réfrigérateur ou à période. température ambiante en fonction du temps disponible pour cette opération. Une fois le processus de congélation terminé, revenez à la température Les petites portions peuvent même être souhaitée (voir «... -
Page 28: Entretien Et Nettoyage
6.3 Conseils pour la • la température très basse à laquelle se trouvent les bâtonnets glacés, s'ils congélation sont consommés dès leur sortie du compartiment congélateur, peut Voici quelques conseils importants pour provoquer des brûlures ; obtenir un processus de congélation optimal : •... -
Page 29: Cas D'anomalie De Fonctionnement
FRANÇAIS 7.2 Nettoyage périodique forme pas pendant que l’appareil est en fonctionnement, que ce soit sur les ATTENTION! parois internes ou sur les aliments. Ne tirez pas, ne déplacez L'absence de givre est due à la pas, n'endommagez pas les circulation d'air froid en continu à... - Page 30 8.1 En cas d'anomalie de fonctionnement Problème Cause probable Solution L'appareil ne fonctionne L'appareil est éteint. Mettez l'appareil en marche. pas du tout. La fiche du câble d'ali‐ Branchez correctement la fi‐ mentation n'est pas cor‐ che du câble d'alimentation rectement insérée dans...
- Page 31 FRANÇAIS Problème Cause probable Solution Les aliments introduits Laissez refroidir les aliments dans l'appareil étaient à température ambiante trop chauds. avant de les mettre dans l'appareil. La porte n'est pas fermée Reportez-vous au chapitre correctement. « Fermeture de la porte ». La fonction FastFreeze Consultez le paragraphe est activée.
-
Page 32: Installation
Problème Cause probable Solution La porte a été ouverte N'ouvrez la porte qu'en cas trop souvent. de nécessité. L'air froid ne circule pas Assurez-vous que de l'air dans l'appareil. froid circule dans l'appareil. 2. Si nécessaire, ajustez la porte. - Page 33 FRANÇAIS 7. Mettez en place la porte. 8. Serrez l'entretoise et le pivot min. 5 cm 200 cm supérieur. Faites une dernière vérification pour vous assurer que : • Toutes les vis sont bien serrées. min. • Le joint magnétique 200 cm adhère bien à...
- Page 34 2. Percez un trou de 2,5 mm de 6. Poussez l'appareil dans la direction diamètre (10 mm max. de indiquée par les flèches (2) contre le profondeur) dans l'appareil. meuble, du côté opposé à la 3. Fixez l'attache carrée à l'appareil.
- Page 35 FRANÇAIS 12. Mettez en place la grille d'aération (B). 13. Fixez les cache-charnières (E) sur la charnière. 14. Placez l'appareil contre la paroi latérale du meuble de cuisine. 15. Détachez les pièces (Ha), (Hb), (Hc) et (Hd). 10. Retirez la pièce correcte du cache- charnière (E).
- Page 36 22. Placez de nouveau le petit carré sur le guide et fixez-le à l'aide des vis fournies. 23. Alignez la porte du meuble de cuisine et celle de l'appareil en réglant la pièce (Hb). 18. Ouvrez la porte de l'appareil et la porte du meuble de cuisine à...
-
Page 37: Bruits
FRANÇAIS 10. BRUITS L'appareil émet certains bruits pendant son fonctionnement (compresseur, circuit frigorifique). HISSS! BRRR SSSRRR! SSSRRR! HISSS! HISSS! -
Page 38: Caractéristiques Techniques
CRACK! CRACK! BLUBB! BLUBB! 11. CARACTÉRISTIQUES TECHNIQUES 11.1 Caractéristiques techniques Dimensions de la niche d'encastre‐ ment Hauteur 1780 Largeur Profondeur Autonomie de fonctionnement Heures Tension Volts 230 - 240 Fréquence Les caractéristiques techniques figurent côté intérieur ou extérieur de l'appareil et sur la plaque signalétique située sur le... - Page 39 11. TECHNISCHE DATEN................... 57 WIR DENKEN AN SIE Vielen Dank, dass Sie sich für ein Gerät von Electrolux entschieden haben. Sie haben ein Produkt gewählt, hinter dem jahrzehntelange professionelle Erfahrung und Innovation stehen. Bei der Entwicklung dieses großartigen und eleganten Geräts haben wir an Sie gedacht.
-
Page 40: Sicherheitsinformationen
SICHERHEITSINFORMATIONEN Lesen Sie vor der Montage und dem Gebrauch des Geräts zuerst die Gebrauchsanleitung. Der Hersteller übernimmt keine Verantwortung für Verletzungen und Beschädigungen durch unsachgemäße Montage. Bewahren Sie die Gebrauchsanleitung griffbereit auf. 1.1 Sicherheit von Kindern und schutzbedürftigen Personen Das Gerät kann von Kindern ab 8 Jahren und... -
Page 41: Sicherheitsanweisungen
DEUTSCH Beschädigen Sie nicht den Kältekreislauf. • Betreiben Sie in den Lebensmittelfächern des Geräts • keine anderen als die vom Hersteller empfohlenen Elektrogeräte. Reinigen Sie das Gerät nicht mit einem Wasser- oder • Dampfstrahl. Reinigen Sie das Gerät mit einem weichen, feuchten •... - Page 42 • Stellen Sie sicher, dass die Flammen und Zündquellen im Raum elektrischen Daten auf dem gibt. Belüften Sie den Raum. Typenschild den Daten Ihrer • Stellen Sie keine heißen Stromversorgung entsprechen. Gegenstände auf die Kunststoffteile Wenden Sie sich andernfalls an eine des Geräts.
-
Page 43: Betrieb
DEUTSCH • Trennen Sie das Gerät von der • Die Isolierung enthält entzündliches Stromversorgung. Gas. Für Informationen zur korrekten • Schneiden Sie das Netzkabel ab, und Entsorgung des Gerätes wenden Sie entsorgen Sie es. sich an Ihre kommunale Behörde. • Entfernen Sie die Tür, um zu •... - Page 44 3.7 DrinksChill-Modus Informationen zur Auswahl einer anderen Temperatur finden Sie unter Mit dem Modus DrinksChill lässt sich ein „Temperaturregelung“. Alarmton einstellen, der zu der Wenn im Display "DEMO" angezeigt gewünschten Zeit ertönt. Dies ist zum wird, siehe Abschnitt „Fehlersuche“.
-
Page 45: Erste Inbetriebnahme
DEUTSCH Die FastFreeze-Anzeige erscheint. Die Temperaturanzeige des 2. Zum Ausschalten der Funktion vor Gefriergeräts zeigt die höchste erreichte ihrer automatischen Abschaltung, Temperatur ein paar Sekunden lang an. wiederholen Sie die obigen Schritte Danach zeigt sie wieder die eingestellte Temperatur an. Die Funktion wird durch Die Alarmanzeige blinkt so lange, bis die die Auswahl einer... -
Page 46: Tipps Und Hinweise
5.2 Lagern von gefrorenen Verwendung je nach der zur Verfügung stehenden Zeit im Kühlschrank oder bei Lebensmitteln Raumtemperatur aufgetaut werden. Lassen Sie das Gerät vor der ersten Kleinere Gefriergutteile können sogar Inbetriebnahme oder nach einer Zeit, in direkt aus dem Gefriergerät entnommen der das Gerät nicht benutzt wurde,... -
Page 47: Reinigung Und Pflege
DEUTSCH einzufrierenden Lebensmittel in das • Es empfiehlt sich, das Einfrierdatum Gerät. auf jeder einzelnen Packung zu notieren, um einen genauen Überblick • Frieren Sie ausschließlich frische und über die Lagerzeit zu haben. gründlich gewaschene Lebensmittel von sehr guter Qualität ein. 6.4 Hinweise zur Lagerung •... -
Page 48: Fehlersuche
7.2 Regelmäßige Reinigung Dadurch verbessert sich die Leistung des Geräts und es verbraucht ACHTUNG! weniger Strom. Ziehen Sie nicht an 7.3 Abtauen des Gefriergeräts Leitungen und/oder Kabeln im Innern des Geräts und Das Gefrierfach ist ein NoFrost-Fach. achten Sie darauf, diese Das bedeutet, dass sich während des... - Page 49 DEUTSCH Störung Mögliche Ursache Abhilfe Der Netzstecker wurde Stecken Sie den Netzstecker nicht richtig in die Steck‐ korrekt in die Steckdose. dose gesteckt. Es liegt keine Spannung Testen Sie, ob ein anderes an der Steckdose an. Gerät an dieser Steckdose funktioniert.
- Page 50 Störung Mögliche Ursache Abhilfe Zu starke Reif- und Eisbil‐ Die Tür ist nicht richtig Siehe „Schließen der Tür“. dung. geschlossen oder die Dichtung hat sich ver‐ formt/ist verschmutzt. Der Kompressor schaltet Dies ist normal, keine Der Kompressor schaltet sich nicht sofort ein, nach‐...
-
Page 51: Montage
DEUTSCH 9. MONTAGE 9.1 Standort • Der Hersteller übernimmt keinerlei Haftung bei Missachtung der Installieren Sie dieses Gerät in einem vorstehenden Sicherheitshinweise. trockenen, gut belüfteten Raum, in dem • Das Gerät entspricht den EWG- die Umgebungstemperatur mit der Richtlinien. Klimaklasse übereinstimmt, die auf dem Typenschild des Geräts angegeben ist: 9.3 Anforderungen an die Belüftung... - Page 52 Führen Sie eine Endkontrolle durch, um sicherzustellen, dass: • Alle Schrauben fest angezogen sind; • Die Magnetdichtung am Gerät anliegt. • Die Tür ordnungsgemäß öffnet und schließt. Bei niedrigen Umgebungstemperaturen (z. 2. Hängen Sie die Tür aus. B. im Winter) kann es 3.
- Page 53 DEUTSCH 2. Bohren Sie mit einem 2,5-mm-Bohrer 6. Schieben Sie das Gerät auf der den Löcher in das Gerät (höchstens 10 Scharnieren gegenüberliegenden mm tief). Seite in Pfeilrichtung (2) so weit wie 3. Montieren Sie den möglich gegen die Seitenwand des Befestigungswinkel am Gerät.
- Page 54 10. Entfernen Sie das entsprechende Teil aus der Scharnierabdeckung (E). Achten Sie darauf, im Falle eines 12. Bauen Sie das Belüftungsgitter (B) rechten Scharniers Teil DX bzw. bei ein. einem gegenüberliegenden 13. Stecken Sie die Scharnier Teil SX zu entfernen.
- Page 55 DEUTSCH 22. Setzen Sie das Führungsstück erneut auf die Führungsschiene und schrauben Sie es mit den mitgelieferten Schrauben fest. 23. Richten Sie die Tür des Einbaumöbels und die Gerätetür mit Teil (Hb) aus. 18. Öffnen Sie die Gerätetür und die Möbeltür bis zu einem Winkel von 90°.
-
Page 56: Geräusche
10. GERÄUSCHE Während das Gerät in Betrieb ist, entstehen bestimmte Geräusche (Kompressor und Kühlkreislauf). HISSS! BRRR SSSRRR! SSSRRR! HISSS! HISSS! -
Page 57: Technische Daten
DEUTSCH BLUBB! CRACK! CRACK! BLUBB! 11. TECHNISCHE DATEN 11.1 Technische Daten Abmessungen der Einbaunische Höhe 1780 Breite Tiefe Lagerzeit bei Störung Stunden Spannung Volt 230 - 240 Frequenz Die technischen Daten befinden sich auf Innenseite des Geräts sowie auf der dem Typenschild auf der Außen- oder Energieplakette. - Page 58 www.electrolux.com...
- Page 59 DEUTSCH...
- Page 60 www.electrolux.com/shop...