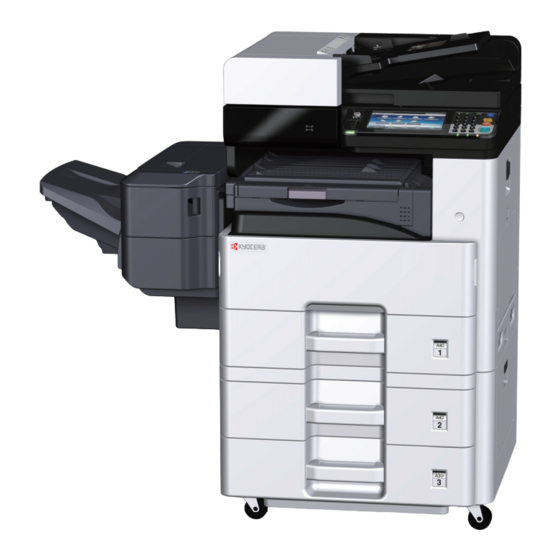
Kyocera ECOSYS M4125idn First Steps Quick Manual
Hide thumbs
Also See for ECOSYS M4125idn:
- Operation manual (514 pages) ,
- User manual (102 pages) ,
- Safety manual (2 pages)
Advertisement
Advertisement
Table of Contents

Related Manuals for Kyocera ECOSYS M4125idn


Summary of Contents for Kyocera ECOSYS M4125idn
- Page 1 PRINT COPY SCAN FIRST STEPS ECOSYS M4125idn QUICK GUIDE ECOSYS M4132idn...
- Page 2 2017.7 302P15601001...
- Page 3 Preface OPERATION GUIDE FIRST STEPS QUICK GUIDE This guide (A) only explains the basic operations of the machine. For other information, see Operation Guide (B) on the Product Library disc. la Guia de Funcionament (B) al disc Biblioteca del producte (Product Library). Dieser Leitfaden (A) erläutert nur die grundlegende Bedienung des Geräts.
- Page 4 pt-BR pt-PT...
- Page 5 Unpacking The included components differ depending on the countries or regions. Els components que s'hi inclouen poden variar en funció dels països o de les regions. De medfølgende komponenter varierer afhængigt af land eller region. Je nach Land oder Region sind im Lieferumfang andere Komponenten enthalten. Los componentes facilitados varían en función de los países o regiones.
- Page 6 Unlock Scanner Lock (Only ECOSYS M4132idn) Install Job Separator Tray and Toner Container CLICK! CLICK!
-
Page 7: Load Paper
Load Paper... - Page 8 Connect Cables Replace Operation Panel Sheet...
-
Page 9: Connect Power Cord
Connect Power Cord... - Page 10 Power On At the first time when turning on the main power switch, Als de hoofdschakelaar voor de eerste keer inges- chakeld wordt, dan start het apparaat de wizard Opstart- the machine runs Startup Wizard to set the following: en op om de volgende instellingen in te stellen: 1.
-
Page 11: Quick Setup Wizard
Quick Setup Wizard System Menu/Counter. 10:10 FAX Setup 1. Dialing/RX Mode 2. Local FAX Info. 3. Sound 4. Rings This wizard will help you set the basic settings to use the fax. 5. Redial Next > The machine provides Quick Setup Wizard in System Menu to set the following as necessary: 1. - Page 12 Maskinen gir en hurtigoppsettveiviser i systemmenyen for å stille inn følgende: 1. Faksoppsett 2. Strømsparingoppsett 3. Nettverksoppsett Følg veiledningen på betjeningspanelet. I maskinens systemmeny finns en snabbinstallationsguide för en korrekt inställning av följande: 2. Inställning av energisparläge 3. Nätverkinst. Wykonuj instrukcje z panelu operacyjnego. Följ instruktionerna som anges på...
- Page 13 Menú del Sistema/Comptador. 10:10 Menú del sistema Assistent de configuració ràpida Idioma Informe Comptador Tanca System Menu/Counter. 10:10 Menú del Sistema/Comptador. 10:10 Quick Setup Wizard Assistent de configuració ràpida FAX Setup Configuració del FAX Energy Saver Setup Configuració de l'estalvi d'energia Network Setup Configuració...
- Page 14 Menú Sistema/Contador. 10:10 Menu système/Compteur. 10:10 Menú Sistema Menu système Asistente de configuración rápida Assistant configuration rapide Idioma Langue Informe Rapport Contador Compteur Cerrar Fermer Menú Sistema/Contador. 10:10 Menu système/Compteur. 10:10 Asistente de configuración rápida Assistant configuration rapide Configuración de fax Configuration du fax Configuración de ahorro de energía Configuration de l'économie d'énergie...
- Page 15 pt-PT Menu do Sistema/Contador. 10:10 Menu Sistema Assistente de Configuração Rápida Idioma Relatório Contador Fechar Menu do Sistema/Contador. 10:10 Assistente de Configuração Rápida Configuração de FAX Configuração de Poupança de Energia Configuração de Rede < Para trás Sistem Menü/Sayaç. 10:10 Sistem Menüsü...
- Page 16 Print Status Page Informe Report Print Sí Listendruck Rapportudskrivning Bericht drucken Informe Rapport Impresión de informe Página de estado...
- Page 17 Jelentés nyomtatása Stampa rapporto pt-BR Relatório pt-PT Relatório Impressão Relatório Imprimare Raport Rapor Skriv ut rapport Rapor Yazd rma Durum Sayfas...
- Page 18 Install Drivers and Utilities If Found new Hardware window appears, click Cancel. pt-BR pt-PT...
-
Page 19: Install Wizard
Install Wizard Follow the instructions in the installation wizard. Seguiu les instruccions de l'auxiliar d'instal·lació. Folgen Sie den Anweisungen des Schnelleinstellung Assistenten. Siga las instrucciones del asistente de instalación. Noudata asennusohjelman ohjeita. Suivre les instructions de l'assistant d'installation. Volg de instructies in de installatiewizard. Siga as instruções no assistente de instalação. - Page 20 ECOSYS M4132idn - 3200 ECOSYS M4132idn - 3200 pt-PT Login-Benutzername: ECOSYS M4125idn - 2500 Nome Utilizador Início de Sessão: ECOSYS M4125idn - 2500 ECOSYS M4132idn - 3200 ECOSYS M4132idn - 3200 Login-Passwort: ECOSYS M4125idn - 2500 : ECOSYS M4125idn - 2500...
-
Page 21: Cancel Printing
Cancel Printing The job will be canceled. 10:10 Job Cancel 0095 doc0000952013092810... Pause 0096 doc0000952013092811... Waiting 0097 doc0000952013092827... Waiting 0098 doc0000952013092833... Waiting Menu Delete Resume All Close Print Jobs Sí Jobbet annulleres. 10:10 Der Aufrag wird abgebrochen. 10:10 Afbryd job Auftrag abbrechen 0095 doc0000952013092810... - Page 22 A feladat törl dik. 10:10 Il lavoro selezionato verrà annullato. 10:10 Feladat visszavonása Annullamento lavoro 0095 doc0000952013092810... Szünet 0095 doc0000952013092810... Pausa 0096 doc0000952013092811... Várakoz. 0096 doc0000952013092811... Attesa 0097 doc0000952013092827... Várakoz. 0097 doc0000952013092827... Attesa 0098 doc0000952013092833... Várakoz. 0098 doc0000952013092833... Attesa Menü Törlés Nyomtatás Bezárás...
- Page 23 Copy Ready to copy. 10:10 Llest per copiar. 10:10 P ipraveno ke kopírování. 10:10 Copy Copies Copia Còpies Kopírovat Po Kopií Paper Zoom Density Paper Zoom Densitat Papír Lupa Sytost Selection Selecció Výb r Auto 100% Normal 0 Automàtic 100% Normal 0 Auto 100%...
- Page 24 Listo para copiar. 10:10 Valmis kopioimaan. 10:10 Prêt pour copie. 10:10 Copia Copias Kopioi Kopiot Copier Copies Selección Zoom Densidad Paperin Zoomaus Tummuus Sélection Zoom Densité de papel valinta du papier Auto 100% Normal 0 Automaattinen 100% Normaali 0 Auto 100% Normal 0 Dúplex...
- Page 25 pt-PT Pronto a Copiar 10:10 Preg tit pentru copiere. 10:10 Copiar Cópias Copiere Copii Seleccione Zoom Densidade Selec ie Zoom Densitate Papel Hârtie Automático 100% Normal 0 Auto 100% Normal 0 Frt Verso Combinar Agrupar/ Duplex Combinare Cola ion./ Deslocar Offset 1 face>>1 face Desligado...
- Page 26 Scan (E-mail) Setup Launch your Web browser. Inicieu el navegador web. In the Address or Location bar, enter the A la barra d'adreces o d'ubicació, introduïu machine’s IP address or Printer Host Name. l'adreça IP del dispositiu o el nom de l'amfitrió...
- Page 27 Inicie el explorador de Internet. Käynnistä verkkoselaimesi. Lancer le navigateur Internet. En la barra de direcciones o de ubicación, Kirjoita IP-osoite osoiteriville tai Dans la barre d'adresses ou introduzca la dirección IP de la máquina o sijaintipalkkiin tietokoneen tai d'emplacement, saisir l'adresse IP de la el nombre de host de la impresora.
- Page 28 pt-BR Åpne webleseren din. Inicie o seu navegador web. Legg inn maksinens IP-adresse eller W polu na pasku adresu lub lokalizacji Na barra Endereço ou Local, insira o skriverens vertsnavn i adresselinjen. endereço de IP da máquina ou o nome do hosta drukarki.
-
Page 29: Status Page
Starta din webbläsare. Skriv in maskinens IP-adress eller skrivarens värdnamn i adressfältet. Status Page Status Page Status Page Network Network Network TCP/IP TCP/IP TCP/IP Printer Host Name: KMA2FA6A Printer Host Name: KMA2FA6A Printer Host Name: KMA2FA6A IPv4 IPv4 IPv4 IP Address: 192.168.48.21 IP Address: 192.168.48.21 IP Address: 192.168.48.21 Skriv in följande och logga in i Command... - Page 30 Send Ready to send. (FullColor) 10:10 Send Dest. : Check Recall One Touch Key Address Book Ext Address Book E-mail Folder Functions Color Favorites E-mail E-mail E-mail Input: Entrada: Vstup: abc@def.com abc@def.com abc@def.com Limit: Límit: Limit: Del. Menu Next Dest. Cancel E-mail E-Mail...
- Page 31 Ready to send. (FullColor) 10:10 Send Dest. : Check E-mail bbb@abc.com One Touch Key Address Book Ext Address Book E-mail Folder Functions Color Favorites Ready to send. (FullColor) 10:10 Llest per enviar. (A tot color) 10:10 P ipr.k odeslání.(Plnobarevné) 10:10 Functions Funcions Funkce...
- Page 32 Redo att skicka. (Fyrfärg) 10:10 Göndermeye haz r. (Tam Renk) 10:10 10:10 Funktioner levler Färgval Renk Seçimi Svartvit Siyah ve Beyaz Filformat Dosya Biçimi Originalets storlek Orijinal Boyut Originalorientering Orijinal Yön Överst vid överkanten Üst kenar üstte Stäng Ny/Ändra Kapat Ekle/Düze Genväg K sayol...
- Page 33 Ready to send. 10:10 Dest. : Check On Hook Chain Direct Recall Add Dest. Address Book Ext Address Book One Touch Key Functions Favorites Ready to send. 10:10 Llest per enviar. 10:10 On Hook Sub Address Detail Settings Penjat Subadreça Config.detall 1234567890 1234567890...
- Page 34 Küldésre kész. 10:10 Pronta per l'invio. 10:10 Gereed voor verzenden. 10:10 Letett Mellék- Részl. Libero Indirizzo Impostazioni Op de haak Subadres Detailinstell. hallgatóval azonosító beállítás secondario dei dettagli instellingen 1234567890 1234567890 1234567890 Szünet Szóköz Backspace Pausa Spazio Indietro Pauze Spatie Backspace Menü...
- Page 35 Ready to send. 10:10 Dest. :: Check On Hook Chain Direct 0123456789 Add Dest. Address Book Ext Address Book One Touch Key Functions Favorites 10:10 10:10 10:10 Ready to FAX. A punt per a FAX. P ipraveno na FAX. Functions Funcions Funkce Original Size...
- Page 36 Klar att FAXA. 10:10 FAKS göndermeye haz r. 10:10 Funktioner levler Originalets storlek Orijinal Boyut Auto Otomatik Originalorientering Orijinal Yön Överst vid överkanten Üst kenar üstte 2-sidigt/bokoriginal 2 yüzlü/Kitap Orijinal 1-sidig 1-yüzlü FAX TX-upplösning FAX TX Çözünürlü ü 200×100dpi Normal 200x100dpi Normal Stäng Ny/Ändra...
-
Page 37: Private Printing
Private printing From a PC To activate the private printing from the PC, set the items No. 1 and 2 in the screen. Per activar la impressió privada des d'un PC, configureu els elements núm. 1 i núm. 2 de la pantalla. For at aktivere privat udskrivning fra pc´en, indstilles enheder nr. - Page 38 From the Operation Panel Copy Send Removable Job Box Address Memory Status Task Screen Dokumentboks. 10:10 Jobboks Privat udskrivning Gennemse og hold Afbryd Næste > Casella de documents 10:10 Casella de tre... - Impressió/Desament privats user 1 user 2 user 3 Accepta <...
- Page 39 Dokumentenbox. 10:10 Auftragsbox Privater Druck Prüfen und Halten Abbrechen Weiter > Dokumentenbox. 10:10 Buzón de documentos. 10:10 Auftra... - Privater/Gespeicherter Druckauftrag Buz... - Impresión privada/trabajo almacenado user 1 user 1 user 2 user 2 user 3 user 3 Aceptar < Zurück Weiter >...
- Page 40 Casella documenti. 10:10 Document box. 10:10 Dokumentboks. 10:10 Casella lavoro Taakvenster Boks Stampa privata Privé-afdruk Privat utskrift Controlla e mantieni Proefafdruk Testutskrift Cancella Avanti > Annuleren Volgend > Avbryt Neste > Casella documenti. 10:10 Casell... - Stampa privata/Lavoro memorizzato user 1 user 2 user 3 <...
- Page 41 Caset document. 10:10 Dokumentlåda. 10:10 Jobblåda Caset lucrare Imprimare privat Privat utskrift Probare i re inere Proof and Hold Avbryt Nästa > Anulare Urm t. > Parol Lösenord Intrare: Inmatn.: ********* ********* ********* Limit : Gräns: ter. Rad. AÄÅ Anulare Avbryt Caset document.
-
Page 42: Troubleshooting
Troubleshooting If an error occurs on the machine, the error message appears on the screen. Also the Attention indicator on the operation panel will light up or flash. Follow the instructions on the screen to clear the error. For details, refer to the Operation Guide on the Product Library disc. - Page 43 Als er een fout optreedt op het apparaat, dan verschijnt de foutmelding op het scherm. Bovendien gaat ook het Opgelet-indictorlampje op het bedieningspaneel branden of knipperen. Volg de instructies op het scherm om de fout te wissen. Voor meer informatie, raadpleeg de Gebruikershandleiding op de Product Library schijf. Hvis det oppstår en feil på...
-
Page 44: Clear Paper Jam
Clear Paper Jam 10:10 Paper jam. Clear the paper jammed in Cassette 1. Press [Next >] to follow the instructions. JAM 0001 < Back Next > If paper jam occurs, follow the guidance on the operation panel to remove paper. Si s'encalla el paper, seguiu els passos indicats al tauler d'operacions per extraure el paper.