
Related Manuals for AT&T EL51103


Summary of Contents for AT&T EL51103
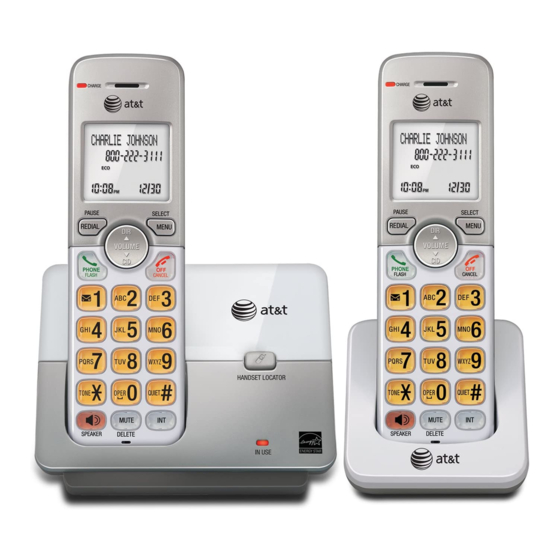
- Page 1 Quick start guide EL51103/EL51203/EL51253/ EL51303/EL51353/EL51403/ EL51453/EL51503 DECT 6.0 cordless telephone with caller ID/call waiting...
-
Page 2: Table Of Contents
This quick start guide provides you with basic installation and operation instructions. A limited set of features are described in abbreviated form. Please refer to the complete online EL51103/EL51203/EL51253/EL51303/ EL51353/EL51403/EL51453/EL51503 DECT 6.0 cordless telephone with caller ID/call waiting user’s manual for a full set of installation and operation http://telephones.att.com/manuals... -
Page 3: Parts Checklist
Quick start guide Telephone base Power adapter for telephone base Cordless handset Charger for cordless handset Wall-mount bracket (1 for EL51103) with power adapter installed (2 for EL51203/EL51253) (1 for EL51203/EL51253) (3 for EL51303/EL51353) (2 for EL51303/EL51353) (4 for EL51403/EL51453) -
Page 4: Installation
Installation Install the telephone base and charger, as shown below. If you subscribe to high-speed Internet service (DSL - digital subscriber line) through your telephone line, you must install a DSL filter on the DSL line. If you want to mount your telephone on a wall, use the included wall-mount bracket and refer to Wall-mount installation in the online user’s manual for details. -
Page 5: Battery Installation
Battery installation Install the battery, as shown below. Plug the battery connector securely into the socket inside the handset battery compartment, matching the color-coded label. Insert the supplied battery with the label ThIs sIDE uP facing up, as indicated. Align the cover flat against the battery compartment, then slide it upwards until it clicks into place. -
Page 6: Battery Charging
Battery charging Once you have installed the battery, the screen indicates the battery status (see the following table). If necessary, place the handset in the telephone base or charger to charge the battery. For best performance, keep the handset in the telephone base or charger when not in use. -
Page 7: Handset Overview
handset overview ChargE light CID/voLumE On when the handset is • Press to scroll down while charging in the telephone in menus. base or charger. • Press to decrease the listening volume. DIr/voLumE • Press to show the caller ID log when the handset is not •... -
Page 8: Telephone Base Overview
Telephone base overview /hanDsET LoCaTor Press to page all handsets (page 26). In usE light • Flashes when there is an incoming call, or another telephone sharing the same line is in use. • Flashes when handsets are being deregistered. •... -
Page 9: Menu Overview
menu overview Use the menu to change the telephone settings. Press mEnu/ in idle mode (when the handset is not in use) to enter the sELECT main menu. Press to scroll through menu items. Press /sELECT to select or save the indicated item. mEnu -or- /CanCEL to cancel an operation, back up to the previous menu or exit... -
Page 10: Telephone Settings
Telephone settings Use feature summary on page 7 to find and set features. The following are a few examples of common features to set. Refer to handset settings in the online user’s manual for detailed instructions on setting all telephone features. handset ringer volume You can set the handset ringer volume level, or turn the ringer off. -
Page 11: Making, Answering And Ending Calls
making, answering and ending calls making a call PhonE/ /sPEaKEr and then dial the number Press fLash using the dialing keys. -or- Enter the number using the dialing keys and then press PhonE/ /sPEaKEr to dial. fLash While predialing a number, you can: •... -
Page 12: Options While On Calls
options while on calls volume control /voLumE to increase or press /voLumE to decrease While on a call, press the listening volume. note: The handset volume setting and speakerphone volume setting are independent. Changing one does not affect the other. Join a call in progress If a handset is already on a call and you would like to join the call, press PhonE/... -
Page 13: Handset Locator
handset locator Use the handset locator to find misplaced handset(s). To start the paging tone: • Press /hanDsET LoCaTor at the telephone base to start the paging tone on all handsets for 60 seconds. To stop the paging tone: PhonE/ /sPEaKEr, •... -
Page 14: Intercom
Intercom make and answer an intercom call Intercom to You can make an intercom call between handsets. Press InT on your handset when not in use. • If you have 2 handsets, your originating handset screen shows Calling hs x, and the other handset screen shows hs x is calling. - Page 15 Call transfer using intercom You can transfer an outside call to another system handset. Transferred During an outside call, press InT and proceed just as you would make a normal intercom call. Once the other party has answered the intercom call, you have the following options: •...
-
Page 16: Directory
Directory Directory overview The directory is stored in the telephone base and shared by all handsets. It stores up to 50 entries. Changes made to the directory on any one handset apply to all. Only one handset can review the directory at a time. Create directory entries Press mEnu/ /sELECT to... -
Page 17: Speed Dial
Dial a directory number When the desired directory entry displays, press PhonE/ /sPEaKEr fLash to dial. Edit a directory entry When the desired directory entry displays on the screen, press /sELECT. mEnu /sELECT. Edit the telephone number, then press mEnu Edit the name. -
Page 18: Caller Id
Caller ID This product supports caller ID services offered by most telephone service providers. Caller ID allows you to see the name, number, date and time of calls. The available caller ID information will appear after the first or second ring. missed (new) call indicator The telephone base stores the last 50 incoming calls as the caller ID information. -
Page 19: Adding And Registering Handsets
1, and so forth. You can purchase additional handset AT&T EL50003 to expand your telephone system. EL50003 is for use with EL51103/EL51203/EL51253/EL51303/EL51353/EL51403/EL51453/ EL51503. Additional handsets are assigned numbers in the sequential order they are registered (up to hanDsET 5). -
Page 20: Deregistering Handsets
Deregistering handsets If you want to replace a handset, or reassign the designated handset number of a registered handset, you must deregister all handsets that are registered to the telephone base, and then register each handset individually. To make deregistration easier, read all of the instructions before you begin. Deregister all handsets from the telephone base: Press and hold /hanDsET LoCaTor on the telephone base for about 10 seconds... -
Page 21: Troubleshooting
If changing the telephone line cord does not help, the wall jack (or the wiring to this wall jack) may be defective. Try using a different wall jack in your home to connect your EL51103/EL51203/EL51253/EL51303/EL51353/EL51403/EL51453/ EL51103/EL51203/EL51253/EL51303/EL51353/EL51403/EL51453/ EL51503 telephone, or contact your telephone service provider (charges may apply). - Page 22 I cannot dial out. • First try all the suggestions in the item The display shows no line. I cannot get a dial tone. • Make sure you have a dial tone before dialing. The cordless handset may take a second or two to find the telephone base and produce a dial tone.
- Page 23 The batteries do not hold a charge. • If the cordless handset is in the telephone base or charger and the charge light does not turn on, refer to the item The charge light is off on page 21. • Charge the battery in the cordless handset for at least 16 hours.
- Page 24 I experience poor sound quality when using the speakerphone. • For increased sound quality while using the speakerphone, place the handset on a flat surface with the dial pad facing up. • When using a speakerphone, controlling background noise in your environment is essential.
-
Page 25: Important Safety Information
Important safety information This symbol is to alert you to important operating or servicing instructions that may appear in this user’s manual. Always follow basic safety precautions when using this product to reduce the risk of injury, fire, or electric shock. safety information •... - Page 26 Especially about cordless telephones • Privacy: The same features that make a cordless telephone convenient create some limitations. Telephone calls are transmitted between the telephone base and the handset by radio waves, so there is a possibility that your cordless telephone conversations could be intercepted by radio receiving equipment within range of the cordless handset.
-
Page 27: For C-Ul Compliance
for C-uL compliance In compliance with the bilingual requirements for safety, caution, and warning markings of Canadian Federal and Provincial/Territorial statutes and regulations, the French version of Important safety information is included. mesures de sécurité importantes Ce symbole vous alertera d’informations importantes ou d’instructions d’entretien pouvant apparaître dans ce guide d’utilisation. - Page 28 mIsEs En garDE: • N’utilisez que les adaptateurs inclus avec ce produit. Pour obtenir une pièce de rechange, visitez www.telephones.att.com notre site Web au ou composez le 1-800-222-3111 1-866-288-4268 . Au Canada, composez le • N’utilisez que la pile de rechargeable incluse ou une pile de rechange (modèle BT162342/ www.telephones.att.com BT262342).
- Page 29 mesures préventives pour les utilisateurs de stimulateurs cardiaques implantés dans l’organisme stimulateurs cardiaques (ne s’applique qu’aux téléphones sans fil numériques) : L’organisme ‘Wireless Technology Research, LLC (WTR)’, une firme de recherche indépendante, a mené une évaluation pluridisciplinaire des interférences entre les téléphones sans fil portatifs et les stimulateurs cardiaques implantés dans l’organisme.
-
Page 30: Fcc Part 68 And Acta
fCC Part 68 and aCTa This equipment complies with Part 68 of the FCC rules and with technical requirements adopted by the Administrative Council for Terminal Attachments (ACTA). The label on the back or bottom of this equipment contains, among other things, a product identifier in the format US:AAAEQ##TXXXX. This identifier must be provided to your telephone service provider upon request. -
Page 31: Fcc Part 15
Industry Canada This device complies with Industry Canada license-exempt RSS standard(s). Operation is subject to the following two conditions: (1) this device may not cause harmful interference, and (2) this device must accept any interference received, including interference that may cause undesired operation. Privacy of communications may not be ensured when using this telephone. -
Page 32: Limited Warranty
Limited warranty The AT&T brand is used under license - any repair, replacement or warranty service, and all questions about this product should be directed to our website at www.telephones.att.com 1 (800) 222-3111 or call . In Canada, dial 1 (866) 288-4268 What does this limited warranty cover? The manufacturer of this AT&T branded product warrants to the holder of a valid proof of purchase (“CONSUMER”... - Page 33 how do you get warranty service? To obtain warranty service in the United States of America, visit www.telephones.att.com 1 (800) 222-3111 or call . In Canada, dial 1 (866) 288-4268 NOTE: Before calling for service, please review the user’s manual. A check of the PRODUCT’s controls and features might save you a service call.
-
Page 34: Technical Specifications
Technical specifications RF frequency band 1921.536MHz — 1928.448MHz Channels Operating temperature 32ºF — 122ºF 0ºC — 50ºC Telephone base voltage 96 — 130Vrms (AC voltage, 60Hz) Telephone base voltage AC6V @ 300mA (DC adapter output) Handset voltage 2.4VDC — 3.2VDC Charger voltage AC6V @ 300mA (AC adapter output) - Page 35 www.telephones.att.com © 2014-2015 Advanced American Telephones. All Rights Reserved. AT&T and the AT&T logo are trademarks of AT&T Intellectual Property licensed to Advanced American Telephones, San Antonio, TX 78219. RBRC® and 1-800-8-BATTERY® are registered trademarks of the Rechargeable Battery Recycling Corporation. Printed in China.