Table of Contents
Advertisement
Available languages
Available languages
Quick Links
DANBY PRODUCTS LIMITED, ONTARIO, CANADA N1H 6Z9
DANBY PRODUCTS INC., FINDLAY, OHIO, USA 45840
OWNER'S USE AND CARE GUIDE
GUIDE D'UTILISATION ET SOINS DE PROPRIÈTAIRE
GUÍA DE UTILIZACIÓN Y CUIDADO PARA EL PROPIETARIO
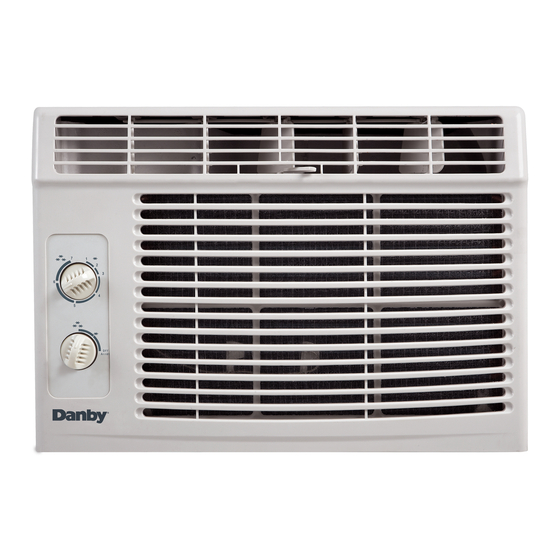
AIR CONDITIONER
CLIMATISEUR
AIRE ACONDICIONADO
MODEL • MODÈLE • MODELO
Mod el • M odèle • Modelo
DAC050MB3GDB
V1.2 .11.13
5
Advertisement
Table of Contents

Related Manuals for Danby DAC050MB3GDB


Summary of Contents for Danby DAC050MB3GDB
- Page 1 GUÍA DE UTILIZACIÓN Y CUIDADO PARA EL PROPIETARIO AIR CONDITIONER CLIMATISEUR AIRE ACONDICIONADO MODEL • MODÈLE • MODELO Mod el • M odèle • Modelo DAC050MB3GDB DANBY PRODUCTS LIMITED, ONTARIO, CANADA N1H 6Z9 DANBY PRODUCTS INC., FINDLAY, OHIO, USA 45840 V1.2 .11.13...
- Page 2 TO OBTAIN WARRANTY SERVICE YOU MUST PROVIDE A VALID PROOF OF PURCHASE. PLEASE STAPLE YOUR RECEIPT TO THIS PAGE FOR FUTURE REFERENCE. ------------------------------------------------------------------------------------------------------------------- POUR OBTENIR LE SERVICE SUR GARANTIE VOUS DEVEZ FOURNIR UNE PREUVE D’ACHAT VALIDE. VEUILLEZ AGRAFER VOTRE REÇU À CETTE PAGE POUR RÉFÉRENCE FUTURE.
-
Page 3: Table Of Contents
Guía de utilización y cuidado para el propietario..21-31 • Bienvenido • Información importante sobre seguridad • Características • Instrucciones de instalación • Instrucciones de funcionamiento • Cuidado y mantenimiento • Resolución de problemas • Garantía Model • Modèle • Modelo DAC050MB3GDB... -
Page 4: Owner's Use And Care Guide
WELCOME Welcome to the Danby family. We are proud of our quality products, and we believe in dependable service, like you will fi nd in this Owner’s Use and Care Guide, and like you will receive from our friendly customer service department. Best of all, you will experience these values each and every time you use your Danby appliance. -
Page 5: Important Safety Information
Important Safety Information READ AND FOLLOW ALL SAFETY INSTRUCTIONS FOR YOUR SAFETY: Read these instructions carefully before operating the unit. ELECTRICAL REQUIREMENTS 1. All wiring must comply with local and national electrical codes and must be installed by a qualifi ed electrician. If you have any questions regarding the following instructions, contact a qualifi... -
Page 6: Features
FOR YOUR SAFETY: Read these instructions carefully before operating the unit. ENERGY SAVING TIPS Your Danby appliance is designed to be highly effi cient in energy savings. Follow these recommendations for greater effi ciency. 1. Select a thermostat setting that suits your comfort needs and leave at that chosen setting. -
Page 7: Installation Instructions
INSTALLATION INSTRUCTIONS ELECTRIC SHOCK HAZARD NOTE: Your Room Air Conditioner is designed for easy installation in a single or double-hung window. This unit To avoid the possibility of personal is NOTdesigned for vertical (slider type) windows and/or injury, disconnect power to the unit through-the-wall applications. - Page 8 INSTALLATION INSTRUCTIONS LOCATION 1. This room air conditioner is designed to fi t easily into a single or double hung window. However, since window designs vary, it may be necessary to make some modifi cations for safe, proper installation. 2. Make sure window and frame are structurally sound and free from dry and rotted wood. 3.
- Page 9 INSTALLATION INSTRUCTIONS ASSEMBLY AND INSTALLATION 1. Assembly of the upper channel to the cabinet (factory installed on some units). • “L” Shaped Top Channel: install the “L” shaped channel to the top of the cabinet as shown in Fig. 3, using four (4) 3/8” screws.
-
Page 10: Operation Instructions
OPERATING INSTRUCTIONS ASSEMBLY AND INSTALLATION Fig. 7 Check that the air conditioner is tilted downwards to the outside, about Measure the tilt angle from the cabinet’s edge 3° to 4°, as shown in Fig. 7. After proper installation, condensed water : approximately should not drain from the overfl... -
Page 11: Care And Maintenance
CARE AND MAINTENANCE NOTE: In order to avoid electric shock, please turn off the A/C and unplug the plug before mainte- CLEANING nance or repair. When cleaning the air conditioner be sure to turn the SELECTOR knob to the “OFF” position and disconnect the power cord from the electrical outlet. -
Page 12: Troubleshooting
Occasionally a problem may arise that is minor in nature, and a service call may not be neccessary. Use this troubleshoot- ing guide for a possible solution. If the unit continues to operate improperly, call an authorized service depot or Danby’s Toll Free Number 1-800-263-2629 for assistance. Air conditioner will •... - Page 13 Danby or its authorized distributors and all other warranties, conditions, representations or Nothing within this warranty shall imply that Danby will be responsible or liable for any spoilage or damage to food or other c...
-
Page 14: Bienvenue
BIENVENUE Bienvenue dans la famille Danby. Nous sommes fi ers de la qualité de nos produits et nous croyons fermement au service par une assistance fi able. Vous découvrirez au travers de ce quide, facile d’utilisation et vous en aurez la confi rmation par notre service d’assistance à... -
Page 15: Consignes De Sécurité Importantes
Consignes de sécurité importantes LISEZ TOUTE L’INFORMATION DE SÉCURITÉ AVANT UTILISATION POUR VOTRE SÉCURITÉ: Lire attentivement ces instructions avant d’utiliser l’appareil. SPECIFICATIONS ELECTRIQUES 1. Tous les câblages doivent être conformes aux codes électriques locaux et nationaux et doivent être installés par un électricien qualifi... -
Page 16: Caractéristiques
L’ÉCONOMIE DE L’ÉNERGIE Votre appareil ménager Danby est conçu pour l’effi cacité en économie de l’énergie. Pour le rendement maximal, observer les recommandations qui suivent. 1. Choisir un réglage du thermostat qui répond à vos besoins de confort et le laisser au réglage choisi. -
Page 17: Consignes D'installation
CONSIGNES D’INSTALLATION RISQUE DE CHOC ÉLECTRIQUE REMARQUE: Votre climatiseur de chambre a été conçu pour une installation facile dans une fenêtre à châssis à Pour éviter la possibilité de guillotine simple ou double. Cet appareil n’a pas été conçu blessures corporelles, débrancher pour des fenêtres verticales (de type coulissant) ou pour l’alimentation de courant à... - Page 18 CONSIGNES D’INSTALLATION ENDROIT 1. Ce climatiseur pour chambre a été conçu pour être installé facilement dans une fenêtre à châssis à guillotine simple ou double. Cependant, comme le design de la fenêtre peut varier, it peut être nécessaire d’y faire quelques modifi ca- tions pour une installation sécuritaire et appropriée.
- Page 19 CONSIGNES D’INSTALLATION ASSEMBLAGE ET INSTALLATION 1. Montage de canaux supérieur sur le caisson (préinstallé sur certain modèles). • Canal supérieur en forme de “L”: Installez le canal en forme de “L” au-dessus du caisson tel que montré à la Fig. 3, un utilisant quatre (4) vis de 3/8 po.
-
Page 20: Consignes D'utilisation
CONSIGNES D’UTILISATION ASSEMBLAGE ET INSTALLATION Vérifi ez que le climatiseur est incliné vers le bas à l’extérieur, environ Fig. 7 3° à 4°, selon Fig. 7. Après une installation adéquate, l’eau conden- sée ne devrait pas s’écouler du trou de drainage pendant une utilisa- Mesurez l’angle d’inclination du bord du caisson. -
Page 21: Soins Et Entretien
SOINS ET ENTRETIEN NOTE : Afi n d’éviter tout choc électrique, éteindre et débrancher le climatiseur avant entretien ou NETTOYAGE réparation. Avant de procéder à l’entretien du climatiseur, assurez-vous de tourner le bouton de SÉLECTION en position “ARRÊT” et débranchez le cordon d’alimentation de la prise électrique. 1. -
Page 22: Dépannage
De temps en temps, un problème peut se poser qui est mineur, et une intervention peut ne pas être nécessaire. Employez ce guide de dépannage pour une solution possible. Si l’unité continue à fonctionner incorrectement, demandez un dépôt autorisé de service ou le numéro de appel sans frais Danby pour l’aide à: (1-800-263-2629). PROBLEME... - Page 23 Danby ou ses distributeurs agréés. De même, sont exclues toutes les autres garanties, Nothing within this warranty shall imply that Danby will be responsible or liable for any spoilage or damage to food or other c ontents of this appliance, whether due conditions ou représentations, y compris les garanties, conditions ou représentations en vertu de toute loi régissant la vente...
-
Page 24: Bienvenido
BIENVENIDO Bienvenido a la familia Danby. Estamos orgullosos de nuestros productos de alta calidad y creemos en el servicio confi - able. Usted lo podrá apreciar en este manual fácil de usar, y lo escuchará enlas voces amistosas de nuestro departamen- to de servicio al consumidor. -
Page 25: Información Importante Sobre Seguridad
Información importante sobre seguridad LEA Y SIGA TODAS LAS INSTRUCCIONES DE SEGURIDAD PARA SU SEGURIDAD: Lea estas instrucciones cuidadosamente antes de utilizar la unidad. REQUISITOS ELÉCTRICOS 1. Toda la instalación eléctrica debe cumplir con los códigos locales y nacionales de electricidad y debe ser realizada por un electricista califi... -
Page 26: Características
CONSEJOS PARA AHORRAR ENERGÍA Su artefacto Danby está diseñado para ser altamente efi ciente en el ahorro de energía. Siga estas recomendaciones para lograr mayor efi ciencia. 1. Seleccione la confi guración del termostato que se adapte a sus necesidades de comodidad y deje esa confi guración. -
Page 27: Instrucciones De Instalación
INSTRUCCIONES DE INSTALACIÓN RIESGO DE CHOQUE ELÉCTRICO NOTA: Su equipo de aire acondicionado de pared está diseñado para instalarse fácilmente en una ventana única o Para evitar la posibilidad de ventana de doble abertura. Esta unidad NO está diseñada lesiones personales, desconecte para ventanas verticales (tipo deslizantes) o para ser la energía de la unidad antes de la aplicada en la pared. - Page 28 INSTRUCCIONES DE INSTALACIÓN UBICACIÓN 1. Este aire acondicionado está diseñado para adaptarse fácilmente a una ventana única o ventana de doble abertura. Sin embargo, ya que el diseño de las ventanas varía, puede ser necesario hacer algunas modifi caciones para realizar una instalación segura y adecuada.
- Page 29 INSTRUCCIONES DE INSTALACIÓN MONTAJE E INSTALACIÓN 1. Montaje del canal superior al gabinete (en algunas unidades instalado de fábrica) • Canal superior en "L": Instale el canal en "L" en la parte superior del gabinete, como se muestra en la Fig. 3; utilice cuatro tornillos (4) de 3/8 in.
-
Page 30: Instrucciones De Funcionamiento
INSTRUCCIONES DE FUNCIONAMIENTO MONTAJE E INSTALACIÓN Fig. 7 Verifi car que el aire acondicionado este empinado hacia afuera, de 3° Mida el angulo empinade del filo del gabinete. a 4° aproximadamente, así como lo muestra el dibujo Fig. 7. Después : de 5/8 a 3/4 pulgadas de la instalación, ninguna agua condensada tiene que fl... -
Page 31: Cuidado Y Mantenimiento
CUIDADO Y MANTENIMIENTO NOTA: para evitar descargas eléctricas, apague el aire acondicionado y desconecte el enchufe antes LIMPIEZA de realizarle mantenimiento o reparación. Al limpiar el aire acondicionado, asegúrese de girar la perilla de SELECCIÓN hacia la posición “APAGADO” y desconecte el cable. -
Page 32: Resolución De Problemas
En ocasiones, pueden presentarse problemas menores ante los cuales no será necesario llamar al servicio técnico. Use esta guía de resolución de problemas para encontrar una posible solución. Si la unidad continúa funcionando de manera incorrecta, llame a un centro de servicio autorizado o al número gratuito de Danby al 1-800-263-2629 para solicitar asis- tencia. - Page 33 Danby under this warranty shall be void. Nada de lo indicado en esta garantía debe implicar que Danby se hará responsable por el deterioro de los alimentos o el daño a otros componentes de este electrodoméstico, ya sea debido a defectos del aparato, o al uso que se le dé, sea éste adec-...
- Page 34 Para pedir servicio y/o la lo- calización del depósito del servicio lo más cerca posible usted, llama Danby gratis. Al pedir servicio o pidiendo piezas, proporcione siempre la información siguiente: Tel: 1-800-26- •...