Table of Contents
Advertisement
Available languages
Available languages
KDC-210U
CD-RECEIVER
INSTRUCTION MANUAL
AMPLI-TUNER LECTEUR DE CD
MODE D'EMPLOI
REPRODUCTOR DE DISCOS COMPACTOS RECEPTOR DE FM/AM
MANUAL DE INSTRUCCIONES
Take the time to read through this instruction manual.
Familiarity with installation and operation procedures will help you obtain the best performance from your new CD-receiver.
For your records
Record the serial number, found on the back of the unit, in the spaces designated on the warranty card, and in the space provided below.
Refer to the model and serial numbers whenever you call upon your Kenwood dealer for information or service on the product.
Model KDC-210U Serial number
US Residents Only
Register Online
Register your Kenwood product at www.Kenwoodusa.com
© 2013 JVC KENWOOD Corporation
GET0939-001A (K0)
Advertisement
Chapters
Table of Contents

Related Manuals for Kenwood KDC-210U


Summary of Contents for Kenwood KDC-210U
- Page 1 Record the serial number, found on the back of the unit, in the spaces designated on the warranty card, and in the space provided below. Refer to the model and serial numbers whenever you call upon your Kenwood dealer for information or service on the product.
-
Page 2: Table Of Contents
CONTENTS BEFORE USE Warning BEFORE USE Do not operate any function that takes your attention away from safe driving. BASICS Caution Volume setting: GETTING STARTED • Adjust the volume so that you can hear sounds outside the car to prevent accidents. •... -
Page 3: Basics
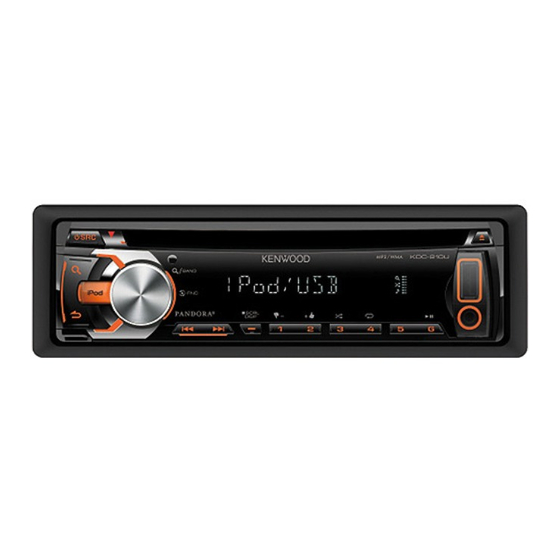
BASICS Faceplate Remote control (RC-406) Volume knob Remote sensor (Do not expose (turn/press) Loading slot to bright sunlight.) Pull out the insulation sheet when using for the Detach button Display window * Not used. first time. Attach Detach How to reset How to replace the battery Your preset adjustments will also be... -
Page 4: Getting Started
F/W UPDATE Then, perform step above to set the clock. F/W UP xx.xx YES: Starts upgrading the firmware. ; NO: Cancels (upgrading is not activated). For details on how to update the firmware, see: www.kenwood.com/cs/ce/... -
Page 5: Radio
RADIO Other settings Press the volume knob to enter [FUNCTION]. Turn the volume knob to select [SETTINGS], then press the knob. Turn the volume knob to make a selection (see the following table), then press the knob. Press and hold to exit. -
Page 6: Cd / Usb / Ipod
• Audio CD: TRAC REPEAT, REPEAT OFF • MP3/WMA file: FILE REPEAT, FOLD REPEAT, REPEAT OFF iPod/iPhone • iPod or KENWOOD Music Editor Light (KME Light)/ KENWOOD Music Control (KMC) file: FILE REPEAT, REPEAT OFF USB input terminal Random play * Press 3 repeatedly. - Page 7 CD / USB / iPod Select a track/file from a list Direct Music Search (using RC-406) Set the skip search ratio For iPod: Applicable only when [MODE OFF] is Press DIRECT. While listening to iPod or KME Light/ KMC file... selected.
-
Page 8: Aux
Pandora® Preparation: Preparation: Do this Select [ON] for [BUILTIN AUX]. (➜ 4) Install the latest version of the Pandora Press 6 38 (or press ENT 38 Pause or application onto your device (iPhone/ iPod Start listening resume on RC-406). touch), then log in and create an account playback with Pandora. -
Page 9: Audio Settings
AUDIO SETTINGS While listening to any source... DETAIL SET Press the volume knob to enter [FUNCTION]. LPF SUB-W THROUGH: All signals are sent to the subwoofer. ; 85HZ/ 120HZ/ Turn the volume knob to select [AUDIO CTRL], then press the knob. 160HZ: Audio signals of frequencies lower than 85 Hz/ 120 Hz/ 160 Hz Turn the volume knob to make a selection (see the following table), are sent to the subwoofer. -
Page 10: Display Settings
• Playable disc media: CD-R/CD-RW browse item will display the correct title, etc. • Playable disc file format: ISO 9660 Level 1/2, Joliet, • You cannot operate iPod if “KENWOOD” or “ ” is displayed on iPod. Default: XX Romeo, Long file name. -
Page 11: Troubleshooting
TROUBLESHOOTING Symptom Remedy Symptom Remedy Sound cannot be heard. • Adjust the volume to the optimum level. “NO MUSIC” appears. Connect a USB device that contains playable audio files. • Check the cords and connections. “USB ERROR” appears. • Remove the USB device, turn the unit off, then turn it on “PROTECT”... -
Page 12: Warning
Warning Installing the unit (in-dash mounting) • The unit can only be used with a 12 V DC power supply, negative ground. • Disconnect the battery’s negative terminal before wiring and mounting. Do the required wiring. • Do not connect Battery wire (yellow) and Ignition wire (red) to the (➜... - Page 13 To rear speaker (left) Green/Black (Mute control wire) when the telephone rings or during D Wiring harness conversation. (To connect the Purple Kenwood navigation system, refer To rear speaker (right) Purple/Black your navigations manual.) Ignition switch Car fuse box E Extraction key...
-
Page 14: Avant L'utilisation
TABLE DES MATIERES AVANT L’UTILISATION Avertissement AVANT L’UTILISATION N’utilisez aucune fonction qui risque de vous distraire de la conduite sure de votre véhicule. FONCTIONNEMENT DE BASE 3 Précautions Réglage du volume: PRISE EN MAIN • Ajustez le volume de façon à pouvoir entendre les sons extérieurs à la voiture afin d’éviter tout risque d’accident. •... -
Page 15: Fonctionnement De Base
FONCTIONNEMENT DE BASE Façade Télécommande (RC-406) Bouton de volume Capteur de télécommande (tournez/appuyez) Fente d’insertion (NE l’exposez PAS à la lumière directe du soleil.) Retirez la feuille d’isolant lors de la première Touche de détachement Fenêtre d’affichage * Non utilisé. utilisation. -
Page 16: Prise En Main
YES: Démarrer la mise à niveau du micrologiciel. ; NO: Annulation (la mise à de l’horloge directement pendant que l’horloge est affichée. xx.xx niveau n’est pas activée). Puis, réalisez l’étape ci-dessus pour régler l’horloge. Pour en savoir plus sur la mise à niveau du micrologiciel, référez-vous à: www.kenwood.com/cs/ce/... -
Page 17: Radio
RADIO Autres paramètres Appuyez sur le bouton de volume pour entrer [FUNCTION]. Tournez le bouton de volume pour choisir [SETTINGS], puis appuyez sur le bouton. Tournez le bouton de volume pour réaliser une sélection (voir le tableau suivant), puis appuyez sur le bouton. Maintenez enfoncée pour quitter. -
Page 18: Cd / Usb / Ipod
• CD audio: TRAC REPEAT, REPEAT OFF • Fichier MP3/WMA: FILE REPEAT, FOLD REPEAT, REPEAT OFF iPod/iPhone • iPod ou fichier KENWOOD Music Editor Light (KME Light)/ KENWOOD Music Control (KMC): FILE REPEAT, REPEAT OFF Prise d’entrée USB Lecture aléatoire * Appuyez répétitivement sur 3... - Page 19 CD / USB / iPod • Pour revenir au menu principal, appuyez sur Sélectionnez une plage/fichier à partir Recherche directe de morceau (en la touche numérique 5. d’une liste utilisant la RC-406) • Pour annuler, maintenez enfoncée Pour iPod: Fonctionne uniquement quand Appuyez sur DIRECT.
-
Page 20: Aux
Pandora® Préparation: Préparation: Pour Faire Sélectionnez [ON] pour [BUILTIN AUX]. (➜ 4) Installez la dernière version de l’application Appuyez sur 6 38 (ou Mettez en pause Pandora sur votre appareil (iPhone/ iPod appuyez sur ENT 38 sur la ou reprenez la Démarrez l’écoute touch), puis connectez-vous et créez un lecture... -
Page 21: Réglages Audio
RÉGLAGES AUDIO Pendant l’écoute de n’importe quelle source... DETAIL SET Appuyez sur le bouton de volume pour entrer [FUNCTION]. LPF SUB-W THROUGH: Tous les signaux sont envoyés au caisson de grave. ; 85HZ/ Tournez le bouton de volume pour choisir [AUDIO CTRL], puis 120HZ/ 160HZ: Les signaux audio des fréquences inférieures à... -
Page 22: Réglages D'affichage
Niveau 1/2, Joliet, Romeo, Nom de fichier étendu. • Pour revenir à la hiérarchie précédente, • Il n’est pas possible d’utiliser un iPod lorsque “KENWOOD” ou “ ” est • Systèmes de fichier de périphérique USB compatibles: affiché sur l’iPod. -
Page 23: En Cas De Difficultés
EN CAS DE DIFFICULTÉS Symptôme Remède Symptôme Remède Le son ne peut pas être • Ajustez le volume sur le niveau optimum. “NO MUSIC” apparaît. Connectez un périphérique USB qui contient des fichiers entendu. • Vérifiez les cordons et les connexions. audio compatibles. - Page 24 Avertissement Installation de l’appareil (montage encastré) • L’appareil peut uniquement être utilisé avec une alimentation de 12 V CC, à masse négative. • Déconnectez la borne négative de la batterie avant le câblage et le montage. • Ne connectez pas le fil de batterie (jaune) et le fil d’allumage (rouge) au Réalisez les connexions châssis de la voiture ou au fil de masse (noir) pour éviter les courts-circuits.
- Page 25 (Pour Violet connecter au système de navigation D Faisceau de fils Vers l’enceinte arrière Violet/Noir Kenwood, reportez-vous à votre (droite) manuel de navigation.) Interrupteur d’allumage Boîte de fusible de la voiture Rouge Bleu (Non utilisé) E Clé...
- Page 26 CONTENIDO ANTES DEL USO Advertencia ANTES DEL USO No utilice ninguna función que pueda desviar su atención mientras está conduciendo el vehículo. PUNTOS BÁSICOS Precaución Ajuste del volumen: PROCEDIMIENTOS INICIALES 4 • Ajuste el volumen a un nivel que le permita oír los ruidos del exterior para impedir accidentes. •...
-
Page 27: Puntos Básicos
PUNTOS BÁSICOS Placa frontal Mando a distancia (RC-406) Rueda de volumen Sensor remoto (DO lo exponga (girar/pulsar) Ranura de carga a la luz solar brillante.) Retire la hoja aislante cuando se utilice por Botón de liberación Ventanilla de visualización * Sin utilizar. primera vez. -
Page 28: Procedimientos Iniciales
A continuación, realice el paso anterior y ponga el reloj en hora. F/W UP xx.xx YES: Se empieza a actualizar el firmware. ; NO: Se cancela (la actualización no se activa). Para obtener información sobre cómo actualizar el firmware, consulte: www.kenwood.com/cs/ce/... -
Page 29: Radio
RADIO Otros ajustes Pulse la rueda de volumen para ingresar en [FUNCTION]. Gire la rueda de volumen para seleccionar [SETTINGS] y luego púlsela. Gire la rueda de volumen para seleccionar (consulte la siguiente tabla) y luego púlsela. Para salir, pulse y mantenga pulsado Búsqueda de una emisora Predeterminado: XX Pulse L SRC para seleccionar TUNER. -
Page 30: Cd / Usb / Ipod
• CD de audio: TRAC REPEAT, REPEAT OFF • Archivo MP3/WMA: FILE REPEAT, FOLD REPEAT, REPEAT OFF iPod/iPhone • iPod o achivo KENWOOD Music Editor Light (KME Light)/ KENWOOD Music Control (KMC): FILE REPEAT, REPEAT OFF Terminal de entrada USB Reproducción... - Page 31 CD / USB / iPod Seleccionar una pista/archivo de una Búsqueda directa de música (mediante Defina el índice de búsqueda por salto lista RC-406) Mientras se escucha desde el iPod o archivos KME Light/ KMC... Para iPod: Aplicable sólo cuando se selecciona Pulse DIRECT.
-
Page 32: Aux
Pandora® Preparativos: Preparativos: Para Hacer esto Seleccione [ON] para [BUILTIN AUX]. (➜ 4) Instale la última versión de la aplicación Pulse 6 38 (o pulse ENT 38 Pausar o Pandora en su dispositivo (iPhone/ iPod reanudar la en el RC-406). Comience a escuchar touch) y, a continuación, inicie sesión y cree reproducción... -
Page 33: Ajustes De Audio
AJUSTES DE AUDIO Mientras se escucha desde cualquier fuente... DETAIL SET Pulse la rueda de volumen para ingresar en [FUNCTION]. LPF SUB-W THROUGH: Todas las señales se envían al subwoofer. ; 85HZ/ Gire la rueda de volumen para seleccionar [AUDIO CTRL] y luego 120HZ/ 160HZ: Las señales de audio con frecuencias inferiores a púlsela. -
Page 34: Ajustes De Visualización
• Formato de archivo de disco reproducible: ISO 9660 • Para volver a la jerarquía anterior, pulse • El iPod no se puede utilizar si se visualiza “KENWOOD” o “ ” en el iPod. Nivel 1/2, Joliet, Romeo, nombre de archivo largo. -
Page 35: Problemas
LOCALIZACIÓN Y SOLUCIÓN DE PROBLEMAS Síntoma Solución Síntoma Solución El sonido no se escucha. • Ajuste el volumen al nivel óptimo. Aparece “NO MUSIC”. Conecte un dispositivo USB que contenga archivos de audio • Inspeccione los cables y las conexiones. reproducibles. - Page 36 Advertencia Instalación de la unidad (montaje en el tablero) • La unidad puede utilizarse solamente con una fuente de alimentación de 12 V CC con negativo a masa. • Desconecte el terminal negativo de la batería antes de realizar el cableado y el montaje.
- Page 37 Al terminal de tierra cuando suena el Verde/negro (izquierdo) (Silenciar cable del teléfono o durante la conversación. control) (Para conectar el sistema de Púrpura navegación Kenwood, consulte el Al altavoz trasero D Mazo de conductores Púrpura/negro manual de navegación.) (derecho) Caja de Interruptor de...
- Page 38 SPECIFICATIONS / SPÉCIFICATIONS / ESPECIFICACIONES Frequency Range / Bande de fréquences / Gama de frecuencias 87.9 MHz — 107.9 MHz (200 kHz space / intervalle de / espacio) Usable Sensitivity / Sensibilité utilisable / Sensibilidad útil (S/N = 26 dB) 11.2 dBf (1.0 μV/75 Ω) Quieting Sensitivity / Seuil de sensibilité...
- Page 39 Subject to change without notice. / Sujet à changement sans notification. / Sujeto a cambios sin previo aviso. USB Standard / Standard USB / Estándar USB USB 1.1, USB 2.0 (Full speed / Vitesse maximale / Alta velocidad) Maximum Supply Current / Courant d’alimentation maximum / DC 5 V Corriente de alimentación máxima File System / Système de fichiers / Sistema de archivos...
- Page 40 • iPhone, iPod, iPod classic, iPod nano, and iPod touch are trademarks of Apple Inc., JVC KENWOOD Corporation registered in the U.S. and other countries.