Advertisement
Quick Links
Advertisement

Related Manuals for Fisher-Price GNX43


Summary of Contents for Fisher-Price GNX43
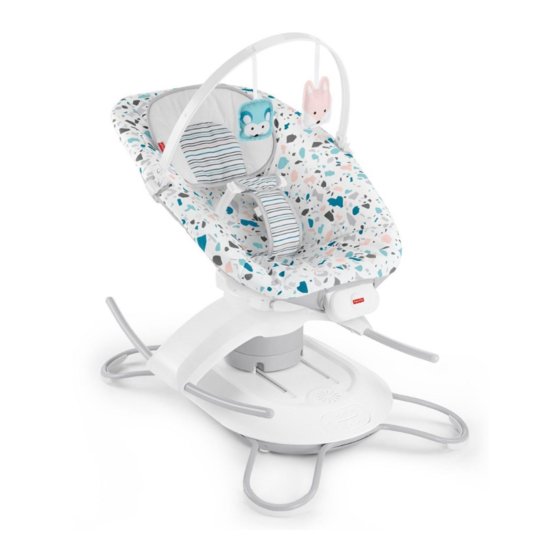
- Page 1 GNX43 ASSEMBLY AND USE | MONTAJE Y USO...
- Page 2 BEFORE YOU BEGIN | ANTES DE EMPEZAR IMPORTANT! Keep this instruction sheet for future reference, as it contains important information. Before assembly and each use, inspect this product for damaged hardware, loose joints, missing parts or sharp edges. Do not use the product if any parts are missing, damaged or broken.
- Page 3 WARNING When used as a glider: Prevent serious injury or death: • Never leave child unattended. • This product is not intended for unsupervised or prolonged periods of sleep. • Always use the restraint system. • Never use for a child able to sit up unassisted. • Fall Hazard –...
- Page 4 ADVERTENCIA Cuando se utiliza como mecedora: Evita lesiones graves o la muerte: • Nunca dejes al niño sin supervisión. • Este producto no está diseñado para períodos no supervisados o prolongados de sueño. • Siempre usa el sistema de sujeción. • No lo uses con niños que puedan incorporarse por sí solos. • Peligro de caídas: no lo uses en superficies elevadas, ya que el movimiento del niño puede causar que el producto se resbale o voltee.
- Page 5 PARTS | PIEZAS IMPORTANT! Please remove all parts from the package and identify them before assembly. Some parts may be packed in the pad. ¡IMPORTANTE! Sacar todas las piezas del empaque e identificarlas antes de empezar con el montaje. Algunas piezas pueden venir embaladas en la almohadilla. M3,5 x 15 mm Screw Tornillo M3,5 x 15 mm Note: Tighten or loosen all screws with a Phillips...
-
Page 6: Montaje
ASSEMBLY MONTAJE Push the base tube until it “snaps” into place. Pull on it to be sure it’s assembled to the base. Empuja el tubo base hasta que “se ajuste” en su lugar. Tira de él para asegurarte de que esté montado en la base. - Page 7 ASSEMBLY MONTAJE Push the other base tube until it “snaps” into place. Pull on it to be sure it’s assembled to the base. Empuja el otro tubo base hasta que “encaje” en su lugar. Tira de él para asegurarte de que esté montado en la base.
- Page 8 ASSEMBLY MONTAJE Make sure the socket is upright. Asegúrate de que el tomacorriente quede en posición vertical. Make sure the socket is upright. Asegúrate de que el tomacorriente quede en posición vertical.
- Page 9 ASSEMBLY MONTAJE Turn the assembly over and fit a seat rail to the frame. Gira el ensamblaje y ajusta el carril del asiento al armazón.
- Page 10 ASSEMBLY MONTAJE Turn the assembly upright to attach the seat pad. Deja el ensamblaje en posición vertical para fijar la almohadilla del asiento. Pull the front edge of the pad around the front edge of the seat. Jala el borde delantero del colchón alrededor del borde delantero del asiento.
- Page 11 ASSEMBLY MONTAJE Fasten the pad button holes to the pegs. Ajusta los broches a los ojales de la almohadilla. Buckle the straps on the pad. Make sure you hear a “click”. Abrocha los cinturones de la almohadilla. Asegúrate de oír un clic. Tuck the pad around the toy bar retainers.
- Page 12 ADJUST SEAT BACK AJUSTE DEL RESPALDO DEL ASIENTO The seat back can be raised or lowered for upright or recline seating when used as a rocker or glider. El respaldo del asiento se puede subir o bajar para una posición de asiento vertical o reclinado cuando se utiliza como balancín o mecedora.
-
Page 13: Restraint System
RESTRAINT SYSTEM SISTEMA DE SUJECIÓN Position the restraint pad between your child’s legs and fasten the restraint belts to each side of the restraint pad. Make sure you hear a “click” on both sides. Check to be sure the restraint system is securely attached by pulling it away from your child. - Page 14 GLIDER MECEDORA “Snap” the seat to the base to use as a glider. “Encaja” el asiento en la base para utilizarlo como mecedora. Place the glider near a standard wall outlet. First plug the AC adapter into the glider base and then the wall outlet.
- Page 15 GLIDER MECEDORA Touch the power button on the glider Toca el botón de encendido/apagado base to turn power ON or OFF. ubicado en la base de la mecedora para ENCENDER o APAGAR el producto. Touch the speed buttons or to select the desired gliding speed to turn gliding Toca los botones de velocidad para...
- Page 16 ROCKER SEAT | BALANCÍN Lift to remove the seat from the base to use as a rocker. Levanta el asiento para sacarlo de la base y poder utilizar el producto como un balancín.
- Page 17 WANT TO SWITCH THE MOTION? CÓMO CAMBIAR LOS MOVIMIENTOS Turn the seat for head-to-toe motion. Cambia el movimiento del asiento a un movimiento de adelante hacia atrás. HEAD-TO-TOE ADELANTE HACIA ATRÁS Turn the seat for side-to-side motion. Cambia el movimiento del asiento a un movimiento de lado a lado.
- Page 18 CARE | MANTENIMIENTO The pad is machine washable. Wash the pad La almohadilla se puede lavar a máquina. Usa separately, with a mild detergent, in cold un detergente neutro para lavar la almohadilla water and on the gentle cycle. Do not use por separado en agua fría en ciclo para ropa bleach.
- Page 19 GENERAL INFORMATION INFORMACIÓN GENERAL FCC STATEMENT (UNITED STATES ONLY) NOTA FCC (VÁLIDO SÓLO EN LOS ESTADOS UNIDOS) This equipment has been tested and found to comply with the limits for a Class B digital device, Este equipo fue probado y cumple con los límites pursuant to Part 15 of the FCC rules.
- Page 20 UNITED STATES COLOMBIA 1-800-432-5437. Fisher-Price, Inc., Mattel Colombia, S.A., Calle 123#7-07 P.5, 636 Girard Avenue, East Aurora, NY 14052. Bogotá. Tel.: 01800-710-2069. MÉXICO PERÚ Importado y distribuido por Mattel de México, Mattel Perú, S.A., Av. Juan de Arona # 151, S.A.