Table of Contents
Advertisement
Advertisement
Table of Contents

Related Manuals for Toshiba 55 QA4C Series


Summary of Contents for Toshiba 55 QA4C Series
- Page 1 55/65 QA4C Series OPERATING INSTRUCTIONS...
-
Page 2: Table Of Contents
Table of Contents Safety Information ..........2 Introduction ............4 Stand Installation & Wall Mounting ....... 4 Stand Installation & Wall Mounting ....... 5 Other Connections ..........6 Turning On/Off the TV(**) ........7 TV Control & Operation(**).........8-9 Remote Control (**) ........10-11-12 Initial Setup Wizard .......... -
Page 3: Safety Information
• Do not expose the TV to direct sunlight or do Safety Information not place open flames such as lit candles on the top of or near the TV. • Do not place any heat sources such as electric CAUTION heaters, radiators, etc. near the TV set. RISK OF ELECTRIC SHOCK • Do not place the TV on the floor and inclined DO NOT OPEN surfaces. - Page 4 WARNING WALL MOUNTING WARNINGS Do not ingest the battery, Chemical Burn Hazard • Read the instructions before mounting your TV on the wall. This product or the accessories supplied with the product may contain a coin/button cell battery. If the • The wall mount kit is optional. You can obtain from coin/button cell battery is swallowed, it can cause your local dealer, if not supplied with your TV.
-
Page 5: Introduction
intended to achieve, showing the hidden areas of Introduction dark shadows and sunlight with full clarity, colour and detail. HDR/HLG contents are supported via native Thank you for choosing our product. You’ll soon be and market applications, HDMI, USB inputs and enjoying your new TV. -
Page 6: Stand Installation & Wall Mounting
Assembling the pedestal Your TV is also prepared for a VESA-compliant wall mount bracket. If it is not supplied with your TV, contact Place the pedestal on the table or similar even your local dealer to purchase the recommended wall- surface. -
Page 7: Other Connections
Other Connections If you want to connect a device to the TV, make sure that both the TV and the device are turned off before making any connection. After the connection is done, you can turn on the units and use them. When using the wall mounting kit Connector Type Cables Device (contact your dealer to purchase one, if not supplied), we recommend that HDMI you plug all your cables into the back Connection... -
Page 8: Turning On/Off The Tv(**)
• Press the Standby button on the remote control. Turning On/Off the TV (**) • Press the centre of the control switch on the TV in. The TV will then switch on. Connect power To switch the TV into standby IMPORTANT: The TV set is designed to operate on 220-240V AC, 50 Hz socket. -
Page 9: Tv Control & Operation(**)
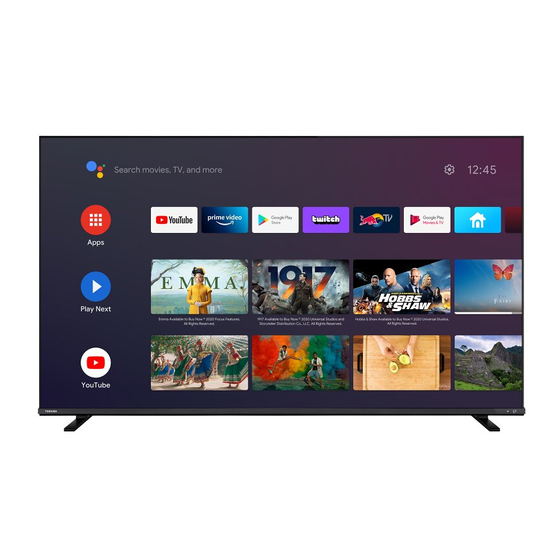
To power down the TV completely, unplug the power Operation with the Remote Control cord from the mains socket. Press the Menu button on your remote control to Quick Standby Mode display Live TV settings menu when in Live TV mode. Press Home button to display or return to the Home In order to switch the TV into quick standby mode Screen of the Android TV. - Page 10 Press Home button to display or return to the Home Input Selection Screen of the Android TV. Use the directional buttons Once you have connected external systems to your to move the focus, proceed, adjust some settings and TV, you can switch to different input sources. Press the press OK to make selections in order to make changes, Source button on your remote control consecutively set your preferences, enter a sub-menu, launch an or use the directional buttons and then press the OK...
-
Page 11: Remote Control (**)
Remote Control (**) Standby: Quick Standby / Standby / On Numeric buttons: Switches the channel in Live TV mode, enters a number or a letter in the text box on the screen Language: Switches among sound modes (analogue TV), displays and changes audio language (digital TV, where available) Home: Opens the Home Screen Mute: Completely turns off the volume of the TV... - Page 12 Remote Control (**) Standby: Quick Standby / Standby / On Numeric buttons: Switches the channel in Live TV mode, enters a number or a letter in the text box on the screen Language: Switches among sound modes (analogue TV), displays and changes audio language (digital TV, where available) Mute: Completely turns off the volume of the TV Volume +/-...
- Page 13 Remote Control (**) Standby: Quick Standby / Standby / On Numeric buttons: Switches the channel in Live TV mode, enters a number or a letter in the text box on the screen Language: Switches among sound modes (analogue TV), displays and changes audio language (digital TV, where available) Volume +/- Microphone: Activates the microphone on the remote...
-
Page 14: Initial Setup Wizard
5. Network Connection Initial Setup Wizard You will be directed to the next step automatically, if you Note: Follow the on-screen instructions to complete the initial connect your TV to internet via Ethernet at this point. If setup process. Use the directional buttons and the OK button not, available wireless networks will be searched and on the remote to select, set, confirm and proceed. - Page 15 also view Terms of Service, Privacy Policy and can perform a channel search later using the related Channels menu options. Play Terms of Service on this screen. To display the content an internet connection is needed. A message The next step is the selection of the tuner mode. Select will be displayed mentioning the web site address on your tuner preference to install channels for Live TV which this information can also be viewed, in case...
- Page 16 DVBS Configuration Setting screen will be displayed network scan, make sure that you have adjusted the next. First Antenna type(*) should be set. Universal, Frequency, Symbol Rate (Ksym/s) and Polarisation Single Cable and Jess Singlecable options are parameters under the Transponder option accurately available.
-
Page 17: Live Tv Mode Menu Content
Move the focus to the desired option and press OK Display Mode: Set the aspect ratio of the screen. to proceed. Select one of the predefined options according to your preference. On the upper right of the screen, Notifications, Inputs, Network &... -
Page 18: Record(**)
HBBTV Support: Turn the HBBTV function on options will differ depending on the selected country or off. during the initial setup process. Do Not Track: Set your preference regarding the Auto Sleep: Define an idle time after which you tracking behaviour for HBBTV services. want your TV to enter sleep mode automatically. 4 Hours, 6 Hours and 8 Hours options are available. -
Page 19: Channel
LCN: Set your preference for LCN. LCN is the Logical Available networks Channel Number system that organizes available When the WLAN function is turned on, available broadcasts in accordance with a recognizable channel wireless networks will be listed. Highlight See all and number sequence (if available). - Page 20 may vary depending on the operator and the Scan depending on whether or not the last watched channel Mode selections. Set the Scan Mode as Full if you was analogue. don’t know how to set up other options. Highlight Scan Clear Channel List: Delete all channels stored in the and press OK to start the scan.
-
Page 21: Accounts & Sign In
may also be editable. You can press the Blue button Second Audio Language to delete the highlighted channel. Set one of the listed language options as second Clear Channel List: Delete all channels stored in the audio language preference. If in the Audio Language channel list of the selected channel installation mode. -
Page 22: Device Preferences
No Signal Auto Power Off: Set the behaviour of Device Preferences the TV, when no signal is detected from the currently set input source. Define a time after which you want About: Check for system updates, change the device your TV to turn itself off or set as Off to disable. name, restart the TV and display system information such as network addresses, serial numbers, versions Picture etc. - Page 23 signal. Set your DNR preference as Low, Medi- strength of the Red, Green, Blue colours and Gain um, Strong, Auto or turn it off by setting as Off. value manually. Highlight Enable and press OK to turn this function on. MPEG NR: MPEG Noise Reduction cleans up block noise around outlines and noise on the back- Reset to Default: Reset the video settings to factory ground.
- Page 24 Smart, Movie, Music and News options will be Visually Impaired: Digital TV channels can available. Highlight the option you prefer and broadcast special audio commentary describing press OK to set. on-screen action, body language, expressions and movements for people with visual disabilities. Reset to Default: Resets the sound settings to factory defaults.
-
Page 25: Channel List
Editing the Channels and the Channel List Bluetooth Remotes & Accessories (**) You can edit the channels and the channel list using You can use Bluetooth accessories, such as your the Channel Skip, Channel Swap, Channel Move remote control (depends on the model of the remote and Channel Edit options under the Settings>Chan- control), headphones, keyboards or game controllers nel>Channels menu. -
Page 26: Connecting To The Internet
switch to previous/next channel on the list and Right/ Left directional buttons to select a desired event of the currently highlighted channel. If available, the full name, start-end time and date, genre of the highlighted event and a brief information about it will be displayed on the screen. - Page 27 A stable connection speed is required to play back streaming content. Use an Ethernet connection if the wireless LAN speed is unstable. Multi Media Player On the Home Screen scroll to Apps row, select Multi Media Player (MMP) and press the OK button to launch.
- Page 28 Fast Forward: Start fast forward playback. Press Info: Display the info bar. Press twice to display the consecutively to set the forward playback speed. extended information. Stop: Stop the playback and return to the media Play/pause: Pause and resume the slide show. player screen.
-
Page 29: Usb Recording(**)
Please note that any commercial use of the recording function could lead to copyright infringement of From a Mobile Device via DMR authors' rights. Toshiba asks you to respect the intellectual property rights of third parties. Make sure that your mobile device is connected to the same network as your TV. -
Page 30: Watching Recorded Programmes
Press Record button to add a timer while the Schedule Watching Recorded Programmes List menu is displayed on the screen. You can define the type of the timer by setting the Schedule Select Record List from the Record menu in Live Type option as Reminder or Record. When other TV mode and press OK. -
Page 31: Google Cast
is in Live TV mode and select the related HDMI input Tap on ‘Wireless projection’ source from the list. To terminate this operation and Select the TV you would like to cast to control the TV via the remote again, press the Source If the mobile app is Cast-enabled, such as YouTube, button, which will still be functional, on the remote and Dailymotion, Netflix, you can cast your app to your TV. -
Page 32: Troubleshooting & Tips
camera, the remote control is working. The TV needs Quick Standby Search to be checked. If you do not notice the flickering, the batteries may If earlier an automatic search is performed, your TV will be exhausted. Replace the batteries. If the remote is search for new or missing digital channels at 05:00 am still not working, the remote control might be broken every morning while in quick standby mode. -
Page 33: Hdmi Signal Compatibility
HDMI Signal Compatibility Source Supported Signals 480i 60Hz 480p 60Hz 576i, 576p 50Hz 720p 50Hz,60Hz 1080i 50Hz,60Hz 24Hz, 25Hz, 30Hz, 1080p 50Hz, 60Hz HDMI 24Hz, 25Hz, 30Hz, 3840x2160p 50Hz, 60Hz 24Hz, 25Hz, 30Hz, 4096x2160p 50Hz, 60Hz In some cases a signal on the TV may not be displayed properly. -
Page 34: Supported File Formats For Usb Mode
Supported File Formats for USB Mode Video Video Codec Resolution Bit Rate Profile Container MPEG program stream (.DAT, .VOB, .MPG, .MPEG), MPEG transport stream MPEG 1/2 1080P@ 60fps 80Mbps MP@HL (.ts, .trp, .tp), MP4 (.mp4, .mov), 3GPP (.3gpp, .3gp), AVI (.avi), MKV (.mkv), ASF (.asf) • Simple Profile MPEG program stream (.MPG, .MPEG),... - Page 35 Audio Codec Sample rate Channel Bit Rate Container Note Movie: AVI (.avi), ASF (.asf), Matroska (.mkv), MPEG transport 8Kbps ~ MPEG1/2 Layer2 16KHz ~ 48KHz Up to 2 stream (.ts, .trp, .tp), MPEG program 384Kbps stream (.DAT, .VOB, .MPG, .MPEG) Music: MP3 (.mp3), WAV (.wav) Movie: AVI (.avi), ASF (.asf), Matroska (.mkv), 3GPP (.3gpp,...
-
Page 36: Picture
Audio Codec Sample rate Channel Bit Rate Container Note Movie: AVI (.avi), Matroska (.mkv), 3GPP (.3gpp, .3gp), MP4 (.mp4, 64Kbps ~ .mov), MPEG transport stream (.ts, LPCM 8KHz ~ 48KHz Up to 5.1 1.5Mbps .trp, .tp), MPEG program stream, (.DAT, .VOB, .MPG, .MPEG) Music: WAV (.wav), MP4 (.m4a) Movie: AVI (.avi), Matroska (.mkv), IMA-ADPCM... -
Page 37: Subtitle
Subtitle Internal File Extension Container Subtitle Codec dat, mpg, mpeg, vob MPG, MPEG DVD Subtitle ts, trp, tp DVB Subtitle DVD Subtitle UTF-8 Plain Text UTF-8 Plain Text VobSub DVD Subtitle AVI(1.0, 2.0), XSUB DMF0, 1, 2 XSUB+ External File Extension Subtitle Parser Remark .srt... -
Page 38: Disposal Information
Disposal Information The following information is only for EU-member states: Disposal of products The crossed out wheeIed dust bin symbol indicates that products must be collected and disposed of separately from household waste. Integrated batteries and accumulators can be disposed of with the product. They will be separated at the recycling centres. The black bar indicates that the product was placed on the market after August 13, 2005. By participating in separate collection of products and batteries, you will help to assure the proper disposal of products and batteries and thus help to prevent potential negative consequences for the environment and human health.