Table of Contents
Advertisement
Quick Links
Professional Handheld FM Transceiver
Contents
Introduction.............................................34
Included.................................................34
Accessories List.......................................35
Main Features.........................................35
Technical Information................................37
Know the Radio.......................................39
Preparation before using...........................40
Function Operations..................................46
Function Setting ......................................54
Maintenance...........................................58
Trouble Shooting .....................................59
Appendix: CTCSS and DCS chart................61
Advertisement
Table of Contents

Related Manuals for Nanfone NF-688

Summary of Contents for Nanfone NF-688
-
Page 1: Table Of Contents
Professional Handheld FM Transceiver Contents Introduction……………………………………...34 Included………………………………………….34 Accessories List………………………………...35 Main Features…………………………………..35 Technical Information…………………………..37 Know the Radio………………………………...39 Preparation before using………………………40 Function Operations…………………………..46 Function Setting ………………………………..54 Maintenance…………………………………….58 Trouble Shooting ……………………………….59 Appendix: CTCSS and DCS chart…………….61... -
Page 2: Introduction
Introduction Thanks for purchasing NANFONE transceiver NF-688 (688plus). Please read this manual carefully to learn its latest functions and operations before using. NF-668 is with mini compact size, easy-to-use feature and stable performance. It’s developedfor satisfying the customer’s demand. No matter you are in the countryside、 forest area、... -
Page 3: Accessories List
Professional Handheld FM Transceiver Accessories List: Descripti Unit Quan Antenna Belt clip Lithium battery pack Charger Adaptor 3*6 screw User Manual QC passed card Main Features 1、Frequency range: 400-470MHz 2、Voice reported function in both English and Chinese (Optional) 3、High /Low power switchable: 5W 4、Wide/Narrow Bandwidth 5、CTCSS 50/ DCS 83 to avoid interference from other radios... - Page 4 6、VOX function. Release your hands for convenient use 7、TOT Function. Avoid damage due to the long- term transmit 8、BCL Function 9、Scan function. Scan and receive all the conversion channel 10、FM Radio. Know more about the latest news。 11、Battery Save and Long Standby. 12、Built in Bluetooth(Optional).
-
Page 5: Technical Information
Professional Handheld FM Transceiver Technical Information GENERAL Frequency range: 400MHz-470MHz Number of channel: Channel spacing: 12.5kHz/25kHz(Optional) Modulation: Frequency Modulation (FM) Operating temperature range: -20℃ -- +55℃ Voltage: 7.4V Standby Current: About 15mAh (Power Save) Size: 100(H)×58(W)×36(D) Weight: About 205g TRANSMITTER: Frequency Distortion: ±3ppm Output power:... - Page 6 RECEIVER Reference sensitivity: <-122dBm(12dB SINAD) Squelch sensitivity: <-126dBm RatedAudioPower: ≥500mW Receiving current: ≤380mA Audio frequency distortion: <10% Adjacent- Channel Selectivity: ≥60dB Intermediation Rejection: ≥60dB...
-
Page 7: Know The Radio
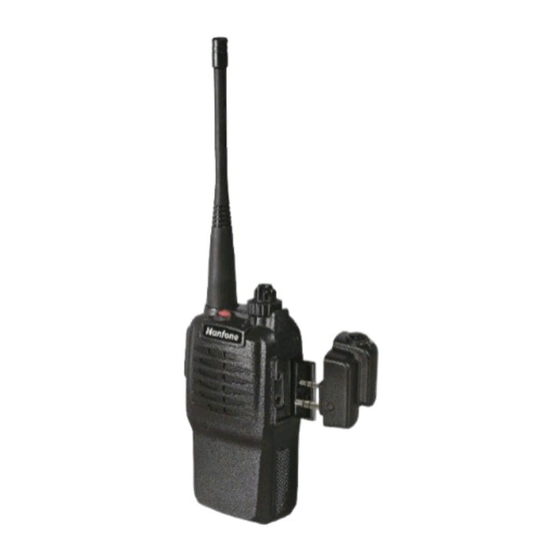
Professional Handheld FM Transceiver Know the Radio 1. Antenna 2. Alarm/Bluetooth Multi function Key 3. Indicator 4.VOX 5. Channel 6.Ring Hole7 PTT 8.FM/Mnoitor/FM+ 9.FM-/Call 10.MIC 11.Battery snap 12.Battery 13.SP 14.MIC/SP Waterproof Cover 15.Belt Clip... -
Page 8: Preparation Before Using
Preparation for Using Install the antenna Install the antenna as picture and rotate it clockwise till tight (The antenna in picture only for reference) Note:Don’t hold the machine by antenna or hang the keychain and earphone on it, since they will spoil the antenna and reduce the performance of the machine. - Page 9 Professional Handheld FM Transceiver Install Lithium battery pack Put the original Lithium battery pack into the transceiver correctly as following picture shows: Figure 1 Figure 2...
- Page 10 Unfold the Battery Press the battery snap like picture shows and push up . Figure 1 Figure 2...
- Page 11 Professional Handheld FM Transceiver Install the belt clip If necessary, installing the belt clip with 3*6 Screws to fix it. Note: 1.When installing the belt clip , do not use any glue to fix crew or it will be bad for casing. 2.
- Page 12 Install external microphone Install the microphone as picture shows, Charging The battery pack is without power when finished, and please charge it before using. When used for the first time after purchased or Stored over two months, the capacity of battery pack is less than...
- Page 13 Professional Handheld FM Transceiver normal. However, it will return normal after charged and discharged for five times. Charge in power-off mode, the indicate red light is on, and it is off when finish charging. Charging steps below: 1. Insert the AC adaptor line to the charging hole of desk-top . 2.
-
Page 14: Function Operations
Note: 1.Please make sure battery charging is working 2. It will return normal after charged and discharged for five times. Charge in power-off mode, the indicate red light is on, and it is off when finish charging. 3. Do not short-circuit the battery terminals or dispose of batteries in fire. - Page 15 Professional Handheld FM Transceiver Press 【PTT】 and Red Indicator flashes, then transmitting the information and release. Monitor Short press (FM/Monitor/FM+) to turn on the Squelch , press gain to turn off. Call Function Press (PTT) and (FM/Monitor/FM+) simultaneously to call and transmit , release (FM/Monitor/FM+) to quit .
- Page 16 both with 668P radio and the wireless remote control PTT button. 2、Pairing the Bluetooth headset with 668P Two Way Radio : Be sure the built-in bluetooth headset of the radio is OFF. Press and hold the Bluetooth headset Multi-function button on the radio for about 6 seconds to enter pairing state.
- Page 17 Professional Handheld FM Transceiver Release the PTT button,the transmitting finishes,and the talking continues. *The red light on the radio turns off. 2.Receiving while talking to a cell phone: *.The indicator light on the radio shines in green when there is signal. *.The call will be paused for the moment and you will hear the voice on the other end in the bluetooth headset.
- Page 18 FM Operation 1.Long press (FM/Monitor/FM+) for more than 2 seconds and hear the sound “Di” ,turning on the FM .The radio can scan automatically by short pressing the (FM/Monitor/FM+). Stop scanning when get a signal If want to receive another radios, short press (FM/Monitor/FM+) again.
- Page 19 Professional Handheld FM Transceiver Emergency Call 668 Model:Long press Bluetooth button on the top of panel for more than 2s ,then can active “Emergency Call”; 668Plus Model: Long press (FM-/Call) button on the side panel for more than 2s ,then active the “Emergency Call” Now:The red indicator of radio flashes and makes aloud emergency call to the same frequency (channel one) radio.
- Page 20 scanning would stop and ready for transmitting . Channel Lock Out Radio with channel lock out function avoid not transmitting by some improper operation on the radio at some specific occasions. Steps: Press (FM/Monitor/FM +) and (FM-) at same time to turn the radio on ,and “Di”...
- Page 21 Professional Handheld FM Transceiver 2. Rotate the channel selector on the base transceiver to channel 8, then hold and Press “Radio/Monitor/Reception+” key to power on, (3 seconds later) until the orange light (red light and yellow light flash simultaneously) flashes which indicates the base transceiver is in cloning state, then release the button.
-
Page 22: Function Setting
Function Setting PC Software Programming Setting Please login in http://www.nanfone.com to download to NF-668 software. SQL Setting 1. Open the PC software to choose the squelch you require. Squelch level is from 1-9. The higher the squelch level, the lower chance of interference, but it may affect the communication distance. - Page 23 Professional Handheld FM Transceiver 1. The purpose of the Time-out Timer is to prevent any single person from using a channel for an extended period of time. 2. The overtime can be set by PC software programming ( the time can set as 30 seconds, 60 seconds, 90 seconds、 120 seconds、150 seconds、180 seconds or OFF ).
- Page 24 behind each channel if the function is selected. When the scan function is set to be ON, the channel can be scanned automatically in standby state, and you can talk on this channel while there’s signal. Rotate the channel selector to channel 16 to activate the scan function, and then those channels which set automatic scan will be activated by itself.
- Page 25 Professional Handheld FM Transceiver 2. CTCSS Busy Lockout: The transceiver receives SQ, but no CTCSS/DCS, and then transmitting is allowed. The transceiver receives SQ, and CTCSS/DCS, and then transmitting is prohibited. Power Save Open the PC software to decide whether you will choose the power save or not.
-
Page 26: Maintenance
CTCSS/DCS 1.Open the program software,choose"BCLO"what you want. The radio can be set off "carrier wave" CTCSS/DCS BCLO. Only set by receiving the CTCSS,can open the CTCSS/DCS. 2.CTCSS/DCS BCLO:Reciving the SQ but not the CTCSS/ DCS,transmitting is allowed.Reciving the SQ and CTCSS/ DCS,transmitting is prohibited. -
Page 27: Trouble Shooting
Professional Handheld FM Transceiver Trouble Shooting Problem Solution The battery may have been exhausted.Please recharge or replace the battery pack.The No power battery pack may not be installed correctly.Please check and install it again. Make sure you are using the same frequency and CTCSS Unable to talk or tone as other members in... - Page 28 The other Please change the frequency. group members’ Make sure to change CTCSS voices are present signal of all transceivers in on the channel. your group. The battery pack has been used out and cannot function Battery lasts in any longer. Please replace it a short time after with a new one.
-
Page 29: Appendix: Ctcss And Dcs Chart
Professional Handheld FM Transceiver Appendix: CTCSS and DCS chart 50 groups CTCSS 67.0 85.4 107.2 136.5 165.5 186.2 210.7 254.1 69.3 88.5 110.9 141.3 167.9 189.9 218.1 71.9 91.5 114.8 146.2 171.3 192.8 225.7 74.4 94.8 118.8 151.4 173.8 196.6 229.1 77.0 97.4 123.0 156.7 177.3 199.5 233.6 79.7 100.0 127.3 159.8 179.9 203.5 241.8 82.5 103.5 131.8 162.2 183.5 206.5 250.3...