Advertisement
Quick Links
Advertisement

Related Manuals for Xilinx ML630 Si570


Summary of Contents for Xilinx ML630 Si570
- Page 1 ML630 Si570 Fixed Frequencies March 2012 XTP120 © Copyright 2012 Xilinx...
-
Page 2: Revision History
NOTICE OF DISCLAIMER: The information disclosed to you hereunder (the “Information”) is provided “AS-IS” with no warranty of any kind, express or implied. Xilinx does not assume any liability arising from your use of the Information. You are responsible for obtaining any rights you may require for your use of this Information. - Page 3 ML630 Si570 Fixed Frequency Overview Xilinx ML630 Board Software Requirements Setup for the ML630 Si570 Fixed Frequency ML630 Si570 Fixed Frequency Changing an Si570 from 156.25 to 19.440 MHz Other Fixed Frequencies References...
- Page 4 ML630 Si570 Fixed Frequency Overview Description – The ML630 board has six Silicon Labs Si570 Programmable Oscillators that default to 156.25 MHz. Via a series of bitstreams, the frequency of these devices can be changed. This tutorial shows how to change the output frequency of these devices.
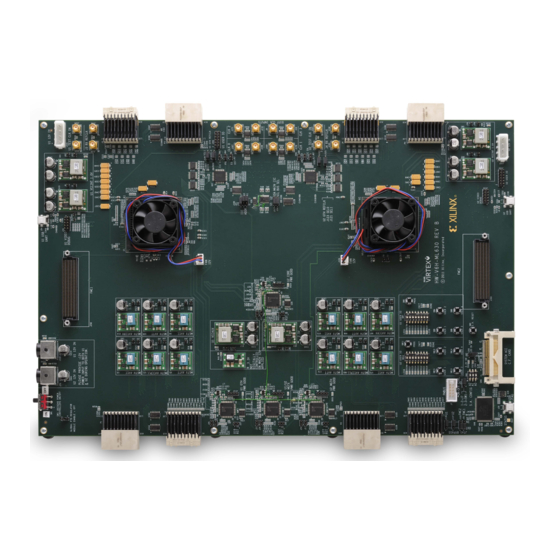
- Page 5 Xilinx ML630 Board Note: Presentation applies to the ML630...
- Page 6 ISE Software Requirements Xilinx ISE 13.4 software Note: Presentation applies to the ML630...
- Page 7 ChipScope Pro Software Requirement Xilinx ChipScope Pro 13.4 software Note: Presentation applies to the ML630...
- Page 8 ML630 Setup Install USB UART Drivers – CP210x_VCP_Win_XP_S2K3_Vista_7.exe Note: Presentation applies to the ML630...
- Page 9 ML630 Setup Reboot your PC if necessary Right-click on My Computer and select Properties – Select the Hardware tab – Click on Device Manager Note: Presentation applies to the ML630...
- Page 10 ML630 Setup Expand the Ports Hardware – Right-click on Silicon Labs CP210x USB to UART Bridge and select Properties Note: Presentation applies to the ML630...
- Page 11 ML630 Setup Under Port Settings tab – Click Advanced – Set the COM Port to an open Com Port setting from COM1 to COM4 Note: Presentation applies to the ML630...
- Page 12 ML630 Setup Board Power must be on before starting Tera Term Start the Terminal Program – Select your USB Com Port – Set the baud to 9600 Note: Tera Term may need to be restarted if board power is cycled...
- Page 13 Setup for ML630 Si570 Fixed Frequency Unzip the ML630 Si570 Fixed Frequencies Design Files (13.4 C) to your C:\ drive – Available through http://www.xilinx.com/ml630 Note: Presentation applies to the ML630...
- Page 14 Setup for ML630 Si570 Fixed Frequency Important: Set the power switch, SW1, to OFF first The ML630 uses two power supplies; connect both power supplies – Use a power strip to turn on both power supplies simultaneously Only after the two power supplies are on, turn on the power switch...
- Page 15 Setup for ML630 Si570 Fixed Frequency When powering down, turn the power switch off, then turn off the power strip – Always follow this sequence when cycling power to the ML630 Leave the power off for now Note: Presentation applies to the ML630...
- Page 16 Setup for ML630 Si570 Fixed Frequency Connect a USB Type-A to Mini-B cable to the USB JTAG connector on the ML630 board – Connect this cable to your PC Note: Presentation applies to the ML630...
- Page 17 Setup for ML630 Si570 Fixed Frequency Connect a USB Type-A to Mini-B cable to the U2 USB UART connector on the ML630 board – Connect this cable to your PC...
- Page 18 Setup for ML630 Si570 Fixed Frequency Connect J117 and J14 to pins “U2” (1) – This selects U2 as the IIC master Connect J121 across pins 1 & 2 (2) – This selects the Si570_0, 1, and 2 as GTH clocks...
- Page 19 Setup for ML630 Si570 Fixed Frequency Set the power switch, SW1, to OFF (1) Turn on the power strip (with the two ML630 power supplies) Turn on the power switch (1) Note: Presentation applies to the ML630...
- Page 20 ML630 Si570 Fixed Frequency Open ChipScope Pro and select JTAG Chain -> USB Cable… (1) Verify 12 MHz operation and click OK (2) Note: Presentation applies to the ML630...
- Page 21 ML630 Si570 Fixed Frequency Click OK (1) Note: Presentation applies to the ML630...
- Page 22 ML630 Si570 Fixed Frequency Right-click DEV:1 MyDevice1 (XC6VHX565T) and select Configure… Select <Design Path>\ready_for_download\u1_reset.bit Note: Presentation applies to the ML630...
- Page 23 ML630 Si570 Fixed Frequency Right-click DEV:2 MyDevice2 (XC6VHX565T) and select Configure… Select <Design Path>\ready_for_download\si570_freq_monitor.bit Note: Presentation applies to the ML630...
- Page 24 ML630 Si570 Fixed Frequency Select File → Open Project… Select <Design Path>\ready_for_download\ml630_si570.cpj Note: Presentation applies to the ML630...
- Page 25 ML630 Si570 Fixed Frequency All clocks except the 200 MHz clock should be at 156.25 MHz – As seen here, CLK0_FREQ_SI570_0 and 3 are at not at 156.25 MHz...
- Page 26 ML630 Si570 Fixed Frequency Press SW6 to reset the clocks – The Crosspoint clock IC’s can power up with the clock outputs tri-stated – This clears this tri-state state of the clock IC...
- Page 27 ML630 Si570 Fixed Frequency CLK0_FREQ_SI570_0 and 3 are now at 156.25 – All clocks should appear as seen below...
- Page 28 Changing Si570s from 156.25 to 19.440 MHz Right-click DEV:2 MyDevice2 (XC6VHX565T) and select Configure… Select <Design Path>\ready_for_download\ set_19.440_mhz_si570_4_5.bit Note: Presentation applies to the ML630...
- Page 29 Changing Si570s from 156.25 to 19.440 MHz Si570_4 and Si570_5 have been successfully updated to 19.440 Note: Presentation applies to the ML630...
- Page 30 Changing Si570s from 156.25 to 19.440 MHz Si570_4 and Si570_5 should now show 19.440 MHz Note: Presentation applies to the ML630...
- Page 31 Other Frequencies The fixed frequency bitstreams include: – 19.440 MHz for OC-48 – 77.760 MHz for OC-48 – 155.520 MHz for OC-48 – 156.250 MHz for 100Gbe/66 – 161.133 MHz for 100Gbe/64 – 166.629 MHz for OTU-1 – 174.703 MHz for OTU-4/64 –...
- Page 32 References...
- Page 33 References Silicon Labs – Si570 Data Sheet http://www.silabs.com/Support%20Documents/TechnicalDocs/si570.pdf ChipScope Pro – ChipScope Pro Software and Cores User Guide http://www.xilinx.com/support/documentation/sw_manuals/ xilinx13_4/chipscope_pro_sw_cores_ug029.pdf...
- Page 34 Documentation...
- Page 35 Documentation Virtex-6 – Virtex-6 HXT FPGAs http://www.xilinx.com/products/silicon-devices/fpga/virtex-6/hxt.htm ML630 Documentation – Virtex-6 HXT FPGA Optical Transport Network Kit http://www.xilinx.com/products/boards-and-kits/EK-V6-ML630-G.htm – ML630 Hardware User Guide http://www.xilinx.com/support/documentation/boards_and_kits/ ug828_ML630_eval_bd.pdf...