
Related Manuals for Pioneer DMH-A340DAB


Summary of Contents for Pioneer DMH-A340DAB
- Page 1 DMH-A340DAB DMH-A240DAB RDS AV RECEIVER AVH-A240DAB AVH-A240BT DVD RDS AV RECEIVER Operation Manual...
-
Page 2: Table Of Contents
Contents Thank you for buying this Pioneer product. Please read through these instructions so you will know how to operate your model properly. After you have finished reading the instructions, keep this document in a safe place for future reference. -
Page 3: Precaution
• If you notice smoke, a strange noise or odour from this product, or any other abnormal signs on the LCD screen, turn off the power immediately and consult your dealer or the nearest authorised Pioneer Service Station. Using this product in this condition may result in permanent damage to the system. - Page 4 battery. If the coin/button cell battery is swallowed, it can cause severe internal burns in just 2 hours and can lead to death. Keep new and used batteries away from children. If the battery compartment does not close securely, stop using the product and keep it away from children.
- Page 5 • To prevent data loss and damage to the storage device, never remove it from this product while data is being transferred. • Pioneer cannot guarantee compatibility with all USB mass storage devices and assumes no responsibility for any loss of data on media players, iPhone, smartphone, or other devices while using this product.
- Page 6 • We offer the latest information about PIONEER CORPORATION on our website. • Pioneer regularly provides software updates to further improve it’s products. Please check the support section of the Pioneer website for all available software updates. About this product •...
- Page 7 About this manual • This manual uses diagrams of actual screens to describe operations. However, the screens on some units may not match those shown in this manual depending on the model used. • When an iPhone is connected to the unit, the source name on the unit appears as [iPod].
-
Page 8: Parts And Controls
Parts and controls Main unit A340DAB DMH- A240DAB DMH- A240DAB A240BT AVH- - 8 -... - Page 9 Press to turn off the display information. To turn on the display information, press again. Press and hold to power off. To power back on, press again. If you power the unit off, you can turn off almost all functions. The unit turns on by operating the following functions: •...
-
Page 10: Basic Operation
Basic operation Resetting the microprocessor CAUTION • Pressing the RESET button resets settings and recorded contents to the factory settings. – Do not perform this operation when a device is connected to this product. – Some of the settings and recorded contents will not be reset. •... - Page 11 Operating list screens Touching an item on the list allows you to narrow down the options and proceed to the next operation. Touch to view any hidden items. Operating the time bar You can change the playback point by touching in the bar. - 11 -...
- Page 12 Top menu screen Source icons You can display the hidden source icon(s) by swiping left or right on the screen. Settings (page 36) - 12 -...
-
Page 13: Bluetooth
Bluetooth® Bluetooth connection Turn on the Bluetooth function on the device. Press Touch [Phone] or [Bluetooth Audio]. The unit name is shown in the display. Select the unit name shown in the mobile device display. Perform the pairing operation by the mobile device and this unit. After the device is successfully registered, a Bluetooth connection is established by the system. - Page 14 Synchronises the contacts and call history on your phone manually. Using phone book Select a contact from the phone book. Touch the contact on the list. You can use initial search by touching the character at the right side of the phone book screen.
- Page 15 Notes for hands-free phoning ▶General notes • Connection to all mobile phones featuring Bluetooth wireless technology is not guaranteed. • The line-of-sight distance between this product and your mobile phone must be 10 metres or less when sending and receiving voice and data via Bluetooth technology. •...
- Page 16 NOTES • Depending on the Bluetooth audio player connected to this product, the available operations with this product may be limited to the following two levels: – A2DP (Advanced Audio Distribution Profile): Only playing back songs on your audio player is possible.
-
Page 17: Av Source
• USB The following sources can be played back or used by connecting an auxiliary device. • iPhone • Bluetooth audio • AUX *1 DMH-A340DAB, DMH-A240DAB, AVH-A240DAB *2 AVH-A240DAB, AVH-A240BT Selecting a source Press Touch the source icon. You can display the hidden source icon(s) by swiping left or right on the screen. -
Page 18: Digital Radio
Digital Radio tuner operations For improved Digital Radio reception, make sure a Digital Radio aerial with phantom power input (active type) is used. Pioneer recommends using AN-DAB1 (sold separately) or CA-AN-DAB.001 (sold separately). Current consumption of Digital Radio aerial should be 100 mA or less. - Page 19 Selects a station from the list. If you touch [Auto Tune], you can update station list information manually. Digital Radio settings (page 19) Digital Radio settings Press Touch [DAB] then The DAB setting screen appears. Menu Item Description [Traffic Announcement] Receives the traffic announcement and interrupts other sources.
-
Page 20: Radio
Radio Starting procedure Press Touch [Radio]. The Radio screen appears. Basic operation Recalls the preset channel stored to a key from memory. XX.XX XX.XX Stores the current broadcast frequency to a key. Selects the FM1, FM2, FM3, AM1 or AM2 band. Automatically stores the six strongest broadcast frequencies. - Page 21 Select to enable the following RDS function: • [CT]: Synchronizes the time information from the radio station. • [AF]: Allows the unit to retune to a different frequency providing the same station. • [TA]: Receives the traffic announcement and interrupts other sources. NOTE Some functions are available only when you receive the FM band.
-
Page 22: Disc
Disc A240DAB A240BT AVH- Inserting and ejecting a disc You can play a normal music CD, Video-CD, or DVD-Video using the built-in drive of this product. CAUTION Do not insert anything other than a disc into the disc-loading slot. Inserting a disc Insert a disc into the disc-loading slot. - Page 23 Skips files forwards or backwards. Performs fast forwards or fast reverse. Sets a repeat play for the current disc/the current track. Plays or does not play tracks in random order. Selects a track from the list. Touch a track on the list to play back. Video source CAUTION For safety reasons, video images cannot be viewed while your vehicle is in motion.
- Page 24 Switches the audio/subtitle language. NOTE This function is available for DVD-Video. Displays the hidden function bar. Searches for the part you want to play. Select search target, input the desired number then touch To cancel an input number, touch [C]. Selects the audio output.
-
Page 25: Compressed Files
If the disc is already set, select [Disc] as the playing source. Ejecting a disc ▶AVH-A240DAB/AVH-A240BT Press Plugging a USB storage device ▶DMH-A340DAB Pull out the plug from the USB port of the USB cable. Plug a USB storage device into the USB cable. ▶DMH-A240DAB/AVH-A240DAB/AVH-A240BT Open the USB port cover. - Page 26 • This product may not achieve optimum performance with some USB storage devices. • Connection via a USB hub is not possible. • A USB cable is required for connection.* * DMH-A340DAB Unplugging a USB storage device Pull out the USB storage device from the USB cable.
- Page 27 Skips files forwards or backwards. Performs fast forwards or fast reverse. Sets a repeat play range for all files/the current folder/the current file. Plays files or does not play in random order. Selects a file from the list. Touch a file on the list to playback. TIPS •...
- Page 28 Skips files forwards or backwards. Performs fast forwards or fast reverse. (only for USB) Performs fast forwards or fast reverse. (only for disc) Sets a repeat play range for all files/the current folder/the current file. Selects a file from the list. Touch a file on the list to playback.
- Page 29 Skips files forwards or backwards. Rotates the displayed picture 90° anticlockwise. Sets a repeat play range for all files/the current folder. Selects a file from the list. Touch a file on the list to playback. TIPS • Touching a folder on the list shows its contents. You can play a file on the list by touching it.
-
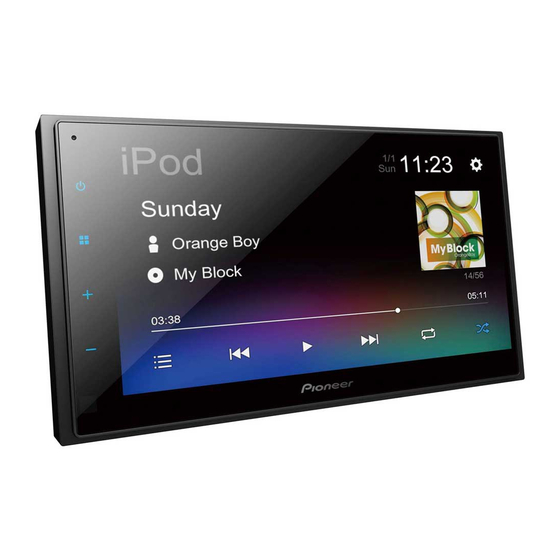
Page 30: Iphone
iPhone NOTE iPhone may be referred to as iPod in this manual. Starting procedure When connecting an iPhone to this product, the settings are automatically configured according to the device to be connected. For details of the compatibility, refer to Compatible iPhone models (page 49). - Page 31 Selects a song from the list. Touch the category then the title of the list to playback of the selected list. You can switch the song list by selecting the character in the initial bar while the initial bar is displayed. NOTE Only 1 300 songs in the iPhone are available in the list if the iPhone has more than 1 300 songs.
-
Page 32: Weblink
Using WebLink Important • Pioneer is not responsible for content or functions accessed via WebLink, which are the responsibility of the application and content providers. • Availability of non-Pioneer content and services, including apps and connectivity, may change or discontinue without notice. - Page 33 You can also start this source by pressing then touching [WebLink]. NOTE For USB connection, refer to the Quick start guide. For smartphone (Android™) users System requirement Android 7.0 or higher NOTE The video playback capability depends on the connected Android device. Unlock your smartphone and connect it to this product via USB.
-
Page 34: Aux
You can display the video image output by the device connected to AUX input. CAUTION For safety reasons, video images cannot be viewed while your vehicle is in motion. To view video images, stop in a safe place and apply the handbrake. NOTE A Mini-jack AV cable (sold separately) is required for connection. -
Page 35: Camera View
CAUTION Pioneer recommends the use of a camera which outputs mirror reversed images, otherwise the screen image may appear reversed. • Immediately verify whether the display changes to the rear view camera image when the gearstick is moved to REVERSE (R) from another position. -
Page 36: Settings
Settings You can adjust various settings in the main menu. Displaying the setting screen Press Touch Touch one of the following categories, then select the options. :System Settings (page 36) :Theme Settings (page 37) :Audio Settings (page 38) NOTE Some settings are available only when you stop your vehicle in a safe place and apply the handbrake. System Settings Menu Item Description... -
Page 37: Theme Settings
This setting is not available when the video/image file is in playback. Menu Item Description [Background] Select the wall paper from the preset items in this product. [Illumination]* Select an illumination colour from the preset list. * DMH-A340DAB - 37 -... -
Page 38: Audio Settings
Audio Settings Menu Item Description [Graphic EQ] Select or customise the equaliser curve. [Flat] [Super Bass] [Powerful] [Natural] [Vocal] [Custom] [Fader/Balance] Touch to adjust the front/rear speaker balance. Set front/rear speaker balance to 0 when using a dual speaker system. Touch to adjust the left/right speaker balance. -
Page 39: Other Functions
Other functions Setting the time and date You can adjust the date and time from [Date & Time] in the [System Settings] menu (page 36). Restoring this product to the default settings You can restore settings or recorded content to the default settings from [Restore Settings] in the [System Settings] menu (page 37). -
Page 40: Appendix
– Park your vehicle in a safe place, and authorised Pioneer service facility. then turn off the ignition switch (ACC OFF). Subsequently, turn the ignition Common problems switch to on (ACC ON) again. - Page 41 If the error persists, record the error message and contact your – Replace the disc. → The loaded disc is a type this product dealer or your nearest Pioneer service centre. cannot play. – Check what type of disc it is.
- Page 42 – Select a file that can be played. Unplayable File → This type of file is not supported on this USB storage device product. – Select a file that can be played. HUB Error Audio Code Not Supported → The connected USB hub is not →...
- Page 43 • Despite our careful design of the product, Handling and care of small scratches that do not affect actual discs operation may appear on the disc surface as a result of mechanical wear, ambient conditions for use or handling of the disc. Some basic precautions are necessary This is not a sign of the malfunction of when handling your discs.
- Page 44 Detailed information Playing DualDisc for playable media • DualDiscs are two-sided discs that have a recordable CD for audio on one side and a recordable DVD for video on the other. • Playback of the DVD side is possible with Compatibility this product.
- Page 45 characteristics, scratches or dirt on the • You cannot connect a USB storage device disc, or dirt, scratches or condensation on to this product via a USB hub. the lens of the built-in drive. • Partitioned USB storage device is not •...
- Page 46 USB storage device FLAC compatibility CODEC FORMAT MP3, WMA, SAMPLING FREQUENCY 8 kHz to 192 WAV, AAC, FLAC, AVI, QUANTIZATION BIT RATE 8 bit, 16 bit, 24 MPEG-PS, MP4, WMV, MKV, MOV, FLV, Video files compatibility MPEG-TS • Files may not be played back properly depending on the environment in which MP3 compatibility the file was created or on the contents of...
- Page 47 Maximum frame rate 30 fps registered trademarks owned by Bluetooth SIG, Inc. and any use of such marks by Pioneer .wmv Corporation is under license. Other trademarks and trade names are those of their respective...
- Page 48 NOT LIMITED TO, THE IMPLIED WARRANTIES OF MERCHANTABILITY AND FITNESS FOR A PARTICULAR PURPOSE ARE • Pioneer accepts no responsibility for data DISCLAIMED. IN NO EVENT SHALL THE lost from an iPhone, even if that data is FOUNDATION OR CONTRIBUTORS BE lost while using this product.
- Page 49 Apple Inc., registered in the U.S. and connected content services using this other countries. product: • Latest version of the Pioneer compatible connected content application(s) for the smartphone, available from the service IOS is a trademark or registered provider, downloaded to your trademark of Cisco in the U.S.
- Page 50 Content application(s) or service by its provider. Handling the LCD screen • Pioneer is not liable for any issues that may arise from incorrect or flawed app- • When the LCD screen is subjected to based content.
- Page 51 Heat visible. In that case, please consult your from the heater may break the LCD dealer or the nearest authorised Pioneer screen, and cool air from the cooler may Service Station. cause moisture to form inside this product, resulting in possible damage.
- Page 52 Display DVD drive (AVH-A240DAB/AVH- A240BT) Screen size/aspect ratio: (DMH-A340DAB) System: 6.75 inch wide/16:9 (effective display DVD-V, VCD, CD, MP3, WMA, WAV, AAC, area: 151.8 mm × 79.68 mm) MPEG player (DMH-A240DAB/AVH-A240DAB/AVH- Usable discs: A240BT) DVD-VIDEO, VIDEO-CD, CD, CD-R, CD- 6.2 inch wide/16:9 (effective display area: RW, DVD-R, DVD-RW, DVD+R, DVD+RW, 137.40 mm ×...
- Page 53 MAX: 576 (H) × 720 (W) 45 dB (analogue broadcasting) (IHF-A MIN: 32 (H) × 32 (W) network) BMP decoding format: .bmp DAB tuner (DMH-A340DAB/DMH- Decode Size: A240DAB/AVH-A240DAB) MAX: 936 (H) × 1 920 (W) Frequency range : MIN: 32 (H) × 32 (W) 174 MHz to 240 MHz (5A to 13F) (Band III) <USB video>...
- Page 54 © 2021 PIONEER CORPORATION <OPM_DMHA240DABEU_EG_A> EU...