Table of Contents
Advertisement
Quick Links
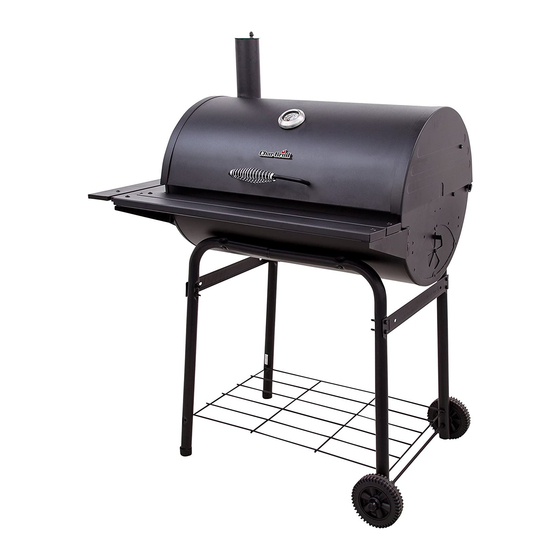
CHARCOAL GRILL 840
GRILL AU CHARBON 840
PARRILLA DE CARBÓN 840
MODEL | MODÈLE | MODELO
21301714
Date purchased | Fecha de compra | Date d'achat
If you have questions or need assistance during
assembly, please call 1-800-241-7548.
Si tiene alguna pregunta o si Necesita ayuda
durante el Ensamblado, llámenos Al 1-800-241-
7548.
Si vous avez des questions ou besoin d'aide
pendant le montage, veuillez composer le 1-800-
241-7548
Tools needed for assembly:
Adjustable Wrench
Phillips Screwdriver
(Tools not provided)
Outils requis pour l'assemblage :
Clé à molette
Tournevis
(Outils non inclus)
Herramientas necesarias para el
armado:
Llaves regulables
Destornillador Phillips
© 2020 Char-Broil, LLC • Columbus, GA 31902 • Printed in China
42805507 • 06/30/2020
Advertisement
Table of Contents

Related Manuals for Char-Broil American Gourmet 840


Summary of Contents for Char-Broil American Gourmet 840
- Page 1 Phillips Screwdriver (Tools not provided) Outils requis pour l’assemblage : Clé à molette Tournevis (Outils non inclus) Herramientas necesarias para el armado: Llaves regulables Destornillador Phillips © 2020 Char-Broil, LLC • Columbus, GA 31902 • Printed in China 42805507 • 06/30/2020...
-
Page 2: For Outdoor Use Only
FOR OUTDOOR USE ONLY INSTALLATEUR / ASSEMBLEUR : This instruction manual contains important Vous devez laisser le présent manuel au client. information necessary for the proper assembly and safe use of the appliance. CLIENT : Follow all warnings and instructions when using the Conservez ce manuel pour pouvoir le consulter ultérieurement. - Page 3 Operation and Lighting Procedure The grill is designed for use with charcoal briquettes or lump WARNING • charcoal. Do not exceed 2 lbs (0,9 kg) of charcoal. Set up or place grill in a safe location. • ATTENTION! This grill will become very hot, do not move Ÿ...
-
Page 4: Cooking Tips
PREPARING TO USE YOUR GRILL Direct and Indirect Grilling Before cooking with your grill, the following steps should be closely followed to both cure the finish and season the interior steel. Failure to properly follow these steps Direct Grilling - For most grilling, the ignited coals are spread in a single layer under the may damage the finish and/or impart metallic flavors to your first foods. -
Page 5: Entretien
Procédure d'allumage et fonctionnement Le barbecue est conçu pour être utilisé avec des briquettes de Ÿ AVERTISSEMENT charbon de bois ou des blocs de charbon. Ne dépassez pas 2 lbs. (0,9 kg) de charbon. Attention ! Ce barbecue deviendra très chaud, ne le Ÿ... -
Page 6: Conseils Pour La Cuisson
Cuisson au gril directe et indirecte PRÉPARATIFS POUR UTILISER LE GRIL Avant de faire la cuisson avec votre gril, suivez les étapes que voici pour traiter le fini du Cuisson au gril directe La majeure partie du temps, les briquettes allumées sont gril et apprêter l'acier à... -
Page 7: Mantenimiento
Procedimiento de uso y encendido La parrilla está diseñada para su uso con briquetas de carbón o Ÿ ADVERTENCIA carbón de terrón. No exceda los 2 lbs. (0,9 kg) de carbón. Coloque o posicione la parrilla en un lugar seguro. Ÿ... -
Page 8: Consejos Para Cocinar
Cerdo - Madera de árboles frutales, nogal americano, roble ha quemado. Limpiar con un cepillo pesados como cepillo de Char-Broil broca. Carnero - Madera de árboles frutales, mezquite Vuelva a aplicar manteca vegetal y el calor, como se indica arriba para volver a la Ternera - Madera de árboles frutales, parra... -
Page 9: Limited Warranty
LIMITED WARRANTY This warranty only applies to units purchased from an authorized retailer. Manufacturer warrants to the original consumer-purchaser only that this product shall be free from defects in workmanship and materials after correct assembly and under normal and reasonable home use for the periods indicated below beginning on the date of purchase*. -
Page 10: Garantie Limitée
GARANTIE LIMITÉE La présente garantie n'est valide que pour les appareils achetés auprès d'un détaillant autorisé. Le fabricant garantit à l'acheteur initial, et uniquement celui-ci, que le produit est exempt de tout défaut de matériel et de main-d'œuvre, dans la mesure où il a été assemblé correctement, qu'il est utilisé de façon normale et raisonnable à... -
Page 11: Garantía Limitada
GARANTÍA LIMITADA Esta garantía es válida únicamente para las unidades adquiridas de los distribuidores autorizados. El fabricante le garantiza únicamente al consumidor- comprador original, que este producto no presentará defectos de mano de obra ni de materiales por el período indicado a continuación, contado desde la fecha de compra*, si se arma correctamente y se usa en el hogar, en condiciones normales y razonables. - Page 12 PARTS DIAGRAM SCHEMA DES PIÈCES DIAGRAMA DE PIEZAS...
-
Page 13: Parts List
PARTS LIST NOMENCLATURE DES PIÈCES LISTA DE PIEZAS Qty Description Réf. Qté Description LID ASSEMBLY Assemblage du couvercle SWINGAWAY GRATE Grille pivotante COOKING GRATE Grille de cuisson FIRE GRATE HANGER Crochet pour grille de foyer BUTTERFLY DAMPER Registre à papillon ASH PAN/FIRE GRATE ASSEMBLY Panier à... - Page 14 HARDWARE LIST / LISTE DU MATÉRIEL / LISTA DE HARDWARE Key/ R? ./ Clave Description/ Description/ Descripci? Picture/ Illustr? Ilustra Qty/ Qt? Cant. Wheel Cap Enjoliveur de roue Centro de la tapa 1/4-20 Shoulder Bolt Vis ?epaulement 1/4-20 1/4-20 Perno hombre Hinge Pin Broche Bisagra pin...
- Page 15 ASSEMBLY ASSEMBLAGE ENSAMBLAR FIRST, GET A HELPER! This unit is heavy and requires a second person for lifting and moving. NEXT, pick a suitable location to work. Open the carton and slit the corners so that the carton lays flat. This will give you a protective surface during assembly.
- Page 16 Attach leg braces to the outside of one leg assembly using 4 each 1/4-20x1 3/4" screws and 4 each 1/4-20 flange nuts. Do not fully tighten screws until Step 6 is complete. Fixez les renforts des pieds à l'extérieur d'un assemblage de pied au moyen de quatre vis nº 1/4-20 × 1 3/4 po et de quatre écrous d'accouplement nº...
- Page 17 Lay the leg assembly on its side with leg braces pointing upward. insert the wood rack hooks into leg holes and swing rack upward, parallel to leg braces. Posez l'assemblage du pied sur le côté, avec les renforts de pied orientés vers le haut. Insérez les crochets de la grille à bois dans les orifices des pieds et faites pivoter la grille vers le haut, parallèlement aux renforts de pied.
- Page 18 With aid of a helper, place leg holes of remaining leg assembly over wood rack and rotate leg assembly unitl it meets the leg braces. Make sure both short legs are at one end of the rack and both long legs at the other end. Attach leg braces using 4 each 1/4x20x1 3/4"...
- Page 19 Insert a small Hair Pin Clip into the hole at one end of the axle. Slide a wheel onto the axle. Slide the axle through the holes at the ends of the short legs. Slide the remaining wheel onto the axle and secure with the remaining Hair Pin Clip. Finally, Push the wheel caps onto each end of the axle.
- Page 20 Place the firebox onto the cart. The butterfly damper should be on your right hand side - the same side as the wheels. Insert 4 each 1/4-20X1 3/4" screws through cart and firebox. Secure the firebox using 4 each 1/4-20 flange nuts. Insert screws from outside, flange nuts from inside chamber.
- Page 21 Attach LH and RH Front Shelf Brackets to the firebox using 4 each 1/4-20" Shoulder Bolts and 4 each 1/4-20 flange nuts. After the front shelf brackets are secured, attach the front shelf slats to the brackets using 4 each 1/4-20x1 1/4 screws and 4 each 1/4-20 flange nuts.
- Page 22 Attach Side Shelf Brackets to LH side of firebox using 4 each 1/4-20x1/2 screws and 4 each 1/4-20 Flange nuts. NOTE: The Side Shelf may be pre-assembled, if so attach the Side Shelf per Step A. Fixez les supports de la tablette latérale sur le côté gauche du foyer au moyen de quatre vis nº 1/4-20 × 1/2 po et de quatre écrous d'accouplement nº...
- Page 23 Attach Handle to Grill Lid, secure with 2 each 1/4-20x1/2” screws and 1/4-20 Flange nuts. Attach the Temperature Gauge to the Grill Lid using the Temperature Gauge Clip. Next, install Smokestack by inserting 2 each 1/4-20x3/4” screws though Grill Lid, insert Smokestack into Grill Lid hole, then secure using 2 each 1/4-20 flange nuts.
- Page 24 Install the Swing-Away Grate by inserting 2 each 1/4-20x2" screws (one for each side of the lid) into Grill Lid and secure with 2 each 1/4-20 flange nuts. Place the wire loop in Swing-Away over the shaft of the bolt, as shown below. Similarly secure the Swing-Away leg to the firebox using 2 each 1/4-20x3/4"...
- Page 25 Insert the Charcoal Tray into the firebox as shown below. The charcoal tray hanger will rest on the hanger tabs on the firebox. Insérez le plateau à charbon dans le foyer tel qu'illustré ci-dessous. Le crochet du plateau à charbon reposera sur les languettes de suspension du foyer.
- Page 26 Place the 4 Cooking Grates into the firebox. The Cooking Grates will rest on the front and rear ledges of the firebox. Next, Attach the Grease Cup Clip as shown. A soup can works nicely to capture grease dripping from the firebox. (soup can not included) Your grill is now completely assembled.
- Page 28 ©2020 Char-Broil, LLC. Columbus, GA, 31902. Printed in China. Imprimé en Chine. Impreso en China. ©2020 Assembly instructions. ©2020 Assemblée des instructions. ©2020 Instrucciones de ensamblado.