Table of Contents
Advertisement
INSTRUCTIONS AND WARRANTY
MODEL: HC2000
HOOVER CANISTER VACUUM
Congratulations on purchasing our Hoover Canister Vacuum. Each unit is manufactured to
ensure safety and reliability. Before using this appliance for the first time, please read the
instruction manual carefully and keep it for future reference.
Advertisement
Table of Contents

Related Manuals for Hoover HC2000


Summary of Contents for Hoover HC2000
- Page 1 MODEL: HC2000 HOOVER CANISTER VACUUM Congratulations on purchasing our Hoover Canister Vacuum. Each unit is manufactured to ensure safety and reliability. Before using this appliance for the first time, please read the instruction manual carefully and keep it for future reference.
-
Page 2: Package Contents
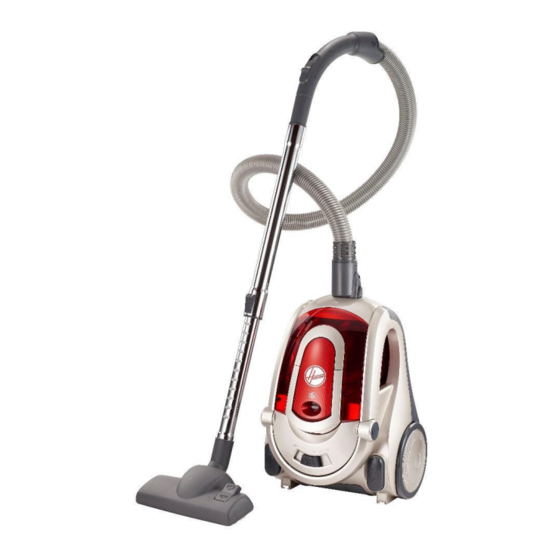
FEATURES OF THE HOOVER CANISTER VACUUM ● Power: 2000W ● 320AW ● HEPA Filtration ● Cord length: 5m ● Hose Length 1.8m ● Hose swivel 360 Degree ● Noise Level: <80dB ● 2L Dust capacity ● Accessories: ● Metal telescopic tube ●... - Page 3 they have been given supervision or instruction concerning use of the appliance by a person responsible for their safety. 7. Children should be supervised to ensure that they do not play with the appliance. 8. Check the power cord and plug regularly for any damage. If the cord or the plug is damaged, it must be replaced by the manufacturer or a qualified person in order to avoid an electrical hazard.
- Page 4 23. Ensure that the switch is in the “Off” position after each use. 24. The manufacturer does not accept responsibility for any damage or injury caused by improper or incorrect use, or for repairs carried out by unauthorised personnel. 25. In case of technical problems, switch off the machine and do not attempt to repair it yourself.
-
Page 5: Parts Diagram
PARTS DIAGRAM 1. Power On/Off 2. Power level adjust 3. Cord rewind 4. Dust cup handle 5. Handle 6. Angled pipe 7. Hose 8. Suction power control 9. Telescopic tube 10. Accessories storage 11. Multi floor tool ASSEMBLING THE PRODUCT Connecting the hose to the vacuum cleaner Insert flexible hose into the air-intake: Press the knob until it clicks into the position... - Page 6 1.) A yellow mark on power cord shows the ideal cable length. Do not expend the cable beyond the red mark. To rewind the power cord, press the rewinder pedal with one hand and guide the cord with the other hand. 2.) Press the power switch to switch the appliance on.
-
Page 7: Storing The Appliance
Replacing the motor filter: Replacing the outlet filter: STORING THE APPLIANCE 1. Unplug the unit from the power socket and clean all the parts as instructed above. Ensure that all parts are dry before storing. 2. Store the appliance in its box or in a clean, dry place. 3. -
Page 8: Changing The Plug
There are no user serviceable parts in this appliance. If the unit is not operating correctly, please check the following: ● You have followed the instructions correctly ● That the unit has been wired correctly and that the wall socket is switched on. ●... - Page 9 IN THE EVENT OF A CLAIM UNDER WARRANTY THIS RECEIPT MUST BE PRODUCED. W A R R A N T Y 1. Home of Living Brands (Pty) Limited (“Home of Living Brands”) warrants to the original purchaser of this product (“the customer”) that this product will be free of defects in quality and workmanship which under normal personal, family or household use and purpose may manifest within a period of 1 (one) year from the date of purchase (“warranty period”).