Advertisement
Quick Links
Advertisement

Related Manuals for Samsung TS DR Series


Summary of Contents for Samsung TS DR Series
- Page 1 대 외 비 보 존 기 한 3 년 31 Series B X 2031/ BX 2031N BX 1931N Training M anual TS DR MONITOR G R OUP...
- Page 2 C ontents Product Overview Circuit Description Assembly and Disassembly Troubleshooting How to Execute Code Etc. ...
-
Page 3: Product Overview
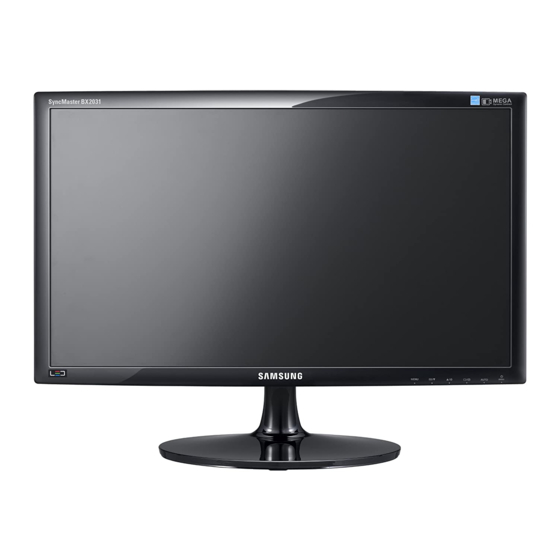
1. Product Overview (Product Features) *. Feature -. Panel : 250cd/m2, 5ms, DCR:MEGA , 170/160(CR>10) -. DPMS : Typital 0.3W -. Picture : a screen size desire -. Off-Timer function for reducing standby power usages -. Windows 7 -. Key repeat time... - Page 4 1. Product Overview (Product Specification) K ey S pecification Model B X2031 (B X2031N) B X1931N S ize 20” 18.5” R es olution 1600*900@ 60Hz 1360*768@ 60Hz B rig htnes s 250cd/m 250cd/m C ontras t R atio 1000:1 1000:1 Dynamic C ontras t MEG A (Typ.) MEG A (Typ.)
- Page 5 1. Product Overview (C onnecting External Devices) Power Connect the power cord for your monitor to the power port on the back of the monitor. Plug the power cord for the monitor into a nearby outlet. Using the D-sub (Analog) connector on the video card. Connect the signal cable to the 15-pin, D-sub connector on the back of your monitor.
- Page 6 1. Product Overview BX 2031/BX 2031N (Supported Display M odes) Horizontal Vertical Pixel Clock Sync Polarity EDID 표 시 Display Mode Frequency Frequency (MHz) (H/V) 표 기 형 식 (kHz) (Hz) 640 x 350 70Hz 31.469 70.086 25.175 720 x 400 70Hz 31.469 70.087...
- Page 7 1. Product Overview BX 1931N (Supported Display M odes) Horizontal Vertical Pixel Clock Sync Polarity EDID 표 시 Display Mode Frequency Frequency (MHz) (H/V) 표 기 형 식 (kHz) (Hz) 640 x 350 70Hz 31.469 70.086 25.175 720 x 400 70Hz 31.469 70.087...
- Page 8 1. Product Overview (OSD Functions) ME NU C us tomized K ey / Down B utton Up B utton / B rig htnes s S ource / B uttonEnter Auto Power B utton...
- Page 9 1. Product Overview (OSD Functions) MENU Button : Open the OSD menu. Use this button to exit the OSD or go to the upper OSD menu. Customized Button : Press this button to adjust MagicBright™. MagicBright™ is a monitor that fits to various user environments such as editing documents and playing games, etc.
- Page 10 2. Product Overview (OSD Hidden K ey) Customized Key / Down Button : Us e this button to move around the OS D menu or chang e the value. Up Button / Brightness : Us e this button to adjus t the brig htnes s of the s creen Source Button / Enter : Pres s this button to s elect a function and video s ource.
- Page 11 O S D Adjustment (P icture) M enu D es cription Controls the screen brightness. This menu is unavailable when <MagicBright> is set to <Dynamic B rig htnes s Contrast> mode. This menu is unavailable when <MagicEco> is set. Controls the contrast of the pictures displayed on the screen This menu is unavailable when <MagicBright>...
- Page 12 O S D Adjustment (P icture) M enu D es cription Provides preset picture settings optimized for various user environments such as editing a document, surfing the Internet, playing games, watching sports or movies and so on. • <Custom> If the preset picture modes are not sufficient, users can configure the <brightness> and <Contrast> directly using this mode.
- Page 13 O S D Adjustment (C olor) The color menu is unavailable when <MagicBright> is set to <Dynamic Contrast> or <Cinema> mode.
- Page 14 D es cription Expresses natural colors more clearly without changing the picture quality using proprietary digital picture quality improvement technology developed by Samsung Electronics. • <Off> - Turns the MagicColor function off. • <Demo> - You can compare the pictures processed by MagicColor with the original pictures.
- Page 15 O S D Adjustment (C olor) You can change the overall atmosphere by changing the color of pictures. This menu is unavailable when <MagicColor> is set to <Full> mode or <Intelligent> mode. • <Off> - Turns the color effect function off. •...
- Page 16 3.O S D Adjustment (S IZE &P O S ITIO N)
- Page 17 3. O S D Adjustment (S IZE &P O S ITIO N) M enu D es cription Moves the position of the display area on the screen horizontally. H-Pos ition This function is only available in analog mode. Moves the position of the display area on the screen vertically. V-Pos ition This function is only available in analog mode.
- Page 18 3. O S D Adjustment (S E TUP &R E S E T)
- Page 19 3. O S D Adjustment (S E TUP &R E S E T) M enu D es cription Use this function to restore the visual quality and color settings to the factory defaults. R es et • <No> - <Yes> Select a language for the OSD.
- Page 20 3. O S D Adjustment (S E TUP &R E S E T) M enu D es cription Set to PC when connected to a PC. Set to AV when connected to an AV device. PC /AV M ode This function does not support analog mode. S upplied for the wide models only s uch as 16:9 or 16:10.
- Page 21 3. O S D Adjustment (INFO R M ATIO N) M enu D es cription Shows the frequency and resolution set on the PC. INFOR M ATION For models with an Analog interface only, <Analog/ D igital/ HD M I> is not s hown in the<Information>.
- Page 22 3. O S D Adjustment (Factory M ode) M enu D escription To enter the Service Function, set the Brightness Factory /Contrast to 0 and press and hold the ENTER M ode /SOURCE key for 5 seconds.
-
Page 23: Product Overview
1. Product Overview (Specifications of Options) - Page 24 2. C ircuit Description (Product Structure) 1. Panel Part S ee P roduct S pecifications. Part 2. Mai n Boar d Receives external PC analog signals, and then outputs the video signals to the panel using a Scaler and also outputs the same signals as external input. rive 3.
- Page 25 2. C ircuit Description (New Part) *. Scaler(MSTR) SE959LMH-LF Use a type of scaler with an embedded MCU core. -. Detailed Specifications On-Chip Microcontroller On-Chip OSD Controller LVDS/RSDS Transmitters 128-QFP Package / 3.3V/1.8V suppliers ...
-
Page 26: Circuit Description
2. C ircuit Description (Panel Part) - Page 27 2. C ircuit Description (Panel Part) * PROTECTION* LAMP(Inverter) PROTECION => The protection is activated if there is no feedback because the lamp connector is disconnected or the lamp is cracked. => The over voltage protection starts as a lamp protection if the output voltage of the inverter transformer is high.
- Page 28 2. C ircuit Description (B lock Diag ram)
- Page 29 2. C ircuit Description (Scaler Part) BX 2031/BX 2031N/BX 1931N LED Driver...
- Page 30 2. C ircuit Description (Power Flow C hart) +5V_PANE L AO6415 PANE L S E 959LM H Pin4/47 B L_E N Pull up AC 2DC _C TR L Pull +5V_M AIN B L_ADJ_PWM Pull C HK_DVI Pull up B L_ADJ_ANALOG Pull up ZD101 E DID_PR OTE C T...
- Page 31 2. C ircuit Description (Power Flow C hart) K ey Pull up PANE L_EN Pull up WR _PR OTE C T Pull M C L/M DA Pull up S -24C S 08AFJ +3.3V NC P1117S T33 F_PR OTE C T Pull up F25L04PA S E 959LM H Pin44 Pull up...
- Page 32 2. C ircuit Description (C ircuit Diagram) Dig ital Part S caler : S E959LM H-LF Analog Part LED Driver & Function C onnector...
- Page 33 2. C ircuit Description (C ircuit Diagram) LED Driver Part...
- Page 34 2. C ircuit Description (M ain PBA) LVDS Flash memory EEPROM Scaler IC LAMP Adapter Analog...
- Page 35 2. C ircuit Description (M ain PBA) 비고 Block Description Scaler Besides the ADC,LVDS,and scaling part,an MCU is SE959LMH-LF embedded as well . All of them are integrated into IC400 one chip. Flash Memory Stores the MCU program embedded in the scaler. F25L04PA It is of a flash type and rewritable.
- Page 36 2. C ircuit Description (Adapter) S MPS Part D IO D E ,IND UC TO R , P O W E RTR ANS FO R M E R , LINE FILTE R ,X -C AP , C apacitor FE T Y-C AP S witchingB LOC K R eg ulator...
-
Page 37: Assembly And Disassembly
3. Assembly and Disassembly Caution 1. Make sure to turn off the monitor before starting the disassembly. 2. Never use metal tools other than the jig provided when disassembling the product. 3. For the disassembly, carefully follow the steps given below. 4. - Page 38 3. Assembly and Disassembly Des cription Picture Des cription 3. Turn the monitor over again to remove the back cover. 4. Disconnect LVDS, LED Driver and FUNCTION cable. And then Remove SHIELD_COVER.
- Page 39 3. Assembly and Disassembly Des cription Picture Des cription 5. Remove LED Panel.
- Page 40 3. Assembly and Disassembly Des cription Picture Des cription 7. Remove 4 screws. 8. Remove 3 screws and remove Bracket Support.
- Page 41 3. Assembly and Disassembly Des cription Picture Des cription 9. Remove Main PCB from SHIELD-COVER.
-
Page 42: Troubleshooting
4. Troubleshooting Notes : 1. B efore troubles hooting, s etup the P C ’s display as below. - R esolution: 1600*900; 1360*768; - H-frequency: 60k Hz; 47k Hz; - V-frequency: 60 Hz; 60 Hz 2. If no picture appears , make s ure the power cord is correctly connected. 3. - Page 43 4. Troubleshooting No power Symptom : -. When turning on the Power button after connecting the power, the LED at the front of the monitor does not operate. Major Checkpoints: -. Check the Adapter power fuse and Adapter output power. -.
- Page 44 4. Troubleshooting No power C heck connection of Function Ass’y W hen P in 2,3,4 of C N601 is 0V, C hange another adapter or check power cord D oes proper D C 12V appear at P in 1 of C N600 separately? have already connected to AC power or not.
- Page 45 4. Troubleshooting C heck the C ircuit diag ram when the power not turn on...
- Page 46 4. Troubleshooting The C ircuit diag ram when the power not turn...
- Page 47 4. Troubleshooting No video (Analog ) Symptom : -. Though the LED power turns on, the screen is blank when connecting the VGA cable. Major Checkpoints: -. Check the D-SUB connection. -. Check whether the LVDS cable is connected correctly to the Panel. -.
- Page 48 4. Troubleshooting No video (Analog ) C heck the s ignal cables and the connections . Is X401 os cillating R eplace or check related circuit. correctly? Y E S Do the R GB input appear at R 204, R 207, C heck Input part R 209 ? Y E S...
- Page 49 4. Troubleshooting The C ircuit diag ram when no video (Analog )
- Page 50 4. Troubleshooting The C ircuit diag ram when no video (Analog )
- Page 51 4. Troubleshooting No video (Dig ital) Symptom : -. Though the LED power turns on, the screen is blank when connecting the DVI cable. Major Checkpoints: -. Check the DVI connection. -. Check whether the LVDS cable is connected correctly to the Panel. -.
- Page 52 4. Troubleshooting No video (Dig ital) C heck the s ignal cables and the connections . Is X401 os cillating R eplace or check related circuit. correctly? Y E S Do the TM D S input appear at R 100 to C heck Input part R 105 ? Y E S...
- Page 53 4. Troubleshooting The C ircuit diag ram when no video (Dig ital)
- Page 54 4. Troubleshooting The C ircuit diag ram when no video ( Dig ital...
- Page 55 Troubleshooting *. Service Function OSD Panel Information Select Auto Select Pixel Shift Country Select HotPlug Time Select MagicReturn Time when MagicReturn is on Scaler Vender Micom version Micom checksum...
- Page 56 4. Troubleshooting *. To move next step. Press (+) key.
- Page 57 Troubleshooting *. To select off/on. Press (-) key.
- Page 58 Troubleshooting *. Replace Panel After replacing the panel, select the Panel item and then hold down the Menu button for five (5) seconds. The Ch. No. of the panel will increase. Then, on time and cycle number will be set to 0. This number will be changed.
- Page 59 5. How to execute code 1. E nter the DDC EDID data when the AD board is replaced. 2. Download the DDC input prog ram and the DDC file that corres ponds to the model from the Quality Department of S ams ung and ins tall it us ing a jig as s hown in the fig ure below, and then enter the data.
- Page 60 5. How to execute code (DDC ) 1. C lick the Open icon 2. S elect Two EDID 3. S elect a DDC file. 4. S elect week 5. C lick Next (OK ).
- Page 61 5. How to execute code (DDC ) 6: E nter the serial number and pres s the E nter key. B 520...
- Page 62 5. How to execute code (M C U code) 1. Options Checking. -. Manufacture : MSTAR -. Device Type :TSUMxxx -. Communication Port : DSUB15 (Analog) -. External Memory : PMC25LV020E...
- Page 63 5. How to execute code (M C U code) 2. After click the 'LoadFile' button , choose MCU code.
- Page 64 5. How to execute code (M C U code) 3. ‘Auto Program' button choice.
- Page 65 5. How to execute code (M C U code) 4. After the Program and Verify completed, execute hard power off/on.
- Page 66 6. etc. (After replacing M ain PBA) Auto Color PC analog (1600X900@60/1360X768@60): Tools to use: MSPG-3240L PC Analog Control Pattern(16 GRAY) Select Language English on the OSD menu and then hold down the Source button for five (5) seconds.