Advertisement
Quick Links
Sport Setup for the Mystique 2.9M Glider
Parts:
1.
Mystique 2.9m ARF by E‐flite
EFL4905
2.
EFLM4025A Power 25 BL Outrunner Motor, 870Kv by E‐flite
3.
EFLA1060 60‐Amp Pro Switch‐Mode BEC Brushless ESC by E‐flite
4.
EFLP14080FA 14 x 8 Folding Prop w/Aluminum Spinner, 40mm by E‐flite
5.
3S 3300‐3600 mah 25C – 45C Lipo battery
6.
SPMSA7020 A7020 Digital Wing Servo by Spektrum (Qty. 4)
7.
SPMSA4020 A4020 Micro Digital Aircraft Metal Gear Servo by Spektrum
or HRC35085S Digital Mighty Micro Servo HS‐5085MG (Qty. 2)
8.
7 Channel (or higher) receiver and transmitter
9.
Multiplex connectors [2 pair, optional]
10. [optional] Jack Pak RC Sailplane Carrying Bag at: http://www.ne‐aero.com/jackpak.html
11. White electrical tape (vinyl) and a glue stick to keep in your flight bag
Introduction:
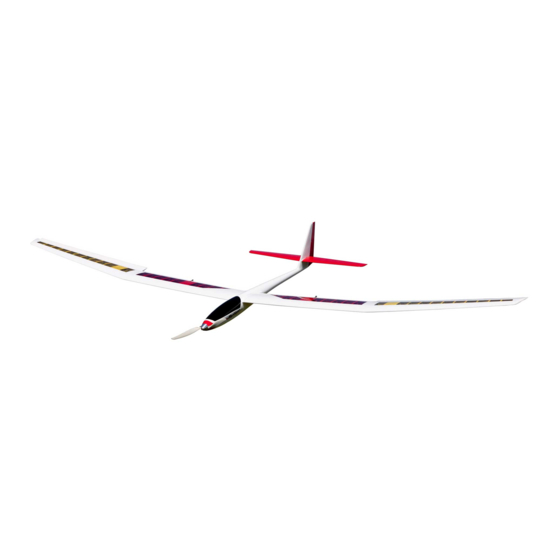
The Mystique is a beautiful
ARF and one of the best
quality kits I have seen. This
baby is big, so watch yourself
going through doorways with those wings!! The kit is an easy build, but requires a lot of patience.
The motor, ESC, and radio installation is easy, but the wings take some time to do right. I have
already worked out all the bends and tricks you will need to shoe horn in the servos and get the
recommended control throws to fly this awesome glider. Have fun, and take your time. You will be
rewarded with an excellent flying "full house" glider. If you are worried about the cost, I compared it
to setups of equivalent size and quality, and you will pay up to twice as much for other gliders of this
capability and quality. The Mystique is a great value, and flies like a dream. It really is that good.
Starting Out:
The Mystique is about 95% pre‐built, and you are basically putting in the electronics and power
system. If you use the recommended equipment, it makes things easier. The wings and horizontal
may require some ironing of the covering as temperature changes can cause wrinkles between you
and the factory. Make sure you use a nice covering iron with a cotton sock. Follow the manual
carefully except where noted in this write up.
Page 1 of 5
Mystique 2.9M
Advertisement

Related Manuals for E-FLITE Mystique 2.9m ARF


Summary of Contents for E-FLITE Mystique 2.9m ARF
- Page 1 Sport Setup for the Mystique 2.9M Glider Parts: Mystique 2.9m ARF by E‐flite EFL4905 EFLM4025A Power 25 BL Outrunner Motor, 870Kv by E‐flite EFLA1060 60‐Amp Pro Switch‐Mode BEC Brushless ESC by E‐flite EFLP14080FA 14 x 8 Folding Prop w/Aluminum Spinner, 40mm by E‐flite 3S 3300‐3600 mah 25C – 45C Lipo battery SPMSA7020 A7020 Digital Wing Servo by Spektrum (Qty. 4) SPMSA4020 A4020 Micro Digital Aircraft Metal Gear Servo by Spektrum or HRC35085S Digital Mighty Micro Servo HS‐5085MG (Qty. 2) 7 Channel (or higher) receiver and transmitter Multiplex connectors [2 pair, optional] 10. [optional] Jack Pak RC Sailplane Carrying Bag at: http://www.ne‐aero.com/jackpak.html 11. White electrical tape (vinyl) and a glue stick to keep in your flight bag Introduction: The Mystique is a beautiful ARF and one of the best quality kits I have seen. This baby is big, so watch yourself going through doorways with those wings!! The kit is an easy build, but requires a lot of patience. The motor, ESC, and radio installation is easy, but the wings take some time to do right. I have already worked out all the bends and tricks you will need to shoe horn in the servos and get the recommended control throws to fly this awesome glider. Have fun, and take your time. You will be rewarded with an excellent flying "full house" glider. If you are worried about the cost, I compared it to setups of equivalent size and quality, and you will pay up to twice as much for other gliders of this capability and quality. The Mystique is a great value, and flies like a dream. It really is that good. Starting Out: The Mystique is about 95% pre‐built, and you are basically putting in the electronics and power system. If you use the recommended equipment, it makes things easier. The wings and horizontal ...
- Page 2 Some building tips: 1. Take your time and go slow. It should only take a week's worth of evenings. Patience is key so you don't damage or poke holes in the covering. 2. Lay some thin foam or cloth on the work bench to avoid scoring the wings when working on them. 3. Read the instructions carefully and follow them except where noted in this write up. 4. Use canopy glue (not CA) on the flap and aileron linage fairings and Figure 1 Flap/Aileron Linkage Fairing with "Foot" leave a little "foot" at the base when cutting them out. This will give them a more secure gluing surface. Program your ESC to BRAKE ON [hard]. This is very important to make your prop stops spinning when you go to idle on the throttle stick. A spinning prop at idle causes a lot of drag! Wing Servo Installation: The hardest part of assembly will be the aileron and flap control linkages. The wing is thin, so low profile servos are required. If you try the HS‐85MG in the wing, they may fit, but expect to do some modifications to avoid binding of the control rods. The low profile servos are more expensive, but I think they are worth it. Figure 3 Flap Linkage with Low Profile Servo Figure 2 Aileron Linkage with Low Profile Servo If you don't use a low profile servo, or you want more than 20 degrees of stock flap deflection, you will have to Figure 4 Aileron/Flap Control Rod Bend install the flap control linkage with the arm in the down position. There are plastic "bumps" supplied in the kit to protect and cover the servo arm where it will stick out of the slot on the servo cover. This is why the flap servo cover is slotted in case you wish to install the flap for larger deflections. If you install the flaps per the manual, you can just cover the slots in the flap servo covers with clear tape. ...
- Page 3 The following modifications are listed below, and are corrections to the manual for easier flap and aileron control installation: 1. The control rods should be bent on one end by 15 degrees, 35 mm from the trailing edge (TE) as shown in . Measure the Figure 4 Aileron/Flap Control Rod Bend 5 mm angle carefully, because it is a tight fit. 2. Place the servo arms on the flap and aileron servo at an angle of 10 degrees toward the leading edge and Figure 5 Aileron Linkage Clearance NOT 20 degrees as shown in the manual on page 6. 3. Clear the aileron linkage exit hole about 5 mm from the bottom of the wing to avoid binding. This will provide enough clearance for the deflection listed in the manual. Reference Figure 5 Aileron Linkage . Clearance 4. Clear the flap linkage exit hole at an angle so it doesn't bind when the flap is extended down. Reference . Figure 6 Flap Linkage Exit Clearance Figure 6 Flap Linkage Exit Clearance 5. Before flight, you must glue down the elevator control rod inside the fuselage about 12" aft of the servos as shown in and . You can Figure 7 Figure 8 use 30 minute epoxy and micro balloons. This will eliminate any flex in the control rode ...
- Page 4 Radio Setup: The control settings in the manual are very good for sport gliding and are a good place to start. Depending on your radio, you can set up a glider in many ways. If you are an advanced glider pilot, you know how to program your glider already and you can skip this section. However, if you are like me and just to enjoy sport gliding in a simple format, then follow this section and program your glider using AIRPLANE mode. These settings will give you normal throttle operation, a thermal mode for lift, a landing mode with flaps, and a cruise setting. You can ignore the speed setting which involves reflexing the wing (negative flap and aileron) because I did not find it to be a noticeable difference from the cruise setting during my flight testing. Start by making sure your flap system is enabled in your setup menu on the transmitter. Each wing servo must be on a different channel, and this is why you need minimum of a seven channel receiver and transmitter for this setup. If you only have a six channel radio or less, and really want to take advantage of the wonderful flight characteristics of the Mystique, then it is time to upgrade your radio. You will be glad you did. Follow the deflections given in the manual, and you won't need to set any wing differential. E‐flite did this by reducing the down travel on each aileron to a max of 12mm, and the up aileron max deflection to 20mm (measure from the inboard edge of the aileron). Check your aileron throws and set your servo travel in the transmitter to get these settings. Also, make sure the full flap deflection gives you 20 mm down as measured from the inboard edge of the flap. The rudder and elevator deflections should also be set per the manual. The mixes and dual rates for easy sport flying are as follows: Down Deflection* Elevator Flap Settings Mixes Mid Setting 8% D (3.5 mm) D 6% Mix 1 Camber** ailerons down Landing Setting 90% D (20 mm) D 75%...
- Page 5 WARNING! Always balance your model and check the CG before your first flight! ALWAYS!! If the CG is too far off you will crash. If it is a little off, it will just fly terribly. If you don't have a balance machine, get one because they are worth it. Optional Wing Servo Connectors: If you want to take the time for an easy wing servo connector, solder up a pair of Multiplex connectors for each wing. Then you will always be sure that the flap and ailerons are plugged in correctly, and you will only have one plug for each wing instead of two. I always do this on my big planes where there is more than one servo per wing. Just take some 3" servo extensions and clip off the ends and carefully solder up the Multiplex connectors as shown in the pictures. Be sure to use heat shrink. You can also glue the female connector to the fuselage and make each wing plug in automatically as you slide it in place. Figure 9 Multiplex Connectors for Wing Servos Mystique 2.9M Page 5 of 5 ...