Table of Contents
Advertisement
Quick Links
Advertisement
Table of Contents

Related Manuals for Nautilus ONE CP02


Summary of Contents for Nautilus ONE CP02
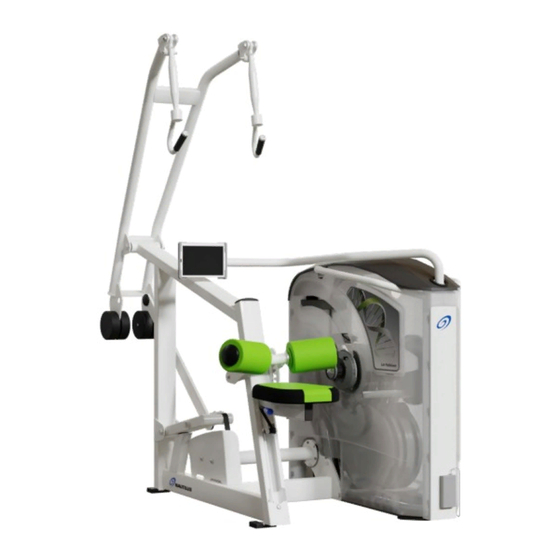
- Page 1 CORE HEALTH & FITNESS NAUTILUS ONE OWNER'S MANUAL...
-
Page 2: Table Of Contents
TABLE OF CONTENTS IMPORTANT SAFETY INSTRUCTIONS ........................2 LABELS ..............4 SWIRL TEMPLATE ..............6 SEAT FRAME DETAILS ........................7 ABDUCTION/ADDUCTION ..............8 ABDOMINAL CRUNCH ..............10 CHEST PRESS ..............12 LOWER BACK ..............14 LEG PRESS ..............16 LAT PULLDOWN ..............18 ASSEMBLY ........................20 TOOLS... -
Page 3: Important Safety Instructions
Leave 5. Use only replacement components supplied by a minimum of 19.7 inches (0.5 meters) between Nautilus®. Substitutes are forbidden and will void two adjacent units. These dimensions are the all warranties. recommended minimum distances. - Page 4 Never use dumbbells or other means to incrementally increase the weight resistance. Use only those means provided by Nautilus. Ensure all adjustment and locking features are properly secured before using the equipment. 10. When adjusting any seat, knee stabilization pad,...
-
Page 5: Labels
LABELS 12-1173 SEAT ADJUSTMENT DECAL 1-11 731-7311 12-5655 STICKER, NLS, DECO, DECAL RANGE SELECTOR S6AA 45MMX191MM CAUTION 12-1026 050-2225 DECAL CAUTION (YELLOW) STICKER, WARNING, BOLT DOWN 12-5666 DECAL SEAT POSITION S6LP 12-5667 12-5668 DECAL SEAT BACK ANGLE S6LP THIGH PAD ADJUSTMENT Notice: images are not to scale Page 4... - Page 6 THIS PAGE INTENTIONALLY BLANK Page 5...
-
Page 7: Swirl Template
SWIRL TEMPLATE Fig. 2 Print this page and cut out template for placement of Nautilus Logo as shown. Page 6... - Page 8 SEAT FRAME DETAILS Fig. 3 All Fit20 Seat Frames Details for the seat frames are on the following pages. Images include the Fit20 hardware listed below. Weights & dimensions do not include the below hardware. Colors are representative only. Part No. Name Part No.
-
Page 9: Abduction/Adduction
ABDUCTION/ADDUCTION This page shows the locations of the warning labels and communication stickers placed on the equipment as part of the manufacturing process. It is critical that owners maintain the integrity and placement of these stickers. If you find any stickers missing or damaged the replacement numbers are shown below. Image for the Placard/Lenticular is on the next page, for all others refer to LABELS on page 16. - Page 10 Placard/Lenticular Detail 12-5652 LENTICULAR,AB-AD 12-5651 PLACARD,AB-AD 12-5681 PLACARD, FIT20, S6AA Page 9...
-
Page 11: Abdominal Crunch
ABDOMINAL CRUNCH This page shows the locations of the warning labels and communication stickers placed on the equipment as part of the manufacturing process. It is critical that owners maintain the integrity and placement of these stickers. If you find any stickers missing or damaged the replacement numbers are shown below. Image for the Placard/Lenticular is on the next page, for all others refer to LABELS on page 16. - Page 12 Placard/Lenticular Detail 12-5628 LENTICULAR,AB CRUNCH 12-5627 PLACARD,AB CRUNCH 12-5682 PLACARD, FIT20, S6AB Page 11...
-
Page 13: Chest Press
CHEST PRESS This page shows the locations of the warning labels and communication stickers placed on the equipment as part of the manufacturing process. It is critical that owners maintain the integrity and placement of these stickers. If you find any stickers missing or damaged the replacement numbers are shown below. Image for the Placard/Lenticular is on the next page, for all others refer to LABELS on page 16. - Page 14 Placard/Lenticular Detail 12-5632 LENTICULAR,CHEST PRESS 12-5631 PLACARD,CHEST PRESS 12-5683 PLACARD, FIT20, S6CP Page 13...
-
Page 15: Lower Back
LOWER BACK This page shows the locations of the warning labels and communication stickers placed on the equipment as part of the manufacturing process. It is critical that owners maintain the integrity and placement of these stickers. If you find any stickers missing or damaged the replacement numbers are shown below. Image for the Placard/Lenticular is on the next page, for all others refer to LABELS on page 16. - Page 16 Placard/Lenticular Detail 12-5640 LENTICULAR,LOW BACK 12-5639 PLACARD,LOW BACK 12-5685 PLACARD, FIT20, S6LB Page 15...
-
Page 17: Leg Press
LEG PRESS This page shows the locations of the warning labels and communication stickers placed on the equipment as part of the manufacturing process. It is critical that owners maintain the integrity and placement of these stickers. If you find any stickers missing or damaged the replacement numbers are shown below. Image for the Placard/Lenticular is on the next page, for all others refer to LABELS on page 16. - Page 18 Placard/Lenticular Detail 90° 12-5638 LENTICULAR,LEG PRESS 12-5637 PLACARD,LEG PRESS 12-5686 PLACARD, FIT20, S6LP Page 17...
-
Page 19: Lat Pulldown
LAT PULLDOWN This page shows the locations of the warning labels and communication stickers placed on the equipment as part of the manufacturing process. It is critical that owners maintain the integrity and placement of these stickers. If you find any stickers missing or damaged the replacement numbers are shown below. Image for the Placard/Lenticular is on the next page, for all others refer to LABELS on page 16. - Page 20 Placard/Lenticular Detail 12-5634 LENTICULAR,LAT PULLDOWN 12-5633 PLACARD,LAT PULLDOWN 12-5684 PLACARD, FIT20, S6LT Page 19...
-
Page 21: Tools
ASSEMBLY TOOLS Required Tools: • 3/4” Socket Wrench • Adjustable Wrench PROCEDURE (ALL SEAT FRAMES) 56-0365 1. Remove (3) 1/2-13x3” bolts from the tower. 2. Remove the weight drive support from the seat frame by removing (4) 1/2-13x1 1/4” bolts and (4) 1/2-13 lock nuts. -
Page 22: Tools
MAINTENANCE TOOLS Working on this product will require basic and/or sometimes specialty tools based on the type of service that will be performed at any time. To assist, we recommend having the tools listed available when performing maintenance. Tool Socket Set, SAE Screwdriver Set, Phillips Socket Set, Metric Screwdriver Set, Flat... -
Page 23: Maintenance Schedule
MAINTENANCE SCHEDULE With durable, high performance components, this equipment is designed for heavy usage with minimal maintenance required. To keep it in top condition, perform regular daily, weekly and monthly preventive maintenance routines outlined below. The safety and integrity of this machine can only be maintained when the equipment is regularly examined for damage and wear and repaired. - Page 24 Cleaning Keeping your Nautilus® units clean is an important component of preventative maintenance and the overall aesthetics of your product. While your clients will appreciate clean equipment free of sweat, dirt and other con- taminants proper care and cleaning will extend the life of your product and reduce premature aging and wear.
- Page 25 SUPPORT & SERVICE For Technical Support, Service, Parts Orders or any Customer Service needs, please contact us direct by phone, email, or through our 24 hour support site: GLOBAL SUPPORT CENTER 4400 NE 77th Avenue, Suite 300 Vancouver, WA 98662 Tel: (360) 326-4090 •...
- Page 26 THIS PAGE INTENTIONALLY BLANK Page 25...
- Page 27 THIS PAGE INTENTIONALLY BLANK Page 26...
- Page 28 PART NUMBER 620-8889, REV A All rights reserved. Star Trac, the Star Trac logo and StairMaster are registered trademarks of Core Health & Fitness, LLC. Schwinn and Nautilus are registered trademarks of Nautilus Inc. used under license to Core Health & Fitness LLC. Throwdown is a registered trademark of Throwdown Industries, LLC.