Table of Contents
Advertisement
E8G06ED(EN).fm Page 1 Friday, July 27, 2007 8:51 PM
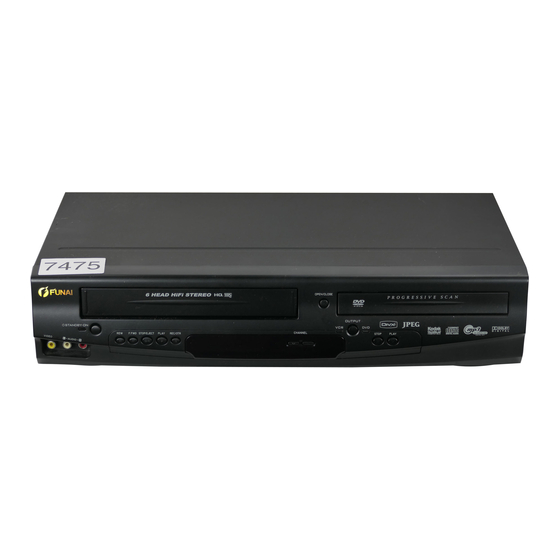
DVD/CD PLAYER &
VIDEO CASSETTE RECORDER
D8A-A4110DB (N)
Owner's Manual
Table of Contents
Precautions .......................................................................... 2
Laser Safety........................................................................ 2
Important............................................................................. 2
Power Supply..................................................................... 2
Dew Warning ...................................................................... 2
Caution................................................................................ 2
Positioning .......................................................................... 2
A Note about Recycling ...................................................... 2
Playable Discs .................................................................... 3
Unplayable Discs ................................................................ 3
Important Copyright Information ......................................... 3
Notice for Progressive Scan Outputs...................................3
Symbols Used in This Manual ............................................ 3
Functional Overview ........................................................... 4
Front Panel ......................................................................... 4
Display ................................................................................ 4
Remote Control................................................................... 5
Loading Batteries ................................................................ 5
DVD/VCR Switching ........................................................... 5
Rear View ........................................................................... 6
Setting up Your DVD/VCR................................................... 6
Before Connecting .............................................................. 6
Connecting to a TV ............................................................. 6
For Better Sound (for DVD Features) ................................. 7
External Input Mode (for VCR Features) ............................ 7
Video Cassette Tape .......................................................... 8
TV Colour System............................................................... 8
Turning on Your DVD/VCR ................................................. 8
Changing the Language...................................................... 8
Setting the Clock................................................................. 8
Channel Presetting ............................................................. 9
Automatic Channel Preset .................................................. 9
Manual Channel Preset ...................................................... 9
To Skip a Preset Channel ................................................... 9
Channel Reprogramming.................................................. 10
VCR Operation ................................................................... 10
VCR Features ................................................................... 10
Playback ........................................................................... 10
Auto Repeat Playback ...................................................... 11
Picture Select.................................................................... 11
Auto Return....................................................................... 11
Index Search..................................................................... 11
Time Search...................................................................... 12
Hi-Fi Stereo Sound System .............................................. 12
Recording.......................................................................... 12
OTR (One Touch Recording)............................................ 12
Timer Recording ............................................................... 13
Hints for OTR and Timer Recording ................................. 13
Supplied Accessories
• Remote control
• Two R6 (AA) batteries
• RF cable
• Scart cable
• Owner's Manual
Printed in China
PAL
Copying a Video Tape...................................................... 14
Recording from DVD to VCR ........................................... 14
Status Display .................................................................. 15
Real Time Tape Counter.................................................. 15
Automatic Operations....................................................... 15
DVD Operation .................................................................. 15
Basic Playback................................................................. 15
General Features ............................................................. 15
Disc Menus ...................................................................... 15
Title Menu ........................................................................ 15
Calling up a Menu Screen during Playback ..................... 16
Playback ........................................ 16
®
Dual Playback .................................................................. 17
Slide Show Mode ............................................................. 18
Adjustment of Picture Size ............................................... 18
Resume............................................................................ 18
Pause ............................................................................... 18
Step by Step Playback ..................................................... 18
x1.3 and x0.8 Rapid Play with Voice................................ 18
Fast Forward / Reverse Search ....................................... 18
Slow Forward / Reverse Search ...................................... 19
Zoom ................................................................................ 19
Audio Language ............................................................... 19
Subtitle Language ............................................................ 19
Camera Angle .................................................................. 19
Stereo Sound Mode ......................................................... 19
Virtual Surround ............................................................... 19
Track Search.................................................................... 20
Chapter / Title Search ...................................................... 20
Time Search..................................................................... 20
Marker Setup.................................................................... 20
Repeat.............................................................................. 21
Programmed Playback..................................................... 21
Random Playback ............................................................ 22
Folder Playback ............................................................... 22
On-Screen Information..................................................... 22
DVD Setup ......................................................................... 23
Language Setting ............................................................. 23
Display Setting ................................................................. 23
Audio Setting.................................................................... 23
Parental Control ............................................................... 24
Others Setting .................................................................. 24
To Reset All the Settings of the Setup Screen................. 25
Language Code ................................................................. 25
Troubleshooting Guide .................................................... 26
Specifications ................................................................... 27
Maintenance ...................................................................... 27
Declaration of Conformity................................. Back cover
Model/Serial Number
This appliance has a serial number located on the rear panel.
Please note down the serial number and retain the information
for your records.
Model number:
D8A-A4110DB
Serial number:
EN
Advertisement
Table of Contents

Related Manuals for FUNAI D8A-A4110DB


Summary of Contents for FUNAI D8A-A4110DB
-
Page 1: Table Of Contents
E8G06ED(EN).fm Page 1 Friday, July 27, 2007 8:51 PM DVD/CD PLAYER & VIDEO CASSETTE RECORDER D8A-A4110DB (N) Owner’s Manual Table of Contents Precautions ................2 Copying a Video Tape............14 Laser Safety................ 2 Recording from DVD to VCR ........... 14 Important................ -
Page 2: Precautions
E8G06ED(EN).fm Page 2 Friday, July 27, 2007 8:51 PM Precautions Power Supply WARNING: The power supply is engaged when the mains plug is plugged TO REDUCE THE RISK OF FIRE OR ELECTRIC in a 220-240 V , 50 Hz AC outlet. To operate the unit, press SHOCK, DO NOT EXPOSE THIS APPLIANCE STANDBY-ON to turn on the unit. -
Page 3: Playable Discs
E8G06ED(EN).fm Page 3 Friday, July 27, 2007 8:51 PM Playable Discs *6: Some discs cannot be played back because of incompatible recording conditions, characteristics of the recorder or The following discs can be played back on this unit. special properties of discs. *7: You can play back discs which bear marks above. -
Page 4: Functional Overview
E8G06ED(EN).fm Page 4 Friday, July 27, 2007 8:51 PM Functional Overview Front Panel OPEN/CLOSE OUTPUT STANDBY-ON CHANNEL STOP PLAY F.FWD STOP/EJECT PLAY REC/OTR 1. y STANDBY-ON indicator Display The indicator is on when this unit is turned on. Remote Sensor 2. -
Page 5: Remote Control
E8G06ED(EN).fm Page 5 Friday, July 27, 2007 8:51 PM Remote Control TOP MENU (DVD) To call up the title menu on a DVD. To return to the top file of the highest hierarchy in the PROGRAM and the FILE LIST. STANDBY-ON SPEED/ OPEN/CLOSE... -
Page 6: Rear View
E8G06ED(EN).fm Page 6 Friday, July 27, 2007 8:51 PM Rear View S-VIDEO OUT jack (DVD only) Connect to the S-VIDEO input jack on your TV. Use a commercially available S-Video cable. AV1 (TV) jack Connect to the scart jack on your TV. Use the supplied Scart cable. -
Page 7: For Better Sound (For Dvd Features)
E8G06ED(EN).fm Page 7 Friday, July 27, 2007 8:51 PM If your TV has no scart input jack but has an Hints for connecting to a Dolby Digital S-VIDEO input jack, decoder or MPEG decoder 1) Follow the steps in the “Connecting to a TV”. •... -
Page 8: Video Cassette Tape
E8G06ED(EN).fm Page 8 Friday, July 27, 2007 8:51 PM Video Cassette Tape Changing the Language This unit will operate with any cassette that bears the VHS If you want to change the language used on the TV screen mark. For best results, we recommend the use of high-quality menus, follow the steps below. -
Page 9: Channel Presetting
E8G06ED(EN).fm Page 9 Friday, July 27, 2007 8:51 PM Channel Presetting •When a weak signal is received in Manual Tuning mode, you can change the background to solid blue or the Tuning of broadcast channels not already preset in the unit static screen by pressing C.RESET can be performed in two ways. -
Page 10: Channel Reprogramming
E8G06ED(EN).fm Page 10 Friday, July 27, 2007 8:51 PM 7) Press to select “SKIP”, then press to select •You cannot select a position number where “- - -” “ON”. appears next to the number. This is because “SKIP” is •To memorise the channel again, press . -
Page 11: Auto Repeat Playback
E8G06ED(EN).fm Page 11 Friday, July 27, 2007 8:51 PM <Note for “Speed Search” and “Still Picture”> Note: • Once you select the Picture Select mode, it stays in • Usually there will be video “noise” lines (black and white effect even after you turn off the unit. streaks or dots) on the screen. -
Page 12: Time Search
E8G06ED(EN).fm Page 12 Friday, July 27, 2007 8:51 PM Time Search Two Different Tape Speeds Before recording, select the tape speed: SP mode (Standard This feature allows you to go to a specific point on a tape by Play) or LP mode (Long Play). The table below shows the entering the exact amount of time you wish to skip in order to maximum recording/playback time using E-60, E-120, E-180 reach the point. -
Page 13: Timer Recording
E8G06ED(EN).fm Page 13 Friday, July 27, 2007 8:51 PM Timer Recording To Stop a Timer Programme Which Has Already Started You may programme the unit to start and end a recording STOP/EJECT Press on the unit. while you are away. You can set 8 programmes to record on Note: •... -
Page 14: Copying A Video Tape
E8G06ED(EN).fm Page 14 Friday, July 27, 2007 8:51 PM When an OTR or a Timer Recording is completed... Using AV front terminals • If Auto Power Off for DVD has been activated and there are Timer Recordings on standby, the unit turns off Playing VCR automatically, and the indicator on the front panel... -
Page 15: Status Display
E8G06ED(EN).fm Page 15 Friday, July 27, 2007 8:51 PM Status Display Real Time Tape Counter To check the Counter, or Clock & Channel number, press • This counter shows the elapsed recording or playback time in hours, minutes, and seconds on screen. (Nothing is DISPLAY . -
Page 16: Calling Up A Menu Screen During Playback
E8G06ED(EN).fm Page 16 Friday, July 27, 2007 8:51 PM Calling up a Menu Screen during Playback • High resolution JPEG files take longer to be displayed. DVD-V • When playing back the files recorded in high bit rates, MENU • Press to call up the DVD menu. -
Page 17: Dual Playback
E8G06ED(EN).fm Page 17 Friday, July 27, 2007 8:51 PM DivX ® Subtitle Kodak Picture CD The subtitle created by the user can be displayed during DivX ® The unit can also run JPEG files stored on Kodak Picture playback. CDs. The Picture CD is a service to convert photographs 1) After select the DivX file, the SUBTITLE LIST will taken by a conventional film camera into digital data and write... -
Page 18: Slide Show Mode
E8G06ED(EN).fm Page 18 Friday, July 27, 2007 8:51 PM Slide Show Mode Step by Step Playback JPEG DVD-V DivX ® 1) During playback, press PAUSE You can switch to the slide show mode during playback. •Playback will be paused and sound will be muted. 1) During playback, press MODE once. -
Page 19: Slow Forward / Reverse Search
E8G06ED(EN).fm Page 19 Friday, July 27, 2007 8:51 PM Slow Forward / Reverse Search Subtitle Language DVD-V DivX ® DVD-V DivX ® 1) During playback, press PAUSE This unit allows you to change languages for subtitle during 2) Press playback of DVD discs and discs with DivX files (if ®... -
Page 20: Track Search
E8G06ED(EN).fm Page 20 Friday, July 27, 2007 8:51 PM Note: • Virtual Surround will not be effective if the sound 2) Enter the desired chapter/title number using the Number mode is set to something other than “STEREO” (for buttons Audio CDs only). (Refer to page 19.) Using the Number buttons •... -
Page 21: Repeat
E8G06ED(EN).fm Page 21 Friday, July 27, 2007 8:51 PM Repeat Programmed Playback REPEAT • is available only during playback. JPEG REPEAT CHAPTER / TITLE You may determine the order in which tracks will be played. DVD-V 1) In Stop mode, press MODE 1) During playback, press REPEAT... -
Page 22: Random Playback
E8G06ED(EN).fm Page 22 Friday, July 27, 2007 8:51 PM Random Playback •Current repeat setting appears only when the repeat setting is active. JPEG ( C: Chapter repeat/ T: Title repeat/ A B: A-B This function shuffles the playing order of tracks instead of repeat) playback in the original sequence. -
Page 23: Dvd Setup
E8G06ED(EN).fm Page 23 Friday, July 27, 2007 8:51 PM DVD Setup In Setup menu, QUICK mode, CUSTOM mode and INIT. mode (refer to pages 23-25) are available. QUICK mode consists of the setting menus often needed, and you can make all settings required in CUSTOM mode. You can make the settings of the QUICK items with mark in QUICK mode. -
Page 24: Parental Control
E8G06ED(EN).fm Page 24 Friday, July 27, 2007 8:51 PM 3) Press to select “AUDIO”, then press ENTER •If you forget the password, press . The original confirm. password will be cleared and parental levels will be set to “ALL”. Enter a new 4-digit password, then press ENTER 5) Press to select “PARENTAL LEVEL”, then press... -
Page 25: To Reset All The Settings Of The Setup Screen
E8G06ED(EN).fm Page 25 Friday, July 27, 2007 8:51 PM Press to select “YES” if you want to play back DivX(R) VOD : • This unit allows you to use the DivX Video-On-Demand ® the file, or to select “NO” if you do not wish to play it (VOD) services. -
Page 26: Troubleshooting Guide
E8G06ED(EN).fm Page 26 Friday, July 27, 2007 8:51 PM Troubleshooting Guide If the unit does not perform properly when operated as instructed in this Owner’s Manual, check the unit, consulting the following checklist. WARNING: Under no circumstances should you try to repair the system yourself, as this will invalidate the warranty. -
Page 27: Specifications
E8G06ED(EN).fm Page 27 Friday, July 27, 2007 8:51 PM Specifications PRODUCT TYPE CONNECTIONS DVD/CD PLAYER & VIDEO CASSETTE RECORDER Front Panel: Video input RCA connector x 1 DISCS Audio input RCA connector x 2 DVD-Video Rear Panel: Audio CD AERIAL Coaxial type, female CD-R RF OUT... -
Page 28: Declaration Of Conformity
EN55013 : 2001+A1 : 2003 EN55020 : 2002+A1 : 2003+A2 : 2005 EN61000-3-2 : 2003+A2 : 2005 EN61000-3-3 : 1995+A1 : 2001 EN60065 : 2002 EN60825-1 Edition 1.2 : 2001 1VMN24313 E8G06ED***** © 2007-2008 FUNAI EUROPE GMBH. All rights reserved.