Table of Contents
Advertisement
Available languages
Available languages
Quick Links
Cat. No. / No de cat.
48-35-1211
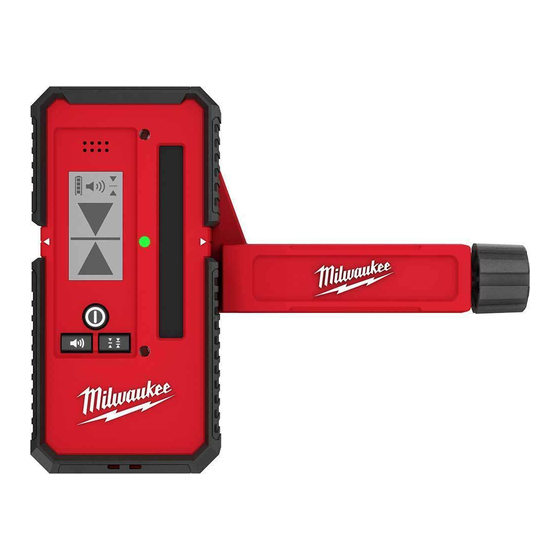
165' LASER LINE DETECTOR
DETECTEUR DE LIGNE DE LASER DE 50 m (165')
DETECTOR DE LÍNEA DE LASER DE 50 m (165')
WARNING
WARNING
AVERTISSEMENT
AVERTISSEMENT
comprendre le manuel.
comprendre le manuel.
ADVERTENCIA
ADVERTENCIA
To reduce the risk of injury, user must read and understand operator's manual.
To reduce the risk of injury, user must read and understand operator's manual.
Afin de réduire le risque de blessures, l'utilisateur doit lire et bien
Afin de réduire le risque de blessures, l'utilisateur doit lire et bien
Para reducir el riesgo de lesiones, el usuario debe leer y entender el manual.
Para reducir el riesgo de lesiones, el usuario debe leer y entender el manual.
OPERATOR'S MANUAL
MANUEL de L'UTILISATEUR
MANUAL del OPERADOR
Advertisement
Table of Contents

Summary of Contents for Milwaukee 48-35-1211
- Page 1 OPERATOR'S MANUAL MANUEL de L'UTILISATEUR MANUAL del OPERADOR Cat. No. / No de cat. 48-35-1211 165' LASER LINE DETECTOR DETECTEUR DE LIGNE DE LASER DE 50 m (165') DETECTOR DE LÍNEA DE LASER DE 50 m (165') WARNING WARNING To reduce the risk of injury, user must read and understand operator's manual.
- Page 2 • Maintain labels and nameplates. These carry important information. If unreadable or missing, contact a MILWAUKEE service facility for a free replacement. • The device conforms to the most stringent requirements of the relevant Electromagnetic Compatibility (EMC) Standards and Regulations.
-
Page 3: Specifications
If the laser will not be used for a long with the Laser Beam*. time, remove the batteries as a protection against *Use with MILWAUKEE Laser Levels for best results. corrosion. Change batteries when the battery indication begins Clamp flashing. -
Page 4: Maintenance
MILWAUKEE to be defective in material or workmanship for a period of five (5) years** after the date of purchase unless otherwise noted. Return of the power tool to a MILWAUKEE factory Service Center location or MILWAUKEE Authorized Service Station, freight prepaid and insured, is required. -
Page 5: Utilisation Et Entretien De La Batterie
Warranty Registration is not necessary to obtain the applicable warranty • Ne pas combiner des piles neuves et usagées. Ne on a MILWAUKEE power tool product. The manufacturing date of the pas mélanger des piles de marques différentes product will be used to determine the warranty period if no proof of pur- (ou des piles de même marque mais de types... -
Page 6: Spécifications
• Consulter le concessionnaire ou un technicien radio/ TV qualifié pour obtenir de l'aide. SPÉCIFICATIONS No de Cat..........48-35-1211 Tension ...........3 V (2xAA) LR6 Angle de réception........... ±40° Mesure de précision fine .....±0,76 mm (0,03") à 10 m (33') Mesure de précision de cours ..±1 mm (0,04") -
Page 7: Dépannage
3. Appuyer sur le bouton de mode de précision pour Si le problème persiste, contacter une installation passer entre les différentes options de précision: de réparations MILWAUKEE à des fins d’assistance. REVISION DE PRECISION Fin (préétabli) SUR CHAMP Grossier Effectuer une révision de précision sur le... -
Page 8: Entretien
(5) ans** à compter de la date d’achat, sauf indication contraire. Retourner l’outil électrique à un centre de réparation en usine MILWAUKEE ou à un poste d’entretien agréé MILWAUKEE, en port prépayé et assuré. Une copie de la preuve d’achat doit être présentée lors du retour du produit. -
Page 9: Seguridad En El Área De Trabajo
Canada uniquement. Veuillez consulter la rubrique Centre SAV Milwaukee, dans la sec- de reciclado ambientalmente compatible. tion Pièces et Services du site Web de MILWAUKEE, à l’adresse •Asegúrese de que los imanes de la herramienta www.milwaukeetool.com, ou composer le 1-800-SAWDUST estén montados fijamente a una superficie de... -
Page 10: Descripcion Funcional
Para encender el detector de láser, presione el botón de encendido hasta que la unidad emita un BIP Cat. No..........48-35-1211 y los ÍCONOS y las luces LED PARPADEARÁN. Voltaje ..........3 V (2xAA) LR6 Para apagar el detector del láser, mantenga presio- Ángulo de recepción ........ -
Page 11: Resolución De Problemas
5. Mueva lentamente el detector hacia arriba y hacia ducto, comuníquese con un centro de servicio abajo, a la derecha y a la izquierda en el área MILWAUKEE. El no hacerlo puede ocasionar el re- general del haz del láser proyectado. chazo en la aceptación de la garantía. - Page 12 Nota: si el juego de cables está dañado, tiene que reemplazarse en un Esta garantía no aplica a daños que MILWAUKEE determine que son oca- Centro de Servicio Autorizado para evitar riesgos eléctricos.


