
Related Manuals for Moulinex ACTIVYS AHK1


Summary of Contents for Moulinex ACTIVYS AHK1
- Page 1 AHK1 Mode d’emploi, Gebruiksaanwijzing, Bedienungsanleitung, Libretto di istruzioni, Instrucciones de uso, Guia do utilizador, Instructions for use, Brugsanvisning.
- Page 2 * selon modèle, afhankelijk van het model, je nach Modell, a seconda del modello, según modelo, consoante o modelo, according to model, afhængig af model.
- Page 4 PRÉCAUTIONS IMPORTANTES Prenez le temps de lire toutes les instructions et reportez-vous au “Guide de l’utilisateur”. Cet appareil est conforme aux règles et conditions de sécurité en vigueur ainsi qu’aux directives : - Directive Compatibilité Electromagnétique 89/336/CEE modifiée par les Directives 92/31/CEE et 93/68/CEE.
- Page 5 Ne pas utiliser l’appareil si : - celui-ci a un cordon défectueux, - l’appareil est tombé et présente des détériorations visibles ou des anomalies de fonctionnement. Dans chacun de ces cas, l’appareil doit être envoyé au centre de service après-vente agréé...
-
Page 6: Avant La Première Utilisation
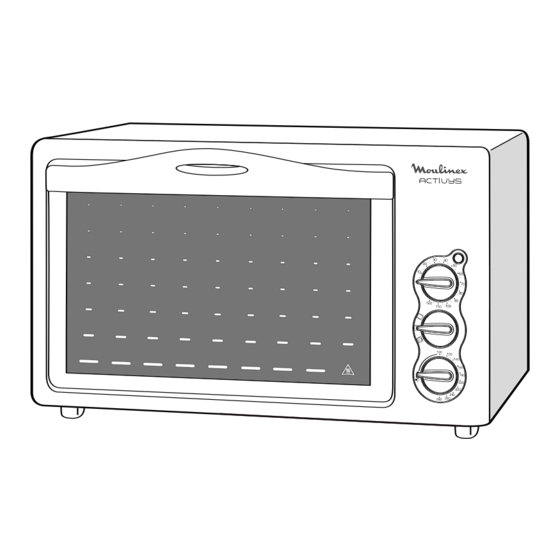
CARACTERISTIQUES DE L’APPAREIL Voyant de fonctionnement Bouton de réglage de la minuterie (0 à 120 minutes) Bouton de sélection de fonctions : Four Gril Gril + Tournebroche Bouton de réglage du thermostat de 100° C à 280°C Résistance de gril rabattable Résistance de sole relevable* Trous de fixation du support broche* Grille réversible... -
Page 7: Arrêt Du Four
Arrêt du four Quel que soit le mode de cuisson utilisé, le four peut être arrêté avant la fin du temps de cuisson. Pour cela, ramenez le temps de cuisson à 0 grâce à la minuterie. Cuisson au four Insérez la grille à la hauteur souhaitée. (Fig F) Posez votre plat avec sa préparation sur la grille et fermez le four. -
Page 8: Nettoyage Et Entretien
Cuisson au gril avec tournebroche Pour cuire au tournebroche volaille et viande. Mise en place de la broche : Pour installer le tournebroche, mettez en place le support de la broche dans les trous de la paroi gauche. (Fig M) Glissez une fourche le long de la broche en appuyant sur son extrémité. - Page 9 Pour les traces adhérentes, utilisez éventuellement un tampon métallique doux non abrasif. Ne forcez jamais pour manipuler les résistances. Tous les accessoires* (grille, plat, kit tournebroche) se nettoient à l’eau additionnée de détergent ou peuvent être mis au lave-vaisselle. Position de la grille TABLEAU DE CUISSON Les temps de cuisson ci-après sont donnés à...
- Page 10 IMPORTANT PRECAUTIONS Take the time to read all the instructions and refer to the User Guide. This appliance complies with the regulations and safety conditions in force and with the directives: - Electromagnetic Compatibility Directive 89/336/EEC as modified by 92/31/EEC and 93/68/EEC.
- Page 11 Never use the appliance if: - the supply cord is defective, - lthe appliance has fallen to the floor and shows visible signs of damage or does not function correctly. In either case, the appliance must be sent to the nearest KRUPS approved service centre to eliminate any risk (list attached).
-
Page 12: Using The Appliance
APPLIANCE CHARACTERISTICS Main indicator lamp Timer setting knob (0 to 120 minutes) Function select knob: Oven Grill Grill + Rotisserie Temperature setting knob (100°C to 280°C) Hinged grill element Hinged bottom element* Spit support fixing hole* Reversible shelf Fixed cord Rotisserie kit* (1 spit, 2 spit forks) Spit support* Drip pan*... -
Page 13: Oven Cooking
Stopping the oven Whatever cooking mode is being used, the oven can be stopped before cooking has fini- shed. To do this, set the cooking time to 0 using the timer. Oven cooking Insert the shelf at the desired height. (Fig F) Place your prepared dish of food on the shelf and close the oven. -
Page 14: Cleaning And Care
Spit roasting under the grill To cook poultry or meat on the spit. Fitting the spit: To install the spit, fit the spit support in the holes on the left wall. (Fig M) Slide one spit fork along the spit by pressing on its end. Release the end to lock the spit fork in place. -
Page 15: Cooking Table
Never attempt to move the heating elements by force. All accessories* (shelf, pan, rotisserie kit) can be cleaned with water and detergent or put in the dishwasher. Shelf position COOKING TABLE The cooking times below are given by way of indication. They can vary depending on the size, thickness, freshness and initial temperature of the item to be cooked.