Advertisement
Available languages
Available languages
Quick Links
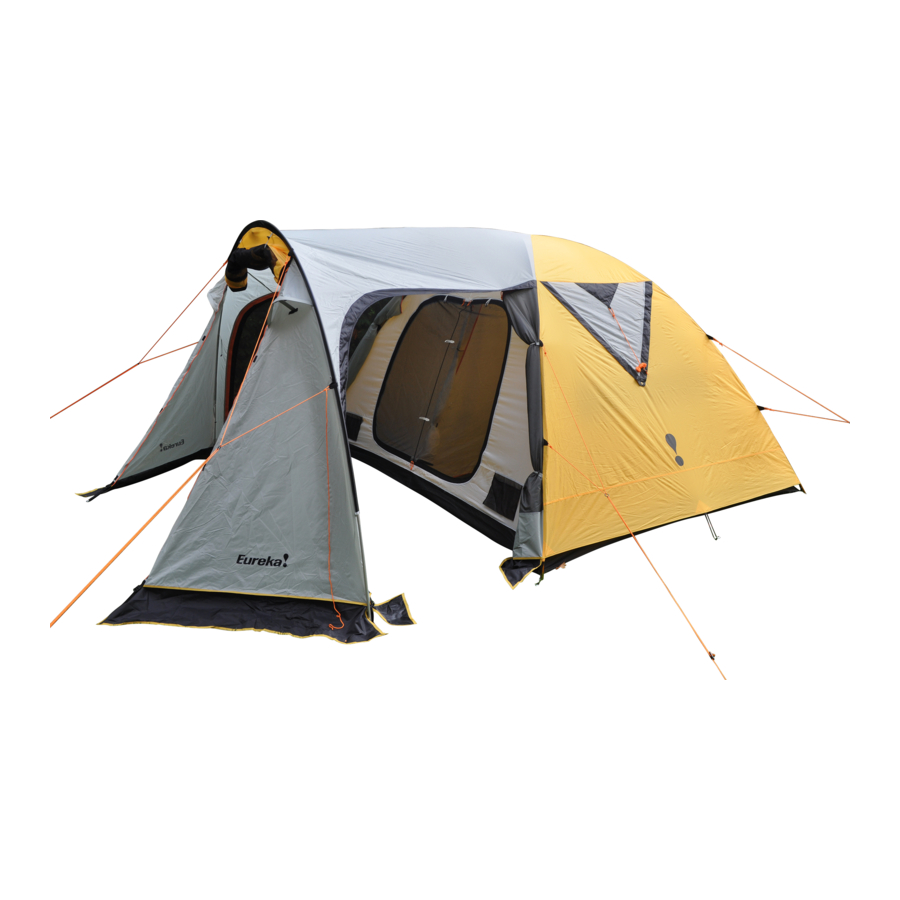
ASSEMBLY INSTRUCTIONS
Tundern Cove 6EV
We recommend setting up your tent prior to first trip and at the
start of each camping season to ensure setup is understood and
all parts are in order.
Site Preparation
• Select a location free of sharp or protruding objects
• Be sure the site chosen will not pool water beneath the tent in the
event of a heavy rain.
Components; Tent body, tent fly sheet,
poles (2 main frame, 1 fly pole, 1
vestibule), bag of stakes and guylines,
tent duffel bag.
Spread the tent body on the selected
site. (One corner web/grommet will be
orange, this should be positioned front
right when looking at the tent)
Assemble all 4 poles. Select the two
equal length main frame poles. Insert
poles through black pole sleeves until
they are laying in an X pattern on top of
the flat tent.
At one tent corner, insert the tent pin
into the end of the pole. Repeat with this
same pole at the other end. In doing so
the pole will need to flex. Be sure to
adjust the tent fabric during this process
so it does not cause the pole to flex
awkwardly resulting in possible damage.
One pole should now be inserted and
flexed. Repeat this step with the second
pole. As you do this step the tent will
now rise into shape. Attach any tent clips
to poles where possible, towards the
back of the tent.
Stake the tent down at each corner
using the corner webs.
Locate the Fly pole (pole with capped
ends).Lay out the fly sheet upside down
exposing the fly pole pockets. Insert one end
of the fly pole into a pocket. Repeat at the
opposite end. In doing so the pole will flex
slightly.
At the midpoint you will be able to attach the
Velcro around the pole
When completed the fly pole will be all
secured to the upside down fly sheet.
Lift the fly sheet, with pole in place, and align
the fly sheet vestibule (look for mesh doors
on fly) at the front end of the tent.
Lift and place the fly over the tent, now with
the fly sheet underside facing down. (Easier
with two people) Spread the fly so fabric is
balanced side to side and fly pole is laying on
top of the inner tent running front to back.
At one tent corner, find the fly sheet corner
hook and hook through the tent corner ring.
Attach all remaining tent corner hooks in the
same method.
Insert the assembled vestibule pole through
the vestibule pole sleeve. The vestibule pole
sleeve is on the 'top' side of the fly sheet.
Now locate the vestibule pole ring and pin on
the fly sheet by following the vestibule pole
seam to the lower edge of the fly sheet.
Insert the pin into the end of the pole.
Repeat the pin insertion at the opposite end
of the vestibule pole and during this process
the vestibule will flex into position.
Stretch the pole away from the tent and
secure with stakes at each end of the
vestibule pole
Now stretch out remaining fabric of the
vestibule and stake, two locations. Repeat by
staking out the rear vestibule, one location.
The tent is now up.
Open up a door to move inside the vestibule.
Fasten the Velcro on the underside of the fly
sheet, found along the seam, to the Velcro
on the pole sleeve. Repeat until all are
connected.
At the back of the tent, open the smaller
vestibule to get inside. Locate the Velcro on
the underside of the fly sheet along corner
seams and fasten around the pole.
Repeating on both poles.
Along the side of the tent you will find a pre-
attached pull out. ON the underside of the fly
is a web and toggle. Connect it to the web
and ring of the inner tent. Then stake out the
fly using the pre-attached cord.
Final set up involves use of supplied
guylines. If you plan to leave the site for a
period of time or anticipate stormy/windy
conditions then you must use the guylines
and stakes provided. There are attachment
locations on every corner pole, as well as
location on the vestibule pole. When secured
properly, adjusting tension, these can add
incredible stability to your tent.
You are all set!
Doors and windows can be used as you
see fit and weather dictates
JOHNSON OUTDOORS
4180 Harvester Rd., Burlington, Ont L7L 6B6
905 634 0023 eurekatentscanada.com
Advertisement

Related Manuals for Eureka Tundern Cove 6EV


Summary of Contents for Eureka Tundern Cove 6EV
- Page 1 Repeat at the Stretch the pole away from the tent and opposite end. In doing so the pole will flex secure with stakes at each end of the Tundern Cove 6EV slightly. vestibule pole Now stretch out remaining fabric of the...
- Page 2 INSTRUCTIONS DE MONTAGE double toit. Insérez l'une des extrémités position. Étirez le mât de vestibule dans la Tundern Cove 6EV du mât du double toit dans une poche. direction d'éloignement de la tente et Répétez l'opération au bout opposé. En ce haubanez-le en utilisant des piquets à...