Table of Contents
Advertisement
Quick Links
Download the BEA DECODER app
for a quick overview
of settings
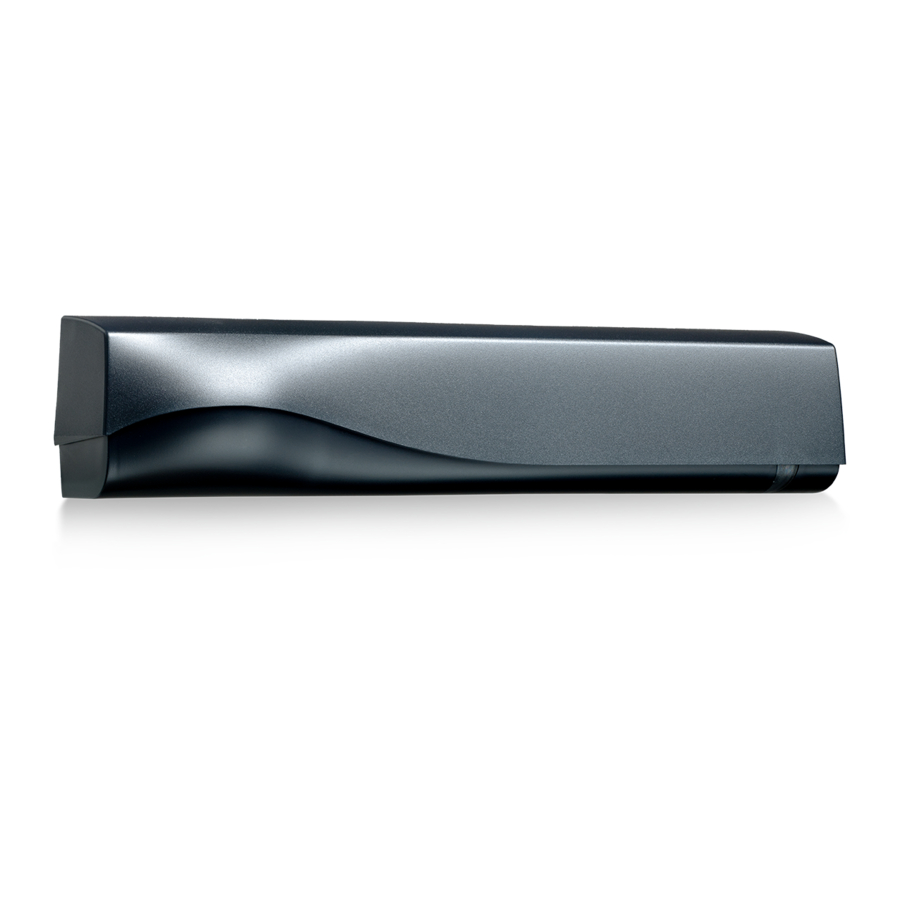
DESCRIPTION
1
2
3
4
5
ACCESSORIES
BA: Bracket accessory
Retrofit interface
1.
LCD
2.
radar antenna (narrow field)
3.
radar antenna (wide field)
4.
IR-curtain width adjustment
5.
IR-lenses
CA: Ceiling accessory
Door bell + interface
IXIO-DT3
OPENING & SAFETY SENSOR
FOR AUTOMATIC SLIDING DOORS
(according to EN 16005 and DIN 18650,
including emergency exits)
User's Guide for software version 0501 and higher
(refer to tracking label on product)
6.
cover
7.
main connector
8.
main adjustment knob
9.
IR-curtain angle adjustment knob
RA: Rain accessory
Smart Daisy Chain hub
6
7
8
9
CDA: Curved door accessory
9 V battery
Advertisement
Table of Contents

Related Manuals for BEA IXIO-DT3


Summary of Contents for BEA IXIO-DT3
- Page 1 IXIO-DT3 OPENING & SAFETY SENSOR Download the BEA DECODER app for a quick overview FOR AUTOMATIC SLIDING DOORS of settings (according to EN 16005 and DIN 18650, including emergency exits) User’s Guide for software version 0501 and higher (refer to tracking label on product)
-
Page 2: Navigating In Menus
HOW TO USE THE LCD? DISPLAY DURING NORMAL FUNCTIONING To adjust contrast, push and turn Negative display = active output Opening Safety the grey button simultaneously. impulse During normal function only. FACTORY VALUE VS. SAVED VALUE displayed value = saved value displayed value = factory value NAVIGATING IN MENUS Select your language before... -
Page 3: Mounting And Wiring
IXIO-DT3: INSTALLATION GUIDE MOUNTING & WIRING GREEN POWER SUPPLY BROWN YELLOW OPENING INPUT WHITE PINK GREY SAFETY INPUT TEST BLUE OUTPUT YE/BK + OPENING INPUT WH/BK - FOR CURRENT SOURCE * Depending on OUTPUT CONFIGURATION settings ** For compliance with EN 16005 and DIN 18650, Fixation is compatible with the ACTIV8. - Page 4 INFRARED SAFETY FIELD DOOR CLOSER CLOSER max. 9 cm** AWAY AWAY If necessary, adjust the IR-curtain Activate the visible* spots to verify angle (from -7° to 4°, default 0°). the position of the IR-curtain. * Visibility depends on external conditions. When spots are not visible, use the Spotfinder to locate the curtains. ** The distance between the inner curtain of the inside door sensor and the inner curtain of the outside door sensor should always be smaller than 20 cm.
-
Page 5: Overview Of Settings
OVERVIEW OF SETTINGS BASIC Back More factory values for radar immunity, IR immunity, IR number and redirection shopping critical increased immunities, 1 curtain PRESETTINGS standard street env. increased immunities, redirection = motion and presence Freq : freq. in no detection RAD: FIELDSIZE small >... -
Page 6: Troubleshooting
TROUBLESHOOTING ORANGE LED flashes 1 x. The sensor signals Replace sensor. an internal fault. ORANGE LED flashes 2 x. The power supply is too low Check power supply (in the diagnostics menu of the LCD). or too high. Check wiring. ORANGE LED flashes 3 x. -
Page 7: Installation
LED-SIGNAL Presence Motion detection detection LED flashes LED flashes LED flashes LED flashes LED is off red-green quickly x times INSTALLATION The sensor should be Do not cover the sensor. Avoid moving objects Avoid highly fixed firmly to avoid reflective objects in and light sources in extreme vibrations. -
Page 8: Technical Specifications
All values measured in specific conditions and with a temperature of 25°C. BEA SA | LIEGE Science Park | Allée des Noisetiers, 5 - 4031 ANGLEUR [BELGIUM] | T +32 4 361 65 65 | F +32 4 361 28 58 | info-eu@beasensors.com | www.beasensors.com BEA hereby declares that the IXIO-DT3 is in conformity with the European directives 2014/53/EU (RED), 2006/42/EC (Machinery) and 2011/65/EU (ROHS).