Advertisement
Quick Links
READ AND SAVE THESE
To register this product visit
www.broan.com
READ AND SAVE
THESE
INSTRUCTIONSS
WARNING
TO REDUCE THE RISK OF FIRE, ELECTRIC
SHOCK, OR INJURY TO PERSONS, OBSERVE THE
FOLLOWING:
1. Use this unit only in the manner intended by the
manufacturer. If you have questions, contact the
manufacturer at the address or telephone number
listed in the warranty.
2. Before servicing or cleaning unit, switch power off
at service panel and lock the service disconnect-
ing means to prevent power from being switched
on accidentally. When the service disconnecting
means cannot be locked, securely fasten a promi-
nent warning device, such as a tag, to the service
panel.
3. Installation work and electrical wiring must be done
by a qualified person(s) in accordance with all ap-
plicable codes and standards, including fire-rated
construction codes and standards.
4. Sufficient air is needed for proper combustion and
exhausting of gases through the flue (chimney) of
fuel burning equipment to prevent backdrafting. Fol-
low the heating equipment manufacturer's guideline
and safety standards such as those published by
the National Fire Protection Association (NFPA),
and the American Society for Heating, Refrigeration
and Air Conditioning Engineers (ASHRAE), and the
local code authorities.
5. When cutting or drilling into wall or ceiling, do not
damage electrical wiring and other hidden utili-
ties.
6. Ducted fans must always be vented to the out-
doors.
7. If this unit is to be installed over a tub or shower, it
must be marked as appropriate for the application
and be connected to a GFCI (Ground Fault Circuit
Interrupter) - protected branch circuit.
8. Never place a switch where it can be reached from
a tub or shower.
9. This unit must be grounded.
!
CAUTION
1. For general ventilating use only. Do not use to
exhaust hazardous or explosive materials and
vapors.
2. To avoid motor bearing damage and noisy
and/or unbalanced impellers, keep drywall spray,
construction dust, etc. off power unit.
3. Please read specification label on product for further
information and requirements.
Installer: Leave this manual with the
homeowner.
Homeowner: Use and Care information
on page 4.
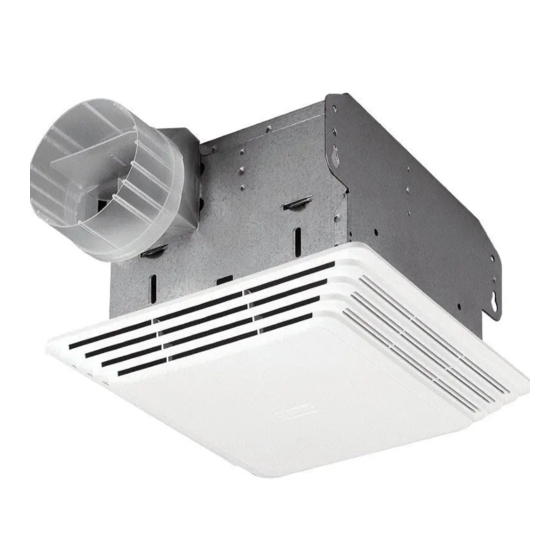
CEILING VENTILATORS/VENTILADORES DE CIELO RASO
TYPICAL INSTALLATION
POWER CABLE
MOUNTING TABS
CEILING
JOIST
HOUSING
CEILING
GRILLE
MATERIAL
HOUSING MOUNTED DIRECTLY TO JOIST
2x6 (or larger) Discharge parallel to joists.
POWER CABLE
MOUNTING
TABS
2 x 4
CEILING
JOIST or
TRUSS
HOUSING
CEILING
GRILLE
MATERIAL
HOUSING MOUNTED TO 2x4 TRUSS
Requires additional framing for mounting tabs.
Discharge parallel to joists.
POWER CABLE
MOUNTING
TABS
HOUSING
I
"
"
CEILING
JOIST
GRILLE
MATERIAL
HOUSING MOUNTED TO "I" JOIST
Requires additional framing for mounting tabs.
Discharge parallel to joists.
4" ROUND
DUCT
POWER CABLE
MOUNTING TABS
HOUSING
ADDITIONAL
CEILING
FRAMING *
GRILLE
MATERIAL
HOUSING MOUNTED TO ADDITIONAL FRAMING
Discharge 90
to joists.
0
4" ROUND
DUCT
POWER CABLE
MOUNTING TABS
HOUSING
ADDITIONAL
2 x 4
CEILING
FRAMING
GRILLE
CEILING
MATERIAL
JOIST or
TRUSS
HOUSING MOUNTED TO 2x4 TRUSS
Requires additional framing for mounting tabs.
Discharge 90
to joists.
0
4" ROUND
DUCT
POWER CABLE
MOUNTING TABS
HOUSING
ADDITIONAL
I
"
"
FRAMING
CEILING
GRILLE
JOIST
MATERIAL
HOUSING MOUNTED TO "I" JOIST
Requires additional framing for mounting tabs.
Discharge 90
to joists.
0
* Additional framing must be a 2x6 (minimum height), at
least 9-inches long.
MODELS / MODELOS 676 • 684
LEA Y CONSERVE ESTA
ADVERTENCIA
PARA REDUCIR EL RIESGO DE INCENDIO, DES-
CARGA ELÉCTRICA O LESIONES PERSONALES,
OBSERVE LO SIGUIENTE:
1. Utilice esta unidad solamente de acuerdo con las
instrucciones del fabricante. Si tiene preguntas co-
muníquese con el fabricante a la dirección o al número
ADDITIONAL
telefónico que se indica en la garantía.
FRAMING
*
2. Antes de dar servicio o limpiar la unidad, interrumpa
2 x 4
el suministro de energía en el panel de servicio y
CEILING
JOIST or
bloquee los dispositivos de desconexión para evitar
TRUSS
la reinstalación accidental de la energía. Cuando no
se puedan bloquear los dispositivos de desconexión,
fije seguramente en el panel de servicio un medio de
advertencia que sea visible, como por ejemplo una
etiqueta.
3. Una persona o personas calificadas deben realizar
el trabajo de instalación y el cableado eléctrico, de
acuerdo con todos los códigos y normas aplicables,
ADDITIONAL
*
FRAMING
inclusive los códigos y normas de construcción para
evitar incendios.
4. Se necesita suficiente aire para que se realice la
combustión y la descarga de gases adecuadas a
través de la chimenea del equipo para quemar com-
bustible a fin de evitar las corrientes de inversión.
Observe los lineamientos del fabricante del equipo
I
"
"
JOIST
de calefacción y las normas de seguridad, como por
ejemplo las publicadas por la Asociación Nacional de
Protección contra Incendios (National Fire Protection
Association: NFPA), y la Sociedad Americana de
Ingenieros en Calefacción, Refrigeración y Sistemas
de Acondicionamiento de Aire (American Society for
Heating, Refrigeration and Air Conditioning Engineers:
ASHRAE), y los códigos locales.ditioning Engineers
(ASHRAE), and the local code authorities.
5. Cuando corte o perfore la pared o el cielo raso, tenga
cuidado de no dañar el cableado eléctrico ni otras
conexiones de servicios que se encuentren ocultas.
6. Los ventiladores con conductos siempre deben tener
CEILING
JOIST
salida hacia el exterior.
7. Si se va a instalar esta unidad sobre una tina o ducha,
debe marcarse que es apropiada para esta aplicación
y conectarse a un GFCI (interruptor accionado por pér-
dida de conexión a tierra) en un circuito de derivación
protegido.
8. Nunca coloque el interruptor en un lugar en donde se
pueda alcanzar desde la tina o ducha.
9. Esta unidad debe conectarse a tierra.
PRECAUCIÓN
*
2 x 4
CEILING
1. Esta unidad debe usarse solamente para ventilación
JOIST or
general. No la utilice para la descarga de materiales
TRUSS
ni vapores peligrosos o explosivos.
2. Para evitar causar daño a los cojinetes del motor y
pistones impulsores ruidosos y/o no balanceados,
mantenga los aerosoles para pirca, el polvo de
construcción, etc. lejos del motor.
3. Por favor consulte la información y los requerimientos
adicionales contenidos en la etiqueta de especifica-
ciones que se encuentra en el producto.
A la persona que realiza la instalación:
Deje este manual con el dueño de la
I
"
"
*
JOIST
casa.
Al dueño de la casa: Las instrucciones
de operación y limpieza se encuentran
en la página 4.
INSTRUCCIONES
!
Advertisement

Related Manuals for Broan 676


Summary of Contents for Broan 676
-
Page 1: Typical Installation
HOUSING MOUNTED TO “I” JOIST Requires additional framing for mounting tabs. Discharge 90 to joists. * Additional framing must be a 2x6 (minimum height), at least 9-inches long. MODELS / MODELOS 676 • 684 LEA Y CONSERVE ESTA INSTRUCCIONES ADVERTENCIA PARA REDUCIR EL RIESGO DE INCENDIO, DES- CARGA ELÉCTRICA O LESIONES PERSONALES, OBSERVE LO SIGUIENTE: 1. Utilice esta unidad solamente de acuerdo con las... -
Page 2: Typical Installations
SHOW 2 x 6 JOISTS. IF YOU HAVE A TRUSS OR “I”- JOIST INSTALLATION, MOUNT THE VENTILATOR TO THE ADDITIONAL FRAMING IN THE SAME MAN- NER. (Additional framing must be a 2x6 (minimum height), at least 9-inches long.) New Construction 1. Choose the location for your fan in the ceiling. For best possible performance, use the shortest pos- sible duct run and a minimum number of elbows. 2. Position mounting brack- HOLES ets against joist so that... -
Page 3: Existing Construction
INSTALL THE HOUSING Existing Construction 1. Choose the location for your fan in the ceiling. For best pos- sible performance, use the shortest possible duct run and a minimum number of elbows. 2. In attic, position mounting brackets against joist. Trace outline of housing on ceiling material. 3. Set housing aside and cut ceiling opening slightly larger than marked. 4. Place housing in opening so that its bottom edge is flush with finished ceiling. Nail to joist through keyhole on both sides. To ensure a noise-free installation, drive another nail through the top hole of each mounting bracket. 5. Additional mounting holes are provided for installations where access from above is inconvenient or not possible. Nail or screw housing directly to joists or framing. INSTALL THE DUCTWORK 1. Snap the damper/duct connector onto housing. Make sure that tabs on the connector lock into slots in housing. Top of damper/duct connector should be flush with top of housing. 2. Connect 4” round duct to damper/duct connector and extend duct to outside through a roof or wall cap. Check damper to make sure that it opens freely. Tape all duct connections to make them secure and air tight. CONNECT THE WIRING 1. Wire unit following diagram. Run electrical cable as direct as possible to unit. Do not allow cable to touch sides or top of... -
Page 4: Motor Lubrication
Broan-NuTone garantiza al consumidor comprador original de sus productos que dichos productos carecerán de defectos en materiales o en mano de obra por un período de un año a partir de la fecha original de compra. NO EXISTEN OTRAS GARANTIAS, EXPLICITAS O IMPLICITAS, INCLUYENDO, PERO NO LIMITADAS A, GARANTIAS IMPLICITAS DE COMERCIALIZACION O APTITUD PARA UN PROPOSITO PARTICULAR. Durante el período de un año, y a su propio criterio, Broan-NuTone reparará o reemplazará, sin costo alguno cualquier producto o pieza que se encuentre defectuosa bajo condiciones normales de servicio y uso. ESTA GARANTIA NO SE APLICA A TUBOS Y ARRANCADORES DE LAMPARAS FLUORESCENTES. Esta garantía no cubre (a) mantenimiento y servicio normales o (b) cualquier producto o piezas que hayan sido utilizadas de forma errónea, negligente, que hayan causado un accidente, o que hayan sido reparadas o mantenidas inapropiadamente (por otras compañías que no sean Broan-NuTone), instalación defectuosa, o instalación contraria a las instrucciones de instalación recomendadas. La duración de cualquier garantía implícita se limita a un período de un año como se especifica en la garantía expresa. Algunos estados no permiten limitaciones en cuanto al tiempo de expiración de una garantía implícita, por lo que la limitación antes mencionada puede no aplicarse a usted. LA OBLIGACION DE BROAN-NUTONE DE REPARAR O REEMPLAZAR, SIGUIENDO EL CRITERIO DE BROAN-NUTONE, DEBERA SER EL UNICO Y EXCLUSIVO RECURSO LEGAL DEL COMPRADOR BAJO ESTA GARANTIA. BROAN-NUTONE NO SERA RESPONSABLE POR DAÑOS INCIDENTALES, CONSIGUIENTES, O POR DAÑOS ESPECIALES QUE SURJAN A RAIZ DEL USO O DESEMPEÑO DEL PRODUCTO. Algunos estados no permiten la exclusión o limitación de daños incidentales o consiguientes, por lo que la limitación antes mencionada puede no aplicarse a usted. Esta garantía le proporciona derechos legales específicos, y usted puede también tener otros derechos, los cuales varían de estado a estado. Esta garantía reemplaza todas las garantías anteriores. Para calificar en la garantía de servicio, usted debe (a) notificar a Broan-NuTone al domicilio que se menciona abajo o al teléfono:1-800-637-1453, (b) dar el número del modelo y la identificación de la pieza, y (c) describir la naturaleza de cualquier defecto en el producto o pieza. En el momento de solicitar servicio cubierto por la garantía, usted debe de presentar evidencia de la fecha original de compra. Broan-NuTone LLC, 926 West State Street Hartford, WI 53027 (1-800-637-1453) . DE PIEZA, GARANTIA BROAN-NUTONE LIMITADA POR UN AÑO...