Table of Contents
Advertisement
Quick Links
Advertisement
Table of Contents

Related Manuals for Baumatic B724SS-A


Summary of Contents for Baumatic B724SS-A
- Page 1 B724SS-A 60 cm Built-under electric double oven ‘v20...
- Page 2 User Manual for your Baumatic B724SS-A 60 cm Built-under electric double oven NOTE : This User Instruction Manual contains important information, including safety & installation points, which will enable you to get the most out of your appliance. Please keep it in a safe place so that it is easily available for future reference;...
-
Page 3: Table Of Contents
Contents Environmental note Important safety information Specifications Product and aperture dimensions Product specifications Standard accessories Optional extras Electrical details Control panel Oven programmer/timer display Setting and using the oven programmer/timer Setting the time of day and selecting manual operation mode Before first use Setting the minute minder function (main and secondary oven) Setting the duration function... -
Page 4: Environmental Note
Environmental note The packaging materials that friendly and can be recycled. Please discard all packaging material with due regard for the environment. Baumatic uses are environmentally... -
Page 5: Important Safety Information
IMPORTANT SAFETY INFORMATION Your safety is of the utmost importance to Baumatic. Please make sure that you read this instruction booklet before attempting to install or use the appliance. If yo are unsure of any of the information contained i... - Page 6 This appliance complies with all current European safety legislation. Baumatic do wish to emphasise that this compl does not remove the fact that the appliance surfaces will become hot during use and retain heat after operation. hild Safety Baumatic strongly recommend that babies and young children are prevented from being near to the to touch the appliance at any time.
- Page 7 This appliance must be correctly installed by a suitably qualified person, strictly in ac ith the manufacturer’s instructions. Baumatic Ltd. declines any responsibility for injury or damage, to person or property, as a r use or installation of this appliance.
-
Page 8: Specifications
pecifications Product Dimensions Height: 715 mm Width: 595 mm Depth: C ol o in g fan Tangential cooling fans are fitted inside of this appliance, to make the internal temperature of the external surface temperatur ro u d ct specifications Energy efficiency class LED full program 2 Cooling fans... -
Page 9: Standard Accessories
o Removable side rac o 2 x Safety shelves o 2 x Enamell ed drip trays with handle o 2 x Trivets ptional extras o BPS1 Pizza stone o SCL.2KIT Stay-clean liners kit (main oven only) lectrical details Rated Voltage: Supply Connection: Max Rated Inputs: Mains Supply Lead... -
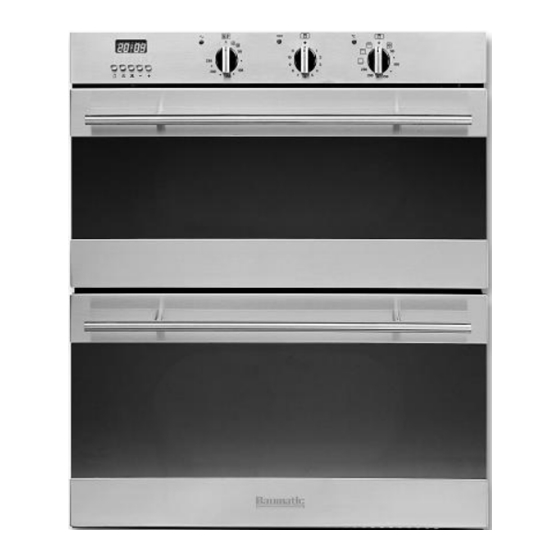
Page 10: Control Panel
ontrol Panel 1. Timer control buttons 2. Oven programmer/timer 3. Main oven operating ligh 4. Main oven control kn 5. Grill operating light 6. Grill thermostat control knob 7. Secondary oven operating ligh 8. Secondary oven control knob ven programmer/timer display 9. -
Page 11: Setting And Using The Oven Programmer/Timer
etting and using the oven programmer/timer Setting the time of day and selecting manual operation mode After your appliance is connected to your mains supply for the first time, the numbers on the timer display will flash 00.00. Before you can select a cooking function or set a temperature you must put the app liance into manual operation mode and et h... -
Page 12: Setting The Minute Minder Function (Main And Secondary Oven)
You are able to set the minute minder at any time, regardless of whether an oven function has been selected. You can set a period of time using the minute minder function a ill sound when this period of time has elapsed. Press the minute minder button, and then use the plus an minus buttons to set the length of time that you require. -
Page 13: Setting The Duration Function
This function will allow you to set a countdown time similar to the minute minder function. However the oven will no long ontinue to heat, once the countdown period has elapsed. Use the main oven control knob (4) to sele the temperature that you want to cook at. -
Page 14: Setting The End Cook Function
This function is similar to the duration function, however instead of selecting a period of time that you wish the oven to switch off after. You s elect the time of day that you wish the ven to switch off at. Use the main oven control knob (4) to sele the temperature that you want to cook at. -
Page 15: Setting The Start And End Time Function
This function will allow you to set a time in the future that the ven switches on at and a time that the oven will switch off at. Use the main oven control knob (4) to sele the temperature that you want to cook at. Press the duration button and the display will show a value of 00:00. -
Page 16: Cancelling An Automatic Cooking Function
If an automatic cooking function has been set and you wish to use the oven in manual operation e automatic cooking function. To select manual operation mode, press th cooking end time buttons simultaneously. The Auto function symbol will disappear from the timer and the manual operation symbol will appear instead. -
Page 17: Selecting A Cooking Function And Temperature
electing a cooking function and temperature IMPORTANT: Before attempting to select an oven function for the first time, you must set the time of day and select manual operation mode (see page 12). Selecting a main oven function and temperature oven functions OVEN LIGHT: Separate light control which allows switched on, even when the oven is not cooking. -
Page 18: Selecting An Oven Function And Temperature (Secondary Oven)
econdary oven functions To use one of the other functions, you shou 30°C and select the following functions:- OVEN LIGHT: Separate light control which allo switched on, even when the oven not cooking. LOWER ELEMENT ONLY: This method of cooking uses the lower element to direct heat upwards to th cooking recipes or for warming up meals. -
Page 19: Grill Thermostat Control Knob
If you turn this control knob clockwise, it will set the power level of the grill in the secondary oven. Number one is the low leven is the highest. The grill operating e grill is in use. ven operating lights (main and secondary oven) This light will come on to indicate that the oven’s heating elements are in operation. -
Page 20: Warnings
cooking, unless the instructions on the food packaging advise that you can “cook from frozen”. o Before cooking, check that any accessories that are not required are removed from the oven. o Place cooking trays in the centre of the oven and leave gaps between the trays to allow air to circulate. -
Page 21: Cleaning And Maintenance
Any damage that is caused to the appliance by a cleaning product will not be fixed by Baumatic free of charge, even if the appliance is within the guarantee period. -
Page 22: Replacing The Oven Bulb (Main And Secondary Oven)
IMPORTANT: The oven must be disconnected from your mains supply before you attempt to either remove or replace the oven bulb. o Replace the bulb with a 25 W/300°C, screw type pigmy. o Do not use any other type of bulb. o Place the lamp cover back into position. -
Page 23: Removing The Oven Door For Cleaning
To facilitate the cleaning of the inside of the oven and the outer frame of the oven, the door can be removed as follows:- o The hinges (A) have two movable bolts on them (B). o If you raise both of the movable bolts (B), then the hinges (A) are released from the oven housing. -
Page 24: Installation
Care must be taken to ensure that the temperature of the mains supply cable does not exceed 50°C. o If the mains supply cable is damaged, then it must be replaced by an appropriate replacement which can be obtained from the Baumatic Spares Department. -
Page 25: Connecting The Mains Supply Cable
This should be done before contacting the Baumatic Service Department. o IMPORTANT: The appliance must NOT be connected to the mains supply by means of a 13A plug and socket. -
Page 26: Installing The Oven Into The Kitchen Cabinet
Installing the oven into the kitchen cabinet Positioning the appliance o Ensure that the aperture that you will be fitting the oven into is of the size given in the above diagram. o The oven must be fitted into an oven housing with the ventilation cut-outs shown in the “Ventilation requirements”... -
Page 27: Installation Between Two Separate Cabinet Units
o Measure a distance of 717 mm from the underside of the work top and mark the position of the lower support brackets. o Fix the lower support brackets in this position to the side of the cabinet units. They need to be positioned 40 mm back from the front edge of the cabinet units o Mark the position of the side support brackets, ensuring that they are also positioned 40 mm back from the front edge of the... -
Page 28: Installation Between Two Side Panels And One Cabinet Unit
o Measure a distance of 717 mm from the underside of the work top and mark the position of the lower support brackets. o Fix the lower support brackets in this position to the side panels of the cabinet unit. They need to be positioned 40 mm back from the front edge of the side panels. -
Page 29: Ventilation Requirements
Ventilation requirements IMPORTANT: The ventilation requirements shown in the above drawing MUST be followed; otherwise the oven may not operate correctly. -
Page 30: My Appliance Isn't Working Correctly
My appliance isn’t working correctly o The oven isn’t coming on. * Check that the oven is in manual operation mode. * Check that you have selected a cooking function and a cooking temperature. o There appears to be no power to the oven and grill. * Check that the appliance has been connected to the electrical mains supply correctly. - Page 31 Or any installation other than the one specified by Baumatic Ltd. has been completed. Please refer to the conditions of guarantee that appear on the...
-
Page 32: Contact Details
(0118) 933 6933 E-mail: sales@baumatic.co.uk technical@baumatic.co.uk Website: www.baumatic.co.uk Republic of Ireland 01- 6266 798 Czech Republic Baumatic CR spol s.r.o. Amperova 495 46215, Librec Czech Republic +420 800 185 263 www.baumatic.cz Slovak Republic Baumatic Slovakia, s.r.o. Skultetyho 1 831 04 Bratislava 3...