Table of Contents
Advertisement
Available languages
Available languages
Quick Links
NEFB26H / NEFB30H
SAFETY INFORMATION
WARNING
!
FIRE OR EXPLOSION HAZARD
If the information in these instructions are
not followed exactly, a fi re or explosion may
result causing property damage, personal
injury, or loss of life.
- Do not store or use gasoline or other
fl ammable vapors and liquids in the vicinity of
this or any other appliance.
INSTALLER:
Leave this manual with the appliance
CONSUMER:
Retain this manual for future reference
Wolf Steel Ltd., 24 Napoleon Rd., Barrie, ON, L4M 0G8 Canada / 103 Miller Drive, Crittenden, Kentucky, USA, 41030
$10.00
MULTIPLE PRODUCT CODES (LEAVE BLANK IF N/A)
WARNING - KEEP BATTERIES OUT OF REACH OF CHILDREN
- SWALLOWING MAY LEAD TO SERIOUS INJURY IN AS LITTLE AS 2 HOURS
OR DEATH, DUE TO CHEMICAL BURNS AND POTENTIAL PERFORATION OF
THE OESOPHAGUS.
- IF YOU SUSPECT YOUR CHILD HAS SWALLOWED OR INSERTED A
BUTTON BATTERY, IMMEDIATELY SEEK URGENT MEDICAL ASSISTANCE.
- EXAMINE DEVICES AND MAKE SURE THE BATTERY COMPARTMENT IS
CORRECTLY SECURED, E.G. THAT THE SCREW OR OTHER MECHANICAL
FASTENER IS TIGHTENED. DO NOT USE IF COMPARTMENT IS NOT
SECURE.
- DISPOSE OF USED BUTTON BATTERIES IMMEDIATELY AND SAFELY. FLAT
BATTERIES CAN STILL BE DANGEROUS.
- TELL OTHERS ABOUT THE RISK ASSOCIATED WITH BUTTON BATTERIES
AND HOW TO KEEP THEIR CHILDREN SAFE.
Phone 1 (866) 820-8686 • www.napoleon.com • hearth@napoleon.com
INSTALLATION AND
ADD MANUAL TITLE
OPERATION MANUAL
Cineview™ Electric Appliance
WARNING!
ADD BUTTON BATTERY WARNING IF APPLICABLE
This appliance has a remote that requires button
batteries that are hazardous to young children.
CERTIFIED TO THE CANADIAN AND AMERICAN NATIONAL STANDARDS:
CERTIFIED TO THE CANADIAN AND AMERICAN NATIONAL STANDARDS:
IF INSTALLATION + OPERATION, ADD SERIAL
CSA /
INTERTEK
LOGO
BARCODE LABEL ON THE OWNER'S MANUAL"
Product Name / Code
(MUST use title from Price Book)
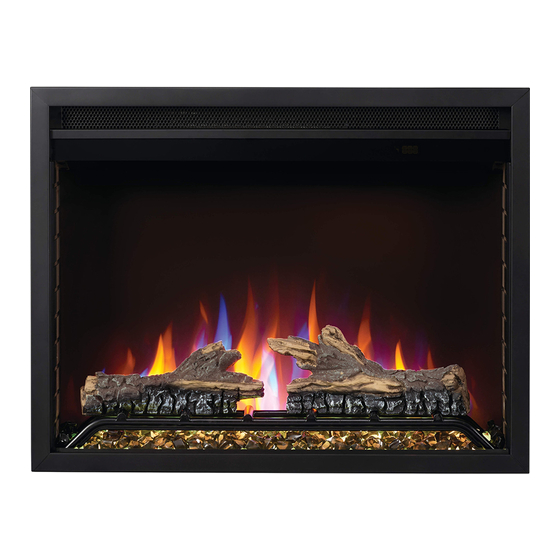
(NEFB26H Illustrated)
(IF MULTIPLE, _____ ILLUSTRATED)
ADD PRODUCT IMAGE
FOR INDOOR USE ONLY
CSA C22.2 NO. 46 / UL 2021
CSA 22.2 NO. 46 / UL 1278
NUMBER LABEL HERE
IF SEPARATE MANUALS, ADD "PLACE
ENGLISH
FRENCH PG. 27
AVERT
ENFANTS
- L'INGESTION P
HEURES OU LA
RATION POTEN
- SI VOUS PENS
BOUTON, CONS
- EXAMINEZ LES
BATTERIE EST B
EST SERRÉE. N
- ÉLIMINER LES
SÉCURITÉ. LES
- RENSEIGNEZ-
FAÇON DE GAR
W415-2945 / B / 12.22.20
Advertisement
Chapters
Table of Contents

Related Manuals for Napoleon Cineview NEFB26H


Summary of Contents for Napoleon Cineview NEFB26H
- Page 1 INTERTEK LOGO BARCODE LABEL ON THE OWNER’S MANUAL” Wolf Steel Ltd., 24 Napoleon Rd., Barrie, ON, L4M 0G8 Canada / 103 Miller Drive, Crittenden, Kentucky, USA, 41030 Phone 1 (866) 820-8686 • www.napoleon.com • hearth@napoleon.com $10.00 W415-2945 / B / 12.22.20...
- Page 2 safety information WARNING • If equipped with a heater, this appliance can be hot when operated and can cause severe burns if contacted. • Do not operate appliance before reading and understanding operating instructions. Failure to operate appliance according to operating instructions could cause fi re or injury. •...
- Page 3 • It is normal for your electric appliance to produce noise, especially when installed in a quiet space such as a bedroom. safety information WARNING • To prevent a possible fi re, do not block air intakes or exhaust in any manner. Do not use on soft surfaces, like a carpet, where openings may become blocked.
-
Page 4: Table Of Contents
table of contents general information dimensions hardware list listing approvals general instructions unpacking and testing appliance rating plate information label location locating appliance grounding appliance installation minimum clearance to combustibles minimum mantel clearances rough framing appliance installation and finishing electrical information 120V cord plug installation wiring diagram hard-wiring installation... -
Page 5: General Information
dimensions 1.0 general information dimensions SIDE VIEW 7 3/4” (197mm) FRONT VIEW 7 1/4” (185mm) 15 3/16” 20 5/16” (386mm) 19 5/8” (516mm) (498mm) TOP VIEW Ref. NEFB26H NEFB30H 23 15/16" 27 15/16" (607mm) (709mm) 26" 30" (660mm) (762mm) 24 3/4" 28 13/16"... -
Page 6: Listing Approvals
general information listing approvals This appliance has been tested in accordance with the CSA Standards for fixed and location-dedicated electric room appliances in the United States and Canada. If you need assistance during installation, please contact your local dealer. Model No. NEFB26H NEFB30H note:... -
Page 7: Rating Plate Information
DESIGNED IN NORTH AMERICA PAR WOLF STEEL LTD. BY WOLF STEEL LTD. MADE IN CHINA FABRIQUÉ EN CHINE WOLF STEEL LTD. 24 NAPOLEON ROAD, NEFB26H SERIAL NUMBER/NO. DE SÉRIE: BARRIE, ON, L4M 0G8 CANADA W385-2533 For rating plate location, see “label location” section. -
Page 8: Locating Appliance
2.0 locating appliance WARNING • Due to high temperatures, this electric appliance should be located out of traffic. Keep combustible materials such as furniture, pillows, bedding, papers, clothes and curtains at least 36” (91.4cm) from the front of the appliance. •... -
Page 9: Installation
3.0 installation WARNING • Risk of fi re! The power cord must not be pinched against a sharp edge. Secure cord to avoid tripping or snagging to reduce the risk of fi re, electric shock, or personal injury. Do not run cord under carpeting. Do not cover cord with throw rugs, runners, or similar items. -
Page 10: Rough Framing
installation rough framing WARNING • Select a location that is not prone to moisture and is located at least 36" (91.4cm) away from combustible materials such as curtains, drapes, furniture, bedding, paper, etc. note: It is recommended to complete finishing of the wall before fully securing the appliance. Once the rough framing and the finishing materials have been prepared and the power has been routed to the right side of the recess, the appliance may be installed. -
Page 11: Appliance Installation And Finishing
installation appliance installation and finishing 1. Remove the front decorative cover held in place by 2 magnets (Fig. 3-1). 2. With one hand on the glass door to prevent it from falling, remove the 2 screws holding the glass door in place (Fig. - Page 12 installation note: It is recommended to complete finishing of the wall before fully securing the appliance (Fig. 3-5). 6. Carefully lift the appliance into the finished framing (Fig. 3-6). Fig. 3-5 Fig. 3-6 7. Secure the appliance into the opening by installing 1 screw (supplied) through the mounting tab into the fram- ing material, working from inside the appliance (Fig.
- Page 13 installation 8. Reinstall brick panels if they have been removed (Fig. 3-8). Ensure the tabs fit into the slots along the bottom of the firebox (Fig. 3-9) before securing the brick panels in place using the 2 screws previously removed in step 4 (Fig.
-
Page 14: Electrical Information
4.0 electrical information 120V cord plug installation The factory default setting is 120 volt cord plug installation configuration. Simply plug the appliance to a grounded 120V, 15 amp outlet box. note: This appliance must be connected to a dedicated 15 amp circuit. The use of an extension cord is NOT permitted. -
Page 15: Hard-Wiring Installation
electrical information hard-wiring installation WARNING • Turn off the appliance completely and let cool before servicing. Only a qualified service person should service and repair this electric appliance. HARD-WIRING CONNECTION If it is necessary to hard-wire this appliance, a qualified electrician must remove the cord connection, and wire the appliance directly to the household wiring. -
Page 16: Finishing
5.0 finishing WARNING • Power supply service must be completed prior to finishing to avoid reconstruction. • Heat vents and air openings cannot be covered in any circumstances. note: Multiple media options are provided. crystal installation 1. Remove glass door (see "installation" section). 2. -
Page 17: Operating Instructions
6.0 operating instructions WARNING • Ensure the house circuit breakers for the circuit supply are turned on. When initially connecting the appliance to a power source, the appliance will make a beeping sound to indicate standby mode. Once the appliance has been plugged into a grounded electrical outlet or hard-wired to a dedicated 120V power supply, it is ready to operate. -
Page 18: Operating Remote Control
operating instructions operating remote control note: When operating the remote control, it must be directed towards the front of the control panel. Turns the appliance on / off. Power Controls blue flame brightness. Settings: BF4 - Brightest flame Blue BF3 - Bright flame Flame BF2 - Dim flame BF1 - Dimmest flame... - Page 19 operating instructions Turns the heater and blower on/off. Settings: H-0 - Heater and blower off FAN - Blower on H-1 - Heater on Heater NOTE: Heater function can be disabled / enabled by holding the button for 5s. When the heater function is disabled, "LOC" will be displayed.
-
Page 20: Remote Battery Installation
operating instructions remote battery installation WARNING • This remote control requires button batteries that are hazardous to young children. • WARNING! KEEP BATTERIES OUT OF REACH OF CHILDREN. WARNING! AVER • Swallowing may lead to serious injury or death in as little as 2 hours due to chemical burns and potential perforation of the oesophagus. -
Page 21: Replacement Parts
8.0 replacement parts WARNING • Failure to position the parts in accordance with this manual or failure to use only parts specifi cally approved with this appliance may result in property damage or personal injury. Contact your dealer for questions concerning prices and policies on replacement parts. Normally, all parts can be ordered through your Authorized dealer / distributor. -
Page 22: Overview
replacement parts W415-2945 / B / 12.22.20... -
Page 23: Troubleshooting
9.0 troubleshooting WARNING • Turn off the appliance completely and let cool before servicing. Only a qualifi ed service person should service and repair this electric appliance. symptom problem solution Appliance will not Appliance is not plugged into an Check plug, and plug in the appliance if necessary. come on when electrical outlet. - Page 24 Main PCB board issue. Inspect the main PCB board and replace, if necessary. Flame does not Motor is stalled/malfunctioning. Cycle on/off. If problem persists, consult dealer. troubleshooting move. Ember bed is Brightness not selected. See “operation” section. not glowing or Ember LED issue.
-
Page 25: Warranty
Notwithstanding any provisions contained in the Standard Warranty, Napoleon responsibility under this warranty is defi ned as above, and it shall not in any event extend to any incidental, consequential, or indirect damages. - Page 26 NAPOLEON CELEBRATING OVER 40 YEARS OF HOME COMFORT PRODUCTS 7200, Route Transcanadienne, Montréal, Québec H4T 1A3 24 Napoleon Road, Barrie, Ontario, Canada L4M 0G8 214 Bayview Drive, Barrie, Ontario, Canada L4N 4Y8 103 Miller Drive, Crittenden, Kentucky, USA 41030 De Riemsdijk 22, 4004 LC Tiel, The Netherlands Phone: 1-866-820-8686 napoleon.com...
- Page 27 IF SEPARATE MANUALS, ADD “PLACE LOGO BARCODE LABEL ON THE OWNER’S MANUAL” Wolf Steel Ltd., 24 Napoleon Rd., Barrie, ON, L4M 0G8 Canada / 103 Miller Drive, Crittenden, Kentucky, USA, 41030 SERIENNUMMER VOM KARTON AUFBRINGEN Téléphone 1 (866) 826 8686 • www.napoleon.com • hearth@napoleon.com $10.00...
- Page 28 consignes de sécurité AVERTISSEMENT • Si équipé avec un chauffage, cet appareil peut être chaud lorsqu’il fonctionne et peut causer de graves brûlures en cas de contact. • Ne faites pas fonctionner l’appareil avant d’avoir lu et compris les instructions d’utilisation. L’incapacité de respecter les instructions pourrait causer un incendie ou des blessures corporelles.
- Page 29 consignes de sécurité AVERTISSEMENT • Pour prévenir les risques d’incendie, ne bloquez pas les entrées d’air et les sorties d’air de quelque manière que ce soit. Ne placez pas cet appareil sur une surface molle telle qu’un tapis où les ouvertures pourraient se bloquer.
- Page 30 table de matières information générale dimensions liste de pièces homologations instructions générales déballage et test de l'appareil information à propos de la plaque d'homologation emplacement des étiquettes emplacement de l'appareil mise à la terre de l'appareil installation dégagements minimaux aux combustibles dégagements minimaux à...
-
Page 31: Information Générale
dimensions 1.0 information générale dimensions VUE DE CÔTÉ 7 3/4” (197mm) VUE DE FACE 7 1/4” (185mm) 15 3/16” 20 5/16” (386mm) 19 5/8” (516mm) (498mm) VUE DE DESSUS Réf. NEFB26H NEFB30H 23 15/16" 27 15/16" (607mm) (709mm) 26" 30" (660mm) (762mm) 24 3/4"... -
Page 32: Homologations
information générale homologations Cet appareil a été testé selon les normes CSA pour foyers électriques installés de façon permanente aux États- Unis et au Canada. Si vous avez besoin d'assistance durant l'installation, veuillez contacter votre détaillant local. N° de Modèle NEFB26H NEFB30H note:... -
Page 33: Information À Propos De La Plaque D'homologation
PAR WOLF STEEL LTD. BY WOLF STEEL LTD. MADE IN CHINA FABRIQUÉ EN CHINE WOLF STEEL LTD. 24 NAPOLEON ROAD, NEFB26H SERIAL NUMBER/NO. DE SÉRIE: BARRIE, ON, L4M 0G8 CANADA W385-2533 Pour l'emplacement de la plaque d'homologation, voir la section « emplacement des étiquettes ». -
Page 34: Emplacement De L'appareil
2.0 emplacement de l'appareil AVERTISSEMENT • En raison des températures élevées, l'appareil devrait être placé loin des endroits passants. Gardez tous les articles combustibles tels que les meubles, les oreillers, la literie, le papier, les vêtements, et les rideaux à une distance d'au moins 36"... -
Page 35: Installation
3.0 installation AVERTISSEMENT • Risque d’incendie! Le cordon d’alimentation ne doit pas être coincé contre une arrète vive. Fixez le cordon pour éviter les chutes ou les accrochages afi n de réduire le risque d’incendie, de choc électrique ou de blessures corporelles. -
Page 36: Charpente Approximatif
installation charpente approximatif AVERTISSEMENT • Sélectionnez un emplacement non sujet à l'humidité et situé à au moins 91,4 cm (36 po) de matériaux combustibles tels que rideaux, meubles, literie, papier, etc. note: Il est recommandé de terminer la finition du mur avant de fixer complètement l'appareil. Une fois que la charpente approximatif et les matériaux de finition ont été... -
Page 37: Installation Et Finition De L'appareil
installation installation et finition de l'appareil 1. Retirez le couvercle décoratif avant maintenu en place par 2 aimants (Fig. 3-1). 2. Avec une main sur la porte vitrée pour éviter qu'elle ne tombe, retirez les 2 vis maintenant la porte vitrée en place (Fig. - Page 38 installation note: Il est recommandé de terminer la finition du mur avant de fixer complètement l'appareil (Fig. 3-5). 6. Soulevez délicatement l'appareil dans la charpente finie (Fig. 3-6). Fig. 3-5 Fig. 3-6 7. Fixez l'appareil dans l'ouverture en installant 1 vis (fournie) à travers la languette de montage dans le matériau de charpente, en travaillant de l'intérieur de l'appareil (Fig.
- Page 39 installation 8. Réinstallez les panneaux latéraux en brique s'ils ont été retirés (Fig. 3-8). Assurez-vous que les languettes s'insèrent dans les fentes le long du bas de la chambre de combustion (Fig. 3-9) avant de fixer les panneaux latéraux en brique en place à l'aide des 2 vis précédemment retirées à l'étape 4 (Fig. 3-10). Charpente Charpente cachée...
-
Page 40: Informations Électriques
4.0 informations électriques Installation de la fiche du cordon 120 V Le réglage d'usine par défaut est la configuration d'installation de la fiche du cordon de 120 volts. Branchez simplement l'appareil à une prise de courant de 120 V et 15 ampères mise à la terre. note: Cet appareil doit être connecté... -
Page 41: Branchement Par Câble
informations électriques branchement par câble AVERTISSEMENT • Éteignez complètement l'appareil et laissez-le refroidir avant de le réparer. Seul un technicien qualifié doit entretenir et réparer cet appareil électrique. BRANCHEMENT PAR CÂBLE S'il est nécessaire de câbler cet appareil, un électricien qualifié doit retirer le cordon d'alimentation et câbler l'appareil directement au câblage domestique. -
Page 42: Finition
5.0 finition AVERTISSEMENT • Le service d'alimentation électrique doit être terminé avant la finition pour éviter la reconstruction. • Les évents de chaleur et les ouvertures d'aération ne peuvent en aucun cas être couverts. note: Plusieurs options multimédias sont fournies. installation des cristaux 1. -
Page 43: Instructions De Fonctionnement
6.0 instructions de fonctionnement AVERTISSEMENT • Assurez-vous que les disjoncteurs de la maison pour l'alimentation du circuit sont allumés. Lors de la connexion initiale de l'appareil à une source d'alimentation, l'appareil émet un bip pour indiquer le mode veille. Une fois l'appareil branché sur une prise électrique mise à la terre ou câblé à un Alimentation 120V, il est prêt à... -
Page 44: Fonctionnement De La Télécommande
instructions de fonctionnement fonctionnement de la télécommande note: Lors de l'utilisation de la télécommande, elle doit être dirigée vers l'avant du panneau de commande. Allume / éteint l'appareil. Alimentation Contrôle la luminosité de la flamme bleue. Réglages: BF4 - La flamme la plus brillante Flamme BF3 - Flamme brillante Bleue... - Page 45 instructions de fonctionnement Allume / éteint le chauffage et le ventilateur. Réglages: H-0 - Chauffage et ventilateur éteints FAN - Ventilateur allume H-1 - Chauffage allume Chauffage NOTE: La fonction de chauffage peut être désactivée / activée en maintenant le bouton enfoncé pendant 5 s. Lorsque la fonction de chauffage est désactivée, "LOC"...
-
Page 46: Installation Des Piles De La Télécommande
instructions de fonctionnement installation des piles de la télécommande AVERTISSEMENT • Cette télécommande nécessite des piles bouton qui sont dangereuses pour les jeunes enfants. WARNING! AVER • AVERTISSEMENT! GARDER LES PILES HORS DE LA PORTÉE DES ENFANTS. • La déglutition peut entraîner des blessures graves ou la mort en aussi peu que 2 heures en raison de brûlures chimiques et d'une perforation potentielle de l'œsophage. -
Page 47: Pièces De Rechange
8.0 pièces de rechange AVERTISSEMENT • Omettre de positionner les pièces conformément à ce manuel ou d’utiliser uniquement des pièces spécifi quement approuvées pour cet appareil peut causer des dommages matériels ou des blessures corporelles. Contactez votre détaillant pour les questions concernant les prix et la disponibilité des pièces de remplace- ment. -
Page 48: Vue D'ensemble
pièces de rechange W415-2945 / B / 12.22.20... -
Page 49: Guide De Dépannage
9.0 guide de dépannage AVERTISSEMENT • Coupez l’alimentation électrique à l’appareil et laissez-le refroidir avant d’effectuer un entretien. Seulement un technicien de service qualifi é peut effectuer l’entretien ou la réparation de cet appareil électrique. symptôme problème solution L’appareil L’appareil n’est pas branché Vérifi ez la prise, et branchez dans l’appareil si nécessaire. - Page 50 AVERTISSEMENT nécessaire. La chauffage La salle est trop chaude. L’appareil est équipé d’un thermostat intégré et s’éteindra • Coupez l’alimentation électrique à l’appareil et laissez-le refroidir avant d’effectuer un entretien. Seulement un s’éteint automatiquement lorsque la température programmée sera guide de dépannage technicien de service qualifi é...
-
Page 51: Garantie
Toutes les spécifi cations et les conceptions sont sujettes àmodifi cations sans préavis en raison des améliorations constantes apportées aux produits. Napoléon est une marque de commerce déposée de Wolf Steel Ltée. 2.5C - renamed template from Napoleon Electric to Napoleon Electric_Limited (CN 20800) W415-2945 / B / 12.22.20 $799 MSRP OR... - Page 52 NAPOLÉON CÉLÈBRE PLUS DE 40 ANS D’EXISTENCE CONSACRÉS À LA CONCEPTION DE PRODUITS DE CONFORT 7200, Route Transcanadienne, Montréal, Québec H4T 1A3 24 Napoleon Road, Barrie, Ontario, Canada L4M 0G8 214 Bayview Drive, Barrie, Ontario, Canada L4N 4Y8 103 Miller Drive, Crittenden, Kentucky, USA 41030 De Riemsdijk 22, 4004 LC Tiel, Pays-Bas Téléphone: 1-866-820-8686...