Table of Contents
Advertisement
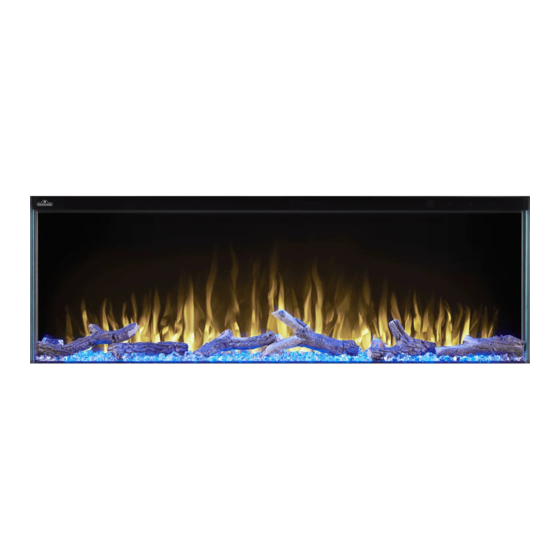
NEFB50H-3SV / NEFB60H-3SV
SAFETY INFORMATION
WARNING
!
FIRE OR EXPLOSION HAZARD
If the information in these instructions are
not followed exactly, a fi re or explosion may
result causing property damage, personal
injury, or loss of life.
- Do not store or use gasoline or other
fl ammable vapors and liquids in the vicinity of
this or any other appliance.
INSTALLER:
Leave this manual with the appliance
CONSUMER:
Retain this manual for future reference
Wolf Steel Ltd., 24 Napoleon Rd., Barrie, ON, L4M 0G8 Canada / 103 Miller Drive, Crittenden, Kentucky, USA, 41030
$10.00
MULTIPLE PRODUCT CODES (LEAVE BLANK IF N/A)
Phone 1 (866) 820-8686 • www.napoleon.com • hearth@napoleon.com
INSTALLATION AND
ADD MANUAL TITLE
OPERATION MANUAL
ADD BUTTON BATTERY WARNING IF APPLICABLE
This appliance has a remote that requires button
batteries that are hazardous to young children.
CERTIFIED TO THE CANADIAN AND AMERICAN NATIONAL STANDARDS:
CERTIFIED TO THE CANADIAN AND AMERICAN NATIONAL STANDARDS:
IF INSTALLATION + OPERATION, ADD SERIAL
CSA /
INTERTEK
LOGO
BARCODE LABEL ON THE OWNER'S MANUAL"
TriVista™ Series
Product Name / Code
(MUST use title from Price Book)
(NEFB60H-3SV llustrated)
(IF MULTIPLE, _____ ILLUSTRATED)
ADD PRODUCT IMAGE
FOR INDOOR USE ONLY
CSA 22.2 NO. 46 / UL 1278
CSA 22.2 NO. 46 / UL 2021
NUMBER LABEL HERE
IF SEPARATE MANUALS, ADD "PLACE
ENGLISH
FRENCH PG. 35
W415-1953 / 02.27.19
Advertisement
Table of Contents

Related Manuals for Napoleon TriVista Series


Summary of Contents for Napoleon TriVista Series
- Page 1 IF SEPARATE MANUALS, ADD “PLACE INTERTEK LOGO BARCODE LABEL ON THE OWNER’S MANUAL” Wolf Steel Ltd., 24 Napoleon Rd., Barrie, ON, L4M 0G8 Canada / 103 Miller Drive, Crittenden, Kentucky, USA, 41030 Phone 1 (866) 820-8686 • www.napoleon.com • hearth@napoleon.com $10.00 W415-1953 / 02.27.19...
-
Page 2: Safety Information
safety information WARNING • If equipped with a heater, this appliance can be hot when operated and can cause severe burns if contacted. • Do not operate appliance before reading and understanding operating instructions. Failure to operate appliance according to operating instructions could cause fi re or injury. •... - Page 3 safety information WARNING • To prevent a possible fi re, do not block air intakes or exhaust in any manner. Do not use on soft surfaces, like a carpet, where openings may become blocked. • These appliances are tested and listed for use only with the optional accessories listed in these instructions. Use of optional accessories not specifi...
-
Page 4: Table Of Contents
table of contents general information dimensions listing approvals general instructions unpacking the appliance hardware list rating plate information label location installation overview installation locating the appliance grounding the appliance minimum clearance to combustibles minimum mantel clearances rough framing three-sided, two-sided, and single-sided viewing pre-installation three-sided, two-sided, and single-sided viewing installation 3.7.1 three-sided viewing installation 3.7.2 two-sided viewing installation... -
Page 5: General Information
dimensions 1.0 general information dimensions W415-1953 / 02.27.19... -
Page 6: Listing Approvals
general information listing approvals Model No. NEFB50H-3SV NEFB60H-3SV 50” three-sided viewing 60” three-sided viewing Description electric appliance electric appliance Voltage 120V/240V AC Watts Max. 1500W/3000W Amps 15 AMP grounded circuit Appliance Width 50” (127cm) 60” (152.4cm) Appliance Height 21 1/4” (53.9cm) Appliance Depth 9 1/2”... -
Page 7: Unpacking The Appliance
general information unpacking the appliance Ensure to unpack this appliance with 2 people. Reference the hardware list (see “hardware list” section) to prepare for installation. Manual, Remote, and Glass Cleaning Cloth Outer Box Exact packaging location may vary. Some packaging has been hidden for clarity. -
Page 8: Rating Plate Information
DÉSIGNÉ EN AMÉRIQUE DE BY WOLF STEEL LTD. NORD PAR WOLF STEEL LTD. MADE IN CHINA FABRIQUÉ EN CHINE WOLF STEEL LTD. 24 NAPOLEON ROAD, BARRIE, ON, L4M 0G8 CANADA NEFB50H SERIAL NUMBER/NO. DE SÉRIE: W385-2354 note: The rating plate must remain with the appliance at all times. It must not be removed. -
Page 9: Installation Overview
2.0 installation overview Your appliance is capable of three unique installation configurations: three-sided, two-sided, and single-sided. Three-Sided Viewing Installation • Appliance is fully recessed into the wall with both sides open • Front, left, and right side views Two-Sided Viewing Installation •... -
Page 10: Installation
3.0 installation WARNING • Risk of fi re! The power cord must not be pinched against a sharp edge. Secure cord to avoid tripping or snagging to reduce the risk of fi re, electric shock, or personal injury. Do not run cord under carpeting. Do not cover cord with throw rugs, runners, or similar items. -
Page 11: Grounding The Appliance
installation grounding the appliance WARNING • A bonded/grounded power source is mandatory for this appliance. • This appliance must be connected to a dedicated 15 amp circuit. The use of an extension cord is NOT permitted. minimum clearance to combustibles Clearance to Combustibles Bottom, Sides, Back, and Top 0”... -
Page 12: Rough Framing
installation rough framing Ceiling Image is for illustrative purposes only. 9 3/4” Drywall (24.8cm) 21 1/2” (54.6cm) Insulation Ref. NEFB50H-3SV NEFB60H-3SV 49” (124.5cm) 59” (149.8cm) note: Appliance is NOT load-bearing. Carefully consider weight of fi nishing materials when constructing rough framing. Ensure installation complies with all local building codes and requirements. -
Page 13: Three-Sided, Two-Sided, And Single-Sided Viewing Pre-Installation
installation three-sided, two-sided, and single-sided viewing pre-installation 1. Remove the 12 screws from the top and bottom of the appliance (Fig. 3-1). 2. Install the 6 metal brackets (supplied) using the 12 screws previously removed (Fig. 3-2). C x 6 Fig. -
Page 14: Three-Sided, Two-Sided, And Single-Sided Viewing Installation
installation three-sided, two-sided, and single-sided viewing installation 3.7.1 three-sided viewing installation note: When installed with both sides open, the appliance will have a front view, as well as left- and right-sided views. 1. Re-secure both side trims using the 14 screws previously removed (Fig. 3-4). Side Trim Side Trim... -
Page 15: Single-Sided Viewing Installation
installation 3.7.3 single-sided viewing installation note: When installed fully recessed into the wall with both left and right sides covered, the appliance will have a front view only. 1. Re-secure both side panels using the 14 screws previously removed (Fig. 3-6). Side Panel Side Panel... -
Page 16: Electrical Information
4.0 electrical information WARNING • Turn off the appliance completely and let cool before servicing. Only a qualifi ed person should service and repair this electric appliance. NEFB50H-3SV wiring diagram 120V AC 240V AC W415-1953 / 02.27.19... -
Page 17: Nefb60H-3Sv Wiring Diagram
electrical information NEFB60H-3SV wiring diagram 120V AC 240V AC W415-1953 / 02.27.19... -
Page 18: Hard-Wiring Introduction
electrical information hard-wiring introduction WARNING • Turn off the appliance completely and let cool before servicing. Only a qualifi ed person should service and repair this electric appliance. HARD-WIRING CONNECTION It is necessary to hard-wire this appliance. A qualified electrician must wire the appliance directly to the household wiring. -
Page 19: 240V Hard-Wiring
2. Turn on the power supply and test all functions of the appliance (see “operation instructions” section). note: If any functions do not operate to the specifi cations of this manual, review wire confi gurations and/or call Napoleon Customer Solutions. 3. Install fi nishing materials (see “fi nishing” section). W415-1953 / 02.27.19... -
Page 20: Operating Instructions
5.0 operating instructions WARNING • Ensure the house circuit breakers for the power supply are turned on. When initially connecting the appliance to a power source, the appliance will make a beeping sound to indicate standby mode. Once the appliance has been hard-wired to a dedicated 120V / 240V power supply, it is ready to operate. -
Page 21: Operating Remote Control
operating instructions operating remote control Power Turns the appliance on / off. Ember Bed Controls the colour of the ember Color bed. Blue Flame Controls fl ame brightness. Settings: 01 - Yellow Settings: 02 - Red F0 - Flame off 03 - Blue Orange Flame F1 - Small fl... -
Page 22: Remote Battery Installation
operating instructions remote battery installation WARNING • This remote control requires button batteries that are hazardous to young children. • WARNING! KEEP BATTERIES OUT OF REACH OF CHILDREN. • Swallowing may lead to serious injury or death in as little as 2 hours due to chemical burns and potential perforation of the oesophagus. -
Page 23: Finishing
6.0 fi nishing WARNING • Risk of fi re! • Never obstruct the front opening of the appliance. • Do not strike, slam, or scratch. Do not operate appliance with glass removed or cracked. • Facing and/or fi nishing material must never overhang into the appliance opening. •... -
Page 24: Installing Combustible And Non-Combustible Materials
fi nishing 6.1.2 installing combustible and non-combustible materials 1. Install combustible and non-combustible materials (i.e. plywood, drywall, cement board, etc.) onto the rough- in framing, ensuring the materials are fl ush with the fi nishing edge trim of the appliance. note: Decorative materials such as brick, marble, granite, and tile must be installed on plywood/drywall/cement board, etc. -
Page 25: Media Installation
fi nishing media installation 1. Place the glass media holder in position (Fig. 6-1). 2. Apply an even layer of small crystals along the glass media holder (Fig. 6-2). 3. Place the driftwood logs on top of the small crystals (see Fig. 6-3 and 6-4 for recommended log placement) OR place the large crystals on top of the small crystals. -
Page 26: Front Glass Installation / Removal
fi nishing front glass installation / removal 1. Place the front glass into the track located inside the fi rebox (Fig. 6-5). 2. Tilt the front glass forward (Fig. 6-6). 3. Secure the fl athead screws (supplied) through the bracket holes (Fig. 6-7). 4. -
Page 27: Replacement Parts
8.0 replacement parts WARNING • Failure to position the parts in accordance with this manual or failure to use only parts specifi cally approved with this appliance may result in property damage or personal injury. Contact your dealer for questions concerning prices and policies on replacement parts. Normally, all parts can be ordered through your Authorized dealer / distributor. -
Page 28: Nefb50H-3Sv Overview
replacement parts W415-1953 / 02.27.19... -
Page 29: Nefb60H-3Sv Overview
replacement parts W415-1953 / 02.27.19... -
Page 30: Troubleshooting
9.0 troubleshooting WARNING • Turn off the appliance completely and let cool before servicing. Only a qualifi ed service person should service and repair this electric appliance. symptom problem solution Appliance will not Appliance is not plugged into an Check plug, and plug in the appliance if necessary. come on when electrical outlet. - Page 31 troubleshooting symptom problem solution Ember bed is Brightness not selected. See “operation” section. not glowing or Ember LED issue. Inspect the ember bed LEDs and replace, if necessary. dimming. Main PCB board issue. Inspect the main PCB board and replace, if necessary. LED fl...
-
Page 32: Warranty
Notwithstanding any provisions contained in the Limited Warranty, Napoleon responsibility under this warranty is defi ned as above, and it shall not in any event extend to any incidental, consequential, or indirect damages. -
Page 33: Notes
11.0 notes W415-1953 / 02.27.19... - Page 34 NAPOLEON CELEBRATING OVER 40 YEARS OF HOME COMFORT PRODUCTS 7200, Route Transcanadienne, Montréal, Québec H4T 1A3 24 Napoleon Road, Barrie, Ontario, Canada L4M 0G8 214 Bayview Drive, Barrie, Ontario, Canada L4N 4Y8 103 Miller Drive, Crittenden, Kentucky, USA 41030 Phone: 1-866-820-8686...