Table of Contents
Advertisement
Available languages
Available languages
Advertisement
Chapters
Table of Contents

Related Manuals for Candy GVW 485T-S


Summary of Contents for Candy GVW 485T-S
- Page 2 Grazie per aver scelto una lavatrice Candy Indicazioni ambientali che, siamo certi, sarà un prezioso alleato per lavare in tutta tranquillità la biancheria Questo elettrodomestico è di tutti i giorni, anche la più delicata. marcato conformemente alla Direttiva Europea 2002/96/CE sui È...
- Page 3 1. NORME GENERALI DI bambini dovrebbero essere l supervisionati per assicurarsi che SICUREZZA non giochino con l'apparecchio. Questo apparecchio è destinato l I bambini di età inferiore a 3 anni l ad uso in ambienti domestici e devono essere tenuti lontano dalla simili come per esempio: macchina, meno...
- Page 4 Oggetti come gomma espansa l (schiuma di lattice), le cuffie per la ATTENZIONE: doccia, materiali tessili arrestare impermeabili, gli articoli con un lavasciuga prima della fine del lato di gomma e i vestiti o i cuscini ciclo d'asciugatura, a meno che hanno delle parti in schiuma tutti articoli...
- Page 5 Non lasciare la lavatrice esposta l Prescrizioni di sicurezza a pioggia, sole o ad altri agenti atmosferici. Prima di qualsiasi intervento di l In caso di trasloco, non sollevare la l pulizia manutenzione della lavatrice dalle manopole né dal lavatrice, togliere la spina e chiudere cassetto del detersivo;...
- Page 6 2. INSTALLAZIONE Tagliare le fascette ferma-tubo, l prestando attenzione danneggiare il tubo e il cavo elettrico. Svitare le 2 o 4 viti (A) sul lato l posteriore e rimuovere i 2 o 4 distanziali (B) come in figura 1. Richiudere i 2 o 4 fori utilizzando i l...
- Page 7 Collegamento idraulico l Allacciare il tubo dell’acqua al rubinetto, utilizzando solamente il tubo di scarico in dotazione con la lavatrice (fig. 3). NON APRIRE IL RUBINETTO. l In alcuni modelli, potrebbero essere presenti più delle seguenti caratteristiche: l HOT&COLD (fig. 4): predisposizione al collegamento alla rete idrica con acqua calda e fredda per un maggiore risparmio energetico.
- Page 8 l Livellare la macchina agendo sui piedini come in figura 8: a.girare in senso orario il dado per sbloccare la vite; b.ruotare il piedino e farlo salire o scendere finché non aderisce al suolo; c.bloccare infine il piedino, riavvitando il dado, fino a farlo aderire al fondo della lavatrice.
- Page 9 3. CONSIGLI PRATICI Quale temperatura lavaggio selezionare? l Indicazioni sul carico L’utilizzo di smacchiatori prima del lavaggio in lavabiancheria riduce la necessità di lavare a temperature superiori a 60°C. È possibile ATTENZIONE: durante la selezione del risparmiare fino al 50% utilizzando la bucato, assicurarsi: temperatura di lavaggio di 60°C anziché...
- Page 10 4. PULIZIA E MANUTENZIONE ORDINARIA Per la pulizia del mobile esterno della lavatrice, utilizzare panno umido, evitando abrasivi, alcol e/o diluenti. La lavatrice ha bisogno di poche accortezze per una pulizia ordinaria: pulizia vaschette e pulizia filtro; di seguito vengono indicati anche suggerimenti in caso di traslochi o lunghi periodi di fermo macchina.
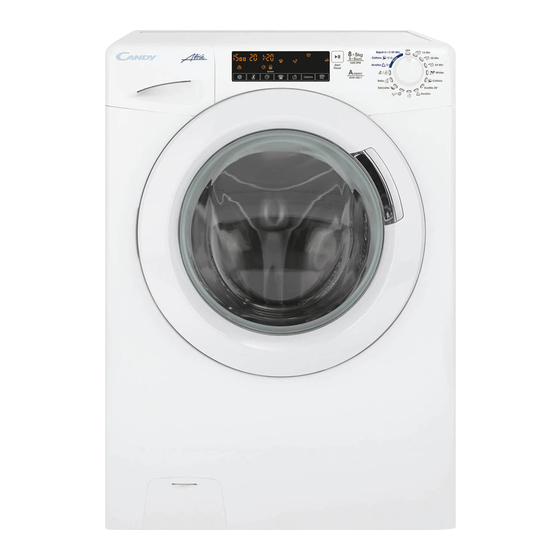
- Page 11 5. GUIDA RAPIDA ALL'USO 6. COMANDI E PROGRAMMI Questa lavatrice è in grado di adattare automaticamente il livello dell’acqua al tipo e alla quantità della biancheria. Questo sistema porta ad una diminuzione dei consumi d’energia e ad una riduzione sensibile dei tempi di lavaggio. Selezione del programma l...
- Page 12 l A fine ciclo spegnere la lavabiancheria portando la manopola programmi in ATTENZIONE: posizione OFF. Non toccare il display all'inserimento della spina perché la macchina, nei primi secondi, effettua un'autocalibrazione La manopola programmi deve essere che potrebbe essere interrotta: se ciò sempre portata in posizione di OFF avvenisse la macchina potrebbe non alla fine di un lavaggio e prima di...
- Page 13 l CANCELLAZIONE PROGRAMMA IMPOSTATO Per la salvaguardia dei tessuti, non è possibile aumentare la temperatura oltre l Per annullare il programma, portare il la massima prevista per ogni programma. selettore in posizione OFF. Tasto PARTENZA DIFFERITA I tasti opzione devono essere selezionati prima di premere il tasto AVVIO/PAUSA.
- Page 14 l - CICLO NOTTE Al momento della selezione di un programma, l verrà automaticamente indicato il livello di Questa opzione limita le centrifughe sporco impostato per quel programma tramite intermedie a 400 giri, dove previsto, l’accensione della relativa spia. aumenta il livello d’acqua nei risciacqui e lascia i capi immersi nell’acqua alla fine l...
- Page 15 2) GIRI CENTRIFUGA Display Il sistema di segnalazione del display consente di essere costantemente informati sul funzionamento dell’apparecchio. Indica velocità centrifuga programma selezionato che può essere variata o annullata, tramite l'apposito tasto. 3) TEMPERATURA DI LAVAGGIO 1) SPIA PORTA BLOCCATA Indica temperatura lavaggio...
- Page 16 5) LIVELLO DI SPORCO 9) PARTENZA DIFFERITA l momento della selezione Lampeggia quando è impostata la partenza programma, verrà automaticamente indicato differita. il livello di sporco impostato per quel programma, tramite l’accensione della relativa 10) Kg Check (attiva solo nei programmi spia.
- Page 17 11) SPIE PROGRAMMI DI ASCIUGATURA L’apparecchio calcola tale tempo in base a un carico standard, ma durante il ciclo la macchina corregge il tempo seconda volume della composizione del carico. Programmi a tempo Le spie indicano il tipo di programma di asciugatura.
- Page 18 Tabella programmi TEMP.°C DETERSIVO kg * PROGRAMMA (MAX.) Consigliata Max. Rapido 14 Min 30° 30° Rapido 30 Min 30° 30° Rapido 44 Min 30° 40° Cotone 60° 90° Resistente Cotone** 40° 60° EcoMix 20° 20° 20° Misti 40° 60° Risciacqui Scarico + Centrifuga Delicati...
- Page 19 In tutti i programmi è possibile ridurre la velocità della centrifuga secondo il consiglio del fabbricante del tessuto, oppure per capi molto delicati eliminare la fase di centrifuga. Questa funzione è attivabile con il tasto SELEZIONE CENTRIFUGA. Se l’etichetta non riporta alcuna indicazione è possibile centrifugare alla massima velocità...
- Page 20 Scarico + Centrifuga Selezione programmi Tramite questo programma la macchina effettuerà direttamente lo scarico dell’acqua Per trattare i vari tipi di tessuto e le varie e una centrifuga ad alta velocità. Qualora si gradazioni di sporco, la lavatrice è dotata di voglia effettuare solo lo scarico o ridurre programmi specifici, adatti ad ogni esigenza l’intensità...
- Page 21 Misti Lavasciuga 59 Min Programma asciugatura bassa Un programma completo di lavaggio e temperatura, consigliato per tessuti misti asciugatura rapida della durata di circa 59’. (sintetici/cotone) e sintetici (fare sempre È ideale per ottenere capi puliti ed asciutti riferimento alle etichette dei tessuti). che desideriamo indossare immediatamente.
- Page 22 7. CICLO DI ASCIUGATURA Sintetici: camicette, camicie, tute, ecc… fatte di poliestere o poliammide, così l come per misti cotone/sintetici. Le indicazioni fornite sono generali, sarà necessaria un po’ di pratica per un funzionamento ottimale dell’asciugatura. l Asciugare solo biancheria già...
- Page 23 l l Chiudere l’oblò. La spia del programma di asciugatura rimarrà accesa fino alla fase raffreddamento che verrà segnalata con l Ruotare la manopola programmi sul l’accensione della relativa spia. programma di asciugatura più adatto alla biancheria caricata. l Alla fine del programma sul display viene visualizzata la scritta "End".
- Page 24 l 8. CICLO AUTOMATICO DI Premere il tasto di AVVIO/PAUSA. LAVAGGIO/ASCIUGATURA l La manopola programmi rimarrà ferma sul programma selezionato sino alla fine del ciclo. Il ciclo completo può essere eseguito solo con un carico di biancheria che l Al termine della fase di lavaggio, sul non ecceda il massimo asciugabile display verrà...
- Page 25 9. CENTRO ASSISTENZA TECNICA E GARANZIA Nel caso si pensi che la lavatrice non funzioni in modo corretto, consultare la breve guida sotto riportata, con alcuni suggerimenti pratici per risolvere le anomalie più comuni. Problema Possibili cause e soluzioni pratiche lavatrice Verificare che la spina sia inserita in modo corretto.
- Page 26 Centro Assistenza Tecnica Candy. È inoltre possibile aderire al piano di assistenza Candy, in modo da ricevere il supporto operatore specializzato gratuitamente a domicilio anche nel momento in cui il prodotto risulti fuori dai termini legali di garanzia.
-
Page 28: Table Of Contents
Thank-you for choosing a Candy washing Environmental conditions machine. We are confident it will loyally assist you in safely washing your clothes, This appliance marked even delicates, day after day. according to the European directive 2002/96/EC on Waste Electrical and... -
Page 29: General Safety Rules
1. GENERAL SAFETY Children shall not play with the appliance. Cleaning user RULES maintenance shall not be made by This appliances is intended to be l children without supervision. used in household and similar Children should be supervised to l applications such as: ensure that they do not play with - Staff kitchen areas in shops, offices... - Page 30 foam rubber pads should not be WARNING: dried in the washer dryer. never stop a washer dryer before Fabric softeners, similar l the end of the drying cycle products, should be used as unless all items are quickly specified by the fabric softener removed and spread out so that instructions.
- Page 31 Make sure the electrical system is When moving, do not lift the l l grounded. Otherwise, seek qualified washing machine by the knobs or professional assistance. detergent drawer; during transport, never rest the porthole on the Please do not use converters, l...
-
Page 32: Installation
2. INSTALLATION Cut the tube straps, being careful l not to damage the tube and power cord. Unscrew the 2 or 4 screws (A) on l the back and remove the 2 or 4 shims (B) as illustrated in figure Close the 2 or 4 holes using the l... - Page 33 Hydraulic connections l Connect the water tube to the faucet, only using the drain tube supplied with the washing machine (fig. 3). DO NOT OPEN THE FAUCET. l Some models may include one or more of the following features: l HOT&COLD (fig.
- Page 34 l Level the appliance using the feet as illustrated in figure 8: a. turn the nut clockwise to release the screw; b. rotate the foot to raise or lower it until it adheres to the floor; c. lock the foot, screwing in the nut, until it adheres to the bottom of the washing machine.
-
Page 35: Practical Tips
3. PRACTICAL TIPS reduce the necessity of a hot wash programme. Save up to 50% energy by using a 60°C Load tips wash programme. Before using a drying programme… WARNING: when sorting laundry, make sure: l SAVE energy and time by selecting a - have eliminated metallic objects such as high spin speed to reduce the water barrettes, pins, coins, from laundry;... -
Page 36: Maintenance And Cleaning
4. MAINTENANCE AND CLEANING To clean the washing machine exterior, use a damp cloth, avoiding abrasives, alcohol and/or solvents. The washing machine does not require any special care for ordinary cleaning: clean drawer compartments and the filter; some tips on how to move the machine or on long periods of disuse are provided below. -
Page 37: Quick User Guide
5. QUICK USER GUIDE 6. CONTROLS AND PROGRAMS This washing machine automatically adapts the level of the water to the type and quantity of washing. This system gives a decrease in energy consumption and a sensible reduction in washing times. Program selection l... - Page 38 l Switch off the washing machine by turning the selector to OFF. WARNING: Don’t touch the display while inserting plug because machines The programme selector must be calibrates the systems during the first returned to the OFF position at the end seconds: touching the display, the of each cycle or when starting a machine couldn’t work property.
- Page 39 DELAY START button The option buttons should be selected before pressing START/PAUSE button. l This button allows you to pre-programme option selected that the wash cycle to delay the start of the compatible with selected cycle for up to 24 hours. programme then the option indicator first flashes and then goes off.
- Page 40 l - NIGHT CYCLE Once the programme has been selected l the indicator light will automatically show This option reduces the intermediate spin the stain level set for that programme. speed to 400 rpm, where applicable, increase the water level during rinsing and keep the laundry immersed in water after the l...
- Page 41 the wash cycle has finished and the Digital Display DOOR LOCKED light has gone out before opening the door. At the end of the cycle turn the programme selector to OFF. The display’s indicator system allows you to be constantly informed about the status of 2) SPIN SPEED the machine.
- Page 42 5) STAIN LEVEL 9) DELAY START l Once the programme has been selected, This flashes when delay start has been set. the indicator light will automatically show the stain level set for that programme. 10) Kg Check (function active only on l...
- Page 43 11) DRYING PROGRAMME INDICATORS The appliance calculates the time to the end of the selected programme based upon standard loading. During cycle, appliance corrects the time according to the size and composition of the load. The indicators display the type of the drying Timed drying programmes programme.
- Page 44 Table of programmes TEMP.°C DETERGENT kg * PROGRAM (MAX.) Recommended Max. Rapid 14 Min 30° 30° Rapid 30 Min 30° 30° Rapid 44 Min 30° 40° Whites 60° 90° Cottons** 40° 60° EcoMix 20° 20° 20° Acrylics 40° 60° Rinse Drain + Spin Delicates 40°...
- Page 45 The spin speed may also be reduced, to match any guidelines suggested on the fabric label, or for very delicate fabrics cancel the spin completely this option is available with a spin speed button. This function can be activated with the button SPIN SELECTION.
- Page 46 Delicates Programmes selection This program alternates among moments of work during breaks and is particularly suitable for To clean different types of fabrics and washing delicate fabrics. The wash cycle and various levels of dirt, the washing machine rinses are carried out with a high level of water to has specific programs to meet every need ensure the best performance.
-
Page 47: Drying Cycle
l 7. DRYING CYCLE Only dry pre-spun laundry. l Drying guidance advice is general, but l The washer dryer can perform the practical experience of using the product following types of drying: will help you to achieve the best drying results. - Page 48 l l Turn the programme dial to the more When the programme is finished the word suitable drying programme for your laundry. "End" will appear on the display. After 5 minutes the appliance will go into standby mode (on certain models, the l...
-
Page 49: Automatic Washing/Drying Cycle
l 8. AUTOMATIC The programme selector remains in the same stationery position throughout the WASHING/DRYING cycle until it ends. CYCLE l At the end of the wash phase the display will show the drying time remaining. You cannot exceed the maximum dryable load of laundry indicated in the programme table, otherwise the l... -
Page 50: Customer Service Centre And Warranty
9. CUSTOMER SERVICE CENTRE AND WARRANTY If you believe the washing machine is not working correctly, consult the quick guide provided below with some practical tips on how to fix the most common problems. Problem Possible causes and practical solutions The washing machine Make sure it is correctly plugged in. - Page 51 Candy Customer Service Centre. You can also register for the Candy service plan to receive free home service after the warranty expires. Attention: the call is not toll-free. The cost will be communicated in a voice message by your telephone operator's customer service.
- Page 52 Ihren Alltag erleichtern. entsprechend der EU-Richtlinie wünschen Ihnen allzeit viel Freude mit Ihrer 2002/96/CE über Elektro- Candy Waschmaschine. und Elektronik-Altgeräte (WEEE) gekennzeichnet. können Gerät unter Bitte sorgen Sie dafür, dass das Gerät www.registercandy.com kostenpflichtig ordnungsgemäß entsorgt wird, damit mögliche...
-
Page 53: Generelle Sicherheitshinweise
1. GENERELLE sicher zu bedienen, dürfen die Waschmaschine nicht ohne Aufsicht SICHERHEITSHINWEISE oder Anweisung durch eine Dieses Gerät ist ausschließlich für l verantwortliche Person benutzen, den Haushaltsgebrauch konzipiert sich in der Nähe aufhalten oder das bzw. für haushaltsnahen Gerät saubermachen. Gebrauch, wie z.B: Kinder sollten nicht mit dem Gerät spielen. - Page 54 anderen Stellung ist das Gerät zuvor industrielle Chemikalien eingeschaltet und betriebsbereit. verwendet werden. Der letzte Teil eines kombinierten l Trocknen Sie keine ungewaschenen l Wasch-/Trockenprogrammes erfolgt Kleidungsstücke im Gerät. ohne Wärmezufuhr (Abkühlungsvogang), Kleidungsstücke, die mit Substanzen l sicherzustellen, dass wie Speiseöl, Aceton, Alkohol, Benzin, Kleidungsstücke im Gerät nicht Kerosin, Fleckenentferner, Terpentin, beschädigt werden.
- Page 55 Hitze verhindern eine befindet, wenn Sie das Bullauge Brandgefahr darstellen. öffnen. Bevor Speiseöl oder Bringen Sie keine Schnur an, um l l Haarpflegprodukten verschmutze die Maschine vorzuziehen. Wäschestücke im Waschtrockner Setzen Sie das Gerät keinem l gereinigt und getrocknet werden, Regen, direktem Sonnenlicht oder sollten diese zunächst mit heißem anderen Wetterelementen aus.
-
Page 56: Installation
2. INSTALLATION Schneiden Sie die Transportbefestigungen l der beiden Schläuche und des Netzkabels vorsichtig durch und achten darauf, dass diese dabei nicht versehentlich beschädigt werden. Lösen Sie die 2 bzw. 4 Schrauben l (A) auf der Geräterückseite und entfernen die 2 bzw. 4 Distanzstücke (B) wie in Abbildung 1 gezeigt. - Page 57 Wasseranschluss l Verbinden Sie den Wasserzulaufschlauch mit dem Wasserhahn (Abbildung 3) und bringen den Wasserablaufschlauch wie in Abbildung 7 beschrieben an. ÖFFNEN KEINESFALLS WASSERHAHN OHNE DEN SCHLAUCH ANGEBRACHT ZU HABEN! l Einige Modelle enthalten oder mehrere der folgenden Eigenschaften: HEIß&KALT (Abbildung Wasserverbindungseinstellungen mit heiß...
- Page 58 l Justieren Sie die Höhe der Standfüße wie in Abbildung 8 beschrieben: a. Drehen Sie die Schraubenmuttern im Uhrzeigersinn, um diese zu lösen. b. Drehen Sie den Standfuß, um die Höhe einzustellen. Sichern Sie den Standfuß durch Drehen der Schraubmuttern gegen den Uhrzeigersinn bis zum festen Sitz.
-
Page 59: Praktische Tipps
3. PRAKTISCHE TIPPS Ist heißes Waschen erforderlich? l Das Vorbehandeln von Flecken kann ein Beladungstipps heißes Waschen ersetzen und man kann bis zu 50% Energie bei einem 60 Grad Waschgang sparen. WARNUNG: Beim Sortieren der Wäsche, beachten Sie folgende Punkte: Bevor Trockenprogramm starten…... -
Page 60: Wartung Und Reinigung
l 4. WARTUNG UND Wiederholen Sie die restlichen Schritte in umgekehrter Reihenfolge, um die Teile REINIGUNG wieder einzubauen. Um die Waschmaschine von außen zu reinigen, nutzen Sie ein feuchtes Tuch mit leichten Reinigungsmitteln. Gerät erfordert keine besondere Reinigung von außen: reinigen Sie lediglich die Schubladen für Waschmittel und den Filter. -
Page 61: Kurzanleitung
5. KURZANLEITUNG 6. STEUERUNG UND PROGRAMME Dieses Gerät verfügt über eine moderne Mengenautomatik, die automatisch die benötigte Wassermenge, den Energieverbrauch und die Waschdauer anpasst. Programmauswahl l Schalten Sie Ihr Gerät ein und wählen Sie das benötigte Programm aus. l Stellen wenn nötig eine... - Page 62 Der Programmwahlschalter muss am WARNUNG: Ende jedes Waschvorganges oder vor Berühren beim Einstecken der Wahl eines neuen Waschprogramms Geräts in keinem Fall das Display, da auf die Position AUS gedreht werden. sich die Maschine in den ersten Sekunden kalibriert. Sollte dies dennoch passieren, nehmen Sie das Taste START/PAUSE...
- Page 63 Taste STARTZEITVORWAHL gewünschten Optionen sollten ausgewählt werden, bevor die Taste l Der Programmstart kann zwischen 1 START/PAUSE betätigt wird. Stunde Stunden verzögert Wird eine Option gewählt, welche werden. nicht kompatibel ausgewählten Programm ist, wird l Um den Programmstart zu verzögern, Optionsanzeigemehrfach kurz bitte diesen Schritten folgen:...
- Page 64 Wäscheposten nach dem letzten Spülgang Taste EXTRA SPÜLEN komplett im sauberen Spülwasser liegenbleibt, Waschvorgang durch erneute Betätigung Optionstaste einem l Mit dieser Optionstaste fügen Sie am Endschleudergang beendet wird. Ende des Waschvorgangs zusätzliche Spülgänge ein, deren Anzahl l Während der Spülstoppphase blinkt die jeweiligen Programm abhängig ist.
- Page 65 2) Anzeige SCHLEUDERDREHZAHLWAHL Anzeigebereich Displaybereich werden wichtige Informationen für den Benutzer angezeigt. In der Anzeige erscheint die gewählte Schleuderdrehzahl des Programmes. Diese kann nach Programm über entsprechende Taste nach oben/unten geändert werden. 3) Anzeige WASCHTEMPERATUR 1) KONTROLLEUCHTE TÜRVERRIEGELUNG In der Anzeige erscheint die gewählte Waschtemperatur Programmes.
- Page 66 5) Anzeige VERSCHMUTZUNGSGRADWAHL 9) Anzeige STARTZEITVORWAHL Diese Anzeige blinkt, wenn eine Startzeit In der Anzeige erscheint der vorgewählte voreingestellt wurde. Verschmutzungsgrad. Dieser kann je nach Programm über die entsprechende Taste angepasst werden. 10) "Kg check" - Anzeige MENGENAUTOMATIK (nur in Baumwoll- und Synthetikprogrammen) 6) Anzeige EXTRA SPÜLEN l...
- Page 67 11) ANZEIGE FÜR DAS TROCKENPROGRAMM Das Gerät berechnet die Zeit bis zum Ende des ausgewählten Programms zunächst Basis einer Standardbeladung. Während Trockenvorgangs korrigiert das Gerät die Zeit je nach Menge und Art des eingefüllten Wäschepostens. Display wird ausgewählte Zeitgesteuerte Trockenprogramme Trockenprogramm angezeigt.
- Page 68 Programmübersicht WASCHTEM- WASCHMITTEL MAX. BELADUNG* PERATUR °C PROGRAM (kg) Empfohlen Maximal Kurz 14 Min. 30° 30° Kurz 30 Min. 30° 30° Kurz 44 Min. 30° 40° Baumwollgewebe 60° 90° Baumwolle** 40° 60° EcoMix 20° 20° 20° Pflegeleicht 40° 60° Spülen Abpumpen &...
- Page 69 Die Schleuderdrehzahl kann je nach Modell und den Angaben auf dem Wäscheetikett auch angepasst bzw. das Endschleudern komplett unterbunden werden. Steuerung geschieht dabei über die Taste SCHLEUDERDREHZAHLWAHL. Werden auf dem Wäscheetikett keine Angaben hierzu gemacht, kann jeweils die maximal mögliche Schleuderdrehzahl genutzt werden.
- Page 70 Waschtemperatur und Schleuderdrehzahl Programmauswahl garantieren optimale Pflege für Feinwäsche. Gerät bietet eine Vielzahl Baby Programmen Optionen, Dieses Programm mit einer Waschtemperatur von verschiedene Textilarten allen mindestens 60°C eignet sich ideal zur porentiefen Verschmutzungsgraden optimal zu reinigen. und hygienischen Reinigung von Babybekleidung. Zur Erzielung von optimalen Waschergebnissen Kurz 14 Min.
-
Page 71: Trocknen
7. TROCKNEN Synthetik: Blusen, Hemden, Overalls, usw. aus Polyester oder Polyamid sowie für Baumwolle/Synthetik- Mischgewebe. l nachfolgenden Angaben sind Empfehlungen und können im täglichen l Trocknen Sie nur gut vorgeschleuderte Betrieb unter haushaltsüblichen Bedingungen Wäsche. abweichen. l Der Waschtrockner kann die folgenden l... - Page 72 l l Schließen Sie die Tür. Die Programmanzeige bleibt eingeschaltet, Abkühlphase beginnt l Programmwahlschalter entsprechende Anzeige Display passende Trockenprogramm auswählen. aufleuchtet. l Wählen eines drei l Wenn Programm beendet ist, sensorgesteuerten Programme aus: erscheint das Wort "End" im Display. Nach 5 Minuten schaltet das Gerät Extratrocken-Programm (empfohlen automatisch in den Stand-by-Modus (bei für Handtücher, dicke Textilien und...
-
Page 73: Automatischer Wasch- Und Trockengang
l 8. AUTOMATISCHER WASCH- Programmwählknopf bleibt während kompletten Wasch- UND TROCKENGANG Trockenzyklus in derselben Position und bewegt sich nicht. Bei Überschreitung der angegebenen l Ende Waschprogrammes max. Füllmengen erscheint im Display die verbleibende Trockenprogrammen wird die Wäsche Restlaufzeit für den Trockenvorgang. ggf. -
Page 74: Hinweise Zum Kundendienst Und Zur Garantie
9. HINWEISE ZUM KUNDENDIENST UND ZUR GARANTIE Wenn Sie der Meinung sind, Ihre Waschmaschine läuft nicht einwandfrei, nutzen Sie das “schnelle Benutzerhandbuch”, in dem erklärt wird, wie einige Probleme schnell behoben werden können. Problem Mögliche Ursachen und praktische Lösungen Die Waschmaschine startet Überprüfen Sie, ob die Maschine richtig angeschlossen ist. - Page 75 Sie können sich auch für einen Serviceplan registrieren, um kostenlosen Service auch nach Ablauf der Garantie zu genießen. Achtung: De Anruf ist nicht gebührenfrei. Kosten werden durch eine automatische Bandansage genannt. Candy empfiehlt, immer Originalersatzteile bei einer Reparatur verwenden zu lassen.
- Page 76 Merci d’avoir choisi une machine à laver Règles environnementales Candy. Nous sommes certains qu’elle vous donnera entière satisfaction et Cet appareil répond à la directive prendra soin de votre linge, même délicat, européenne 2002/96/EC relative jour après jour. déchets d’équipements électriques et électroniques (DEEE).
- Page 77 1. RÈGLES GÉNÉRALES des enfants sans surveillance d’un adulte. DE SÉCURITÉ Le produit est conçu pour être l Les enfants doivent être surveillés l utilisé dans un foyer domestique, pour être sûr qu’ils ne jouent pas comme : avec l’appareil. - Le coin cuisine...
- Page 78 une quantité supplémentaire de détergent avant d’être séchés ATTENTION: dans le lave-linge séchant. N’arrêtez jamais un lave-linge Les articles à base de caoutchouc, l séchant avant la fin du cycle latex, textiles imperméables, de séchage ; à moins que tous articles doublés de caoutchouc ou les articles ne soient retirés et des oreillers fabriqués avec du...
- Page 79 panne l Consignes de sécurité dysfonctionnement : éteindre la machine, fermer le robinet d’eau Eteignez machine avant l et ne pas toucher la machine. nettoyage : débranchez l’appareil Appelez immédiatement et fermer l’arrivée d’eau. service client et n’utilisez que des Assurez-vous que le système l...
- Page 80 2. INSTALLATION Coupez avec précaution le cordon l en faisant attention à ne rien endommager. Dévissez les 2 ou 4 vis (A) sur le l dos de l’appareil et retirer les 2 ou 4 cales (B) comme illustré sur la figure 1.
- Page 81 Raccordement à l’eau l Raccorder le tuyau d'eau au robinet, en utilisant seulement le tuyau de vidange fourni avec la machine à laver (fig. 3). NE PAS OUVRIR LE ROBINET. l Certains modèles peuvent inclure une ou plusieurs des caractéristiques suivantes: l...
- Page 82 l Utilisez les pieds comme en figure 8 pour régler la hauteur de l’appareil: a. Tournez dans le sens horaire pour libérer la vis; b. Faire pivoter le pied pour élever ou abaisser jusqu'à ce qu'elle adhère au sol; c. Verrouillez le pied en revissant l’écrou dans le sens inverse des aiguilles d’une montre et le faire adhérer au fond de la machine.
- Page 83 3. CONSEILS PRATIQUES Un lavage chaud est-il nécessaire? l Eliminer les taches avec un détachant ou Conseils de chargement faire tremper les taches dans l'eau avant de la laver réduit la nécessité d'un ATTENTION : Lorsque vous triez le linge, programme lavage à...
- Page 84 4. ENTRETIEN ET NETTOYAGE Pour nettoyer l’extérieur de la machine, utilisez un chiffon humide en évitant les produits abrasifs, alcool et/ou solvants. La machine ne requiert pas de soins particuliers pour un lavage ordinaire ; pensez à nettoyer régulièrement le tiroir à produits et le filtre. Quelques conseils pour déplacer la machine ou pour la préparer à...
- Page 85 5. GUIDE D'UTILISATION 6. CONTRÔLES ET RAPIDE PROGRAMMES Cette machine adapte automatiquement le niveau de l'eau en fonction du type et de la quantité de linge. Ce système permet de diminuer la consommation d'énergie et réduit nettement les temps de lavage. Sélection du programme l...
- Page 86 Le sélecteur de programmes doit être ATTENTION: positionné sur OFF à l’issue de chaque touchez l’écran lors cycle ou avant le début du cycle branchement de la machine car elle suivant pour sélectionner un nouveau étalonne système durant programme. premières secondes. Ceci pourrait engendrer un mauvais fonctionnement.
- Page 87 l Voici comment retarder le départ du Touche SELECTION ESSORAGE cycle: l En appuyant sur cette touche, il est possible - Sélectionnez le programme. de réduire la vitesse d’essorage voir d’annuler totalement l’essorage. - Appuyez touche DÉPART DIFFÉRÉ pour activer la fonction puis l...
- Page 88 augmente, lorsque c’est possible, le Touche EXTRA RINÇAGE niveau de l’eau lors du rinçage pour conserver le linge immergé après le rinçage final afin d’étendre les fibres. l Ce bouton vous permet d’ajouter des rinçages à la fin du cycle de lavage. Le nombre maximum rinçages...
- Page 89 2) VITESSE D’ESSORAGE Afficheur DIGITAL L’affichage Digital vous permet de visualiser en permanence l’état de la machine. Vous pouvez voir la vitesse d’essorage liée au programme sélectionné, vitesse qui peut être modifiée ou supprimée à l’aide de la touche correspondant. 3) TEMPERATURE DE LAVAGE 1) PORTE SECURISEE Vous pouvez voir la température de lavage...
- Page 90 5) DEGRE DE SALISSURE 9) DEPART DIFFERE l fois programme été sélectionné, voyant affiche L’icône clignote lorsque le départ différé a automatiquement le degré de salissure été sélectionné. associé à ce programme. 10) Kg Check (fonction active sur les l Sélectionnez alors, si vous le souhaitez, programmes Coton et Synthétique) un degré...
- Page 91 11) INDICATIONS DES PROGRAMMES L’appareil calcule le temps restant du DE SECHAGE programme sélectionné sur la base d’une charge standard, elle ajuste ensuite pendant le cycle le temps nécessaire en fonction de la charge et du taux d’humidité qu’elle détecte. Programmes de séchage minutés Les icônes indiquent le type de séchage.
- Page 92 Tableau des programmes TEMP.°C DÉTERGENT kg * PROGRAMME (MAX.) Recommandée Max. Rapide 14 Min 30° 30° Rapide 30 Min 30° 30° Rapide 44 Min 30° 40° Blanc 60° 90° Coton** 40° 60° EcoMix 20° 20° 20° Mixtes 40° 60° Rinçage Vidange + Essorage Délicats...
- Page 93 La vitesse d’essorage peut également être réduite pour correspondre aux exigences de certaines étiquettes de tissu ou dans le cas de tissus très délicats pour annuler complètement l’essorage. Cette option est disponible avec la touche SELECTION ESSORAGE. l’étiquette mentionne d’informations spécifiques, il est possible d’utiliser la vitesse de rotation maximale prévue dans le programme.
- Page 94 Le lavage et le rinçage sont effectués avec Sélection des programmes un niveau d’eau élevé. machine dispose différents Baby programmes et d’options pour répondre à Ce programme vous permet de laver tous les tous vos besoins et nettoyer différents types vêtements pour bébé...
- Page 95 7. CYCLE DE SECHAGE Synthétique: chemisiers, chemises, combinaisons…fabriqués en polyamide en polyester ainsi que pour les textiles l Les indications données sont d’ordre mélangés. général, pratique nécessaire pour de meilleures résultats de séchage. l Il est possible de sécher uniquement le linge qui a déjà...
- Page 96 l minutes, l’appareil se met en mode veille Utilisez le sélecteur afin de sélectionner (sur certains modèles, l’écran affiche le programme de séchage le plus adapté deux lignes). à votre linge. l Sélectionnez ensuite le degré de séchage l L’indicateur PORTE SECURISEE souhaité...
- Page 97 l 8. CYCLE AUTOMATIQUE Le cycle commence avec le programme sélectionné à l’aide du sélecteur et ce, LAVAGE + SECHAGE jusqu’à la fin. Si la charge de linge excède le l A la fin de la phase de lavage, l’écran maximum indiqué...
- Page 98 9. SERVICE CLIENT ET GARANTIE Si vous pensez que le lave-linge ne fonctionne pas correctement, consultez le guide rapide ci-dessous quelques conseils pratiques sur la façon de résoudre les problèmes les plus courants. Problèmes Causes possibles et solutions pratiques La machine à laver Assurez-vous que le branchement est correct.
- Page 99 à domicile gratuit après l'expiration de la garantie. Attention: l'appel n'est pas sans frais. Le coût sera communiqué dans un message vocal par le service client de votre opérateur téléphonique. Candy recommande de toujours utiliser des pièces d'origines.
- Page 100 Dziękujemy za dokonany wybór przy zakupie Uwagi dotyczące środowiska pralki Candy. Jesteśmy przekonani, że będzie ona Waszym wartościowym sprzymierzeńcem Nasz sprzęt AGD oznakowany jest codziennym, bezproblemowym praniu zgodnie z Dyrektywą Europejską bielizny, nawet najdelikatniejszej. 2002/96/WE dotyczącą odpadów elektrycznych i elektronicznych (WEEE).
- Page 101 1. OGÓLNE ZASADY Należy unikać możliwości zabawy przez dzieci przy użyciu pralki lub jej czyszczenia BEZPIECZEŃSTWA czy konserwacji bez nadzoru. Urządzenie to przeznaczone jest do l Dzieci powinny być pilnowane tak, l użytku domowego i w podobnych aby nie bawiły się urządzeniem. warunkach, dla przykładu: −...
- Page 102 W urządzeniu nie należy suszyć l wyrobów pianki gumowej UWAGA: (lateksowej), czepków kąpielowych, nie wyłączać urządzenia przed tkanin nieprzemakalnych, podgumowanych zakończeniem cyklu suszenia. oraz odzieży poduszek Jeśli jest to konieczne należy wkładkami z gumy piankowej. szybko wyjąć pranie z bębna, aby umożliwić...
- Page 103 żadnych przedmiotów, w szczególności nie opierać nigdy drzwiczek pralki zapalniczek i zapałek. na wózku. Zaleca się, aby pralkę podnosiły dwie osoby. Odnośnie dodatkowych informacji l dotyczących produktu lub w celu W każdym przypadku uszkodzenia l uzyskania danych karty i/lub złego funkcjonowania pralki, technicznej należy zaznajomić...
- Page 104 2. INSTALACJA Przeciąć opaski podtrzymujące l przewód wody, zachowując ostrożność, aby nie uszkodzić rurki czy kabla elektrycznego. Odkręcić śruby szt. 2 lub 4 (A) na l tylnej ścianie i usunąć podkładki dystansowe szt. 2 lub 4 (B), patrz rysunek 1. Zabezpieczyć...
- Page 105 Połączenie hydrauliczne l Podłączyć przewód wody do kranu z wodą używając w tym celu wyłącznie rurkę dostarczoną z pralką (rys. 3). NIE ODKRĘCAĆ KRANU. l Poszczególne modele mogą posiadać niektóre z poniższych funkcji: l HOT&COLD (rys. możliwość połączenia do sieci wody ciepłej i zimnej większej oszczędności energii.
- Page 106 l Wypoziomować pralkę pomocą obrotowych nóżek, jak na rysunku 8: a.odkręcić nakrętkę zgodnie ruchem wskazówek zegara dla odblokowania śruby; b.obracać nóżkę obniżając ją lub unosząc, tak aby przylegała do podłoża; c.zablokować nóżkę ponownie dokręcając nakrętkę aż do dna pralki. l Włożyć...
- Page 107 3. PRAKTYCZNE PORADY pralce zmniejsza potrzebę zastosowania temperatury wyższej niż 60°C. Można zaoszczędzić do 50% energii stosując Wskazówki dotyczące załadunku temperaturę prania 60°C zamiast 90°C. bębna Przed rozpoczęciem programu suszenia... l zaoszczędzić czas energię UWAGA: Przy sortowaniu odzieży przed elektryczną wyroby przeznaczone do praniem należy dopilnować, aby: suszenia pralko-suszarce...
- Page 108 4. CZYSZCZENIE I RUTYNOWA KONSERWACJA Do czyszczenia zewnętrznej obudowy pralki zastosuj wilgotną ściereczkę, nie używaj środków trących, alkoholu i/lub rozpuszczalników. Pralka wymaga czyszczenia w niewielkim stopniu: czyszczenie szufladki i czyszczenie filtru; poniżej wskazane są także sugestie odnośnie przypadków przewożenia lub długich okresów nie używania urządzenia.
- Page 109 5. SKRÓCONA 6. STEROWANIE I INSTRUKCJA OBSŁUGI PROGRAMY Nasza pralka posiada system automatycznego dostosowania poziomu wody do rodzaju i ilości prania. System ten prowadzi do zredukowania zużycia energii i znacznego skrócenia czasu prania. Wybór programu l Włączyć pralkę i wybrać potrzebny program. l...
- Page 110 Pokrętło wyboru programów należy ustawić pozycji UWAGA: zakończeniu każdego programu lub Nie dotykać wyświetlacza podczas przed wyborem uruchomieniem podłączania pralki zasilania, kolejnego programu prania. ponieważ przez pierwsze klika sekund pralka przeprowadza kalibrację systemów. Dotknięcie wyświetlacza Przycisk START/PAUZA spowoduje błąd i w takiej sytuacji należy odłączyć...
- Page 111 - Nacisnąć jednokrotnie przycisk Przycisk WYBORU WIROWANIA opóźnionego startu (wyświetlacz pokaże h00). Kolejne naciśnięcie przycisku l Przyciśnięcie przycisku powoduje powoduje opóźnienie uruchomienia zmniejszenie maksymalnej prędkości programu o godzinę (na wyświetlaczy wirowania. Cykl wirowania może również pojawi się h01). Każde kolejne zostać...
- Page 112 l Gdy woda nadal znajduje się w bębnie Przycisk DODATKOWEGO PŁUKANIA odpowiednia kontrolka miga, informując że pralka jest w stanie pauzy. l Przycisk służy ustawienia dodatkowych cykli płukania na koniec cyklu prania. Maksymalna liczba l Należy wyłączyć tryb pracy nocnej, by dodatkowych cykli płukania zależy od zakończyć...
- Page 113 2) PRĘDKOŚĆ WIROWANIA Wyświetlacz cyfrowy Wyświetlacz w sposób ciągły informuje użytkownika o statusie urządzenia. Pokazuje prędkość wirowania wybranego programu, która może zostać zmieniona lub wyłączona odpowiednim przyciskiem. 3) TEMPERATURA PRANIA Pokazuje temperaturę prania wybranego programu, która może zostać zmieniona (tam 1) KONTROLKA BLOKADY DRZWICZEK gdzie to możliwe) odpowiednim przyciskiem.
- Page 114 stopnia zabrudzenia ustawionego dla 10) Kg Check (funkcja dostępna tylko z takiego programu. programami "bawełniane" i "syntetyczne") l Po wybraniu innego stopnia zabrudzenia zaświeci się odpowiednia kontrolka. 6) DODATKOWE PŁUKANIE l W pierwszych minutach cyklu kontrolka "Kg Check" świeci się, a inteligentny czujnik waży pranie...
- Page 115 Programy automatyczne Programy czasowe Program Ekstra Suche (przeznaczony do suszenia ręczników, szlafroków i dużych wsadów). Służą wyboru czasowych programów suszenia. Program Suche Do Prasowania (pranie gotowe prasowania bezpośrednio po wyjęciu z bębna). Faza chłodzenia Program Suche Do Szafy (pranie może zostać odłożone do szafy bez Kontrolka zapala się...
- Page 116 Tabela programów TEMP.°C DETERGENT kg * PROGRAM (Maks.) Zalecana Maks. Szybkie pranie 30° 30° w 14 minut Szybkie pranie 30° 30° w 30 minut Szybkie pranie 30° 40° w 44 minut Białe 60° 90° Bawełna ** 40° 60° EcoMix 20° 20°...
- Page 117 Prędkość wirowania może zostać zmniejszona tak aby odpowiadała zaleceniom na metkach ubrań. Dla tkanin delikatnych możliwe jest również całkowite wyłączenie wirowania przyciskiem prędkości wirowania. Funkcję tę można włączyć przyciskiem WIBORU WIROWANIA. Jeśli metka nie podaje konkretnych zaleceń możliwe jest zastosowanie maksymalnej prędkości wirowania dla programu.
- Page 118 Delikatne Wybór programu Program przeznaczony do prania tkanin delikatnych. Łą czy naprzemiennie cykle pracy Pralka posiada specjalne programy i przerw. Cykle prania i płukania są umożliwiające pranie rożnych rodzajów przeprowadzane przy wysokim poziomie wody. tkanin przy różnych stopniach zabrudzenia (patrz tabela). Baby Program ten gwarantuje idealną...
- Page 119 7. SUSZENIE Syntetyki: bluzki, koszule, kombinezony itp. wykonane z poliestru lub poliamidu, również mieszanki bawełny l Wskazówki podane instrukcji włóknem syntetycznym. urządzenia mają charakter ogólny. Osiągnięcie optymalnego efektu suszenia wymaga praktyki w obsłudze urządzenia. l Przed rozpoczęciem suszenia pranie należy odwirować. l...
- Page 120 l l Zamknąć drzwiczki. Kontrolka programu suszenia będzie świecić przez cały czas trwania programu, po czym włączy się kontrolka l Wybierz program suszenia najbardziej sygnalizująca rozpoczęcie fazy odpowiedni dla danego prania. chłodzenia. l Wybrać stopień wysuszenia. Dostępne są l Po zakończeniu programu suszenia na trzy programy automatycznego suszenia: wyświetlaczu pokaże...
- Page 121 l 8. PRANIE/SUSZENIE Nacisnąć przycisk START/PAUZA. AUTOMATYCZNE l Pokrętło programatora pozostanie ustawionej pozycji do końca programu przekraczaj dopuszczalnego suszenia. załadunku suszenia wskazanego w tabeli programów, przeciwnym l Pod zakończeniu programu prania na wypadku pranie będzie wyświetlaczu pokaże się czas pozostały wystarczająco suche.
- Page 122 9. CENTRUM SERWISU TECHNICZNEGO I GWARANCJA W przypadku podejrzenia, że pralka nie działa poprawnie przeczytać poniższy krótki przewodnik zawierający kilka praktycznych sugestii, mających na celu pomóc w rozwiązaniu najczęstszych awarii. Problem Możliwe przyczyny i praktyczne rozwiązania Pralka nie działa / nie Sprawdzić, czy wtyk został...
- Page 123 Uwaga: połączenie telefoniczne jest odpłatne; jego koszcie zostaniecie poinformowani w komunikacie głosowym przez Obsługę Klienta używanego przez was operatora sieci telefonicznej. Candy zaleca używanie zawsze oryginalnych części zamiennych, które dostępne są w naszym Centrum Serwisu Technicznego.
- Page 124 - GVWT -...