Advertisement
Quick Links
Installation of KCE-G7QI / Einbau der KCE-G7QI / Installation du KCE-G7QI / Instalación del KCE-G7QI / Installazione di KCE-G7QI
EN
DE
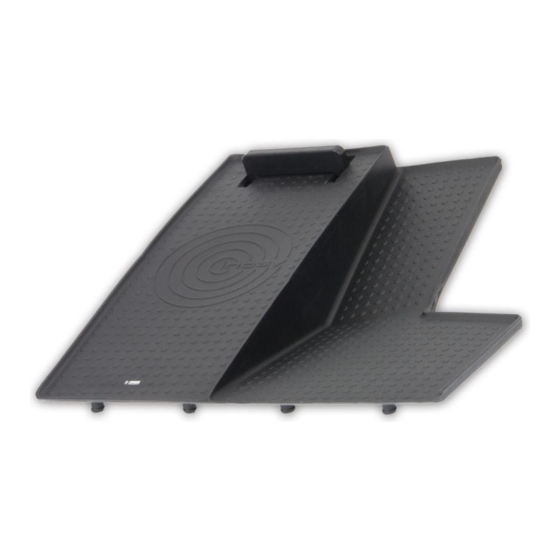
1 Inbay
mat
1 Inbay
-Auflage
®
®
2 Inbay
power cable
2 Inbay
-Anschlusskabel
®
®
3 Power drill (diameter 10 mm)
3 Bohrmaschine (Durchmesser 10 mm)
4 Plastic wedge
4 Kunststoffkeil
5 Screwdriver Torx 20
5 Torx-Schraubendreher 20
6 Wrench SW10
6 Schraubenschlüssel SW10
1
5
9
13
2
FR
ES
1 Tapis Inbay
1 Superficie Inbay
®
2 Câble d'alimentation Inbay
2 Cable de alimentación Inbay
®
3 Perceuse électrique (diamètre 10 mm)
3 Taladradora eléctrica (diámetro 10 mm)
4 Coin en plastique
4 Cuña de plástico
5 Tournevis Torx 20
5 Destornillador Torx 20
6 Clé SW10
6 Llave SW10
2
3
6
7
10
11
Ø10
14
15
2
2
18
1
1
2
20
17
IT
1 Tappetino Inbay
®
®
2 Cavo di alimentazione Inbay
®
®
3 Trapano elettrico (diametro 10 mm)
4 Cuneo in plastica
5 Cacciavite Torx 20
6 Chiave SW10
EN
1. Carefully remove the side cover of the dashboard on the driver's side using the plastic wedge.
2. Pull out the air vent as shown.
3. Push the steering wheel to down position.
4. / 5. Pull out the cover located above the steering wheel.
6. Loosen the 2 screws fixing the instrument cluster using screwdriver T20.
7. Carefully loosen the original equipped faceplate to pull out the instrument cluster.
8. Disconnect all plugs.
9. Open the fuse box cover located on the left hand side of the steering wheel.
4
10. Slightly squeeze the side covers of the fuse box to loosen the fuse box from its fixed position.
11. Carefully pull out the fuse box.
12. Open the compartment.
13. Remove the cover of the climate control.
14. / 15. Carefully remove the compartment below the climate control and disconnect all plugs.
16. Drill a hole on the backside of the compartment with a diameter of 10mm.
17. Route the Inbay
power cable from the fuse box through the instrument cluster opening to
®
the compartment as indicated.
18. Run the Inbay
®
power cable 2 through the 10mm drilling hole of the compartment.
19. Reinsert the compartment.
20. Connect the plug of the Inbay
power cable 2 to the Inbay
®
21. Position the Inbay
®
mat 1 in the compartment as shown.
8
DE
1. Entfernen Sie mithilfe des Kunststoffkeils vorsichtig die Abdeckung auf der Fahrerseite des
Armaturenbretts.
2. Ziehen Sie den Luftausströmer gemäß Abbildung heraus.
3. Stellen Sie das Lenkrad ganz nach unten.
4. / 5. Ziehen Sie die Verkleidung über dem Lenkrad heraus.
6. Lösen Sie die beiden Schrauben, die das Kombiinstrument halten, mit einem
Torx-Schraubendreher (T20).
7. Lösen Sie vorsichtig die Original-Frontblende und ziehen Sie das Kombiinstrument heraus.
8. Ziehen Sie alle Stecker.
9. Öffnen Sie die Abdeckung des Sicherungskastens auf der linken Seite des Lenkrads.
10. Drücken Sie leicht auf die seitlichen Abdeckungen des Sicherungskastens, um den
12
Sicherungskasten aus seiner Befestigungsposition zu lösen.
11. Ziehen Sie den Sicherungskasten vorsichtig heraus.
12. Öffnen Sie das Ablagefach.
13. Entfernen Sie die Abdeckung der Klimaanlage.
14. / 15. Entfernen Sie vorsichtig das Ablagefach unter der Klimaanlage und ziehen Sie alle
Stecker.
16. Bohren Sie in die Rückseite des Ablagefachs ein Loch mit einem Durchmesser von 10 mm.
17. Führen Sie das Inbay
®
-Anschlusskabel wie dargestellt vom Sicherungskasten durch die
Öffnung des Kombiinstruments zum Ablagefach.
18. Stecken Sie das Inbay
-Anschlusskabel 2 durch die 10-mm-Bohrung im Ablagefach.
®
19. Setzen Sie das Ablagefach wieder ein.
20. Verbinden Sie den Stecker des Inbay
-Anschlusskabels 2 mit der Inbay
®
21. Positionieren Sie die Inbay
-Auflage 1 wie dargestellt im Ablagefach.
®
16
ES
1. Retire con cuidado la cubierta lateral del salpicadero del lado del conductor con la ayuda de la
cuña de plástico.
2. Extraiga la rejilla de ventilación tal como se muestra.
3. Baje por completo el volante.
4. / 5. Extraiga la cubierta situada sobre el volante.
6. Afloje los dos tornillos que fijan el grupo de instrumentos con un destornillador T20.
7. Afloje con cuidado la placa frontal original con objeto de extraer el grupo de instrumentos.
8. Desconecte todas las tomas.
9. Abra la tapa de la caja de fusibles situada a la izquierda del volante.
19
10. Apriete ligeramente las tapas laterales de la caja de fusibles para aflojarla y soltarla.
11. Extraiga con cuidado la caja de fusibles.
12. Abra el compartimento.
13. Retire la cubierta del control de climatización.
14. / 15. Retire con cuidado el compartimento situado bajo el control de climatización y
desconecte todas las tomas.
16. Taladre un orificio en la parte posterior del compartimento de 10 mm de diámetro.
17. Lleve el cable de alimentación Inbay
desde la caja de fusibles, a través de la abertura del
®
conjunto de instrumentos y hasta el compartimento, según lo indicado.
18. Pase el cable de alimentación Inbay
2 a través del orificio 10 mm hecho en el compartimento.
®
19. Vuelva a colocar el compartimento.
20. Conecte la toma del cable de alimentación Inbay
21. Coloque la superficie de carga Inbay
1 en el compartimento según se muestra en la imagen.
21
®
3
1
2
mat 1.
®
FR
1. Déposez avec précaution le couvercle latéral du tableau de bord côté conducteur en utilisant le
coin en plastique.
2. Déposez l'ouïe d'aération (voir l'illustration).
3. Abaissez le volant de direction.
4. / 5. Retirez le cache situé au-dessus du volant.
6. Desserrez les 2 vis de fixation du tableau de bord à l'aide du tournevis T20.
7. Desserrez délicatement la plaque frontale d'origine afin de déposer le tableau de bord.
8. Déconnectez toutes les fiches.
9. Ouvrez le couvercle du boîtier de fusibles à gauche du volant.
10. Pincez légèrement les côtés du boîtier de fusibles pour le sortir de son logement.
11. Sortez délicatement le boîtier de fusibles.
12. Ouvrez le compartiment.
13. Déposez le cache de la commande de climatisation.
14. / 15. Déposez avec précaution le compartiment sous la commande de climatisation et
déconnectez toutes les fiches.
16. Percez un trou sur la face arrière du compartiment à l'aide d'un foret de diamètre 10 mm.
17. Faites passer le câble d'alimentation Inbay
en passant par l'ouverture du tableau de bord (voir l'illustration).
18. Faites passer le câble d'alimentation Inbay
compartiment.
19. Remettez le compartiment en place.
20. Raccordez la fiche du câble d'alimentation Inbay
-Auflage 1.
21. Positionnez le tapis Inbay
®
IT
1. Rimuovere con attenzione la copertura laterale del cruscotto sul lato conducente utilizzando il
cuneo di plastica.
2. Estrarre la bocchetta di ventilazione come mostrato.
3. Abbassare il volante.
4. / 5. Sfilare la copertura posta sopra il volante.
6. Allentare le 2 viti che fissano il quadro strumenti col cacciavite T20.
7. Allentare con attenzione il frontalino originale per estrarre il quadro strumenti.
8. Scollegare tutti i connettori.
9. Aprire il coperchio della scatola fusibili ubicata a sinistra del volante.
10. Schiacciare leggermente i coperchi laterali della scatola fusibili per allentarla dalla posizione
in cui è fissata.
11. Estrarre con attenzione la scatola fusibili.
12. Aprire il vano.
13. Rimuovere la copertura del climatizzatore.
14. / 15. Rimuovere con attenzione il vano sotto il climatizzatore e scollegare tutti i connettori.
16. Trapanare un foro di diametro di 10 mm sul retro del vano.
17. Far passare il cavo di alimentazione Inbay
quadro strumenti per farlo arrivare nel vano, come mostrato.
18. Far passare il cavo di alimentazione Inbay
nel vano.
®
2 en la superficie de carga Inbay
®
19. Reinserire il vano.
1.
20. Collegare il connettore del cavo di alimentazione Inbay
21. Posizionare il tappetino Inbay
5
6
4
Ø10
entre le boîtier de fusibles et le compartiment,
®
®
2 dans le trou de 10 mm percé dans le
®
2 au tapis Inbay
®
1.
1 dans le compartiment (voir l'illustration).
®
dalla scatola fusibili attraverso l'apertura del
®
2 attraverso il foro da 10 mm appena trapanato
®
2 al tappetino Inbay
®
®
1.
1 nel vano, come mostrato.
®
Advertisement

Related Manuals for Alpine KCE-G7QI


Summary of Contents for Alpine KCE-G7QI
- Page 1 Installation of KCE-G7QI / Einbau der KCE-G7QI / Installation du KCE-G7QI / Instalación del KCE-G7QI / Installazione di KCE-G7QI Ø10 1 Inbay 1 Inbay -Auflage 1 Tapis Inbay 1 Superficie Inbay 1 Tappetino Inbay ® ® ® ® ® 2 Inbay...
- Page 2 (per maggiori dettagli consultare la risoluzione dei problemi del veicolo). Il PIN GND debe fijarse con la tuerca hexagonal del vehículo, según lo indicado. (B) deve essere fissato con il dado esagonale del veicolo, come indicato. Designed by Alpine Electronics (Europe) GmbH Printed in Hungary ALPINE ELECTRONICS MARKETING, INC.