Table of Contents
Advertisement
Quick Links
Advertisement
Table of Contents

Related Manuals for Siemens Sm@rt DAS


Summary of Contents for Siemens Sm@rt DAS
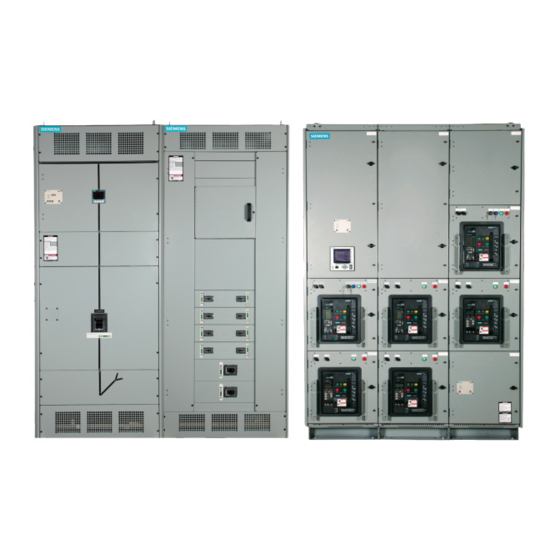
- Page 1 User Guide Siemens Sm@rt DAS usa.siemens.com/smartgear...
- Page 2 Siemens reserves the right to make changes in the specifications shown herein or to make improvements at any time without notice or obligations. Should a conflict arise...
-
Page 3: Table Of Contents
Siemens sales offi ce. The contents of this instruction manual shall not become part of or modify any prior or existing agreement, commitment or relationship. -
Page 4: Chapter 1 Introduction
Sm@rt Dynamic Arc-Flash Sentry (DAS): Sm@rt DAS is a Sm@rt DAS system. The Sm@rt DAS system is used to control solution that allows users the ability to automatically toggle maintenance mode of VL and WL breakers in Type WL between nominal trip settings and a predefined set of lower Switchgear, SB Switchboards, P4 and P5 Panelboards. -
Page 5: Chapter 2 Sm@Rt Das System
Sm@rt DAS System Digital Inputs Introduction Each breaker that has Sm@rt DAS is assigned a digital input. It The Sm@rt DAS system consists of a controller, VL and WL moves from left to right and top to bottom in the lineup. The breakers with MODBUS communication modules, and a input requires 24V to activate. -
Page 6: Gateway
Figure 2.4: WL MODBUS module COM21 (VL Breakers – Switchboards and Panelboards) COM16 (WL Breakers – Switchgear and Switchboards) The COM21 module connects VL breakers to the Sm@rt DAS The COM16 module connects WL breakers to the Sm@rt DAS system. -
Page 7: Breaker Requirements
Chapter 2 Sm@rt DAS System Breaker Requirements The Sm@rt DAS system requires certain features in both the WL and VL breakers. This section highlights the requirements for breakers as well as the features for each breaker with Sm@rt DAS. Figure 2.5: WL Breakers Figure 2.6: VL Breakers... -
Page 8: System Interface
This section will deal with the different schemes and implementations available and how they function. 24VDC Switch Inputs Power Supply (120VAC or 24VDC) Ethernet MODBUS TCP/IP Output LEDs Figure 3.1: Sm@rt DAS Controller with one switch and one light per breaker... -
Page 9: One Switch For System, One Light Per Breaker
24VDC Single Switch Input Power Supply (120VAC or 24VDC) Ethernet MODBUS TCP/IP Output LEDs Figure 3.2: Sm@rt DAS Controller with single switch and one light per breaker... -
Page 10: Hmi
Chapter 3 System Interfaces The HMI option is a design that replaces the switches with either a remote mount or locally mounted HMI. The HMI option allows users to turn on/off maintenance mode over the HMI vs. a switch. HMI with WL Breakers The HMI feature for the WL offers an easy way to turn on/off maintenance mode in the WL breaker on one screen. -
Page 11: Modbus Communication
In order to activate DAS over MODBUS, you will need a MODBUS program. Siemens has a program called Sm@rt DAS MODBUS Communication Module that can be used to read and write settings for Windows 7 and later. -
Page 12: Communication
Table 4.2 shows the MODBUS system codes if integration is needed to upstream devices. In order to permanently connect the Sm@rt DAS to an upstream system, the second RJ45 port of the gateway can be used. An Ethernet switch will need to be placed between the controller and gateway (Figure 4.2, 4.3) if several external... -
Page 13: Configuring The Sm@Rt Das System
Force single coil Table 4.1 shows MODBUS function codes used to access data Preset single register from devices. For Sm@rt DAS, Code 03 is used to read holding Write multiple registers registers and Code 16 is used to write the holding registers. -
Page 14: Siemens Sm@Rt Das Communication Module
Chapter 4 Communications Siemens Sm@rt DAS Communication Module A secondary option for access to Sm@rt DAS system is using the Sm@rt DAS MODBUS module available through the Siemens Download Center. It can be used by connecting directly to the PLC or connecting through an Ethernet switch. - Page 15 DAS on until the Ethernet connection of the PLC is plugged back in. Figure 4.5: Sm@rt DAS MODBUS Communication Module Setup Once open, go to the start menu, select the Siemens folder, select the Sm@rt DAS folder, and then select “Sm@rt DAS” to open the user interface.
- Page 16 DAS mode (either via switch or the software) and check states on the breaker to verify the new settings. * You must read states in order to change the settings. Figure 4.6: Sm@rt DAS MODBUS Communication Module Steps...
-
Page 17: Modbus Register Map
MODBUS Register Map Each breaker has a unique section of the register map. There are 15 registers for Sm@rt DAS per breaker. The next breaker register addresses are +15 up from the current breaker. The first breaker at the leftmost and top most point of the lineup will be the first breaker. -
Page 18: Access To Sm@Rt Das Breakers
Connecting to the breakers the MODBUS RS-485 to TCP/IP gateway. The Sm@rt DAS One key benefit of Sm@rt DAS is it allows for direct access to system uses the same IP address structure for each Sm@rt the breaker if the user wishes to make changes to trip unit DAS order unless otherwise specified. -
Page 19: Commissioning/Common Troubleshooting
Chapter 5 Commissioning/Troubleshooting Introduction Ensure Sm@rt DAS controller has control power by checking the LEDs in Figure 5.2. The Sm@rt DAS This section discusses the steps that should be taken during controller will be in the main device aux compartment if commissioning to verify the Sm@rt DAS system’s... - Page 20 Chapter 5 Commissioning/Troubleshooting Commissioning - WL Sm@rt DAS Review drawings to identify location of Sm@rt DAS switches or HMI. The elevation will show the location of the switches/HMI highlighted in Figure 5.3. The electrical view will show the breakers with Sm@rt DAS highlighted in Figure 5.4.
- Page 21 Chapter 5 Commissioning/Troubleshooting Commissioning - VL Sm@rt DAS Review drawings to identify the location of Sm@rt DAS switches or HMI. The elevation will show the location of the switches/HMI highlighted in Figure 5.6. The electrical view will show the breakers with Sm@rt DAS highlighted in Figure 5.7.
-
Page 22: Chapter 6 Troubleshooting
Verify Switch to Controller Wiring Each device will have a MODBUS communication light – Locate the Sm@rt DAS controller in the gear. When the verify that it is green as well when the switch is closed. switch is closed, one of the green LED highlighted in red Check wiring to ensure all connections are made, will turn on indicating the 24V signal gets to the PLC. - Page 23 Notes...
- Page 24 Printed in USA specifically reflect those described, or which may undergo modification in the course of further 1-800-241-4453 © 2016 Siemens Industry, Inc. info.us@siemens.com development of the products. The requested performance features are binding only when they are expressly agreed upon in the concluded contract.