Table of Contents
Advertisement
Quick Links
Advertisement
Table of Contents

Related Manuals for Grundig MS 530 DAB+


Summary of Contents for Grundig MS 530 DAB+
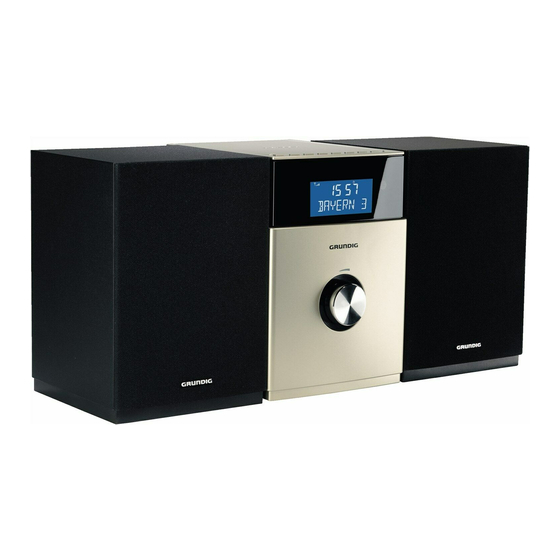
- Page 1 MICRO HIFI SYSTEM MS 530 DAB+ MS 540 DAB+...
-
Page 2: Table Of Contents
CONTENTS ---------------------------------------------------------------------------------------------------------------------------------- EXTERNAL DATA MEDIA MODE SETUP AND SAFETY Using CDs RF Exposure Warning U sing an MP3 player, USB memory stick OVERVIEW or SD/SDHC/MMC memory card The hi-fi system controls Inserting/connecting music data media The hi-fi system connections Selecting the input source The remote control Playback The hi-fi system displays D isplaying track information (for MP3/ WMA) CONNECTION AND PREPARATION Repeat functions Connecting the loudspeakers P laying back tracks in random order C onnecting an MP3 player or a USB (Random) memory stick Playing the start of each track (intro) Inserting a memory card Creating a playlist Removing the memory card Connecting external devices BLUETOOTH MODE (MS 540 ONLY) Connecting the headphones... -
Page 3: Setup And Safety
SETUP AND SAFETY ----------------------------------------------------------------------------- Please note the following instructions: Thunderstorms are a danger to all electrical devices. Even if the hi-fi is switched off, it can The hi-fi system is designed for the playback be damaged by a lightning strike to the mains. of audio signals. All other uses are expressly Always remove the power plug during a thun- prohibited. der storm. If you want to set up the hi-fi system on wall Prolonged listening with the shelves or in cupboards, please ensure that it headphones at loud volumes can is adequately ventilated. There must be at least damage your hearing. 10 cm of space at the side, above and behind the hi-fi system. Note: Do not cover the hi-fi system with newspapers, D o not connect any other equipment while table cloths, curtains, etc. the device is switched on. Also switch off the other equipment before connecting it. When setting up the hi-fi system, remember that furniture is often coated with various types O nly plug the device into the mains socket of varnish and plastic, which often contain... -
Page 4: Overview
OVERVIEW ------------------------------------------------------------------------------------------------------- The hi-fi system controls 15:22 E TUNING F CD/USB/SD AUX/BT RADIO – AUX. IN ANT. ENGLISH SPEAKER... - Page 5 OVERVIEW ------------------------------------------------------------------------------------------------------- Opens the CD compartment. S witches the device in and out of standby mode. OK I n external data media mode: starts and pauses playback. E TUNING F I n DAB mode: select the DAB radio station from the station list. Select options in the menu. I n FM mode: pressing and hold- ing down starts the forwards or reverse frequency search; pressing briefly switches the frequency back or forwards in steps. I n external data media mode: select albums or tracks forwards or backwards; press and hold down to search backwards or forwards for a particular passage. I n standby and timer mode: to set hours/minutes. I n tuner mode: select presets. I n external data media mode: select albums.
-
Page 6: The Hi-Fi System Connections
OVERVIEW ------------------------------------------------------------------------------------------------------- The hi-fi system connections SPEAKER R L AUX IN AUX. IN ANTENNA SPEAKER AC ˜ C ard slot for inserting a memo- SPEAKER R L l oudspeaker sockets, R = right ry card (SD/SDHC/MMC). channel, L = left channel. U SB interface for connecting A udio signal input for connect- an MP3 player or USB memory ing an external device. stick. USB socket for upgrading the T his socket is not suitable for con- software of the device. necting a PC. ANTENNA Wire antenna. H eadphone jack for connecting a AC ˜... -
Page 7: The Remote Control
OVERVIEW ---------------------------------------------------------------------------------------------------------------------------------- The remote control S witches the loudspeakers of the hi-fi system to mute and back on again. S witches the hi-fi system to standby mode and from standby mode to the last input source selected. CD/SD/USB Switches the device on from standby mode. S elects the CD, USB or SD input sources. AUX/BT S witches the device on from standby mode. S elects the AUX and Bluetooth input sources (Bluetooth for MS 540 only). RADIO S witches the device on from standby mode. - Page 8 OVERVIEW ---------------------------------------------------------------------------------------------------------------------------------- I n DAB mode: select the DAB ra- ≈ A ctivates the settings for the dio station from the station list. switch-on timer. Select options in the menu. S witches the alarm function off I n FM mode: press and hold and on again. down to start the reverse or for- WEC/NAP S witches off the alarm function wards frequency search; for the weekend. p ress briefly to change the fre- quency backwards or forwards A ctivates the settings for the re- in steps.
-
Page 9: The Hi-Fi System Displays
OVERVIEW ---------------------------------------------------------------------------------------------------------------------------------- The hi-fi system displays ALBUM AM PM FILE USER Ä 8 8 8 : 8 8 8 CLASSIC JAZZ ROCK PROG ALL 1 ALBUM INTRO RANDOM 8 8 8 8 8 8 8 8 PTY TEXT NAP § I n external data media mode: Ä... -
Page 10: Connection And Preparation
CONNECTION AND PREPARATION --------------------------------------- Connecting the loudspeakers Connecting an MP3 player or a USB memory stick The hi-fi system supports most MP3 players and USB memory sticks on the market. Caution: AUX. IN T he hi-fi system must be switched off while the USB connection is being made. If it is not SPEAKER switched off, data can be lost. 1 Insert the wires of the loudspeaker cable into the terminals for »SPEAKER R« (right chan- nel) and »SPEAKER L« (left channel). -
Page 11: Inserting A Memory Card
CONNECTION AND PREPARATION --------------------------------------- Inserting a memory card Connecting external devices The hi-fi system supports SD/SDHC and MMC Note: memory cards. Switch the hi-fi system off before you connect external devices. Caution: T he hi-fi system must be switched off while the memory card is being inserted. If it is not switched off, data can be lost. AUX. IN SPEAKER 1 Use standard audio cables to connect the au- dio outputs of the external device to the »AUX IN R« or »AUX IN L« sockets on the hi-fi sys- 1 Insert the memory card carefully into the »SD« tem. card slot with the contacts facing the rear until Connecting the headphones it latches into place. -
Page 12: Connecting The Power Cord
CONNECTION AND PREPARATION --------------------------------------- Connecting the power cord Inserting batteries into the remote control Notes: Check that the mains voltage on the type plate (on the bottom of the hi-fi system) cor- responds to your local mains supply. If this is not the case, contact your specialist dealer. All the other devices/loudspeakers must be connected before you connect the power cord. AUX. IN 1 Open the battery compartment by pressing down on the catch and then remove the lid. -
Page 13: Settings
SETTINGS --------------------------------------------------------------------------------------------------------------------------------------- Setting and storing radio stations Storing DAB radio stations as (DAB and FM) – initial set-up presets When the device is connected to the mains for After the automatic station search, all the DAB ra- the first time or after a reset, the device starts an dio stations are stored in the station list. You can automatic station search for DAB radio stations store your favourite DAB radio stations on the pre- and then stores them in the station list. sets 1 to 40. - Page 14 SETTINGS --------------------------------------------------------------------------------------------------------------------------------------- Setting and storing DAB radio Setting and storing FM radio sta- stations manually tions manually 1 Press »RADIO« to select the DAB input source. 1 Press »RADIO« to select the FM input source. 2 Open the menu by pressing and holding down 2 Open the menu by pressing and holding down »MENU«. »MENU«. – Display: » SCAN «. 3 Confirm the » SCAN « menu item with » 3 Select the » MANUAL « menu item with »E« or OK«.
-
Page 15: Setting The Brightness Of The Display
SETTINGS --------------------------------------------------------------------------------------------------------------------------------------- Updating the time automatically Setting the brightness of the display The time is updated automatically if a DAB or DSR radio station transmits a time signal. The brightness of the display can be set sepa- rately for standby and operation modes. Setting the time manually The time can only be changed in standby mode. 1 Change the brightness by repeatedly pressing » MENU « in standby or operation mode. 1 T o set the time in standby mode, press and – You have a choice of four brightness levels. -
Page 16: General Functions
GENERAL FUNCTIONS --------------------------------------------------------------------------------------- Switching on and off Changing the "USER" sound set- ting 1 Switch on the hi-fi system from standby by press- ing » «. You can change the »USER« sound setting. – T he last input source used is automatically 1 Select the »USER« sound setting by pressing selected. »DSC «. Note: Press and hold »DSC «. You can also switch on the hi-fi system by – D isplay: »BASS 0«. -
Page 17: Tuner Mode
TUNER MODE ------------------------------------------------------------------------------------------------------------------------ DAB radio mode Setting Dynamic Range Control (DRC) for DAB stations Selecting the DAB radio input When you activate Dynamic Range Control, you source can hear quiet sounds better in a loud environ- 1 For the best DAB reception, align the wire an- ment. tenna accordingly. 1 Open the menu by pressing and holding down 2 Select the DAB input source with »RADIO«. »MENU«. – D isplay: » DAB « followed by the name of a 2 Select the »... -
Page 18: Fm Radio Mode
(Last Station Memory). Notes: – D isplay: » « and the name of the radio sta- It may take some time before all the RDS tion or the frequency. information is transmitted. Selecting presets GRUNDIG has no influence on the correct- 1 Select the required station using the number but- ness of this information. tons »1« to »0« directly. Searching for an RDS station Note: 1 Select the RDS station by pressing » « or For two-digit presets, press the number but- »... -
Page 19: External Data Media Mode
EXTERNAL DATA MEDIA MODE ------------------------------------------------------- Using CDs Using an MP3 player, USB memory stick or SD/SDHC/MMC The device is suitable for memory card music CDs displaying the logo shown here (CD- The »USB« socket is not compatible with DA) and for CD-Rs and USB hubs and cannot be connected directly CD-RWs with audio data. to a PC. The USB interface of this device is a stand- ard interface. All currently-known MP3 chip concepts were taken into account when it was developed. Due to rapid progress in... -
Page 20: Selecting The Input Source
EXTERNAL DATA MEDIA MODE ------------------------------------------------------- Connecting an MP3 player or a USB Note: memory stick If no data medium is inserted/connected, the message »NO DISC« appears. 1 Switch the device to standby mode by pressing » «. Pausing and resuming playback Connect the USB interface of the MP3 player 1 Press » OK« to pause playback. to the »USB« socket of the hi-fi system with a – D isplay: »II«, the playing time display flash- standard USB cable; or 2 Press » OK« to resume playback. -
Page 21: Repeat Functions
EXTERNAL DATA MEDIA MODE ------------------------------------------------------- Repeat functions Playing back tracks in random order (Random) Repeating a track (Repeat One) 1 Press »INT « during playback. 1 Press » « once during playback. – D isplay: »RANDOM«. – D isplay: » 1«, the current track is repeat- – A ll tracks on the data medium are played back once in random order. -
Page 22: Creating A Playlist
EXTERNAL DATA MEDIA MODE ------------------------------------------------------- Creating a playlist You can create a track memory of up to 60 tracks for the current data medium in any order you choose and then play them back in that sequence. A track may be saved more than once. The entries can only be made in stop mode. Selecting and storing tracks 1 Press »STEREO « to end playback. ¥ 2 Press »PROG « to open the function. – D isplay: »PROG« and »P 0 I« flash. 3 Select the folder by pressing »... -
Page 23: Bluetooth Mode (Ms 540 Only)
BLUETOOTH MODE (MS 540 ONLY) ------------------------------------- Notes: V arious functions can also be controlled on the MS 540. II« to pause playback, Press » Compatible with the following p ress » II« again to resume playback; devices p ress »E« to select the previous track and »F« Your MS 540 can be connected to any com- for the next track. mercially available Bluetooth-compatible de- N ote that the data transmission range can vices that comply with the A2DP standard. This be as much as 9 m, depending on the Blue- includes smartphones, laptops and tablet PCs,... -
Page 24: Using External Devices
USING EXTERNAL DEVICES --------------------------------------------------------------------- Listening to the audio signal from an external device You can play the audio signal from an external device (e.g. an MP3 player) on the hi-fi system. Note: The external device must be connected to IN« socket. the »AUX 1 Switch on the device from standby by pressing » «. 2 Select the AUX input source by pressing »AUX/BT«. – D isplay: »AUX«. 3 Start playback on the external device. -
Page 25: Timer Mode
TIMER MODE -------------------------------------------------------------------------------------------------------------------------- Your hi-fi system has three timer modes: Switch-on timer – T he switch-on timer, which switches the hi-fi Setting the switch-on timer system on at a preset time and wakes you 1 Switch the hi-fi system to standby mode by with the input source you selected. pressing » «. – T he reminder timer, which reminds you by sounding the signal tone at a preset time. -
Page 26: Reminder Timer
TIMER MODE -------------------------------------------------------------------------------------------------------------------------- Interrupting the switch-on time Sleep timer 1 While the alarm signal is sounding (music or Setting the sleep timer S«. signal tone), press »SLEEP 1 Switch on the hi-fi system from standby by – D isplay: »SNOOZE«, the alarm signal stops. pressing » «. – T he alarm goes off again at five-minute inter- 2 Open the function with »SLEEP S«. vals (alarm duration 90 minutes). – Display: »SLP 90«. Cancelling the alarm for the day 3 Select the switch-off time (»90«, »60« to »I5«, 1 Switch the hi-fi system to standby with »... -
Page 27: Special Functions
SPECIAL FUNCTIONS -------------------------------------------------------------------------------------------- Selecting the software version 4 Select the » Y « (yes) option with »F«. Note: 1 Press »RADIO« to select the DAB input source. »E« To cancel the option, select » « (no) with 2 Open the menu by pressing and holding down 5 Confirm the setting with » OK«. »MENU«. 6 Finish the setting by pressing and holding 3 Select the » SYSTEM « menu item with »E« or down »MENU«. »F« and press » OK« to confirm. – O nly the available DAB radio stations are 4 Select the »... -
Page 28: Information
File system/folder management: according to the applicable EU ISO 9660 Level 1 compatible directives. This product fulfils the Euro- USB 2.0 for FAT 32/16 format pean directives 2004/108/EC, 2006/95/EC, Dimensions and weight 2009/125/ EC and 2011/65/EU (MS 530). Device dimensions: This product fulfils the European directives W x H x L 150 x 215 x 210 mm 1999/5/EC, 2009/125/EC and 2011/65/EU (MS 540). Device weight: 1.36 kg To obtain a copy of the Declaration of Conform- Loudspeaker dimensions: ity (Doc), please submit your request by using the W x H x L 150 x 215 x 250 mm contact information at www.grundig.com/down- Loudspeaker weight: 1.3 kg load/doc. The type plate is located on the bottom of the Technical and design modifications are reserved. hi-fi system. ENGLISH... -
Page 29: Environmental Note
INFORMATION ------------------------------------------------------------------------------------------------------------------ Environmental note General information on laser devices This product has been made from high-quality parts and This device is a CLASS materials which can be re-used 1 LASER PRODUCT. CLASS 1 and recycled. This means that the la- LASER PRODUCT ser is designed in such Therefore, do not dispose of the product along a way as to ensure that with normal household waste at the end of its the maximum permissible emission value cannot service life. Take it to a collection point for the be exceeded under any circumstances. -
Page 30: Troubleshooting
INFORMATION ------------------------------------------------------------------------------------------------------------------ Troubleshooting Not every kind of sound interference is caused not resolve the problem satisfactorily, please visit by a defect in your hi-fi system. Cables that have www.grundig.com, product range: hi-fi, micro accidentally been disconnected, damaged CDs CD stations or contact your specialist dealer. and flat batteries for the remote control will im- pair functioning. If the following measures do Problem Possible cause/remedy Insert a CD. Check that the CD was inserted with the label facing upwards. »NO DISC« is displayed Moisture may have collected on the laser lens; wipe it clean. Clean the CD (see "INFORMATION") or use a different CD. The CD-RW/CD-R is not finalised. Reception signal too weak; position the wire antenna differently. Poor radio reception. Move the hi-fi further away from the television. The hi-fi system does not react Disconnect the power cord from the mains plug, reinsert it after a short when the buttons are pressed. time and switch the hi-fi back on. Turn up the volume. - Page 31 Grundig Intermedia GmbH Beuthener Strasse 41 90471 Nürnberg www.grundig.com 72011 909 2200 13/49...