
Related Manuals for YASKAWA GPD-506V


Summary of Contents for YASKAWA GPD-506V
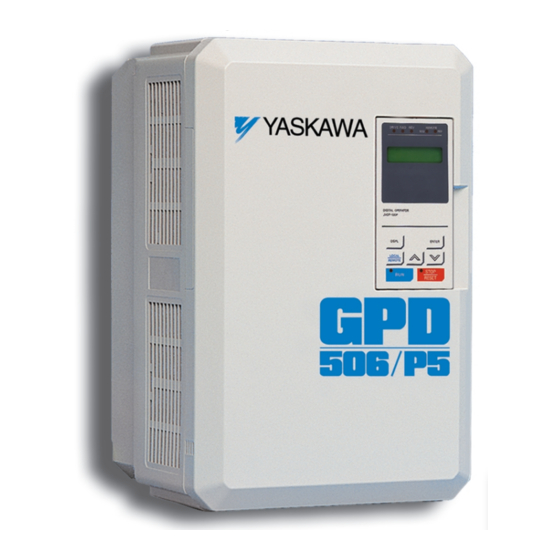
- Page 1 GPD 506/P5 Technical Manual Models: GPD-506V- and CIMR-P5M Document Number: TM4506...
-
Page 2: Table Of Contents
CONTENTS PARAGRAPH SUBJECT PAGE WARNING/CAUTION STATEMENTS ........... ii GPD 506/P5 SIMPLIFIED START-UP PROCEDURE ......v QUICK REFERENCE FOR GPD506/P5 PARAMETERS ......xi CURRENT RATINGS & HORSEPOWER RANGE ....... xii INSTALLATION ................... 1-1 General ....................1-1 Receiving ..................... 1-1 Physical Installation ................1-1 Electrical Installation ................ - Page 3 CONTENTS – Continued PARAGRAPH SUBJECT PAGE 5.15 Jog Reference ..................5-20 5.15.1 Local/Remote Changeover ..............5-21 5.16 Modbus Control ................... 5-22 5.16.1 Miscellaneous Protective Functions ............ 5-25 5.17 Momentary Power Loss Ride-thru ............5-26 5.18 Multi-function Analog Monitor Output (Term. AM & AC) ..... 5-27 5.19 Multi-function Input Terminals (Term.
- Page 4 Any warnings provided by YASKAWA must be promptly provided to the end user. YASKAWA offers an express warranty only as to the quality of its products in conforming to standards and specifications published in the YASKAWA manual. NO OTHER WARRANTY, EXPRESS OR IMPLIED, IS OFFERED.
- Page 5 • This manual may be modified when necessary because of product improvement, modification, or changes in specifications. • To order a copy of this manual, if your copy has been damaged or lost, contact your YASKAWA representative or visit our webpage, www.drives.com.
-
Page 6: Gpd506/P5 Simplified Startup Procedure
GPD506/P5 Simplified Startup Procedure This procedure is a simplified step by step guide to installing, programming, and using a GPD506/P5 drive. It highlights several common installation configurations. INSTALLATION 1. Be certain your input voltage source, motor and drive nameplates are all marked either 230V, 460V or 600V. - Page 7 4. Replace cover and apply input power – digital operator shows “Frequency Ref 00.0 Hz”; DRIVE, SEQ, REF & STOP LEDs are on. Press the LOCAL / REMOTE button. The SEQ & REF LEDs should go off. Press and hold the UP ARROW button until the display shows “6.0 Hz, then press the ENTER button.
- Page 8 Example 1: Sequence & Reference From The Digital Operator GPD506/P5 When the drive is set up with the sequence and the reference coming from the digital operator, it is in “Local” control. Local control is often used during startup to verify motor operation, rotation, etc. The drive can be temporarily placed in “Local”...
- Page 9 Example 2: Remote Sequence (2-Wire) & Remote Reference (4 – 20 mA) GPD506/P5 This configuration is used when the start & stop signals and the frequency reference come from a remote source, such as a PLC. It can also be used with a maintained switch when it is desirable to have the drive restart on restoration of power.
- Page 10 Example 3: Remote Sequence (3-Wire) & Speed Potentiometer GPD506/P5 This configuration is best when a person rather than an external controller (PLC, relay, etc.) controls the drive. Both potentiometers ((R1) & (R2)) should have a resistance value between 2000Ω and 3000Ω and be rated for at least 1 Watt.
- Page 11 Definitions Sequence – refers to how the drive is started, stopped, and told which direction to run. When the sequence comes from the digital operator (local), the drive is started and stopped using the “RUN” and “STOP” keys on the digital operator, and direction is given via the “FWD/REV”...
-
Page 12: Quick Reference For Gpd506/P5 Parameters
QUICK REFERENCE FOR GPD 506/P5 PARAMETERS (FACTORY SET) PARAMETER FACTORY USER PARA. PARAMETER FACTORY USER PARA. PARAMETER FACTORY USER PARA. NUMBER SETTING SETTING REF. NUMBER SETTING SETTING REF. NUMBER SETTING SETTING REF. n001 5.23 n034 STD Motor / 8 Min (1) 5.26 n076 5.20... -
Page 13: Current Ratings & Horsepower Range
Current Ratings & Horsepower Range NOMINAL HORSEPOWER RATED CURRENT NEW DRIVE OLD DRIVE INPUT RATING (AMPS) MODEL NO. MODEL NO. (120% OL) CIMR-P5M GPD506V- 0.75 20P41F A003 1 & 1.5 20P71F A006 21P51F A008 22P21F A011 17.5 23P71F A017 7.5 & 10 25P51F A027 27P51F... -
Page 14: Installation
Section 1. RECEIVING AND INSTALLATION 1 1 . . 1 1 G G E E N N E E R R A A L L The GPD 506/P5, hereafter referred to as the drive, is a high performance sine-coded pulse width modulated special purpose AC motor drive which generates an adjustable voltage/frequency three phase output for complete speed control of most conventional squirrel cage induction motors. - Page 15 • NEVER allow wire leads to contact metal surfaces. Short-circuit may result. • NEVER connect power factor correction capacitors to the drive output. Consult Yaskawa when connecting noise filters to the drive output. • WIRE SIZING MUST BE SUITABLE FOR CLASS I CIRCUITS.
- Page 16 Table 1-1. Typical Wire Sizing For Main Circuit* SECTION A. 230V NEW DRIVE OLD DRIVE WIRE SIZE TERMINAL WIRE SIZE TERMINAL MODEL NO. MODEL NO. TERMINAL SYMBOL RATING TERMINAL SYMBOL SCREW SCREW mm 2 CIMR-P5M GPD506V- L1 (R), L2 (S), L3 (T), - , ⊕ 1, ⊕ 2, B1, B2, T1 (U), T2 (V), T3 (W), 20P41F, A003, 14 - 10...
- Page 17 Table 1-1. Typical Wire Sizing For Main Circuit - Continued* Section B. 460V - Continued NEW DRIVE OLD DRIVE WIRE SIZE DRIVE TERMINAL WIRE SIZE TERMINAL MODEL NO. MODEL NO. TERMINAL SYMBOL mm 2 MODEL NO. TERMINAL SYMBOL SCREW SCREW mm 2 CIMR-P5M GPD506V-...
- Page 18 Table 1-1. Typical Wire Sizing For Main Circuit - Continued* Section C. 575V DRIVE WIRE SIZE DRIVE TERMINAL WIRE SIZE TERMINAL MODEL NO. TERMINAL SYMBOL mm 2 MODEL NO. TERMINAL SYMBOL SCREW SCREW mm 2 CIMR-P5M L1 (R), L2 (S), L3 (T), - , ⊕ 1, ⊕ 2, B1, B2, T1 (U), T2 (V), T3 (W) 51P51F 14 - 10 2 - 5.5...
- Page 19 Table 1-2. Typical Terminal Functions and Voltages of Main Circuit SECTION A. 230V SECTION A. 230V FUNCTION New Drive Model No. TERMINAL FUNCTION 20P41F - 27P51F 20111F - 20151F 20181F - 20750F TERMINAL CIMR-P5 3 TO 40 HP Old Drive Model No. A003-A036 A080 - A312 A054 - A068...
- Page 20 Table 1-2. Terminal Functions and Voltages of Main Circuit SECTION C. 600V FUNCTION TERMINAL CIMR-P5M51P51F to P5M50151F CIMR-P5M50181F to P5M50221F CIMR-P5M50301F to P5M51600F L1 (R) Three phase Main circuit input power supply L2 (S) 500 / 575 / 600V at 50 Hz / 60HZ L3 (T) T1 (U) Three phase AC output to motor...
- Page 21 M M a a i i n n C C i i r r c c u u i i t t C C o o n n f f i i g g u u r r a a t t i i o o n n B B l l o o c c k k D D i i a a g g r r a a m m s s 2 2 3 3 0 0 V V CIMR-P5M20P41F to 27P51F CIMR-P5M20111F to 20151F GPD506V-A003 to -A036...
- Page 22 M M a a i i n n C C i i r r c c u u i i t t C C o o n n f f i i g g u u r r a a t t i i o o n n B B l l o o c c k k D D i i a a g g r r a a m m s s 4 4 6 6 0 0 V V CIMR-P5M40P41F to 40151F CIMR-P5M40181F to 40451F GPD506V-B001 to -B034...
- Page 23 M M a a i i n n C C i i r r c c u u i i t t C C o o n n f f i i g g u u r r a a t t i i o o n n B B l l o o c c k k D D i i a a g g r r a a m m s s 6 6 0 0 0 0 V V (DCL Option) L1 (R)
- Page 24 Table 1-3. Terminal Functions and Signals of Control Circuit TERMINAL FUNCTIONS DESCRIPTION / SIGNAL LEVELS TERMINAL FUNCTIONS LEVELS 2-WIRE CONTROL: Forward Run / Stop signal Run at closed, stop at open (See NOTE 2) (See NOTE 1) 3-WIRE CONTROL: Run signal Run at closed (See NOTE 2) 2-WIRE CONTROL: Reverse Run / Stop signal Run at closed, stop at open (See NOTES 2 &...
- Page 25 NOTES: When Forward Run and Reverse Run inputs are both closed for more than 500 ms, the Digital Operator displays a blinking “ EF Ext Fault ” alarm code and the motor (if rotating) is decelerated by the drive to a stop. This stop condition is not stored by the drive (on Digital Operator, red LED at S S T T O O P P key does not light);...
- Page 26 1 1 . . 4 4 . . 3 3 A A u u x x i i l l i i a a r r y y I I n n p p u u t t a a n n d d O O u u t t p p u u t t P P o o w w e e r r O O p p t t i i o o n n D D e e v v i i c c e e s s A disconnect device (circuit breaker, contactor, disconnect switch, etc.) should NOT be used as a means of starting and stopping the drive or motor.
- Page 27 (max. 20 m) must be used and the screen of the motor cable should be connected to ground at both ends by a short connection, using as large an area as practical. For more detailed explanation, refer to Yaskawa document TD 4077, “Installation Guidelines For EMC Directive using Yaskawa AC Drive Products.”...
- Page 28 Ground Bonds (remove any paint) Ground Bands (remove any paint) INVERTER 506/P5 MAINS FILTER LOAD U V W Cable Length max. 40cm Metal Plate Motor Cable max. 20m Ground Bonds (remove any paint) Ground Bands (remove any paint) Figure 1-2A. Installation of Line Filter and GPD 506/P5 Drive 1-15...
- Page 29 1 1 . . 4 4 . . 4 4 C C o o n n t t r r o o l l C C i i r r c c u u i i t t All basic control circuit (signal) interconnections are shown in the appropriate diagram: •...
- Page 30 1-17...
- Page 31 N N O O T T E E S S F F O O R R F F I I G G U U R R E E 1 1 - - 3 3 ✱ – Indicates components not supplied. ✱✱...
- Page 32 DC Reactor (See Note 6) – 1OL (See Note 2) MCCB U (T1) L1 ( R ) (See Note 8) 3-Phase V (T2) L2 ( S ) Power Supply W (T3) L3 ( T ) 506/P5 MOTOR (For 1-Phase power supply, connect to L1 (R) and L2 (S);...
- Page 33 N N O O T T E E S S F F O O R R F F I I G G U U R R E E 1 1 - - 4 4 ✱ – Indicates components not supplied. ✱✱...
- Page 34 DC Reactor (See Note 6) — 1OL (See Note 2) MCCB U (T1) L1 ( R ) (See Note 8) 3-Phase V (T2) L2 ( S ) Power Supply W (T3) L3 ( T ) 506/P5 MOTOR (For 1-Phase power supply, connect to L1 (R) and L2 (5);...
- Page 35 1-22...
-
Page 36: Pre-Power Checks
Section 2. INITIAL START-UP ("LOCAL" CONTROL) PRE-POWER CHECKS • Verify wires are properly connected and no erroneous grounds exist. • Remove all debris from the drive enclosure. Check for loose wire clippings. • Verify all mechanical connections inside the drive are tight. •... -
Page 37: Test Run Using Digital Operator ("Local" Control)
2 . 2 T E S T R U N USING DIGITAL OPERATOR ( " L O C A L " CONTROL) The operation described in Table 2-1 and shown in Figure 2-2 is for a standard 60 Hz motor. CHANGE FREQ. - Page 38 Table 2-1. Test Run With Digital Operator - Continued DIGITAL OPERATOR DESCRIPTION KEY SEQUENCE DISPLAY ➂ Forward Run Press RUN LED turns " " • Forward run (15 Hz) Output Freq 15.0 Hz (after motor reaches set frequency) ➃ Reverse Run Press DSPL •...
-
Page 39: Pre-Operation Considerations
Table 2-1. Test Run With Digital Operator - Continued DIGITAL OPERATOR DESCRIPTION KEY SEQUENCE DISPLAY ➄ (Continued) • Write-in set value Press Frequency Ref 60.0 Hz ENTER • Select output frequency Press Output Freq monitor display. DSPL 60.0 Hz ➅ Stop •... -
Page 40: Operation At Load
Section 3. OPERATION AT LOAD After completing the start-up, and programming of constants, turn off the AC main circuit power. Make additional wiring connections required for the external control functions selected by the constant programming. Connect the driven machine to the motor. Verify that the driven machine is in running condition, and that no dangerous conditions exist around the drive system. -
Page 41: Digital Operator
Section 4. DIGITAL OPERATOR GENERAL All functions of the GPD 506/P5 are accessed using the Digital Operator. In addition to controlling motor operation, the operator can enter information into the drive memory to configure the drive to the application, either by using the Quick-Start Displays or by entering the Program mode. -
Page 42: Description Of Quick-Start Displays
4 . 2 . 1 D e s c r i p t i o n o f Q u i c k - S t a r t D i s p l a y s By pressing the DSPL key on the Digital Operator while the drive is stopped or running, the operator can step to each of the sixteen Quick-Start Displays and its associated display/setting function: Press... - Page 43 F o r w a r d / R e v e r s e — FWD/REV Run Selection Sets the rotation direction of the motor when a Run command is given by the Digital Operator keypad. Display of F o r = forward run, rEv = reverse run.
- Page 44 M o t o r R a t e d F L A — M o t o r R a t e d C u r r e n t [ n 0 3 3 ] Sets the Amps used for detecting motor overload. This is normally set to the motor rated current value (nameplate full-load amps).
-
Page 45: Basic Programming
4 . 3 B A S I C PROGRAMMING By using the Quick-Start Displays on the Digital Operator, simple programming of the drive is possible. Following are examples of two methods for setting the acceleration time ( n 0 1 8 ). The first example shows how to utilize the A c c e l Quick-Start Display, and the second example shows how to access parameter n 0 1 8 through the Program Mode. -
Page 46: Monitor Displays
4 . 4 M O N I T O R DISPLAYS When using the M o n i t o r Function, a variety of information will appear on the Digital Operator display when each of the U-XX (display only) parameters is selected. CONSTANT DISPLAY CONSTANT... -
Page 47: Programmable Features
Section 5. PROGRAMMABLE FEATURES GENERAL This section describes features of the drive which are defined by programmed settings in the various parameters in memory. Since most features use more than one parameter, the descriptions appear in alphabetical order by the function name. In Table 5-1, the functions are grouped into operational categories. - Page 48 T a b l e 5 - 1 . L i s t o f F e a t u r e s D e f i n e d B y P a r a m e t e r s - C o n t i n u e d PARAGRAPH FUNCTION P A R A M E T E R ( S )
-
Page 49: Accel/Decel Time
5 . 2 A C C E L / D E C E L TIME n 0 1 8 : Accel Time 1 Factory setting (each): 10.0 seconds n 0 1 9 : Decel Time 1 Range (each): 0.0 to 3600 seconds n 0 2 0 : Accel Time 2 Factory setting (each): 10 seconds n 0 2 1 : Decel Time 2... -
Page 50: Accel/Decel: S-Curve Characteristics
ACCEL/DECEL: S-CURVE CHARACTERISTICS n 0 2 2 : S-Curve Selection (S-Curve Select) Setting of this parameter determines the S-curve (starting) characteristics of the acceleration ramp. OUTPUT FREQ FREQUENCY COMMAND Accel ramp per selected Accel Time (n018 or n020 ) TIME S-Curve Characteristics Time (T L E D S e t t i n g... -
Page 51: Auto-Restart
5 . 4 A U T O - R E S T A R T n 0 6 0 : Number of Auto-Restart Attempts Factory setting: 0 (Num of Restarts) Range: 0 - 10 When a fault occurs during operation, the drive can be programmed for an auto-restart operation to automatically reset the fault. -
Page 52: Carrier Frequency
CARRIER FREQUENCY n 0 5 4 : Carrier Frequency Upper Limit (Carrier Freq Sel) The relationship between output frequency and carrier frequency is determined from the set value of n 0 5 4 . ( a ) For constant carrier frequency, set to "2.5 kHz" through "15.0 kHz." ( b ) For synchronous mode, set n 0 5 4 to "synchronous 1, 2, or 3"... -
Page 53: Critical Frequency Rejection
5 . 6 C R I T I C A L FREQUENCY REJECTION n 0 6 2 : Prohibited Frequency 1 (Jump Freq 1) Factory setting (each): 0.0 n 0 6 3 : Prohibited Frequency 2 (Jump Freq 2) Range (each): 0.0 to 400.0 Hz These parameters allow programming of up to two prohibited frequency points for eliminating problems with resonant vibration of the motor/machine. -
Page 54: Dc Injection Braking
DC INJECTION BRAKING n 0 1 6 : Minimum Frequency (Min Frequency) Range: 0.1 to 10.0 Hz n 0 6 8 : DC Injection Braking Current (DC Inj Current) Factory setting: 50 % (% of Drive Rated Current) Range: 0 to 100 % n 0 6 9 : DC Injection Time at Stop (DC Inj Time@Stop) Factory setting: 0.0 sec... -
Page 55: Digital Operator Display Selection
5 . 8 D I G I T A L OPERATOR DISPLAY SELECTION n 0 2 3 : Operator Display Mode Factory setting: 0 Reference and Indication (Display Units) Range: 0 to 4999 This parameter determines the scaling of the Digital Operator display, for both Output Frequency and all Frequency References. - Page 56 5 . 8 D I G I T A L OPERATOR DISPLAY SELECTION Continued Exceptions to the general format are as follows: n 0 2 3 DISPLAY " 1 0 0 0 " 1 0 0 . 0 " 2 0 0 0 " 1 0 .
-
Page 57: Energy Saving Control
ENERGY SAVING CONTROL n 0 9 6 : Energy Saving Selection (Energy Save Sel) LED Setting LCD Setting Disabled* Enabled To enable energy saving control, n 0 9 6 must be set to "Enabled" (" 1 "). Since the parameters used in the energy saving control mode have been preset to the optimum values, it is not necessary to adjust them under normal operation. - Page 58 ENERGY SAVING CONTROL Continued Energy Saving Tuning In the energy saving control mode, the optimum voltage is calculated according to load power, and this voltage is supplied to the load. However, since the set parameter may change due to temperature variations or using other manufacturers’ motors, the optimum voltage may not necessarily be supplied.
- Page 59 5.10 FREQUENCY REFERENCE BIAS/GAIN n 0 4 8 : Terminal FV Gain Factory setting: 100 % Range: 0 to 200 % Sets the auto-speed frequency command gain, in increments of 1%. n 0 4 9 : Terminal FV Bias Factory setting: 0 % Range: -100 to 100 % Sets the auto-speed frequency command bias, in increments of 1%.
- Page 60 5.10 FREQUENCY REFERENCE BIAS/GAIN Continued For inverse-acting frequency reference Begin with n 0 4 8 & n 0 4 9 settings as shown below. Fine tune as indicated in A or B above. GPD 506/P5 FV 0-10V (20K Ω) Frequency reference inputs: FREQUENCY FI 4-20 mA (250 Ω) terminals FV &...
-
Page 61: Frequency Reference Input Signals (Auto/Manual)
5.11 FREQUENCY REFERENCE INPUT SIGNALS (AUTO/MANUAL) n 0 4 3 : Analog Input Selection (AnalogInput Sel) To input an auto frequency reference from external terminals, program n 0 4 3 t o “FV=MSTR FI=AUX” (“0”) for a voltage reference (0 to 10V) or to " FV=AUX FI=MSTR " (“1”) for a current reference (4 to 20mA). - Page 62 Continued 5.11 FREQUENCY REFERENCE INPUT SIGNALS (AUTO/MANUAL) A. Speed pot or 0-10VDC signal only: B. 4-20mA signal only: C. 0-10VDC signal (auto) and speed pot (manual): D. 4-20mA DC signal (auto) and 0-10VDC signal or speed pot (manual): 5-16...
-
Page 63: Frequency Reference Upper & Lower Limits
5.12 FREQUENCY REFERENCE UPPER & LOWER LIMITS n 0 3 1 : Frequency Reference Upper Limit Factory setting: 100 % (Ref Upper Limit) Range: 0 to 109 % n 0 3 2 : Frequency Reference Lower Limit Factory setting: 0 % (Ref Lower Limit) Range: 0 to 100 % These two parameters set the range for the frequency command signal. -
Page 64: Frequency Reference - Loss Detection
5.13 FREQUENCY REFERENCE - LOSS DETECTION n 0 4 6 : Frequency Reference Loss Detection (Ref Loss Detect) n 0 4 7 : Frequency Reference Level at Loss Factory setting: 80% of Frequency Detection Range: 0 - 100% (Fref Lvl@FLoss) L E D T e r m i n a l F I S i g n a l L e v e l S e t t i n g... -
Page 65: Frequency Reference Retention
5.14 FREQUENCY REFERENCE RETENTION n 0 4 5 : Frequency Reference Retention (MOP Ref Memory) Useable with the Up/Down or Sample/Hold commands when either is used as a multi- function contact input. To retain the held frequency reference in n 0 2 4 when power is removed, set n 0 4 5 to "Memorize FREF"... -
Page 66: Jog Reference
5 . 1 5 J O G REFERENCE n 0 3 0 : Jog Reference Factory setting: 6.0 Hz Range: 0.0 to 400.0 Hz n 0 3 6 thru n 0 4 0 : Multi-function Inputs Data : Jog Command (13) (Term. -
Page 67: Local/Remote Changeover
5 . 1 5 . 1 L O C A L / R E M O T E CHANGEOVER n 1 1 1 : Local/Remote Changeover GPD Drive Remote Local L E D S e t t i n g L C D S e t t i n g D e s c r i p t i o n C y c l e E x t e r n R U N *... -
Page 68: Modbus Control
5.16 MODBUS CONTROL The drive can perform serial communication by using a programmable controller (PLC) and MODBUS protocol. MODBUS is composed of one master PLC and 1 to 31 (maximum) slave units (GPD 506/P5 drives). In serial communication between the master and slaves, the master always starts transmission and the slaves respond to it. - Page 69 Continued 5.16 MODBUS CONTROL Data COM/Inv Sel (6) : Serial Communication / n 0 3 6 thru n 0 4 0 : Multi-function Inputs Digital Operator (Term. S2-S6 Sel) Selects operation by serial communication or by external terminal. If the status of this command input is changed while the drive is running, the selection is ignored until the next time the drive is stopped.
- Page 70 5.16 MODBUS CONTROL n 1 0 6 : Modbus Parity Selection (MODBUS Parity) Selects the parity, as indicated by the following table: LED Setting LCD Setting (BPS) No Parity * Even Parity Odd Parity NOTE: To change the values set in n 1 0 4 thru n 1 0 6 and enable the new settings, it is necessary to turn OFF power to the Drive, then turn it ON again.
-
Page 71: Miscellaneous Protective Functions
5.16.1 MISCELLANEOUS PROTECTIVE FUNCTIONS n 1 1 0 : Operator Connection Fault Detection Selection (Oper Detect Flt) LED Setting LCD Setting Disabled* Enabled Set this parameter to "Enabled" ("1") only if the drive should shut down immediately if the Digital Operator is disconnected while the drive is running. When set to Disabled ("2")the fault will not occur until after the drive has been stopped. -
Page 72: Momentary Power Loss Ride-Thru
5 . 1 7 M O M E N T A R Y POWER LOSS RIDE-THRU n 0 5 5 : Momentary Power Loss Ride-thru Protection LED Setting LCD Setting Description Not Provided* Disabled (Factory setting) 2 Seconds Max Enabled – 2 sec. power loss ride-thru CPU Power Active Enabled –... -
Page 73: Multi-Function Analog Monitor Output (Term. Am & Ac)
5 . 1 8 M U L T I - F U N C T I O N ANALOG MONITOR OUTPUT ( T e r m . A M & A C ) n 0 5 2 : Multi-function Analog Output (Teminal AM Sel) The monitor output provides a 0-10 Vdc signal FREQUENCY / CURRENT... -
Page 74: Multi-Function Input Terminals (Term. S2 - S6)
5 . 1 9 M U L T I - F U N C T I O N INPUT TERMINALS ( T e r m . S 2 - S 6 ) 2-Wire Control n 0 3 6 : Terminal S2 Sel Factory Settings: n 0 3 7 : Terminal S3 Sel n036... - Page 75 5 . 1 9 M U L T I - F U N C T I O N INPUT TERMINALS ( T e r m . S 2 - S 6 ) Continued T a b l e 5 - 2 . n 0 3 6 t h r u n 0 4 0 D a t a S e t t i n g s SETTING SETTING FUNCTION...
- Page 76 5 . 1 9 M U L T I - F U N C T I O N INPUT TERMINALS ( T e r m . S 2 - S 6 ) Continued T a b l e 5 - 2 . n 0 3 6 t h r u n 0 4 0 D a t a S e t t i n g s - C o n t i n u e d SETTING SETTING FUNCTION...
-
Page 77: Remote/Local
5 . 1 9 M U L T I - F U N C T I O N INPUT TERMINALS ( T e r m . S 2 - S 6 ) Continued Local/Remote Sel ( 5 ) : Remote/Local Selection Set parameter n 0 0 2 to "SEQ=TRM REF=TRM"... - Page 78 Continued 5 . 1 9 M U L T I - F U N C T I O N INPUT TERMINALS ( T e r m . S 2 - S 6 ) ( n029 ) ( n024 ) OUTPUT ( n028 ) SPEED ( n027 )
-
Page 79: External Base Block
5 . 1 9 M U L T I - F U N C T I O N INPUT TERMINALS ( T e r m . S 2 - S 6 ) Continued Ext Baseblk (NO) (15 ) : External Base Block by N.O. Contact •... -
Page 80: Speed Search
5 . 1 9 M U L T I - F U N C T I O N INPUT TERMINALS ( T e r m . S 2 - S 6 ) Continued Spd Srch (MAX FRQ) (17 ): Speed Search From Max Frequency Spd Srch (SET FRQ) (18 ) : Speed Search From Set Frequency A multi-function input terminal is utilized to activate speed search. - Page 81 Continued 5 . 1 9 M U L T I - F U N C T I O N INPUT TERMINALS ( T e r m . S 2 - S 6 ) n 0 5 7 : Minimum Baseblock Time Factory setting: See Table A3-1 (Min Baseblock t) Range: 0.0 to 25.5 sec.
-
Page 82: Timer Function
5 . 1 9 M U L T I - F U N C T I O N INPUT TERMINALS ( T e r m . S 2 - S 6 ) Continued Timer Start Cmd (22 ) : Timer Function n 0 4 1 or n 0 4 2 : Multi-function Output Terminals Timer Output 1 1 : Timer Function (Terminal MA Sel) or (Terminal M1 Sel) -
Page 83: Sample/Hold Command
5 . 1 9 M U L T I - F U N C T I O N INPUT TERMINALS ( T e r m . S 2 - S 6 ) Continued Ref Sample Hold (24 ) : Sample/Hold Command This function applies only to an analog voltage or current input used as a frequency reference at terminals FV or FI. - Page 84 5 . 1 9 M U L T I - F U N C T I O N INPUT TERMINALS ( T e r m . S 2 - S 6 ) Continued FWD RUN (S5) UP COMMAND (S6) DOWN COMMAND UPPER LIMIT SPEED...
- Page 85 5 . 1 9 M U L T I - F U N C T I O N INPUT TERMINALS ( T e r m . S 2 - S 6 ) Continued H . Hold Command (27): Accel/Decel Hold By programming data "Hold Command"...
-
Page 86: Up/Down Function
Continued 5 . 1 9 M U L T I - F U N C T I O N INPUT TERMINALS ( T e r m . S 2 - S 6 ) Up/Down Control ( 29 ): Up/Down Function Programming data "Up/Down Control"... -
Page 87: Multi-Function Output Terminals
5.20 MULTI-FUNCTION OUTPUT TERMINALS (Term. MA, MB & MC; M1 & M2) n 0 4 1 : Contact Output (external GPD 506/P5 terminals MA, MB & MC) FACTORY MULTI- (Terminal MA Sel) SETTING FUNCTION n 0 4 2 : Contact Output (external IS FOR CONTACT terminals M1 &... - Page 88 5 . 2 0 M U L T I - F U N C T I O N OUTPUT TERMINALS Continued n 0 7 5 : Speed Coincidence Frequency / Frequency Factory setting: 0.0 Hz Detection Level Range: 0.0 to 400.0 Hz (Freq Det Level) Speed coincidence is used to control an output contact at terminals MA or MB (with respect to terminal MC), or terminals M1 &...
-
Page 89: Overtorque /Undertorque Detection
5.21 OVERTORQUE / UNDERTORQUE DETECTION Overtorque detection is used to compare drive rated output current with the overtorque detection level. When the output current is equal to or greater than the defined level, an overtorque condition exists. This will be indicated as an "oL3 Overload 3 " fault on the Digital Operator. - Page 90 5.21 OVERTORQUE / UNDERTORQUE DETECTION Continued n 0 4 1 : Multi-function Output 1 – Contact OverTrq Det (NO) ( 6 ) or OverTrq (Terminal MA Sel) Det (NC) ( 7 ): Overtorque / Undertorque Detection n 0 4 2 : Multi-function Output 2 – Contact (Terminal M1 Sel) A Form-C contact, or an N.O.
-
Page 91: Pid Control
5 . 2 2 P I D C O N T R O L The Proportional, Integral and Derivative control function provides closed-loop control, or regulation, of a system process variable (pressure, temperature, etc.). This regulation is accomplished by comparing a feedback signal to a setpoint reference, which results in an error signal. - Page 92 5 . 2 2 P I D C O N T R O L Continued Setpoint Reference Selection n 0 0 2 : Operation Mode Selection (Oper Mode Sel) n 0 4 3 : Analog Input Selection (AnalogInput Sel) n 0 2 4 thru n 0 3 0 : Multi-step Frequency Presets Factory settings: n 0 3 0 = 6 .
- Page 93 5 . 2 2 P I D C O N T R O L Continued • If the setpoint is entered via the keypad, the entered setpoint needs to be recalculated as follows: Entered Setpoint = Max Value (n 0 2 3 ) – Desired Setpoint This effectively inverts the reference input.
- Page 94 5 . 2 2 P I D C O N T R O L Continued n 0 8 7 : Integral Time Factory setting: 1 0 . 0 seconds (PID I Time) Range: 0.0 to 100.0 seconds This parameter determines how fast the integral gain increase is added to the control loop.
- Page 95 5 . 2 2 P I D C O N T R O L Continued n 0 9 4 : Sleep Function Start Level Factory setting: 0 . 0 Hz (Sleep Start Lvl) Range: 0.0 to 400.0 Hz n 0 9 5 : Sleep Function Delay Time Factory setting: 0 .
-
Page 96: Reset Codes; 2-Wire, 3-Wire Initialization
5 . 2 3 R E S E T CODES: 2-WIRE, 3-WIRE INITIALIZATION n 0 0 1 : Parameter Selection / Initialization Factory setting: 1 (Password) Range: 0 to 9 The following table shows which parameters can be programmed (displayed & changed) or only displayed when n 0 0 1 is selected. -
Page 97: Slip Compensation
5 . 2 3 . 1 S L I P COMPENSATION n 1 0 7 : Slip Compensation Gain Factory setting: 0 . 0 % (Slip Comp Gain) Range: 0.0 to 9.9 % Slip compensation is used to increase motor speed to account for slip; the drive accomplishes this by automatically boosting output frequency, with a corresponding boost in output voltage. - Page 98 5 . 2 3 . 1 S L I P COMPENSATION Continued n 1 0 8 : Motor No-Load Current Factory setting: 2 . 0 sec. (Mtr No-Load Amp) Range: 0.0 to 25.5 sec. Motor no-load current (n 1 0 8 ) is set as a percentage of motor full-load current (n 0 3 3 ). It is used as shown in the slip compensation block diagram.
-
Page 99: Stall Prevention
5 . 2 4 S T A L L PREVENTION n 0 7 2 : Stall Prevention During Deceleration Factory setting: 1 (StallP Decel Sel) LED Setting LCD Setting Description Disabled Stall Prevention during deceleration disabled Enabled * Stall Prevention during deceleration enabled Stall prevention during deceleration Controls the automatically adjusts the deceleration... - Page 100 5 . 2 4 S T A L L PREVENTION Continued n 0 7 4 : Stall Prevention Level At Set Speed Factory setting: See Table A3-1 (StallP Run Lvl) Range: 30 - 200 % This parameter determines the actual drive output current level MOTOR while operating at set speed CURRENT...
-
Page 101: Stopping Method
5 . 2 5 S T O P P I N G METHOD n 0 0 4 : Stopping Method Selects the stopping method suitable for the application. LED Setting LCD Setting Description Ramp to STOP* Deceleration (ramp) to stop Coast to STOP Coast to stop Coast w/Timer 1... - Page 102 5 . 2 5 S T O P P I N G METHOD Continued Coast w/Timer 1 ( 2 ) : Coast to Stop With Timer 1 When programmed for coast to stop with timer 1, a Run command is ignored if issued during the time the motor would normally be decelerating (n 0 1 9 or n 0 2 1 ), or for the minimum base block time (n 0 5 7 ), whichever is longer.
-
Page 103: Thermal Overload Protection
5 . 2 6 T H E R M A L OVERLOAD PROTECTION n 0 3 3 : Motor Rated Current Factory setting: See Table A3-1 (Motor Rated FLA) Range: see description This parameter should be set, in increments of 0.1 A, to the rated current (FLA) value shown on the motor nameplate;... - Page 104 5 . 2 6 T H E R M A L OVERLOAD PROTECTION Continued • General-purpose and blower-cooled motors Induction motors are classified as general-purpose or blower-cooled motors, based on their cooling capabilities; the motor overload detection function operates differently, as shown, for each of these two motor types.
-
Page 105: Torque Compensation
5 . 2 7 T O R Q U E COMPENSATION n 0 7 1 : Torque Compensation Gain (K Factory setting: 1.0 (Torq Comp Gain) Range: 0.0 to 3.0 Sets the torque compensation, in increments of 0.1. When the motor has the same capacity as that of the drive, the gain is 1.0. - Page 106 NOTES: VT = Variable Torque, typically used for blowers, centrifugal pumps, and fans. CT = Constant Torque, most other applications. Consult Yaskawa for further assistance. The following conditions must be considered when selecting a V/f pattern: - Pattern matches the voltage-frequency characteristics of the motor.
- Page 107 5 . 2 8 V / f P A T T E R N Continued n 0 1 1 : Frequency – Max. (Fmax) n 0 1 2 : Voltage – Max. (Vmax) n 0 1 3 : Frequency – Max. Voltage point (F n 0 1 4 : Frequency –...
- Page 108 5 . 2 8 V / f P A T T E R N Continued NOTE: To establish a V/f pattern with a straight line from Fmin to F , set = Fmin. The setting of V is then disregarded and does not affect the V/f pattern.
-
Page 109: Input Phase Loss Detection
5 . 2 9 I N P U T PHASE LOSS DETECTION n 0 8 3 : Input Phase Loss Detection Level Factory setting: 7 % (In Ph Loss Lvl) Range: 1 to 100 % The input phase loss detection circuit monitors the DC bus current ripple and activates when one of the input phases is lost. -
Page 110: Fault Indication And Troubleshooting
Section 6. FAULT INDICATION AND TROUBLESHOOTING GENERAL A failure in the GPD 506/P5 can fall into one of two categories, Alarm or Fault. A blinking "Alarm" indication is a warning that a drive trouble condition will soon occur, or that a problem exists in the external circuitry. The drive will continue to operate during an "Alarm"... - Page 111 T a b l e 6 - 2 . F a u l t I n d i c a t i o n a n d D e t a i l s INDICATION INDICATION (DISPLAY) FAILURE INDICATION ITEM DESCRIPTION (DISPLAY) FAULT...
- Page 112 T a b l e 6 - 2 . F a u l t I n d i c a t i o n a n d D e t a i l s - C o n t i n u e d INDICATION INDICATION (DISPLAY)
-
Page 113: Displaying Fault Sequence
DISPLAYING FAULT SEQUENCE A . If a fault is reset either from the digital operator or a multi-function input, ALL FAULT INFORMATION WILL BE LOST. B . If one or more faults occur simultaneously and are NOT reset (by digital operator, multi-function input, or cycling power), up to four faults can be displayed by pressing the “up arrow”... -
Page 114: Troubleshooting Flowcharts
6 . 3 TROUBLESHOOTING FLOWCHARTS If the GPD 506/P5 Drive malfunctions, locate the cause and take corrective action by following the flowcharts given in this section. A. TROUBLESHOOTING MOTOR SYMPTOMS Motor Does Not Rotate ................Chart 6.1 Motor Stalls During Acceleration ..............Chart 6.2 B. -
Page 115: Motor Does Not Rotate
TROUBLESHOOTING C H A R T 6 . 1 MOTOR DOES NOT ROTATE "CHARGE" LAMP ON MAIN PC BOARD LIT? CHECK CIRCUIT RATED VOLTAGE BREAKER, MAGNETIC ACROSS TERMINALS CONTACTOR AND L1 (R), L2 (S), AND L3 (T)? INPUT POWER. FAULT CODE GO TO SHOWN ON APPROPRIATE... - Page 116 TROUBLESHOOTING C H A R T 6 . 1 - C o n t i n u e d FROM PRECEDING PAGE CHECK EXTERNAL PROPER FREQUENCY REFERENCE INPUT? CIRCUITS FOR (TERMINAL FC(-) TO PROBLEM AND FV OR FI) REPAIR. VOLTAGE PRESENT ACROSS DRIVE OUTPUT TERMINALS IS FAULTY.
-
Page 117: Motor Stalls During Acceleration
TROUBLESHOOTING C H A R T 6 . 2 MOTOR STALLS DURING ACCELERATION WITH DRIVE IN ACCELERATION TIME TOO SHORT? STOPPED CONDITION, EXTEND ACCELER- ATION TIME BY REPROGRAMMING n018 OR n020 . LOAD TORQUE TOO HIGH? LOAD CHECK IF SPECIAL INERTIA MOTOR IS USED. -
Page 118: Overvoltage (Ou) Fault Indication
TROUBLESHOOTING C H A R T 6 . 3 OVERVOLTAGE ( ou ) FAULT INDICATION IS INPUT AC SUPPLY DECREASE TO VOLTAGE CORRECT? PROPER VOLTAGE RANGE. WITH DRIVE IN STOPPED CONDITION, DOES OV TRIP INCREASE DECELER- OCCUR ONLY ATION TIME BY DURING DECEL- REPROGRAMMING ERATION? -
Page 119: Blown Fuse (Puf) Fault Indication
TROUBLESHOOTING C H A R T 6 . 4 BLOWN FUSE ( PUF ) FAULT INDICATION DISCONNECT LEADS FROM OUTPUT TERMINALS T1 (U), T2 (V) AND T3 (W). ARE MOTOR WINDINGS MOTOR SHORTED (T1 TO T2, IS FAULTY. T2 TO T3, OR T3 TO T1)? ARE DRIVE PHASES LOCATE AND SHORTED TO GROUND? -
Page 120: Overcurrent (Oc) Fault Indication
TROUBLESHOOTING C H A R T 6 . 5 OVERCURRENT ( oC ) FAULT INDICATION DOES OUTPUT WITH DRIVE IN STOPPED CON- CURRENT EXCEED DITION, INCREASE ACCELERATION 200% OF RATING? TIME BY REPROGRAMMING n018 OR n020 , IF OC TRIP OCCURS ONLY DURING ACCELERATION. -
Page 121: Overload (Ol) Fault Indication
TROUBLESHOOTING C H A R T 6 . 6 OVERLOAD ( oL ) FAULT INDICATION LOAD TOO LARGE DECREASE LOAD (MOTOR OVERHEATED)? WITHIN RATING. WITH DRIVE IN V/F SELECTION STOPPED CONDITION, APPROPRIATE? REPROGRAM n011 - n017 TO PROPER V/f PATTERN. WITH DRIVE IN STOPPED MORE THAN ONE CONDITION, REPROGRAM... -
Page 122: Undervoltage (Uu) Fault Indication
TROUBLESHOOTING C H A R T 6 . 7 UNDERVOLTAGE ( Uu ) FAULT INDICATION - INCREASE VOLTAGE IS INPUT AC SUPPLY WITHIN PROPER RANGE. CORRECT? - CHECK WIRING BETWEEN MAIN AC CONTACTOR AND DRIVE. IS THERE AT LEAST 225VDC (FOR 230V DRIVE), 450VDC (FOR 460V DRIVE) OR 560VDC DRIVE... - Page 123 TROUBLESHOOTING C H A R T 6 . 8 CONTROL FUNCTION ERROR ( CPF ) FAULT INDICATION TURN OFF POWER. AFTER "CHARGE" LAMP ON MAIN PCB GOES OUT, TURN POWER BACK ON. 1. CHECK THAT ALL DRIVE HARNESS CONNECTORS ARE FIRMLY SEATED. IS CPF STILL INDICATED? 2.
-
Page 124: External Fault (Ef ) Indication
TROUBLESHOOTING C H A R T 6 . 9 EXTERNAL FAULT ( EF ) INDICATION ✱ IS AN EXTERNAL FAULT SIGNAL ✱✱ PRESENT (OPEN OR CLOSED FAULT HAS OCCURRED CIRCUIT BETWEEN TERMINAL IN CIRCUITS OUTSIDE SC AND WHICHEVER TERMINAL THE DRIVE. (S2-S6) HAS BEEN PROGRAMMED TROUBLESHOOT AND FOR EXT. -
Page 125: No Digital Operator Display
TROUBLESHOOTING C H A R T 6 . 1 0 NO DIGITAL OPERATOR DISPLAY DISPLAY 230/460 APPLY L1, L2, L3? POWER DAMAGED PRECHARGE CHARGE RESISTOR, INPUT LAMP DIODES, OR OUTPUT TRANSISTORS IS VOLTAGE IS VOLTAGE REPLACE BETWEEN S1/SC BETWEEN FS/FC GATE DRIVE OR TERM. -
Page 126: Diode And Igbt (Transistor) Module Resistance Test
6 . 4 D I O D E A N D IGBT (TRANSISTOR) MODULE RESISTANCE TEST DIODE MODULE Measure the resistance across the module terminals with a volt-ohm meter. Set the meter at the X1 range. The measured resistance should be within the values listed in Table 6-4. NOTE: If the DC bus fuse is blown (PUF), the values shown below may not be accurate. - Page 127 B . TRANSISTOR MODULE Measure the resistance across the module terminals with a volt-ohm meter. Set the meter to the X1 range. The measured resistance should be within the values listed in Table 6-5. NOTE: If the DC bus fuse is blown (PUF), the values shown below may not be accurate.
-
Page 128: Listing Of Parameters
Appendix 1. LISTING OF PARAMETERS The GPD 506/P5 control circuits use various parameters to select functions and characteristics of the drive. Changing of parameter settings must be done in the Program mode, or by use of the Quick-Start Displays (see Section 4). The following table lists all parameters in numerical order. - Page 129 Table A1-1. Drive Parameters ( nXXX ) – Continued PARAM. FUNCTION NAME SETTING FACTORY USER PARA. DESCRIPTION (ACTUAL DISPLAY) RANGE SETTING ** SETTING REF. n006 Reverse Prohibit Setting Setting REV Allowed ** 0 or 1 (Reverse Oper) REVProhibited n007 LOCAL/ REMOTE Setting Setting...
- Page 130 Table A1-1. Drive Parameters ( nXXX ) – Continued PARAM. FUNCTION NAME SETTING FACTORY USER PARA. DESCRIPTION (ACTUAL DISPLAY) RANGE SETTING ** SETTING REF. n014 Frequency – Level of frequency at which drive 0.1 to 399.9 3.0 (Hz) 5.28 Midpoint output voltage will reach n015 value See Note 1 (Mid...
- Page 131 Table A1-1. Drive Parameters ( nXXX ) – Continued PARAM. FUNCTION NAME SETTING FACTORY USER PARA. DESCRIPTION (ACTUAL DISPLAY) RANGE SETTING ** SETTING REF. n024 Frequency Frequency set by Digital Operator 0 to 400.0 0.0 (Hz) 5.19B Reference 1 (or value retained by Up/Down or See Note 4 (Reference 1) Sample/Hold function)
- Page 132 Table A1-1. Drive Parameters ( nXXX ) – Continued PARAM. FUNCTION NAME SETTING FACTORY USER PARA. DESCRIPTION (ACTUAL DISPLAY) RANGE SETTING ** SETTING REF. n035 Overheat Stop Method Setting Setting Stop method 0 to 3 Ramp STOP/Decel1 Ramp to stop – (OH1 Stop Decel 1 (fault) Method)
- Page 133 Table A1-1. Drive Parameters ( nXXX ) – Continued PARAM. FUNCTION NAME SETTING FACTORY USER PARA. DESCRIPTION (ACTUAL DISPLAY) RANGE SETTING ** SETTING REF. n040 Multi-function Timer Start Cmd Timer function 2 to 29 5.19 Input Selection OH3 Input OH3 (pre-alarm input) (Terminal S6 Sel) Ref Sample Hold Analog reference...
- Page 134 Table A1-1. Drive Parameters ( nXXX ) – Continued PARAM. FUNCTION NAME SETTING FACTORY USER PARA. DESCRIPTION (ACTUAL DISPLAY) RANGE SETTING ** SETTING REF. n045 Frequency 0 or 1 5.14 Reference Setting Setting Description Retention Memorize FREF**Retained in Frequency Reference 1 ( n024 ) (MOP Ref (for Up/Down, Sample/ Memory)
- Page 135 Table A1-1. Drive Parameters ( nXXX ) – Continued PARAM. FUNCTION NAME SETTING FACTORY USER PARA. DESCRIPTION (ACTUAL DISPLAY) RANGE SETTING ** SETTING REF. n054 Carrier 1 to 9 See Note 3 Frequency Setting Setting 1 (x2.5 khz) 2.5 kHz (Carrier Freq 2 (x2.5 khz) 5.0 kHz...
- Page 136 Table A1-1. Drive Parameters ( nXXX ) – Continued PARAM. FUNCTION NAME SETTING FACTORY USER PARA. DESCRIPTION (ACTUAL DISPLAY) RANGE SETTING ** SETTING REF. n061 Fault Contact 0 or 1 Selection at Setting Setting Description Automatic Activate Flt Rly** Closed during Restart auto restart No Rly Output...
- Page 137 Table A1-1. Drive Parameters ( nXXX ) – Continued PARAM. FUNCTION NAME SETTING FACTORY USER PARA. DESCRIPTION (ACTUAL DISPLAY) RANGE SETTING ** SETTING REF. n071 Torque 0.0 to 3.0 5.27 Compensation Gain (Torq Comp Gain) n072 Stall Preven- tion During Setting Setting 0 or 1...
- Page 138 Table A1-1. Drive Parameters ( nXXX ) – Continued PARAM. FUNCTION NAME SETTING FACTORY USER PARA. DESCRIPTION (ACTUAL DISPLAY) RANGE SETTING ** SETTING REF. n077 Overtorque / 0 to 8 5.21 Undertorque Setting Setting Method Detection (OL3) Disabled ** Detection disabled OT/SpdAgree/Alm Overtorque detect only (Torq Det...
- Page 139 Table A1-1. Drive Parameters ( nXXX ) – Continued PARAM. FUNCTION NAME SETTING FACTORY USER PARA. DESCRIPTION (ACTUAL DISPLAY) RANGE SETTING ** SETTING REF. n082 DB Resistor 0 or 1 Overheat Setting Setting Description Function (rH) Disabled ** No DB protection calculated or provided (DB Resistor Enabled...
- Page 140 Table A1-1. Drive Parameters ( nXXX ) – Continued PARAM. FUNCTION NAME SETTING FACTORY USER PARA. DESCRIPTION (ACTUAL DISPLAY) RANGE SETTING ** SETTING REF. n092 Feedback Loss 0.0 to 25.5 1.0 (Sec) 5.22F Det. Delay Time (PID FdbkLoss Time) n093 PID Output 0 or 1 Selection...
- Page 141 Table A1-1. Drive Parameters ( nXXX ) – Continued PARAM. FUNCTION NAME SETTING FACTORY USER PARA. DESCRIPTION (ACTUAL DISPLAY) RANGE SETTING ** SETTING REF. n102 Stop Method 0 to 3 5.16 on Modbus Setting Setting Stop method Communication Ramp STOP/Decel1 Ramp to stop – Decel 1 Error (CE) (fault) Coast to STOP** Coast to stop (fault)
- Page 142 Table A1-1. Drive Parameters ( nXXX ) – Continued PARAM. FUNCTION NAME SETTING FACTORY USER PARA. DESCRIPTION (ACTUAL DISPLAY) RANGE SETTING ** SETTING REF. n110 Operator 0 or 1 5.16.1 Connection Setting Setting Description Fault Detection Disabled ** Operation continues Selection Enabled Operation stops...
-
Page 143: Specifications
Appendix 2. SPECIFICATIONS Table A2-1. Standard Specifications SECTION A. Input Voltage Related Specifications 230V Class Input Power Voltage : 3 Phase 200 / 208 / 220 / 230 VAC + 10%, – 15% Frequency : 50 / 60 Hz +/– 5% Output Power Voltage : 0 - 230V (Output cannot be greater than input) Frequency: 0 - 400 Hz (V/Hz pattern selectable) - Page 144 Table A2-1. Standard Specifications (Continued) SECTION A. Input Voltage Related 600V Class drive Input Power Voltage : 3 Phase 500 / 575 / 600 VAC +/- 10% Frequency : 50 / 60 Hz +/– 5% Output Power Voltage : 0 - 600V (proportional to input voltage) Frequency: 0 - 400 Hz (V/Hz pattern selectable) RATED NOMINAL...
- Page 145 Table A2-1. Standard Specifications (Continued) SECTION B. ALL GPD 506/P5s SECTION C. ALL GPD 506s Control Method Sine Wave PWM (-10 to 40 o C) Digital command: 0.01% (+14 to 104 o F) Frequency Regulation (15 to 35 o C) Analog command: 0.1% (59 to 95 o F) Control...
- Page 146 Table A2-1. Standard Specifications (Continued) SECTION B. ALL GPD 506/P5s (Continued) SECTION C. ALL GPD 506s (CONTINUED) Location Indoor (protected from corrosive gases and dust). Ambient Temperature –10 to 40°C (+14 to 104°F) for NEMA 1; –10 to 45°C (+14 to 113°F) for protected chassis Environmental Conditions Storage Temperature (Note 3)
- Page 147 Appendix 3. CAPACITY RELATED PARAMETERS If a Control PCB is changed, the next time the drive is powered up parameter n 1 1 5 must be set to the appropriate value listed in Table A3-1 for the drive Model No. This will automatically program the values of all other parameters listed in the table to the factory settings for that particular drive rating.
- Page 148 T a b l e A 3 - 1 . P a r a m e t e r s R e l a t e d t o G P D 5 0 6 / P 5 C a p a c i t y - C o n t i n u e d PARAMETER OUTPUT NOMINAL...
-
Page 149: Gpd 506/P5 Spare Parts
A312 IMPORTANT Numbers represent total quantity used in one Drive. To determine adequate inventory of spare parts, Yaskawa suggests using listed value for quantities 2 and below. If listed value is greater than 2, factory suggests 1/3 of total listed. - Page 150 B675 IMPORTANT Numbers represent total quantity used in one Drive. To determine adequate inventory of spare parts, Yaskawa suggests using listed value for quantities 2 and below. If listed value is greater than 2, factory suggests 1/3 of total listed.
- Page 151 B675 IMPORTANT Numbers represent total quantity used in one Drive. To determine adequate inventory of spare parts, Yaskawa suggests using listed value for quantities 2 and below. If listed value is greater than 2, factory suggests 1/3 of total listed.
- Page 152 51600F IMPORTANT Numbers represent total quantity used in one Drive. To determine adequate inventory of spare parts, Yaskawa suggests using listed value for quantities 2 and below. If listed value is greater than 2, factory suggests 1/3 of total listed.
- Page 153 Table A5-1 lists dimensions for the drive in its standard enclosure. For information on other types of enclosures available, consult your Yaskawa representative. T a b l e A 5 - 1 . D r i v e S i z e a n d W e i g h t...
- Page 154 T a b l e A 5 - 1 . D r i v e S i z e a n d W e i g h t MODEL PHYSICAL DIMENSIONS MOUNTING HEAT LOSS NOMINAL ENCLOSURE (IN.) DIM. (IN.) WEIGHT (Watts) VOLTS TYPE...
-
Page 155: Dynamic Braking Connections
Appendix 6. DYNAMIC BRAKING CONNECTIONS GENERAL. Dynamic braking (DB) enables the motor to be brought to a smooth and rapid stop. This is achieved by dissipating the regenerative energy of the AC motor across the resistive components of the Dynamic Braking option. For further details on dynamic braking operation, see the instruction sheet shipped with dynamic braking components. - Page 156 Table A6-3. Dynamic Braking - 10% Duty Cycle - 460V Drive Braking Transistor Module Remote Mount Resistor Unit Dimensions Dimensions Minimum Resistance Power Approx (Inches) (Inches) Rated Part No. Connectable Part No. Model No. Model No. (Ohms) (Watts) Braking Input 46S03331- Reqd Resistance...
- Page 157 INSTALLATION This option should only be installed by a TECHNICALLY QUALIFIED INDIVIDUAL who is familiar with this type of equipment and the hazards involved. WARNING Hazardous voltage can cause severe injury or death. Lock all power sources feeding the drive in the "OFF" position. CAUTION Failure to follow these installation steps may cause equipment damage or personnel injury.
- Page 158 R e m o t e M o u n t R e s i s t o r U n i t I n s t a l l a t i o n ( f o r G P D 5 0 6 V - A 0 0 3 t h r u - A 0 3 6 [ C I M R - P 5 M 2 0 P 4 1 F t h r u 2 7 P 5 1 F ] , - B 0 0 1 t h r u - B 0 3 4 [ C I M R - P 5 M 4 0 P 4 1 F t h r u 4 0 1 5 1 F ] ) , a n d C I M R - P 5 M 5 1 P 5 1 F t h r u 5 0 2 2 1 F ) .
- Page 159 Braking Transistor Unit(s) and Remote Mount Resistor Unit(s) Installation ( f o r G P D 5 0 6 V - A 0 5 4 a n d - A 0 6 8 [ C I M R - P 5 M 2 0 1 1 1 F a n d 2 0 1 5 1 F ] , - B 3 8 0 [ C I M R - P 5 M 4 1 8 5 0 F ] a n d a b o v e , a n d C I M R - P 5 M 5 0 3 0 1 F a n d a b o v e ) .
- Page 160 T1 (U) L1 (R) GPD 506/P5 L2 (S) T2 (V) L3 (T) T3 (W) CONTROL See Note (1) – BRAKING IFU (1) TRANSISTOR UNIT PART OF USER SUPPLIED EXTERNAL CIRCUIT 120VAC THRX REMOTE MOUNT RESISTOR POWER POWER 1THG UNIT THRX FAULT CONTACT Figure A6-4.
- Page 161 L1 (R) T1 (U) GPD 506/P5 L2 (S) T2 (V) L3 (T) T3 (W) CONTROL REMOTE See Note (1) MOUNT – RESISTOR BRAKING UNIT TRANSISTOR UNIT #1 1THG MASTER NOT RECOMMENDED WIRING CONFIGURATION BRAKING BRAKING REMOTE TRANSISTOR TRANSISTOR MOUNT RESISTOR UNIT UNIT BRAKING...
- Page 162 6 . IMPORTANT: After wiring, test insulation resistance of each Braking Transistor Unit/Remote Mount Resistor Unit with a 900V megger as follows: Disconnect leads between the Braking Transistor Unit and the drive. If equipment with semiconductors is connected across terminals 1 & 2 of the Braking Transistor Unit, remove the wiring.
- Page 163 INDEX - A - - D - Volt. Lower Limit at 60Hz .. 5-11 Enclosure ......A5-1 Accel Function LED...4-2, 4-3 Deactivation Time, Momentary ENTER Key ......4-1 Acceleration : Power Loss Ride-thru ... 5-26 Environment ....1-1, A2-3 Stall Prev. Level During ..5-53 Decel Function LED ..
- Page 164 INDEX – Co n t i n u e d Frequency Reference : Integral Value Limit (PID) ..5-48 Min. Output Frequency ..5-61 Bias ........5-13 Integral Value Reset (PID) ..5-48 Min. Output Volt. Freq..5-61 Gain ........5-13 Inverse PID ......
- Page 165 INDEX – Co n t i n u e d - N - - P - - R - Nameplate, Motor ....5-57 Parameters Range, Prohibited Freq... 5-7 No-load Motor Current ..5-57 Factory Reset (Initialize) ..5-50 Rated Current, Motor ..4-4, 5-52 List ........
- Page 166 INDEX – Co n t i n u e d Speed Search Level ....5-34 - T - - V - Stall Prevention : Temperature : V/f During Speed Search ..5-35 During Decel ...... 5-53 Ambient ..... 1-1, A2-3 V / F Function LED ..
- Page 167 Training courses are also provided at the user’s site. Course content can be customized to the specific installation and application if requested. For further information about on-site training and courses specific to your installation and application, log on to our web site, www.drives.com, fax this completed form, call us at 1-800-YASKAWA, or e-mail us at training@yaskawa.com.
- Page 168 Paik Nam Bldg. 901 188-3, 1-Ga Euljiro, Joong-Gu, Seoul, Korea 16555 W. Ryerson Rd., New Berlin, WI 53151, U.S.A. Phone: 82-2-776-7844 Fax: 82-2-753-2639 Phone: (800) YASKAWA (800-927-5292) Fax: (262) 782-3418 Internet: http://www.drives.com YASKAWA ELECTRIC (SINGAPORE) PTE. LTD. Head Office: 151 Lorong Chuan, #04-01, New Tech Park Singapore 556741, SINGAPORE YASKAWA ELECTRIC AMERICA, INC.