Riello GAS 3 P/M Installation, Use And Maintenance Instructions
Forced draught gas burners
Hide thumbs
Also See for GAS 3 P/M:
- Installation, use and maintenance instructions (20 pages) ,
- Installation, use and maintenance instructions (64 pages)
Table of Contents
Advertisement
Quick Links
Istruzioni per installazione, uso e manutenzione
Installations-, Bedienungs- und Wartungsanleitung
Instructions pour l'installation, l'utilisation et l'entretien
Installation, use and maintenance instructions
Bruciatori di gas ad aria soffiata
I
Gas-Gebläsebrenner
D
Forced draught gas burners
GB
Brûleurs gaz à air soufflé
F
Funzionamento bistadio progressivo o modulante
Zweistufig gleitender oder modulierender Betrieb
Progressive two-stage or modulating operation
Fonctionnement à deux allures progressives ou modulant
CODICE - CODE
3753321
3753421
3753521
3753621
3753721
MODELLO - MODELL
MODEL - MODELE
GAS 3 P/M
GAS 4 P/M
GAS 5 P/M
GAS 6 P/M
GAS 7 P/M
TIPO
TYP - TYPE
533 T1
534 T1
535 T1
536 T1
537 T1
2915595 (10) - 04/2018
Advertisement
Table of Contents

Related Manuals for Riello GAS 3 P/M


Summary of Contents for Riello GAS 3 P/M
- Page 1 Progressive two-stage or modulating operation Fonctionnement à deux allures progressives ou modulant MODELLO - MODELL TIPO CODICE - CODE MODEL - MODELE TYP - TYPE 3753321 GAS 3 P/M 533 T1 3753421 GAS 4 P/M 534 T1 3753521 GAS 5 P/M 535 T1...
- Page 3 La qualità viene garantita mediante un sistema di qualità e management certificato secondo ISO 9001:2015. Legnago, 21.04.2018 Direttore Generale Direttore Ricerca e Sviluppo RIELLO S.p.A. - Direzione Bruciatori RIELLO S.p.A. - Direzione Bruciatori Ing. U. Ferretti Ing. F. Comencini Konformitätserklärung gemäß ISO / IEC 17050-1 Hergestellt von: RIELLO S.p.A.
- Page 4 The quality is guaranteed by a quality and management system certified in accordance with ISO 9001:2015. Legnago, 21.04.2018 Executive General Manager Research & Development Director RIELLO S.p.A. - Burner Department RIELLO S.p.A. - Burner Department Mr. U. Ferretti Mr. F. Comencini Déclaration de conformité...
-
Page 5: Table Of Contents
INDICE INHALT DATI TECNICI ........pagina 4 TECHNISCHE ANGABEN ......Seite 5 Dati elettrici. -
Page 6: Dati Tecnici
DATI TECNICI MODELLO GAS 3 P/M GAS 4 P/M GAS 5 P/M GAS 6 P/M GAS 7 P/M TIPO 533 T1 534 T1 535 T1 536 T1 537 T1 POTENZA 2° stadio 130 - 350 180 - 470 320 - 660... -
Page 7: Technische Angaben
TECHNISCHE ANGABEN MODELL GAS 3 P/M GAS 4 P/M GAS 5 P/M GAS 6 P/M GAS 7 P/M 533 T1 534 T1 535 T1 536 T1 537 T1 LEISTUNG 2. Stufe 130 - 350 180 - 470 320 - 660... -
Page 8: Technical Data
TECHNICAL DATA MODELLO GAS 3 P/M GAS 4 P/M GAS 5 P/M GAS 6 P/M GAS 7 P/M TYPE 533 T1 534 T1 535 T1 536 T1 537 T1 OUTPUT 2nd stage 130 - 350 180 - 470 320 - 660... -
Page 9: Données Techniques
DONNÉES TECHNIQUES MODELE GAS 3 P/M GAS 4 P/M GAS 5 P/M GAS 6 P/M GAS 7 P/M TYPE 533 T1 534 T1 535 T1 536 T1 537 T1 PUISSANCE 2ème allure 130 - 350 180 - 470 320 - 660... -
Page 10: Accessori
ACCESSORI (su richiesta) A1 CODE 3000605 L = 185 L1 = 320 mm • GAS 3 P/M A2 CODE 3000606 L = 187 L1 = 320 mm • GAS 4 P/M (A) KIT PER ALLUNGARE LA TESTA DI A3 CODE 3000607 L = 207 L1 = 365 mm •... -
Page 11: Accessories
ZUBEHÖR (auf Wunsch) ACCESSORIES (optional) ACCESSOIRES (sur demande) (A) KIT POUR ALLONGER LA TETE DE (A) KIT VERLÄNGERUNG (A) KIT FOR LENGTHENING THE COMBUS- FLAMMKOPFES COMBUSTION TION HEAD L = Longueur standard L = Standardlänge L = Standard length L1= Longueur pouvant être obtenue avec L1= Mit Kit erreichbare Länge L1= Length obtainable with the kit le kit... -
Page 12: Descrizione Bruciatore
Il modello GAS 7 P/M appoggia su una pedana in legno particolarmente adatta ai car- relli sollevatori. • Il peso del bruciatore completo di imballo è indicato nella tabella (B). GAS 3 P/M INGOMBRO (C) GAS 4 P/M Misure indicative L'ingombro del bruciatore è riportato in (C). -
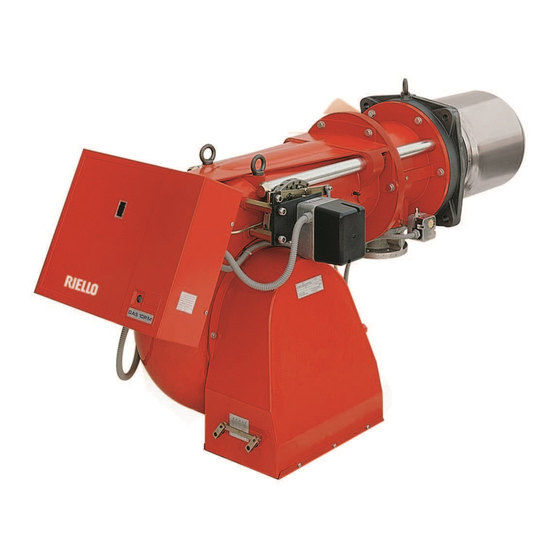
Page 13: Burner Description
BRENNERBESCHREIBUNG (A) BURNER DESCRIPTION (A) DESCRIPTION BRULEUR (A) 1 Gleitschienen zum Ausschwenken des Bren- 1 Slide bars for opening the burner and 1 Guides pour ouverture brûleur et inspection ners und zur Kontrolle des Flammkopfs inspecting the combustion head de la téte de combustion 2 Flammkopf 2 Combustion head 2 Téte de combustion... -
Page 14: Campi Di Lavoro
Esempio: per il GAS 3 P/M può essere scelta tra 80 e 175 kW (equivalenti a 69 e 150 Mcal/h). Non importa conoscere la pressione in camera di combustione in 1° stadio. -
Page 15: Firing Rates
Exemple: bei GAS 3 P/M zwischen 80 und 175 kW (ent- for GAS 3 P/M. pour le GAS 3 P/M on peut la choisir entre 80 sprechend 69 und 150 Mcal/h) einstellbar. The pressure in the combustion chamber et 175 kW (équivalant à 69 et 150 Mcal/h). -
Page 16: Caldaia Di Prova
CALDAIA DI PROVA (A) I campi di lavoro di pag.12 sono stati ricavati in speciali caldaie di prova, secondo la norma EN 676. Riportiamo in (A) diametro e lunghezza della camera di combustione di prova. Esempio: Potenza 1500 Mcal/h: diametro 80 cm - lunghezza 2,5 m. PRESSIONE GAS Le tabelle a lato indicano le perdite di carico minime lungo la linea di alimentazione del gas in... -
Page 17: Test Boiler
PRÜFKESSEL (A) TEST BOILER (A) CHAUDIERE D'ESSAI (A) Die Regelbereiche wurden an speziellen Prüf- The firing rates on page 12 were set in relation Les plages de puissance de la page 12 ont été kesseln entsprechend Norm EN 676 ermittelt. to special test boilers, according to regulation établies sur des chaudières d'essai spéciales, selon la norme EN 676. -
Page 18: Installazione
INSTALLAZIONE Tutte le operazioni di installazione, manutenzione smontaggio GAS 3P/M M 10 devono assolutamente essere GAS 4P/M M 10 eseguite rete elettrica PERICOLO staccata. GAS 5P/M M 10 L’installazione del bruciatore deve GAS 6P/M M 12 essere effettuata da personale GAS 7P/M M 12 abilitato, secondo quanto riportato... -
Page 19: Installation
INSTALLATION INSTALLATION INSTALLATION Alle Arbeiten zur Installation, All the installation, maintenance Toutes les opérations d'installation, Wartung und Demontage müssen and disassembly operations must entretien et démontage doivent unbedingt bei abgeschaltetem be carried out with the electricity être effectuées avec le réseau Stromnetz ausgeführt werden. -
Page 20: Regolazione Testa Di Combustione
REGOLAZIONE TESTA DI COMBUSTIONE BRUCIATORE APERTO / GEÖFFNETER BRENNER La regolazione della testa di combustione BURNER OPEN / BRÛLEUR OUVERT dipende unicamente dalla potenza MAX svilup- pata dal bruciatore. Perciò, prima di regolare la testa di combu- stione, bisogna fissare questo valore. Sono previste due regolazioni della testa: quella del gas e quella dell'aria. -
Page 21: Setting The Combustion Head
Diagramm (C) abgelesen A GAS 3 P/M burner is installed on a 240 kW même et est déduit du diagramme (C); selon la werden, je nach der Höchstleistung, auf die der boiler. -
Page 22: Linea Alimentazione Gas
LINEA ALIMENTAZIONE GAS • La rampa del gas può arrivare da destra o da sinistra, secondo comodità. • Le elettrovalvole del gas devono essere il più vicino possibile al bruciatore in modo da assi- curare l'arrivo del gas alla testa di combu- stione nel tempo di sicurezza di 2 s. -
Page 23: Gas Line
GAS LINE LIGNE ALIMENTATION GAZ GASZULEITUNG • Die Armatur kann je nach Bedarf von rechts bzw. • The gas train can enter the burner from the • La rampe peut arriver par la droite ou par la right or left side, depending on which is the links zugeführt werden. -
Page 24: Impianto Elettrico
IMPIANTO ELETTRICO IMPIANTO ELETTRICO ESEGUITO IN FABBRICA WERKSEITIG AUSGEFÜHRTE ELEKTROANLAGE • ELECTRICAL EQUIPMENT FACTORY-SET IMPIANTO ELETTRICO eseguito in fabbrica INSTALLATION ELECTRIQUE REALISEE EN USINE GAS 3 - 4 P/M SCHEMA (A) Bruciatori GAS 3 - 4 P/M (monofase) SCHEMA (B) Bruciatori GAS 5 - 6 - 7 P/M (trifase) •... -
Page 25: Electrical System
ELEKTROANLAGE ELECTRICAL SYSTEM INSTALLATION ELECTRIQUE • • • ELEKTROANLAGE werkseitig ausgeführt ELECTRICAL SYSTEM as set up by the INSTALLATION ELECTRIQUE réalisée en manufacturer usine SCHEMA (A) Brenner GAS 3 - 4 P/M (einphasig) LAYOUT (A) SCHEMA (A) Burner GAS 3 - 4 P/M (single-phase) Brûleur GAS 3 - 4 P/M (monophasé) SCHEMA (B) Brenner GAS 5 - 6 - 7 P/M (dreiphasig) - Page 26 FUSIBILI E SEZIONE CAVI Schemi (A) - (B) GAS 3 P/M GAS 4 P/M Schemi (C) - (D) GAS 5 P/M GAS 6 P/M GAS 7 P/M 230V 400V 230V 400V 230V 400V...
- Page 27 Funktionen vom Leistungsregler über- Layouts (A) - (B) nommen werden. FUSIBLES ET SECTION CABLES GAS 3 P/M GAS 4 P/M SICHERUNGEN UND KABELQUERSCHNITT Schemas (A) - (B) GAS 3 P/M GAS 4 P/M Schemen (A) - (B)
- Page 28 SCHEMA (A) RWF 50 Allacciamento elettrico regolatore di potenza RWF e relativa sonda ai bruciatori GAS 3 - 4 - 5 - 6 - 7 P/M (funzionamento modulante) SCHEMA (B) Taratura relè termico 9)(A)p.5 Serve ad evitare la bruciatura del motore per un forte aumento dell'assorbimento dovuto alla mancanza di una fase.
- Page 29 SCHEMA (A) LAYOUT (A) SCHEMA (A) Elektroanschluß des Leistungsreglers RWF Branchement électrique régulateur de puis- Connection of RWF and related probe to und des entsprechenden Fühlers an die sance RWF et sonde correspondant aux brû- GAS 3 - 4 - 5 - 6 - 7 P/M burners (modulating Brenner GAS 3 - 4 - 5 - 6 - 7 P/M (modulieren- leurs GAS 3 - 4 - 5 - 6 - 7 P/M operation)
-
Page 30: Regolazioni Prima Dell'accensione
REGOLAZIONI PRIMA DELL'ACCENSIONE PRESSOSTATO GAS DI MAX. PRESSOSTATO ARIA PRESSOSTATO GAS DI MIN. La regolazione della testa di combustione, aria e GAS-HÖCHSTDRUCKWÄCHTER LUFT-DRUCKWÄCHTER GAS-MINDESTDRUCKWÄCHTER gas, è già stata descritta a pag. 18. MAX GAS PRESSURE SWITCH AIR PRESSURE SWITCH MIN GAS PRESSURE SWITCH Altre regolazioni da fare sono: PRESSOSTAT GAZ MAXIMUM PRESSOSTAT AIR... -
Page 31: Adjustments Before First Firing
EINSTELLUNGEN VOR DER ZÜNDUNG ADJUSTMENTS BEFORE FIRST FIRING REGLAGES AVANT L'ALLUMAGE Le réglage de la tête de combustion, air et gaz, Die Einstellung des Flammkopfs, von Luft und Adjustment of the combustion head, and air and a déjà été décrit page 18. Gas, ist bereits auf Seite 18 beschrieben worden. -
Page 32: Avviamento Bruciatore
AVVIAMENTO BRUCIATORE Chiudere i telecomandi. Tutte le operazioni di installazione, manutenzione e smontaggio devono Appena il bruciatore si avvia controllare il senso assolutamente essere eseguite con rete elettrica staccata. di rotazione del motore. PERICOLO Verificare che le lampadine o i tester collegati alle elettrovalvole, o le spie luminose sulle elet- L’installazione del bruciatore deve essere effettuata da personale trovalvole stesse, indichino assenza di tensione. -
Page 33: Burner Starting
ANFAHREN DES BRENNERS BURNER STARTING DEMARRAGE BRULEUR Die Fernsteuerungen schließen. Close the remote control devices. Fermer les télécommandes. Sobald der Brenner anfährt, den Drehsinn des As soon as the burner starts check the direction Dès que le brûleur démarre, contrôler le sens de rotation du moteur. -
Page 34: Eventuali Tarature Preliminari
Per misurare la potenza all'accensione: - Scollegare la spina - presa 22)(A)p.10 sul cavo della sonda di ionizzazione (il bruciatore si accende e va in blocco dopo il tempo di sicurezza). - Eseguire 10 accensioni con blocchi consecutivi. - Leggere al contatore la quantità di gas bruciata. Questa quantità... -
Page 35: Preliminary Calibrations (If Required)
Zur Messung der Zündleistung: In order to measure the firing output: Pour mesurer la puissance à l'allumage: - Den Steckkontakt 22)(A)S.10 vom Kabel der - Débrancher la fiche-prise 22)(A)p.10 sur le - Disconnect the plug-socket 22)(A)p.10 on the Ionisationssonde abtrennen (der Brenner câble de la sonde d'ionisation (le brûleur... -
Page 36: Potenza Max
3 - POTENZA MAX La potenza MAX, 2° stadio, va scelta entro il campo di lavoro MAX riportato a pag. 12. Regolazione gas MAX - Svincolare la camma a profilo variabile 2)(C) dal servomotore premendo la leva 9). - Ruotare a mano lentamente la camma 2) in senso orario fino a 130°, letti in corrispon- denza dell'indice 10). -
Page 37: Max Output
3 - MAX OUTPUT 3 - PUISSANCE MAXI 3 - HÖCHSTLEISTUNG Die Höchstleistung, 2. Stufe, wird innerhalb des La puissance MAX, 2e allure, est choisie dans MAX output (stage 2) must be selected from the auf Seite 12 gezeigten MAX Einstellbereichs la gamme de fonctionnement MAX figurant à... -
Page 38: Potenze Intermedie
5 - POTENZE INTERMEDIE PRESSOSTATO ARIA / LUFT-DRUCKWÄCHTER (necessaria soprattutto per il funzionamento AIR PRESSURE SWITCH / PRESSOSTAT AIR modulante) 5)(A)p.10 - 5)(A)S.10 Non occorre alcuna regolazione Aria La regolazione viene effettuata agendo sulle viti intermedie 1)(C)p.34 di regolazione del profilo della camma, avendo cura di non spostare quelle relative alla minima e massima portata. -
Page 39: Intermediate Outputs
5 - ZWISCHENLEISTUNGEN 5 - INTERMEDIATE OUTPUTS 5 - PUISSANCES INTERMEDIAIRES (erforderlich bei modulierendem Betrieb) (nécessaire surtout en cas de fonctionnement (required particularly for modulating operation) modulant) Keine Einstellung notwendig. No adjustment is required. Aucun réglage n'est nécessaire Luft Die Lufteinstellung erfolgt durch Betätigung der The adjustment is made by acting on intermedi- Le réglage est effectué... -
Page 40: Funzionamento Bruciatore
FUNZIONAMENTO BRUCIATORE ACCENSIONE REGOLARE ORDNUNGSGEMÄSSES ZÜNDEN (n° = secondi dall’istante 0) (n° = Sekunden ab Zeitpunkt 0) AVVIAMENTO BRUCIATORE (A) • 0s : Chiusura telecomando TL. NORMAL FIRING ALLUMAGE REGULIER Avvio servomotore ventilatore. (n° = seconds from instant 0) (n° = secondes à partir de l’instant 0) •... -
Page 41: Burner Operation
BURNER OPERATION BRENNERBETRIEB DEMARRAGE BRULEUR (A) • 0s : Fermeture télécommande TL. ANFAHREN DES BRENNERS (A) BURNER STARTING (A) Démarrage moteur ventilateur. • 0s : Abschalten Fernsteuerung TL. • 0s : Load control TL closes. • 6s : Démarrage servomoteur: il tourne vers Anfahren Gebläsemotor Fan motor starts. -
Page 42: Controlli Finali
CONTROLLI FINALI (con bruciatore funzionante) APERTURA BRUCIATORE BRENNERÖFNUNG • Scollegare un filo del pressostato gas di minima: OPENING THE BURNER • Aprire il telecomando TL: OUVERTURE BRULEUR • Aprire il telecomando TS: il bruciatore deve fermarsi • Scollegare il filo comune P del pressostato gas di massima: •... -
Page 43: Final Checks
ENDKONTROLLEN (bei Brenner in Betrieb) FINAL CHECKS (with burner running) CONTROLES FINAUX (brûleur en fonctionne- • Einen Draht des Gas-Mindestdruckwächters • Disconnect one of the wires on the minimum ment) abtrennen: gas pressure switch: • Débrancher un fil du pressostat de seuil mini- •... - Page 44 TEST SICUREZZA - CON ALIMENTA- ZIONE GAS CHIUSA Per eseguire la messa in funzione in sicurezza è molto importante verificare la corretta esecuzio- ne dei collegamenti elettrici tra le valvole del gas ed il bruciatore. A questo scopo, dopo avere verificato che i col- legamenti siano stati eseguiti in conformità...
-
Page 45: Sicherheitstest - Bei Geschlossener Gasversorgung
SICHERHEITSTEST - BEI GESCHLOSS- SAFETY TEST - WITH GAS SUPPLY ESSAI DE SÉCURITÉ - AVEC ALIMEN- ENER GASVERSORGUNG CLOSED TATION EN GAZ FERMÉE For a safe start up it is very important to check Pour la mise en marche en sécurité, il est très im- Zur sicheren Inbetriebnahme ist es sehr that the electrical wiring between the gas valves portant de vérifier la bonne exécution des bran-... - Page 46 SIMBOLO INCONVENIENTE CAUSA PROBABILE RIMEDIO CONSIGLIATO Il bruciatore non si avvia - Manca l'energia elettrica ......Chiudere interruttori - Controllare collegamenti - Un telecomando di limite o di sicurezza aperto.
- Page 47 ZEICHEN STÖRUNGEN MÖGLICHE URSACHEN EMPFOHLENE ABHILFEN Brenner läuft nicht an 54 - Kein Storm ........Schalter einschalten- Sicherungen kontrollieren 55 - Eine Grenz- oder Sichrerheitsregelung offen .
- Page 48 SYMBOL FAULT PROBABLE CAUSE SUGGESTED REMEDY The burner does not start - No electrical power supply ......Close all switches - Check connections - A limiter or safety control device is open.
-
Page 49: Attention
SYMBOLE INCONVENIENT CAUSE PROBABLE REMEDE CONSEILLE Le brûleur ne démarre pas - Absence de courant électrique ..... . Fermer interrupteurs - Contrôler fusibles - Une télécomande de limite ou de sécurité... -
Page 52: Inconvenienti - Cause - Rimedi
RIELLO S.p.A. I-37045 Legnago (VR) Tel.: +39.0442.630111 http:// www.riello.it http:// www.riello.com Con riserva di modifiche - Änderungen vorbehalten! - Subject to modifications - Sous réserve de modifications...