Advertisement
Table of Contents
- 1 Table of Contents
- 2 Important Safety Instructions
- 3 Precautions to Avoid Possible Exposure to Excessive Microwave Energy
- 4 Installation Guide
- 5 Grounding Instructions
- 6 Installing the Turntable
- 7 Product Diagram
- 8 Specifications
- 9 Control Panel
- 10 Operation Instructions
- 11 Auto Cook Settings
- 12 Cooking Utensils Guide
- 13 Cleaning and Care
- Download this manual
Advertisement
Table of Contents

Related Manuals for Oster OGCMV207S2-07


Summary of Contents for Oster OGCMV207S2-07
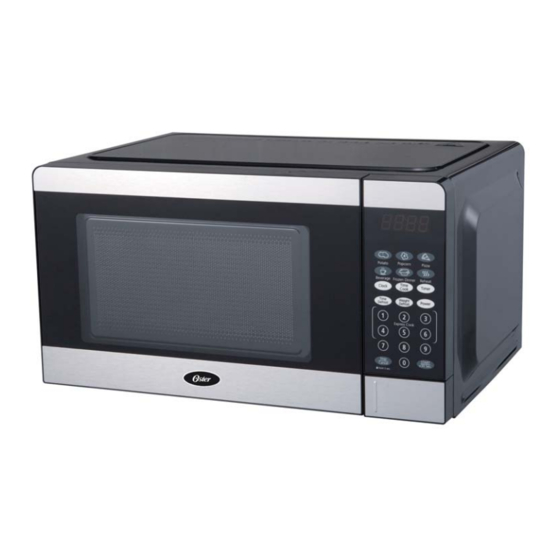
- Page 1 0.7cu. ft. Countertop Microwave Model: OGCMV207S2-07 JCS120311...
-
Page 2: Table Of Contents
TABLE OF CONTENTS IMPORTANT SAFETY INSTRUCTIONS PRECAUTIONS TO AVOID POSSIBLE EXPOSURE TO EXCESSIVE MICROWAVE ENERGY INSTALLATION GUIDE GROUNDING INSTRUCTIONS INSTALLING THE TURNTABLE PRODUCT DIAGRAM SPECIFICATIONS CONTROL PANEL OPERATION INSTRUCTIONS AUTO COOK SETTINGS COOKING UTENSILS GUIDE CLEANING AND CARE... -
Page 3: Important Safety Instructions
IMPORTANT SAFETY INSTRUCTIONS READ ALL SAFETY INSTRUCTIONS BEFORE USING THIS MICROWAVE WARNING - to reduce the risk of burns, electric shock, fire, injury to persons, or exposure to excessive microwave energy, basic safety precautions should be followed, including the following: 1. -
Page 4: Precautions To Avoid Possible Exposure To Excessive Microwave Energy
IMPORTANT SAFETY INSTRUCTIONS (continued) 17. Do not immerse the cord or plug in water. Keep cord away from heated surfaces. Do not let the cord hang over the edge of the table or counter. 18. Use only thermometers specifically designed for microwaves. 19. -
Page 5: Installation Guide
INSTALLATION GUIDE 1. Make sure all packing materials are removed from inside the microwave door. 2. Check the microwave for damage, such as misaligned or bent door, damaged door seals and sealing surface, broken or loose door hinges and latches, and dents inside the cavity or on the door. If there are any damages, do not operate the microwave and contact Customer Service at 1-800-324-0340. -
Page 6: Installing The Turntable
GROUNDING INSTRUCTIONS (continued) RADIO OR TV INTERFERENCE Should there be any interference caused by the microwave oven to your radio or TV, check that the microwave oven is on a different circuit, relocate the radio or TV as far away from the oven as feasible, and check position and signal of receiving antenna. -
Page 7: Product Diagram
PRODUCT DIAGRAM 1. Door Safety Lock System 2. Oven Window 3. Turntable Roller 4. Door Release Button 5. Control Panel 6. Wave Guide (Please do not remove the mica plate covering the wave guide) 7. Glass tray SPECIFICATION Outside Dimensions(H x W x D) ×... -
Page 8: Control Panel
CONTROL PANEL MENU ACTION SCREEN Cooking time, power, indicators and present time are displayed. AUTO COOK MENUS Instant settings to cook popular foods NUMBER PADS (0-9) Press to set time or amount of food. But use the number pads from 1 to 6 to set express cooking program. -
Page 9: Operation Instructions
OPERATION INSTRUCTIONS When the oven first plugged in, beep will sound and the display will show "1:01". In the process of cooking set, broke about 25 seconds the oven will return to standby mode. During cooking, if press STOP/CANCEL pad once, the program will be paused, then press START/+30 SEC. pad to resume, but if press STOP/CANCEL pad twice, the program will be canceled. - Page 10 IME DEFROST The defrosting power is adjusted automatically once the cooking time is programmed. In standby mode, press TIME DEFROST pad once. Use the number pads to set defrosting time. The longest time is 99 minutes and 99 seconds. Press START/+30 SEC. pad to confirm. NOTE: During defrosting program, the system will pause and sound beeps to remind user to turn food over, and then press START/+30 SEC.
-
Page 11: Auto Cook Settings
To cancel: In child lock mode, press and hold STOP/CANCEL pad for 3 seconds, then a beep will sound and the oven can be operated. AUTO COOK SETTINGS The quick cook settings allow you to cook or reheat food automatically without entering power level or time. For smaller portions, simply press the applicable pad and start. - Page 12 Set number of mugs by pressing number pads from 1 to 4. Press START/+30 SEC. pad to confirm. EHEAT To reheat a plate of leftover (12~18 oz): Press REHEAT pad once. Press START/+30 SEC. pad to confirm...
-
Page 13: Cooking Utensils Guide
COOKING UTENSILS GUIDE This section lists which utensils can be used in the microwave, which ones have limited use for short periods, and which ones should not be used in the microwave. RECOMMENDED Microwave browning dish — Use to brown the exterior of small items such as steaks, chops, or pancakes. Follow the directions provided with your browning dish. -
Page 14: Cleaning And Care
CLEANING AND CARE 1. Turn off the microwave and unplug the power cord from the wall when cleaning. 2. Keep the inside of the microwave clean. When food splatters or spilled liquids adhere to microwave walls, wipe with a damp cloth. Mild detergents may be used if the microwave gets very dirty. Avoid using spray or other harsh cleaners. They may stain, streak, or dull the door surface. - Page 15 ® WARRANTY FOR OSTER COUNTERTOP MICROWAVE OGCMV207S2-07 ONE-YEAR LIMITED WARRANTY For one year from the date of purchase, when this appliance is operated and maintained according to instructions attached to or furnished with the product, Guangdong Galanz Microwave Electrical Appliances Manufacturing Co., Ltd., (“GALANZ”) will pay for replacement parts and repair labor costs to correct defects in materials or workmanship, replace the appliance with an equivalent unit or a new unit, or refund the purchase price, solely at our option.
- Page 16 年份改动见措施单 © 2020 Sunbeam Products, Inc. doing business as Jarden Consumer Solutions. All rights reserved. ® Oster logo is a registered trademark of Sunbeam Products, Inc. used under license. Distributed by Guangdong Galanz Microwave Electrical Appliances Manufacturing Co., Ltd., Huangpu, Zhongshan, Guangdong, 528429, China.