
Related Manuals for American Dynamics ADMNLCD20RK


Summary of Contents for American Dynamics ADMNLCD20RK
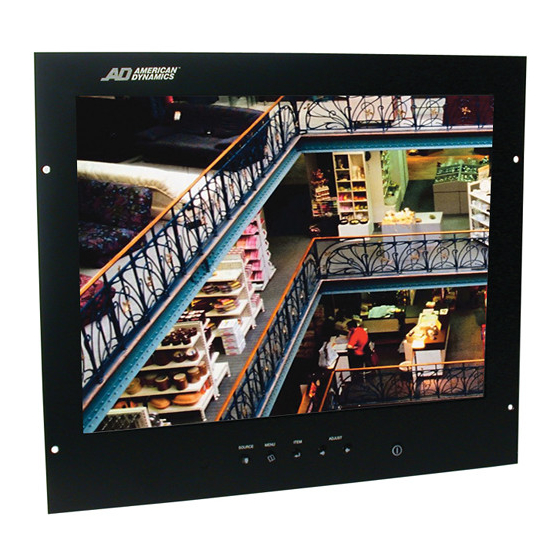
- Page 1 20-INCH TFT-LCD MONITOR RACK MOUNT ADMNLCD20RK INSTRUCTION MANUAL Please read this manual thoroughly before use, and keep it handy for future reference. Part Number 8200-0393-00 Rev. A...
-
Page 2: Warning
WARNING: TO REDUCE THE RISK OF FIRE OR ELECTRIC SHOCK, DO NOT EXPOSE THIS PRODUCT TO RAIN OR MOISTURE. DO NOT INSERT ANY METALLIC OBJECT THROUGH VENTILATION GRILLS. CAUTION: Explanation of Graphical Symbols The lightning flash with arrowhead symbol, within an equilateral triangle, is intended to alert the user to the presence of uninsulated "dangerous voltage"... -
Page 3: Fcc Compliance Statement
FCC COMPLIANCE STATEMENT INFORMATION TO THE USER: THIS EQUIPMENT HAS BEEN TESTED AND FOUND TO COMPLY WITH THE LIMITS FOR A CLASS B DIGITAL DEVICE, PURSUANT TO PART 15 OF THE FCC RULES. THESE LIMITS ARE DESIGNED TO PROVIDE REASONABLE PROTECTION AGAINST HARMFUL INTERFERENCE IN A RESIDENTIAL INSTALLATION. -
Page 4: Important Safeguards
IMPORTANT SAFEGUARDS READ INSTRUCTIONS -- All the safety and operating instructions should be read before the appliance is operated. RETAIN INSTRUCTIONS -- The safety and operating instructions should be retained for future reference. CLEANING -- Unplug video monitor or equipment from the wall outlet before cleaning. -
Page 5: Table Of Contents
TABLE OF CONTENTS Warning… … … … … ..… … … … … … … … … … … … … … … … … … … … … … … … … … FCC Compliance Statement… … … … … … … … … … … … … … … … … … … … … … .. Important Safeguards…... -
Page 6: Features
Latching power supply automatically restores power after interruption or remote switching Built-in power transformer with standard AC cord Remote control for ADMNLCD20RK, adding flexibility and easy control Simple OSD Menu User Interface European and North American power cords for easy installation... -
Page 7: Operating Instructions-Controls
Operating Instructions-Control 1. Power Monitor power ON / OFF. At OFF mode, monitor will be at standby status. Green Light – Power On Red Light – Standby mode 2. 3. Adjust Increase or decrease the value on OSD menu. Increase value or turn ON / OFF function Decrease value or turn ON / OFF function 4. -
Page 8: Backside Connections
Backside Connections A. BACK PANEL CONTROL NOTE : Audio Connections Audio 1 Audio 2 AV 1 AV 2 S-Video 1, 2 AUDIO 2 IN (L, R) Stereo Audio Signal Input, this input is for AV2 or PC (refer to Note below) 3, 4 AUDIO 2 OUT (L, R) Audio looping outputs for AUDIO 2 5, 6 AUDIO 1 IN (L, R) -
Page 9: Remote Control
Remote Control Key Function Power Scan Sel. +100 Note: All TV/CATV functions are inactive for rack mount model Power Turn ON / OFF monitor. At OFF mode monitor will be standby status. Scan Inactive for rack mount model Set (Restricted Channel Setting) Inactive for rack mount model Sel. - Page 10 Remote Control Jump Return to previous channel. Memory Inactive for rack mount model Select Inactive for rack mount model Menu OSD menu ON / OFF and selection. Item Chose sub menu from Audio / Video / Image list. + / - Increase or decrease the value on OSD menu.
- Page 11 Volume Used adjust +/- to increase / decrease volume.. Increase volume value Decrease volume value Channel Inactive for rack mount model - 11 -...
-
Page 12: Osd Architecture
OSD Architecture A. Audio Function Press the MENU button will bring up the OSD Menu. Press MENU again to select AUDIO. Then, press ITEM to choose functions that require proper adjustments. As shown, press Note: In remote control, press (After adjustment, the monitor will store new settings) Volume Controls built-in speakers’... -
Page 13: Video Function
OSD Architecture B. Video Function Video Under AV1, AV2, S-Video mode: Press the MENU button will bring up the OSD Menu. Press MENU again to select VIDEO. Then, press ITEM to choose functions that require proper adjustments. As shown, press Note: In remote control, press (After adjustment, the monitor will store new settings) Contrast... - Page 14 OSD Architecture Contrast Permits adjustment of contrast between light and dark areas of the picture. Example: Brightness Adjusts the overall picture shade and brightness. Tip: Use the Brightness to make details in the dark areas of the picture to be just visible, and Contrast to “brighten” the picture without causing noises and foreheads to turn white.
- Page 15 OSD Architecture CCD Mode If video signal source directly comes from CCD camera, using CCD Mode is suggested to obtain better picture performance. Display Displays video source title. RECALL Sets monitor to the original factory setting. - 15 -...
-
Page 16: Image Function
OSD Architecture C. Image Function Image Under Image mode: Press the MENU button will bring up the OSD Menu. Press MENU again to select IMAGE. Then, press ITEM to choose functions that require proper adjustments. As shown, press Note: In remote control, press (After adjustment, the monitor will store new settings) Auto Contrast... - Page 17 OSD Architecture Auto Auto detect screen detail data such as clock and phase. Contrast Permits adjustment for contrast between light or dark areas of the picture. Brightness Adjusts the overall picture shade and brightness. Tip: Use the Brightness to make details in the dark areas of the picture to be just visible, and Contrast to “brighten”...
- Page 18 OSD Architecture Dos Mode Supports picture enhancement when using under DOS mode. Color Temperature Selects 9300K or 6500K color temperature for display. White Balance Allows the picture white balance adjustment. Display Displays video source title. Recall Sets monitor to the original factory setting. - 18 -...
-
Page 19: Lcd Monitor Mounting Guide
LCD monitor Mounting Guide A. Rack mount The ADMLLCD20RK fits into a standard 19-inch rack. Follow the mounting guide to install the monitor. 450MM - 19 -... -
Page 20: Connecting Device
Connecting Device a. Connect PC to Monitor through VGA connector as shown on the above picture b. Connect External device such as DVD or Game Player to Monitor as shown on the above picture c. Connect CCD Camera 1 and 2 to Monitor through Video Input 1 and 2 (BNC Connector) as showing on the above picture d. -
Page 21: Specification
View angle Input Signal Audio In/Out Operating Controls Power Supply Power Consumption Dimension Weight Temperature Humidity ADMNLCD20RK 20.1 inch” TFT, TN Mode 3D De-interlace 3D Comb filter 408 x 306mm 800 x 600 500 cd/m @6mA 480:1 16ms typ. 80(left),80(right),60(up),60(down) -
Page 22: Appendixes
1.No power 2.No video or audio 3.Bad video or audio 4.Image not stable 5.Ab-normal line 6.Ghost image Package List A. ADMNLCD20RK 20” LCD Monitor B. American Power Cord C. Europe Power Cord D. User Manual E. Accessory Kit 7.Desired video disappears... -
Page 23: Memo
Memo - 23 -... - Page 24 Please visit our website for more information www.americandynamics.net ©2003 Sensormatic Electronics Corporation. Product specifications subject to change without notice. Certain product names mentioned herein may be trade names and/or registered trademarks of other companies.