Table of Contents
Advertisement
Available languages
Available languages
Quick Links
P/N : MMBB0118006
ISSUE 1.0
PRINTED IN KOREA
Lea detenidamente el contenido
de esta tarjeta de Garantía.
Teléfono GPRS & MMS
MANUAL DE USUARIO
MODELO: C3100
Lea este manual atentamente antes
de hacer funcionar su equipo.
Guárdelo para consultarlo en el futuro.
T • E • L • É • F • O • N • O • G • P • R • S • & • M • M • S
ESPAÑOL
ENGLISH
Advertisement
Chapters
Table of Contents

Related Manuals for LG C3100


Summary of Contents for LG C3100
- Page 1 P/N : MMBB0118006 PRINTED IN KOREA Teléfono GPRS & MMS MANUAL DE USUARIO MODELO: C3100 Lea este manual atentamente antes de hacer funcionar su equipo. Guárdelo para consultarlo en el futuro. T • E • L • É • F • O • N • O • G • P • R • S • & • M • M • S...
- Page 2 ESPAÑOL Teléfono GPRS & MMS MANUAL DE USUARIO MODELO: C3100 Lea este manual atentamente antes de hacer funcionar su equipo. Guárdelo para consultarlo en el futuro.
- Page 3 Presentación Enhorabuena por haber adquirido el avanzado teléfono móvil compacto C3100, diseñado para funcionar con la tecnología de comunicación móvil digital más innovadora. Información importante Esta guía de usuario contiene información importante sobre la correcta utilización de este teléfono. Por favor, léala con atención para poder obtener el mayor rendimiento y evitar cualquier daño...
- Page 4 Información sobre exposición a ondas de radio y SAR (Specific Absorption Rate, tasa específica de absorción) El teléfono móvil modelo C3100 ha sido diseñado para cumplir la normativa de seguridad válida en relación con la exposición a las ondas de radio. Esta normativa se basa en directrices científicas que incluyen márgenes de seguridad diseñados para garantizar la...
- Page 5 Directrices para el uso seguro y eficaz Cuidado y mantenimiento del producto Advertencia: utilice únicamente baterías, cargadores y accesorios aprobados para su uso con este modelo de teléfono. El uso de cualquier otro tipo de dispositivo puede anular cualquier aprobación o garantía aplicable al teléfono y puede ser peligroso.
- Page 6 Cambio de fusibles Sustituya siempre un fusible fundido por otro del mismo tipo y tamaño. Nunca utilice un fusible de mayor potencia. Funcionamiento eficaz del teléfono Para disfrutar de un rendimiento óptimo con un consumo de batería mínimo : • Sujete el teléfono mientras mantiene una conversación. Mientras habla directamente por el micrófono, oriente la antena hacia arriba sobre su hombro.
- Page 7 Directrices para el uso seguro y eficaz Seguridad en carretera Consulte las leyes y regulaciones sobre el uso de teléfonos móviles durante la conducción. • No utilice el teléfono móvil mientras conduce. • Preste toda la atención a la conducción. •...
- Page 8 A diferencia de otros sistemas de batería, no existe efecto memoria que pueda afectar al rendimiento de la batería. • Utilice solamente baterías y cargadores LG. Los cargadores LG están diseñados para aprovechar al máximo la duración de la batería.
-
Page 9: Table Of Contents
índice Visión general ..............Partes del teléfono • Vista frontal ................12 • Vista posterior ............... 13 ............Descripción de las teclas • Letras, números y Símbolos ..........16 Información de la pantalla ............Información de pantalla • Iconos ................... 17 Preliminares ................ - Page 10 ..............Códigos de acceso • Código PIN (de 4 a 8 dígitos) ..........27 • Código PIN2 (de 4 a 8 dígitos) ..........27 • Código PUK (de 4 a 8 dígitos) ..........27 • Código PUK2 (de 4 a 8 dígitos) ..........27 •...
- Page 11 índice ..............Perfiles [Menú 3] • Vibración [Menú 3-1] ............. 50 • Silencio [Menú 3-2] ............... 50 • General [Menú 3-3] ............... 50 • Fuerte [Menú 3-4] ..............50 • Auriculares [Menú 3-5] ............50 ..............Ajustes [Menú 4] • Alarma [Menú 4-1] ..............53 •...
- Page 12 ..............Internet [Menú 7] • Inicio [Menú 7-1] ..............76 • Favoritos [Menú 7-2] ............. 76 • Mensajes push [Menú 7-3] ............ 76 • Perfiles [Menú 7-4] ..............77 • Ir a URL [Menú 7-5] .............. 80 • Confg. caché [Menú 7-6] ............80 •...
-
Page 13: Partes Del Teléfono
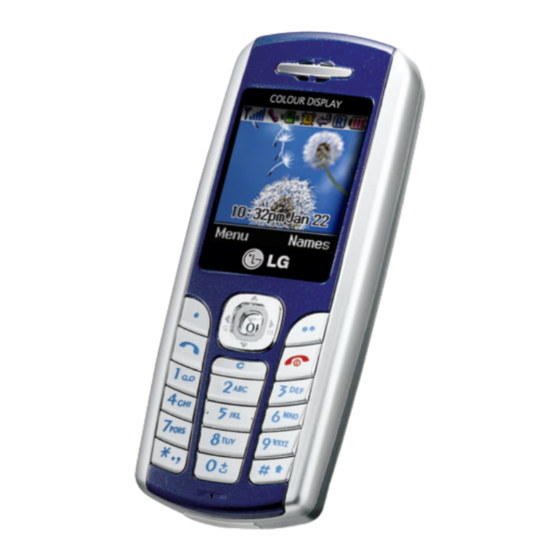
Partes del teléfono Vista frontal Auricular Conector para auricular Visor de la pantalla Tecla Borrar Tecla Confirmar Tecla mensaje Tecla Vibración Tecla multifuncional Tecla multifuncional derecha izquierda Tecla ENCENDIDO/ APAGADO Tecla Enviar Tecla memoria voz Teclas numéricas Tecla Asterisco Tecla Almohadilla Micrófono... -
Page 14: Vista Posterior
Vista posterior Orificio para la correa de transporte Pestillo de la batería Batería Tapa de batería Espacio para la tarjeta SIM Conector para cable Conector para cargador de batería... -
Page 15: Descripción De Las Teclas
Descripción de las teclas A continuación se detallan las teclas del teléfono. Descripción de las teclas Tecla Descripción Tecla blanda izquierda/tecla blanda derecha < > Cada una de estas teclas realiza la función indicada por el texto que aparece en la pantalla inmediatamente superior. - Page 16 Tecla Descripción Teclas numéricas Estas teclas se utilizan principalmente para marcar en modo de inactividad y para escribir números o caracteres en el modo de edición. Puede pulsar estas teclas durante un tiempo prolongado para: • Llamar al buzón de voz si pulsa 1. •...
-
Page 17: Letras, Números Y Símbolos
Descripción de las teclas Letras, números y Símbolos Cada tecla tiene asociados las letras, números y símbolos que se muestran a continuación. Tecla Descripción . , / ? ! - : ' " 1 A B C 2 Ä À Á Â Ã Å Æ Ç a b c ä à á â ã å æ ç D E F 3 Ë... -
Page 18: Información De Pantalla
Información de pantalla La pantalla contiene los iconos que se describen a continuación. Iconos Icono/Indicador Descripción Indica la intensidad de la señal de red. Llamada activa. Se puede usar el servicio GPRS. Indica que se está usando un servicio de itinerancia. Alarma activada. -
Page 19: Instalación
Instalación 1. Insertar la tarjeta SIM Busque el lugar donde debe ir colocada la tarjeta SIM en la parte posterior del teléfono y siga los pasos que se indican a continuación. 1. Retire la batería si está colocada. 2. Inserte la tarjeta SIM deslizándola en la ranura, de modo que quede debajo de los soportes plateados, con los conectores dorados hacia... -
Page 20: Instalar La Batería
3. Instalar la batería 1. Coloque la batería en la parte posterior del teléfono. 2. Presione la batería hasta que quede bien colocada (se oirá un clic) y coloque la tapa del teléfono. Aviso • Cuando vaya a quitar la batería del teléfono, utilice las dos manos. -
Page 21: Cargar La Batería
Instalación 4. Cargar la batería Para conectar el cargador de viaje al teléfono, la batería debe de estar colocada correctamente en el teléfono. 1. Con la flecha mirando hacia usted, como se muestra en la imagen, inserte el enchufe del adaptador de la batería en la toma de la parte inferior del teléfono hasta que escuche un chasquido que indique... -
Page 22: Desconectar El Cargador
5. Desconectar el cargador Desconecte el cargador del teléfono pulsando los botones laterales como se muestra en la imagen. Nota • Asegúrese de que la batería suministrada está completamente cargada antes de utilizar el teléfono. • No quite la batería ni la tarjeta SIM mientras está cargando el teléfono. -
Page 23: Llamar Y Responder Llamadas
Llamar y responder llamadas Realizar una llamada 1. Escriba el número de teléfono, incluido el código de área. Si desea eliminar un número, pulse C. 2. Pulse S para llamar al número. 3. Pulse E para finalizar la llamada. Llamadas internacionales 1. -
Page 24: Menú Durante Llamadas
Menú durante llamadas El menú que se muestra en la pantalla del teléfono durante una llamada es distinto del menú principal predeterminado que aparece si la pantalla está inactiva. Las opciones posibles del menú son las siguientes: 1 Durante una llamada 1-1 Retener una llamada Cuando realice o responda a una llamada, pulse S [Enviar] para retenerla. - Page 25 Menú durante llamadas 1-4 Responder a una llamada Para responder a una llamada cuando el teléfono suena, pulse la tecla S [Enviar]. El teléfono también le puede avisar de que hay una llamada entrante mientras está conversando en otra. Se emitirá un tono en el auricular y la pantalla mostrará...
-
Page 26: Llamadas A Varios Usuarios O De Conferencia
2 Llamadas a varios usuarios o de conferencia El servicio de llamada a varios usuarios o de conferencia le permite mantener una conversación con más de una persona de forma simultánea si el proveedor de servicios de red admite esta función. Sólo se puede establecer una llamada de conferencia si hay una llamada activa y una llamada retenida, y se responde a las dos llamadas. - Page 27 Menú durante llamadas 2-4 Activar la llamada de conferencia retenida Para activar una llamada de conferencia retenida, seleccione < [Opcs.] y luego Conferencia / Unir todas. 2-5 Agregar llamadas a la llamada de conferencia Para conectar una llamada activa a la llamada de conferencia retenida, seleccione <[Opcs.] y luego Conferencia / Unir todas.
-
Page 28: Códigos De Acceso
Códigos de acceso Puede usar los códigos de acceso que se describen en esta sección para evitar el uso no autorizado del teléfono. Los códigos de acceso (excepto los códigos PUK y PUK2) se pueden cambiar con el [Menú 4-5-6]. Código PIN (de 4 a 8 dígitos) El código PIN (número de identificación personal) protege la tarjeta SIM del uso no autorizado. -
Page 29: Código De Seguridad (De 4 A 8 Dígitos)
Códigos de acceso Código de seguridad (de 4 a 8 dígitos) El código de seguridad protege el teléfono del uso no autorizado. Se proporciona normalmente junto con el teléfono. Este código es necesario para eliminar todas las entradas del teléfono y activar el menú... -
Page 30: Árbol De Menús
Árbol de Menús 1 Mensajes 3 Perfiles 1 Nuevo SMS 1 Vibración 2 Nuevo MMS 2 Silencio 3 Buzón entrada 3 General 4 Buzón salida 4 Fuerte 5 Buzón de voz 5 Auriculares 6 Servicio info. 7 Plantillas 8 Configuración 4 Ajustes 1 Alarma 2 Fecha y Hora... - Page 31 Árbol de Menús 6 Accesorios 8 Java 1 Juegos 1 Aplicaciones 2 Archivos 2 Descargas 3 Calculadora 3 Estado memoria 4 Conver. unidad 5 Reloj mundial 6 Grabador de voz 9 Servicio SIM Este menú depende de la tarjeta SIM y de los servicios 7 Internet de la red.
-
Page 32: Mensajes [Menú 1]
Mensajes [Menú 1] Este menú incluye funciones relacionadas con SMS (Servicio de mensajes cortos), MMS (Servicio de mensajes multimedia), buzón de voz y mensajes del servicio de red. Nuevo SMS [Menú 1-1] Puede escribir y editar mensajes de texto, comprobando el número de caracteres del mensaje. - Page 33 Mensajes [Menú 1] Opcs. • Enviar Envía los mensajes de texto. 1. Escriba el número del destinatario. 2. Pulse la tecla D para agregar más destinatarios. 3. Puede agregar números de teléfono a la agenda. 4. Pulse < después de escribir los números. •...
- Page 34 Insertar • Símbolo Le permite agregar caracteres especiales. • Fotos Le permite insertar imágenes Predeterminadas o imágenes almacenadas en Mi carpeta que están disponibles para el uso en mensajes cortos. • Sonidos Le permite insertar sonidos en los mensajes cortos. •...
-
Page 35: Nuevo Mms [Menú 1-2]
Mensajes [Menú 1] Nuevo MMS [Menú 1-2] Puede escribir y editar mensajes multimedia comprobando el tamaño del mensaje. 1. Acceda al menú Mensajes pulsando < [Selec.]. 2. Si desea escribir un mensaje nuevo, seleccione Nuevo MMS. 3. Puede crear un mensaje nuevo o seleccionar una de las plantillas de mensajes multimedia ya creadas. - Page 36 • Eliminar diapositiva Le permite eliminar las diapositivas actuales. • Definir formato de la diapositiva - Establecer temporizador Le permite establecer un temporizador para diapositivas, texto, imágenes y sonidos. - Cambiar texto y fotografía Le permite cambiar la posición de una fotografía y el texto del mensaje.
- Page 37 Mensajes [Menú 1] Cómo utilizar T9 T9 le permite introducir texto de un modo rápido. Con el modo T9, sólo tiene que pulsar la tecla de la letra correspondiente una vez. Esta función se basa en un diccionario integrado al que también puede agregar palabras nuevas.
- Page 38 : Pulse la tecla * y elija la opción de insertar Símbolos símbolos. Seleccione el carácter que desee y elija Seleccionar. 2. Cuando haya terminado de escribir una palabra, compruebe que está escrita correctamente. Si la palabra es correcta : Press 0 and write the next word. : Busque otras palabras con U y Si la palabra D (palabra anterior y...
-
Page 39: Buzón Entrada [Menú 1-3]
Mensajes [Menú 1] Buzón entrada [Menú 1-3] Recibirá una alerta cuando reciba mensajes. Los mensajes se almacenarán en la buzón entrada. En la buzón entrada, los mensajes se identifican con iconos. Para obtener más información, consulte el apartado Significado de iconos. - Page 40 Responder Le permite responder al remitente. Reenviar Le permite reenviar el mensaje seleccionado a otra persona. Devolver llamada Le permite devolver la llamada al remitente. Eliminar Le permite eliminar el mensaje actual. Extraer Le permite extraer imágenes, sonidos y texto. Se guardarán en Mi carpeta o en Agenda.
-
Page 41: Buzón Salida [Menú 1-4]
Mensajes [Menú 1] Buzón salida [Menú 1-4] Aquí puede ver los mensajes enviados y no enviados. En el caso de un mensaje enviado puede ver el estado de entrega. La exploración es similar a la de los mensajes en la bandeja de entrada. -
Page 42: Buzón De Voz [Menú 1-5]
Buzón de voz [Menú 1-5] Puede recibir mensajes de voz si el proveedor de servicios de red admite esta función. Cuando llega un mensaje de voz, se muestra el símbolo correspondiente en la pantalla. Compruebe los detalles del servicio con su proveedor de servicios de red para configurar el teléfono según corresponda. - Page 43 Mensajes [Menú 1] Leer [Menú 1-6-1] 1. Si recibe un mensaje del servicio de información y selecciona Leer para verlo, el mensaje aparecerá en la pantalla. Puede leer otro mensaje si utiliza las teclas de desplazamiento L y R o < [Siguiente].
-
Page 44: Plantillas [Menú 1-7]
Asunto [Menú 1-6-5] (depende de la red y contrato) • Añadir nueva Le permite añadir números de mensajes del servicio de información en la información del teléfono y ponerle un nombre. • Ver lista Le permite ver los números de mensajes del servicio de información que ha añadido. -
Page 45: Configuración [Menú 1-8]
Mensajes [Menú 1] Configuración [Menú 1-8] Mensaje corto [Menú 1-8-1] • Tipos de mensajes Texto, Voz, Localizador o busca, X.400. Correo electrónico, ERMES Por defecto, el tipo de mensaje está establecido es tipo Texto, pero cambiar a otros formatos. Póngase en contacto con el proveedor de servicios para obtener información sobre la disponibilidad de esta función. - Page 46 Mensaje multimedia [Menú 1-8-2] • Periodo validez Este servicio de red le permite establecer el período durante el que se almacenarán los mensajes de texto en el centro de mensajes. • Informe de entrega Si establece esta opción de menú en Sí, podrá comprobar si el mensaje se ha enviado.
-
Page 47: Llamadas [Menú 2]
Llamadas [Menú 2] Perdidas [Menú 2-1] Muestra los números de las últimas llamadas perdidas. Además le permite llamar a este número, guardarlo y ver la fecha/hora en que se produjo la llamada perdida. Recibidas [Menú 2-2] Muestra los números de las últimas llamadas recibidas. Además le permite llamar a este número, guardarlo y ver la fecha/hora en que se recibió. - Page 48 También puede restablecer los temporizadores de llamada. 1. Pulse < [Menú] en el modo de espera. 2. Pulse 2 para acceder directamente o bien L y R para ir a Llamadas y luego seleccione Coste llamadas. 3. Desplácese para resaltar Duración de la llamada y pulse <...
- Page 49 Llamadas [Menú 2] Configuración [Menú 2-6-3] (depende de la tarjeta SIM) • Establ. tarifa Puede establecer el tipo de moneda y el precio por unidad. Póngase en contacto con los proveedores de servicios para obtener los precios por unidad. Para seleccionar la moneda o unidad en este menú, debe introducir el código PIN2.
-
Page 50: Info Gprs [Menú 2-7]
Info GPRS [Menú 2-7] Puede comprobar el volumen de datos transferidos en la red a través de GPRS. Además, puede ver la cantidad de tiempo que está conectado. Duración de la llamada [Menú 2-7-1] Puede comprobar la duración de Última llam. y de Todas, así como restablecer los temporizadores. -
Page 51: Perfiles [Menú 3]
Perfiles [Menú 3] En este menú, puede ajustar y personalizar los tonos del teléfono para situaciones y entornos diferentes. 1. Pulse < [Menú] en el modo de espera. 2. Pulse 3 para acceder directamente o utilice L y R. 3. También puede acceder directamente a este menú si pulsa la tecla L en el modo de espera. - Page 52 Nota • El perfil Auriculares sólo se puede activar si se ha colocado el un micrófono en el teléfono. Sin embargo, se pueden personalizar las propiedades. Habilitar [Menú 3-x-1] Activa el perfil seleccionado. Personalizar [Menú 3-x-2] Contiene los submenús siguientes (excepto para Sólo vibrac.): Tipo de alerta de llamada Le permite seleccionar el tipo de alerta (Timbre, Vibrador, etc) para las llamadas entrantes.
- Page 53 Perfiles [Menú 3] Tono de mensaje Le permite seleccionar el tono de alerta para la recepción del mensaje. Volumen de teclado Le permite ajustar el volumen de teclado que mejor se ajuste a su entorno. Tono del teclado Le permite seleccionar el tono del teclado. Resp.
-
Page 54: Ajustes [Menú 4]
Ajustes [Menú 4] Puede establecer los menús siguientes según sus necesidades y preferencias. 1. Pulse < [Menú] en el modo de espera. 2. Pulse 4 para acceder directamente a Ajustes. Alarma [Menú 4-1] Puede configurar hasta 5 relojes de alarma para que el teléfono suene a una hora específica. -
Page 55: Conf. Teléfono [Menú 4-3]
Ajustes [Menú 4] Formato hora [Menú 4-2-4] Le permite establecer el formato de hora como 12 o 24 horas. Conf. teléfono [Menú 4-3] Le permite establecer funciones relacionadas con el teléfono. Mostrar ajustes [Menú 4-3-1] • Salvapantallas Una imagen aparecerá en la pantalla cuando el teléfono se encuentre en modo de espera, sin realizar ninguna acción durante 20 segundos. -
Page 56: Conf. Llamadas [Menú 4-4]
• Luz de fondo Le permite establecer el tiempo durante el que se ilumina la pantalla interna. • Contraste Le permite cambiar el contraste de la pantalla LCD si pulsa L y R. • Ventana de información Le permite previsualizar el estado actual del menú seleccionado antes de abrirlo. - Page 57 Ajustes [Menú 4] • Si no hay respuesta Desvía las llamadas de voz que no se responden. • Ilocalizable Desvía las llamadas de voz si el teléfono está apagado o fuera de cobertura. • Llamad. datos Desvía de forma incondicional las llamadas de datos a un número con una conexión de PC.
- Page 58 - Cancelar Desactiva el servicio correspondiente. - Ver estado Permite ver el estado del servicio correspondiente. Modo de respuesta [Menú 4-4-2] • Cualquier tecla Si selecciona este menú, puede recibir una llamada si pulsa cualquier tecla excepto E [Finalizar]. • Tecla envío Si selecciona este menú, puede recibir una llamada si pulsa la tecla S [Enviar].
- Page 59 Ajustes [Menú 4] Llam. espera [Menú 4-4-4] (depende de la red y la suscripción) • Habilitar Si selecciona Activar, puede aceptar una llamada (entrante) en espera. • Cancelar Si selecciona Cancelar, puede rechazar una llamada (entrante) en espera. • Ver estado Muestra el estado de la llamada en espera.
-
Page 60: Conf. Seguridad [Menú 4-5]
Si se especifica un índice de grupo, se utilizará para todas las llamadas salientes. Si no se especifica ninguno, la red usará el índice preferente (un índice específico almacenado en la red). Per defecto : Active el grupo predeterminado acordado con el operador de la red. - Page 61 Ajustes [Menú 4] Bloqueo de teléfono [Menú 4-5-2] Puede utilizar el código de seguridad para impedir el uso no autorizado del teléfono. Cada vez que encienda el teléfono, se le solicitará el código de seguridad si el bloqueo de teléfono está establecido en “Activado”.
- Page 62 • Llamadas salientes intnales. excepto al país de origen Este servicio restringe todas las llamadas salientes internacionales, excepto a la red propia cuando se está en itinerancia (roaming). • Todas entran. El servicio está activado para todas las llamadas entrantes. •...
- Page 63 Ajustes [Menú 4] Marcación fija [Menú 4-5-5] (depende de la tarjeta SIM) Puede restringir las llamadas salientes a números de teléfono seleccionados. Los números están protegidos con el código PIN2. • Habilitar Le permite restringir las llamadas salientes a los números de teléfono seleccionados.
-
Page 64: Config. Red [Menú 4-6]
Config. red [Menú 4-6] Puede seleccionar una red que se registrará automática o manualmente. Normalmente, la selección de red está establecida en Automática. Automática [Menú 4-6-1] Si selecciona el modo automático, el teléfono buscará y seleccionará automáticamente una red. Una vez seleccionada la opción Automática, el teléfono se establecerá... -
Page 65: Organizador [Menú 5]
Organizador [Menú 5] Planificador [Menú 5-1] Al acceder a este menú aparece un calendario. En la parte superior de la pantalla hay varias secciones destinadas a la fecha. Además, en la parte inferior de la pantalla hay secciones con iconos (entrada de calendario y nota). -
Page 66: Agenda [Menú 5-2]
• Nota 1. Seleccione Añadir nueva pulsando < [Selec.]. 2. Pulse Nota. 3. Introduzca la nota y luego pulse < [Aceptar]. Ver [Menú 5-1-2] Muestra la nota para el día seleccionado. Utilice U y D para desplazarse por las listas de notas. Si establece una alarma para la nota, aparecerá... - Page 67 Organizador [Menú 5] Buscar [Menú 5-2-1] (llamadas a partir de agenda) 1. En el modo de espera, pulse > [Nombr.]. 2. Busque pulsando < [Selec.]. 3. Escriba el nombre correspondiente al número de teléfono o dirección de correo electrónico que desee buscar o seleccione ‘Lista’...
- Page 68 El número de caracteres depende de la tarjeta SIM. 1. Primero, abra la agenda pulsando > [Nombr.] en el modo de espera. 2. Desplácese para resaltar Añadir nueva y pulse < [Selec.]. 3. Seleccione la memoria que desea guardar: SIM o Teléfono. Si establece Phone, debe seleccionar el número que desea como número principal.
- Page 69 Organizador [Menú 5] • Añada miemb. Le permite agregar miembros al grupo. No puede haber más de 20 miembros en el grupo. • Borrar miembro Le permite eliminar un miembro de la lista de miembros del grupo. No obstante, el nombre y el número seguirán presentes en la agenda.
- Page 70 Config. agenda [Menú 5-2-5] 1. Pulse > [Nombr.] en el modo de espera. 2. Desplácese a Config. agenda y luego pulse < [Selec.]. • Config. memoria Desplácese a Config. memoria y luego pulse < [Selec.]. - Si selecciona Variable, al agregar una entrada, el teléfono le pedirá...
- Page 71 Organizador [Menú 5] 3. Puede ver los menús secundarios siguientes. • Conservar original : Al copiar, se conserva el número de marcación original. • Borrar original : Al copiar, se borra el número de marcación original. Borrar todas [Menú 5-2-7] Puede borrar todas las entradas de la tarjeta SIM y el teléfono.
- Page 72 • Estado memoria Esta función le permite ver las entradas libres y en uso de la agenda. 1. Abra primero la agenda pulsando > [Nombr.] en el modo de espera. Seleccione Información pulsando < [Selec.]. 2. Desplácese a Estado de la memoria y luego pulse < [Aceptar].
-
Page 73: Accesorios [Menú 6]
Accesorios [Menú 6] Juegos [Menú 6-1] El teléfono dispone de varios juegos. Nota • Las teclas de control son distintas según el juego concreto. No obstante, cada uno tiene una introducción en la que se explican las teclas de control principales. -
Page 74: Calculadora [Menú 6-3]
• Como tapiz /Como timbre Le permite establecer los sonidos o las imágenes descargadas como papel tapiz o tono de timbre. • Borrar Le permite eliminar el contenido descargado. • Borrar todas Le permite eliminar todos los contenido descargados. Calculadora [Menú 6-3] La calculadora contiene las funciones estándar: +, –, *, ÷... -
Page 75: Conver. Unidad [Menú 6-4]
Accesorios [Menú 6] Conver. unidad [Menú 6-4] Permite convertir cualquier medida en la unidad que desee. Puede seleccionar entre las cuatro medidas siguientes: longitud, área, peso y volumen. 1. Puede seleccionar uno de los cuatro tipos de unidad si pulsa la tecla <... - Page 76 Ver lista [Menú 6-6-2] El teléfono muestra la lista de notas de voz. Puede seleccionar Reproducir y Eliminar una nota de voz grabada. PC Sync PC Sync es un programa para el intercambio de datos entre el PC y el teléfono con un cable de datos. Para obtener más información, puede usar el archivo de Ayuda de PC Sync que está...
-
Page 77: Internet [Menú 7]
Internet [Menú 7] El teléfono admite servicios basados en WAP (Protocolo de aplicaciones inalámbricas). Puede acceder a los servicios admitidos en su red. El menú de servicios le permite obtener información sobre noticias, pronósticos del tiempo y horarios de vuelos. Inicio [Menú... -
Page 78: Perfiles [Menú 7-4]
Recibir [Menú 7-3-2] Puede establecer una opción para determinar si recibirá el mensaje o no. Perfiles [Menú 7-4] Puede crear hasta 10 perfiles y activar solamente uno de ellos. Desplácese al perfil deseado y pulse < para acceder a las opciones disponibles. - Page 79 Internet [Menú 7] - Ajustes de datos Sólo aparece si selecciona Config. Datos como portadora o servicio. Dirección IP : Introduzca la dirección IP de la puerta de enlace WAP que desee. Marcar núm : Introduzca el número de teléfono que desea marcar para acceder a la puerta de enlace WAP.
- Page 80 - Mostrar imág Puede seleccionar si las imágenes de las tarjetas WAP se muestran o no. - Tipo de conexión Las opciones de tipo de conexión son Temporal o Continua, y dependen de la puerta de enlace utilizada. Continuado Mecanismo de entrega confirmado que no obstante genera más tráfico de red.
-
Page 81: Ir A Url [Menú 7-5]
Internet [Menú 7] Ir a URL [Menú 7-5] Puede conectarse directamente al sitio que desee. Debe introducir una dirección URL específica. Confg. caché [Menú 7-6] Puede borrar el contenido de la memoria caché o cambiar el modo de la memoria caché. Borrar caché... -
Page 82: Menú De Exploración
Menú de exploración Mientras está conectado puede ver los menús siguientes: I Página principal Consulte el [Menú 7-1]. I Recargar Vuelve a cargar la página actual. I Favoritos Consulte el [Menú 7-2]. I Guardar como marcador Le permite guardar un sitio como un marcador. I Mensajes Le permite ver los mensajes cortos durante una conexión WAP. -
Page 83: Java [Menú 8]
Java [Menú 8] Aplicaciones [Menú 8-1] Aplicaciones (Nombre de aplicaciones) 1. Abrir (i) (aplicaciones 1) 2. Eliminar (i) (aplicaciones 2) 3. Actualizar (i) (aplicaciones 3) 4. Informaci n (i) (aplicaciones 4) 5. Ajustes del tel fono Opciones del menú Java Desplácese a una aplicación y seleccione Opciones. -
Page 84: Accesorios
Nota • Utilice siempre accesorios LG originales. • Si no lo hace, la garantía puede quedar invalidada. • Los accesorios pueden variar según las regiones; por favor, consulte con su compañía o agente local para... -
Page 85: Servicio De Red
Servicio de red • El teléfono inalámbrico descrito en la presente guía ha sido aprobado para su uso en redes GSM 900/1800 y EGSM. • La banda dual es una función que depende de la red. Consulte a su proveedor de servicio local para saber si puede suscribirse y utilizar esta función. -
Page 86: Solución De Problemas
Solución de problemas Este capítulo enumera algunos de los problemas que puede encontrar mientras utiliza el teléfono. Para solucionar algunos problemas deberá ponerse en contacto con su proveedor de servicios, pero la mayoría de ellos los podrá solucionar usted mismo fácilmente. Mensaje Causas posibles Posibles medidas correctivas... - Page 87 Conéctelo a otro enchufe o compruebe el voltaje. Cargador defectuoso Si el cargador no se calienta, sustitúyalo por otro. Cargador incorrecto Utilice únicamente accesorios LG originales. Batería defectuosa Sustituya la batería. El teléfono Señal demasiado débil La reconexión a otro proveedor pierde la red de servicios es automática.
-
Page 88: Datos Técnicos
Datos Técnicos General Nomber del Producto : C3100 Sistema : GSM 900 / DCS 1800 Temperatures Ambiente Máxima : +55°C Mínima : -10°C... - Page 90 Memo...
- Page 91 Memo...
- Page 92 ENGLISH GPRS & MMS Phone USER’S MANUAL MODEL: C3100 Please read this manual carefully before operating your mobile phone. Retain it for future reference.
- Page 93 Introduction Congraturations on your purchase of the advanced and compact C3100 cellular phone, designed to operate with the latest digital mobile communication technology. Important Information This user’s guide contains important information on the use and operation of this phone. Please read all the information carefully for optimal performance and to prevent any damage or misuse of the phone.
- Page 94 Exposure to Radio Frequency Energy Radio wave exposure and Specific Absorption Rate (SAR) information This mobile phone model C3100 has been designed to comply with applicable safety requirement for exposure to radio waves. This requirement is based on scientific guidelines that include safety margins designed to assure this safety of all persons, regardless of age and health.
- Page 95 Guidelines for Safe and Efficient Use Product Care and Maintenance Warning: Use only batteries, charger and accessories approved for use with this particular phone model. The use of any other types may invalidiate any approval or warranty applying to the phone, and may be dangerous. •...
- Page 96 Fuse Replacement Always replace a blown fuse with a fuse of the same type and size. Never use a fuse of a higher rating. Efficient Phone Operation To enjoy optimum performance with minimum power consumption please: • Hold the phone as you speak to any other telephone. While speaking directly into the microphone, angle the antenna in a direction up and over your shoulder.
- Page 97 Guidelines for Safe and Efficient Use Road Safety Check the laws and regulations on the use of mobile phones in the areas when you drive. • Do not use a hand-held phone while driving. • Give full attention to driving. •...
- Page 98 Unlike other battery systems, there is no memory effect that could compromise the battery’s performance. • Use only LG batteries and chargers. LG chargers are designed to maximize the battery life. • Do not disassemble or short-circuit the battery pack.
- Page 99 Contents Overview ..............Part of the Phone • Main body of the Phone ............12 • Outside of the Phone ............13 ............... Key Description • Letter Keys ................15 Display Information ..............Display Information • On-Screen Icons ..............16 Getting Started ................
- Page 100 ................. Access Codes • PIN code (4 to 8 digits) ............26 • PIN2 code (4 to 8 digits) ............26 • PUK code (4 to 8 digits) ............26 • PUK2 code (4 to 8 digits) ............26 • Security code (4 to 8 digits) ..........26 Accessing the Menu ................
- Page 101 Contents ..............Profiles [Menu 3] • Vibrate only [Menu 3-1] ............47 • Quiet [Menu 3-2] ..............47 • General [Menu 3-3] ............... 47 • Loud [Menu 3-4] ..............47 • Headset [Menu 3-5] .............. 47 ..............Settings [Menu 4] •...
- Page 102 ..............Internet [Menu 7] • Home [Menu 7-1] ..............70 • Bookmarks [Menu 7-2] ............70 • Push messages [Menu 7-3] ..........70 • Profiles [Menu 7-4] ..............71 • Goto URL [Menu 7-5] ............73 • Cache settings [Menu 7-6] ............ 73 •...
-
Page 103: Part Of The Phone
Part of the Phone Main body of the Phone Earpiece Ear Microphone Connector Display Screen Clear/Cancel Key Confirm Key Message key Vibration Key Soft Right Key Soft Left Key End/Power Key Send Key Numeric Keys Star Key Hash Key Microphone... -
Page 104: Outside Of The Phone
Outside of the Phone Handstrap Hole Battery Lock Battery Battery cover SIM Card Socket Cable Connector Battery Charging Connector... -
Page 105: Key Description
Key Description The following shows key components of the phone. Keypad Description Description Soft Left Key / Soft Right Key < > Each of these keys performs the function indicated by the text on the display immediately above it. Navigation Keys Used to scroll through name, phone numbers, menus or setting options. -
Page 106: Letter Keys
Letter Keys Each key can be used for several symbols. There are shown below. Description . , / ? ! - : ' " 1 A B C 2 Ä À Á Â Ã Å Æ Ç a b c ä à á â ã å æ ç D E F 3 Ë... -
Page 107: Display Information
Display Information The screen displays several icons. There are described below. On-Screen Icons Icon/Indicator Description Tells you the strength of the network signal. Call is connected. You can use GPRS service. Shows that you are using a roaming service. The alarm has been set and is on. Tells you the status of the battery. -
Page 108: Installation
Installation 1. Inserting the SIM Card Locate the SIM card socket in the back of the phone. Follow the steps below to install the SIM card. 1. Remove the battery if attached. 2. Slide the SIM card into the slot, under the silvery holders, with the golden connectors facing down. -
Page 109: Installing The Battery
Installation 3. Installing the Battery 1. Position the lugs on the top of the battery into the retaining holder. 2. Then push the bottom of the battery into position until it clicks. 3. Attach back cover by sliding up into position until it clicks. -
Page 110: Charging The Battery
4. Charging the Battery To connect the travel adapter to the phone, you must have installed the battery. 1. With the arrow facing you as shown in the diagram push the plug on the battery adapter into the socket on the bottom of the phone until it clicks into place. -
Page 111: Disconnecting The Charger
Installation 5. Disconnecting the charger Disconnect the travel adapter from the phone by pressing its side buttons as shown in the diagram. Note • Ensure the battery is fully charged before using the phone. • Do not remove your battery or the SIM card while charging. -
Page 112: Making And Answering Calls
Making and Answering Calls Making a call 1. Key in phone number including the area code. If you want to delete number, press C. 2. Press S to call the number. 3. Press E to end the call. International Calls 1. -
Page 113: In Call Menu
In call Menu The menu displayed on the handset screen during a call is different to the default main menu reached from the idle screen, and the options are described here. 1 During a call 1-1 Putting a Call on Hold When a call is made or answered, press the S [Send] to place it on hold. - Page 114 If Call Waiting is on, you can put the first call on hold and answer the second, by pressing S [Send] or by selecting < [Answer], then Hold & Answer. You can end the current call and answer the waiting call by selecting <...
-
Page 115: Multiparty Or Conference Calls
In call Menu 2 Multiparty or Conference Calls The multiparty or conference service provides you with the ability to have a simultaneous conversation with more than one caller, if your network service provider supports this feature. A multiparty call can only be set up when you have one active call and one call on hold, both calls having been answered. - Page 116 2-5 Adding Calls to the Multiparty Call To join an active call to the held multiparty call, select <[Options] then Multiparty / Join all. 2-6 Displaying Callers in a Multiparty Call To scroll though the numbers of the callers who make up a multiparty call on the handset screen, press D and U keys.
-
Page 117: Access Codes
Access Codes You can use the access codes described in this section to avoid unauthorized use of your phone. The access codes (except PUK and PUK2 codes) can be changed by using [Menu 4-5-6]. PIN code (4 to 8 digits) The PIN (Personal Identification Number) code protects your SIM card against unauthorized use. -
Page 118: Menu Tree
Menu Tree 1 Messages 3 Profiles 1 Write short message 1 Vibrate only 2 Write multimedia message 2 Quiet 3 Inbox 3 General 4 Outbox 4 Loud 5 Voice mail 5 Headset 6 Info service 7 Templates 8 Settings 4 Settings 1 Alarm clock 2 Date &... - Page 119 Menu Tree 6 Fun & Tools 8 Java 1 Games 1 Applications 2 My folder 2 Download 3 Calculator 3 Memory status 4 Unit converter 5 World time 6 Voice recorder 9 SIM Service This menu depends on SIM and the network services. 7 Internet 1 Home 2 Bookmarks...
-
Page 120: Messages [Menu 1]
Messages [Menu 1] This menu includes functions related to SMS (Short Message Service), MMS (Multimedia Message Service), voice mail, as well as the network’s service messages. Write short message [Menu 1-1] You can write and edit text message, checking the number of message pages. - Page 121 Messages [Menu 1] • Save Stores messages in Outbox. • Font You can select Size and Style of fonts. • Colour You can select Colour of foreground and background. • Alignment You can make the message contents aligned Right, Centre or Left.
-
Page 122: Write Multimedia Message [Menu 1-2]
• Text templates You can use Text templates already set in the phone. • Phone book You can add phone numbers or e-mail addresses in Phone book. • Business card You can add your contact information to the message. Write multimedia message [Menu 1-2] You can write and edit multimedia messages, checking message size. - Page 123 Messages [Menu 1] • Save You can save multimedia messages in the outbox or as templates. • Add slide You can add a slide before or after current slide. • Move to slide You can move to previous or next slide. •...
- Page 124 How to Use T9 T9 allows you to input text quickly. In T9, you only need to press the key with the corresponding letter once. This is based on a built-in dictionary to which you can also add new words. •...
- Page 125 Messages [Menu 1] Alternatively : Press * key and select insert symbols. Select the desired character and press Select. 2. When you have finished wirting a word, check whether the word is correct. : Press 0 and write the next word. If the word is correct If the word is not correct : Search by U , D (Previous and Next word).
-
Page 126: Inbox [Menu 1-3]
Inbox [Menu 1-3] You will be alerted when you have received messages. They will be stored in Inbox. In Inbox, you can identify each message by icons. For detail, see the icon directive. Icon directive ] Multimedia message ] Short message ] SIM message ] Read ] Notified multimedia message... -
Page 127: Outbox [Menu 1-4]
Messages [Menu 1] Return call You can call back to the sender. Delete You can delete the current message. Extract You can extract picture, sound and text. They will be saved in My folder or Phonebook. View information You can view information about received messages; Sender’s address, Subject (only for Multimedia message), Message date &... - Page 128 Icon directive ] Sent ] Unsent ] Delivery confirmed ] SMS sent ❇ When you use the message which is already sent Forward You can forward the current message to other recipients. Delete You can delete the current message. View information You can view information about outbox messages;...
-
Page 129: Voice Mail [Menu 1-5]
Messages [Menu 1] Voice mail [Menu 1-5] You can receive the voicemail if this feature is supported by your network service provider. When a new voicemail is arrived, the symbol will be displayed on the screen. Please check with your network service provider for details of their service in order to configure the phone accordingly. -
Page 130: Info Service [Menu 1-6]
Info service [Menu 1-6] (Dependent to network and subscription) Info service messages are text messages delivered by the network to GSM. They provide general information such as weather reports, traffic news, taxis, pharmacies, and stock prices. Each type of information has the number; therefore, you can contact service provider as long as you have input the certain number for the information. - Page 131 Messages [Menu 1] Alert [Menu 1-6-3] • Yes Your phone will beep when you have received Info service message numbers. • No Your phone will not beep even though you have received info service messages. Languages [Menu 1-6-4] You can select the language you want by pressing [On/Off]. Then, the info service message will be shown in the language that you selected.
-
Page 132: Templates [Menu 1-7]
Templates [Menu 1-7] Text [Menu 1-7-1] You have 11 text templates. You can change the predefined templates into your favorite ones or fill the <empty>s. Multimedia [Menu 1-7-2] You can use the following options. Edit : You can edit multimedia templates. Add new : Allows you to add new multimedia templates. - Page 133 Messages [Menu 1] • Reply via same service centre When a message is sent, it allows the recipients to reply and charge the cost of the reply to your telephone bill. • SMS centre If you want to send the text message, you can receive the address of SMS centre through this menu.
-
Page 134: Call Register [Menu 2]
Call register [Menu 2] Missed calls [Menu 2-1] This menu shows recently missed numbers. You can call these numbers, save and view the date and the time. Received calls [Menu 2-2] This menu shows recently received numbers. You can call these numbers, save and view the date and the time. - Page 135 Call register [Menu 2] Call duration [Menu 2-6-1] This function allows you to view the duration of your Last Call, All Calls, Received calls and Dialled calls in hours, minutes and seconds. You can also reset the call timers. 1. Press < [Menu] in standby mode. 2.
- Page 136 Settings [Menu 2-6-3] (SIM Dependent) • Set tariff You can set the currency type and the unit price. Contact your service providers to obtain charging unit prices. To select the currency or unit in this menu, you need the PIN2 code. If you want to input , £, $ symbol, clear all currency strings and then press * key.
-
Page 137: Gprs Information [Menu 2-7]
Call register [Menu 2] GPRS information [Menu 2-7] You can check the amount of data transferred over the network through GPRS. In addition, you can view how much time you are online. Call duration [Menu 2-7-1] You can check the duration of Last call and All calls. You can also reset the call timers. -
Page 138: Profiles [Menu 3]
Profiles [Menu 3] In this menu, you can adjust and customize the phone tones for different events and environments. 1. Press < [Menu] in standby mode. 2. Press 3 for direct access or use L and R. 3. You can also enter this menu directly by pressing L key in standby mode. - Page 139 Profiles [Menu 3] Note • Headset profile can be activated only when ear microphone put on the handset. However, their properties can be personalised. Activate [Menu 3-x-1] Activates the selected Profile. Personalise [Menu 3-x-2] Each has the submenus as shown below except for Vibrate only. Call alert type Allows to select alert type such as Ring, Vibrate, etc.
- Page 140 Keypad tone Allows to select the keypad tone for adjusting environment. Auto answer This function will be activated only when your phone is connected to the headset. • Off : The phone will not answer automatically. • After 5 secs : After 5 seconds, the phone will answer automatically.
-
Page 141: Settings [Menu 4]
Settings [Menu 4] You can set the following menus for your convenience and preferences. 1. Press < [Menu] in standby mode. 2. Press 4 for direct access to enter Settings. Alarm clock [Menu 4-1] You can set up to 5 alarm clocks to go off at a specified time. 1. -
Page 142: Phone Settings [Menu 4-3]
Phone settings [Menu 4-3] You can set functions relating to the phone. Display settings [Menu 4-3-1] • Screen saver You can set screen saver. • Wallpaper You can select the background pictures in standby mode. - Default You can select a picture or an animation of wallpaper by pressing L or R. -
Page 143: Call Settings [Menu 4-4]
Settings [Menu 4] • Information window You can preview the current state of the selected menu before open the menu. The state is shown at bottom of the display. • Menu colour You can select the preferred menu colour among various combination. - Page 144 • All data calls Diverts to a number with a PC connection unconditionally. • All fax calls Diverts to a number with a fax connection unconditionally. • Cancel all Cancels all call divert service. The submenus Call divert menus have the submenus shown below. - Activate Activate the corresponding service.
- Page 145 Settings [Menu 4] Answer mode [Menu 4-4-2] • Press any key If you select this menu, you can receive a call by pressing any key except E [End] key. • Send only If you select this menu, you can receive a call by only pressing S [Send] key.
- Page 146 Minute minder [Menu 4-4-5] If you select On, you can check the call duration by deep sound every minute during a call. Auto redial [Menu 4-4-6] • On When this function is activated, the phone will automatically try to redial in the case of failure to connect a call. •...
-
Page 147: Security Settings [Menu 4-5]
Settings [Menu 4] Security settings [Menu 4-5] PIN code request [Menu 4-5-1] In this menu, you can set the phone to ask for the PIN code of your SIM card when the phone is switched on. If this function is activated, you’ll be requested to enter the PIN code. - Page 148 Note • If you want to lock your phone keypad manually, enter Top menu and press * key. • If you want to unlock your phone keypad, press < [unlock] key and then press * key. But if you enabled Automatic key lock before, your phone keypad will be unlock and then after 25 seconds the keypad will be lock up again automatically.
- Page 149 Settings [Menu 4] • Change password You can change the password for Call Barring Service. Each all barring menu has following submenus: • Activate Allows to request the network to set call restriction on. • Cancel Set the selected call restriction off. •...
-
Page 150: Network Settings [Menu 4-6]
Network settings [Menu 4-6] You can select a network which will be registered either automatically or manually. Usually, the network selection is set to Automatic. Automatic [Menu 4-6-1] If you select Automatic mode, the phone will automatically search for and select a network for you. Once you have selected Automatic, the phone will be set to “Automatic”... -
Page 151: Organiser [Menu 5]
Organiser [Menu 5] Scheduler [Menu 5-1] When you enter this menu a Calendar will show up. On top of the screen there are sections for date. Also on bottom of the screen there are sections for icons (schedule, memo). Whenever you change the date, the calendar will be updated according to the date. -
Page 152: Phone Book [Menu 5-2]
View [Menu 5-1-2] Shows the note for the chosen day. Use U , D to browse through the note lists. If you set alarm for the note, Alarm watch is displayed. At that time, if you press < [Select], you can see the note in detail. - Page 153 Organiser [Menu 5] 4. Instant searching is available by inputting the initial letter of the name or number you want to search. 5. If you want to edit, delete, copy an entry, or to add the voice to one, select < [Options]. The following menu will be displayed. •...
- Page 154 d. You can set a group for the entry by pressing L , R: e. You can set a character for the entry by pressing L , R. The chosen character will be shown on display when receiving call from the selected name. Caller groups [Menu 5-2-3] You can list up to 20 members per one group.
- Page 155 Organiser [Menu 5] Speed dial [Menu 5-2-4] You can assign any of the keys, 2 to 9 with a Name list entry. You can call directly by pressing this key for 2-3 seconds. 1. Open the phonebook first by pressing > [Names] in standby mode.
- Page 156 Copy all [Menu 5-2-6] You can copy/move entries from SIM card memory to Phone memory and vice versa. 1. Open the Phonebook first by pressing > [Names] in standby mode. 2. Scroll to Copy all, then press < [Select] to enter this menu. •...
- Page 157 Organiser [Menu 5] Information [Menu 5-2-8] • Service dial number Use this function to access a particular list of services provided by your network operator (if supported by the SIM card). 1. Open the phonebook first by pressing > [Names] in standby mode and select Information.
-
Page 158: Fun & Tools [Menu 6]
Fun & Tools [Menu 6] Games [Menu 6-1] The phone offers you the games to play with. Note • The control keys are different depending on a game. However, each one has an introduction to explain the main control keys. The rest ones are as follows. [Common Key Function] <... -
Page 159: Calculator [Menu 6-3]
Fun & Tools [Menu 6] • Delete You can delete each downloaded content. • Delete all You can delete all downloaded contents. Calculator [Menu 6-3] This contains the standard functions such as +, –, *, ÷ : Addition, Subtraction, Multiplication, and Division. 1. -
Page 160: World Time [Menu 6-5]
World time [Menu 6-5] You can view clocks of the world’s major cities. 1. Select the city belonged to the time zone by pressing L , R key. 2. You can set the current time to the city time you select by pressing <... -
Page 161: Internet [Menu 7]
Internet [Menu 7] The phone supports services based on Wireless Application Protocol (WAP). You can access services supported by your network. The services menu allows you to get the information such as news, weather reports, and flight times. Home [Menu 7-1] Connect to a homepage. -
Page 162: Profiles [Menu 7-4]
Profiles [Menu 7-4] You can make up to 10 profiles and activate only one out of them. Scroll to the desired profile and press < to access available options. • Activate You can activate the profile you want. • Settings You can edit and change WAP settings of the selected profile. - Page 163 Internet [Menu 7] Call speed : The speed of your data connection; 9600 or 14400. Linger time : You need to enter timeout period.After entering that, the WAP navigation service will be unavailable if any data is not input or transfered. - GPRS settings The service settings are only available when GPRS is chosen as a bearer service.
-
Page 164: Goto Url [Menu 7-5]
• Rename Edit the Profile Name. • Delete Delete the Profile. • Add new You can add a new profile manually. • Email server - Connect Connect to the E-mail server that you configured. - Edit address Edit the E-mail address. Goto URL [Menu 7-5] You can directly connect to the site you want. -
Page 165: Security Certification [Menu 7-7]
Internet [Menu 7] Security certification [Menu 7-7] A list of the available certificates is shown. Reset profiles [Menu 7-8] You can reset profiles to return to original settings. Browser version [Menu 7-9] The WAP Browser version is displayed. -
Page 166: On Browsing Menu
On browsing menu If you are on line, you can view the following menus. I Home Refer to [Menu 7-1]. I Reload Reloads the current page. I Bookmarks See [Menu 7-2]. I Save as bookmark You can save a site as bookmark. I Messages During Wap connection, you can see the Short messages. -
Page 167: Java [Menu 8]
Java [Menu 8] Applications [Menu 8-1] (application name) Applications (i) (application 1) 1. Open (i) (application 2) 2. Delete (i) (application 3) 3. Update (i) (application 4) 4. Information 5. Phone settings Option Back Select Back Java Menu Options Scroll to an application and select Options. 1. -
Page 168: Accessories
You can connect your phone to PC to exchange the data between them. Note • Always use genuine LG accessories. • Failure to do this may invalidate your warranty. • Accessories may be different in different regions; please check with our regional service company or... -
Page 169: Network Service
Network service • The wireless phone described in this guide is approved for use on the EGSM 900 and GSM 1800 network. • Dualband is a network dependent feature. Check with your local service provider if you can subscribe to and use this feature. -
Page 170: Trouble Shooting
Trouble Shooting This chapter lists some problems that you might encounter while using your phone. Some problems require that you call your service provider, but most of problems you encounter are easy to correct yourself. Message Possible causes Possible Corrective measures SIM error There is no SIM card in the Make sure that the SIM card is... - Page 171 Plug in to a different socket or check voltage. Charger defective If the charger does not warm up, replace it. Wrong charger Only use original LG accessories. Battery defective Replace battery. Phone loses Signal too weak Reconnection to another service network provider is automatic.
-
Page 172: Technical Data
Technical Data General Product name : C3100 System : GSM 900 / DCS 1800 Ambient Temperatures Max : +55°C Min : -10°C... - Page 174 Memo...
- Page 175 Memo...
- Page 176 Memo...
- Page 177 Memo...
- Page 178 TARJETA DE GARANTÍA 1. - Guarde durante todo el período de garantía esta tarjeta debidamente cumplimentada y sellada por la tienda junto con la factura de compre. 2. - Cuando requiera cualquier servicio de reparación deberá mostrar esta tarjeta de garantía.
- Page 179 DATOS DEL USUARIO Y DEL PRODUCTO NOMBRE Y APELLIDOS: DOMICILIO: C. POSTAL: POBLACIÓN: PROVINCIA: TELÉFONO: FECHA DE COMPRA: MODELO: N° DE SERIE: SELLO DEL ESTABLECIMIENTO: RELLENAR TODOS LOS DATOS POR EL ESTABLECIMIENTO O TIENDA EN EL MOMENTO DE LA COMPRA...
- Page 180 • LG ELECTRONICS ESPANA, SA. no se hace responsable deles daños que un aparato pueda causare elementos externos. • La Garantía de LG ELECTRONICS ESPANA, SA. sustituye al impreso de origen para todo el Territorio del Estado Español.
- Page 181 DIRECTORIO DE CONTACTOS LG 902.500.234 Este es nuestro número de atención al cliente para cualquier tipo de consulta, reclamación o para requerir asistencia técnica. http://es.lgservice.com A través de esta web podrá descargarse manuales, actualizaciones de SW y realizar consultas técnicas por e-mail.