Table of Contents
Advertisement
Advertisement
Table of Contents

Related Manuals for Siemens iQ500 WK14D542


Summary of Contents for Siemens iQ500 WK14D542
- Page 1 Washer dryer siemens-home.bsh-group.com/welcome Register your product online...
- Page 2 Your new washer dryer Display rules : Warning! You have chosen a Siemens washer dryer. This combination of symbol and signal word indicates a possibly dangerous Please take a few minutes to read and situation. Not heeding the warning can become familiar with the advantages of cause death or injuries.
-
Page 3: Table Of Contents
Contents e n I n s t r u c t i o n M a n u a l a n d I n s t a l l a t i o n I n s t r u c t i o n s Intended use . -
Page 4: Intended Use
Intended use Intended use Safety instructions T he following safety information This appliance is intended for private ■ I n t e n d e d u s e S a f e t y i n s t r u c t i o n s and warnings are provided to domestic use only. - Page 5 Safety instructions Do not allow children to Warning ■ clean or maintain this Risk of suffocation! appliance unsupervised. If allowed to play with the Keep children under 3 years packaging/plastic film or ■ and pets away from this packing components, children appliance.
-
Page 6: Installation
Safety instructions If using a residual current Installation ■ circuit breaker, only use one Warning that bears the following Risk of electric shock/fire/ mark: z. The presence of material damage/damage to this mark is the only way to the appliance! be sure that it fulfils all the If the appliance is not installed applicable regulations. - Page 7 Safety instructions If the hoses and mains Warning ■ cables are not correctly Risk of injury/material routed, they may constitute a damage/damage to the tripping hazard, which may appliance! result in injury. The appliance may vibrate or ■ Route hoses and cables move when in operation, such that they do not potentially resulting in injury...
-
Page 8: Operation
Safety instructions The appliance is secured for Do not place laundry in this ■ ■ transportation by transport appliance to be dried if the locking devices. If the laundry has not been transport locking devices are washed first. not removed before the Do not use the appliance if ■... - Page 9 Safety instructions Warning Warning Risk of fire/material damage/ Risk of injury! damage to the appliance! If you support your weight/sit ■ If a program is terminated on the appliance door when before the drying cycle has it is open, the appliance may finished, this prevents the tip over, which may result in laundry from cooling down...
-
Page 10: Cleaning/Maintenance
Safety instructions If you pour the wrong Warning ■ quantity of detergent or Eye/skin irritation! cleaning agent into the Detergent and care products appliance, this may result in may spray out if the detergent material damage or damage drawer is opened while the to the appliance. - Page 11 Safety instructions Do not make any technical Warning ■ modifications to the Risk of injury/material appliance or its features. damage/damage to the Repairs and any other work appliance! ■ on the appliance must only The use of spare parts and be conducted by our accessories supplied by other customer service or by an...
-
Page 12: Environmental Protection
Environmental protection Reduce the washing temperature for Environmental lightly and normally soiled laundry. protection At low temperatures, the appliance ■ consumes less energy. For light to P ackaging/used appliance normal soiling, lower temperatures E n v i r o n m e n t a l p r o t e c t i o n than indicated on the care label are Dispose of packaging in an also sufficient. -
Page 13: Positioning And Connecting
Positioning and connecting Bag*: Positioning and Installation and operating ■ connecting instructions Customer Service location ■ S tandard accessories directory* P o s i t i o n i n g a n d c o n n e c t i n g Warranty* ■... -
Page 14: Safety Instructions
Positioning and connecting Safety instructions Removing the transport locks Warning Caution! Risk of injury! Damage to the appliance The appliance is very heavy. The appliance is secured for ■ ■ Be careful when lifting/transporting transportation using transport locks. the appliance. If the transport locks are not When the appliance is lifted by its removed, the appliance may... -
Page 15: Installation Surface
Positioning and connecting Unscrew all screws usingthe Insert the protectivecovers.. spanner supplied. Notes – Remove all transport safety bolts Before using the appliance for the ■ completely first time, make sure that all transport safety bolts have been removed and kept safe for any subsequent transport. -
Page 16: Installation On A Base Or A Wooden Joist Floor
Positioning and connecting Installation on a base or a wooden joist floor Caution! Damage to the appliance The appliance may damage to the appliance and kitchen furniture when spinning. On wooden joist floors, install the Note: appliance: The feet of the appliance must be ■... -
Page 17: Installing The Appliance In A Kitchenette
Positioning and connecting Installing the appliance in a kitchenette Warning Risk of death! There is a risk of electric shock if you touch live components. Do not remove the appliance covering plate. Notes Recess width of 60 cm required. ■ Only install the appliance underneath a continuous worktop that is securely ■... -
Page 18: Levelling
Positioning and connecting Levelling Fitting the door hinges Caution! Caution! Intense noise, vibrations and wandering Once the washer-dryer has been instlled may be the result of incorrect levelling. in a kitchen unit, it can be concealed with a door. Hinges supplied to the washer-dryer must be fitted. -
Page 19: Hose And Cable Lengths
Positioning and connecting Hose and cable lengths Connection on left side or connection on right side Note: If the supply hose is too short for your connection, you can order an extension from the after-sales service. -
Page 20: Water Inlet
Positioning and connecting Water inlet Optimum water pressure in the supply network Warning At least 50 kPa (0,5 bar) Risk of death! Maximum 900 kPa (9 bar) There is a risk of electric shock if you When the tap is open, the water flow is touch live components. -
Page 21: Water Outlet
Positioning and connecting – Model: Aqua-Stop* Water outlet Warning Risk of scalding! When you are washing at high temperatures, there is a risk of scalding if you come into contact with hot water (e.g. when draining hot water into a washbasin). -
Page 22: Electrical Connection
Positioning and connecting Electrical connection Before washing for the first time Warning The appliance was inspected Risk of death! thoroughly before leaving the factory. To There is a risk of electric shock if you remove any residual test water, run touch live components. -
Page 23: Transportation
Positioning and connecting Transportation e.g. when moving home Preparatory work: Turn off the water tap. Reduce the water pressure in the supply hose. ~ Page 44 Drain any residual water. ~ Page 43 Disconnect the appliance from the mains. Remove the hoses. Empty the dispensers. -
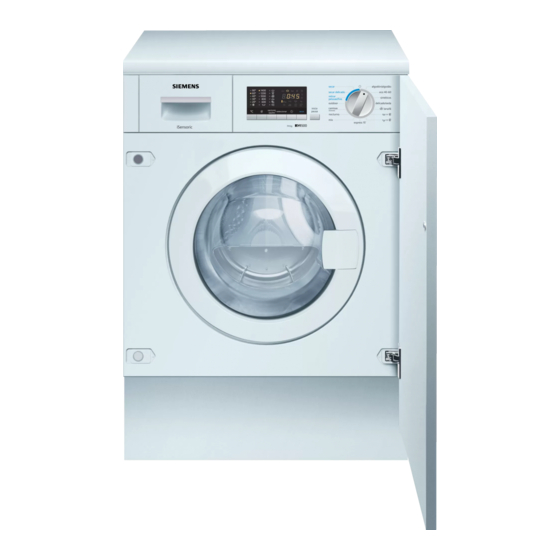
Page 24: Getting To Know The Appliance
Getting to know the appliance Getting to know the appliance A ppliance G e t t i n g t o k n o w t h e a p p l i a n c e Detergent drawer Operating/display panel Loading door Service flap... -
Page 25: Control Panel
Getting to know the appliance Control panel 0 Display Panel* ( Indicator lamp* Shows the settings that have been Indicates the settings that have selected (e.g. spin speed, drying beenselected for: time), the progress of the current Temperature Ž 90°C programme and the programme ■... - Page 26 Getting to know the appliance 8 Buttons* Temperature Ž °C: individual ■ adjustment of the washing temperature. Spin speed : individual ■ adjustment of the spin speed. Options button: sets washing ■ options. Set: activation/deactivation of ■ the selected washing options. Finished In delays the ■...
- Page 27 Getting to know the appliance Options Option Description Option Description SignalC Activates or deactivates the audi- s(Prewash) Prewash at 35 °C. Suitable for ble signal. heavily soiled laundry. Finished In You can postpone Programme Spin speed The spin speed can be individu- start before it begins.
- Page 28 Getting to know the appliance Drying options Washing only Option Description Turn the programme selector ■ Drying Button The drying programmes can be to the desired individually adapted byselecting programme,e.g.Cottons 60°C the drying options.– Press the – The display panel Drying button repeatedly until the alternately shows required drying option is shown...
- Page 29 Getting to know the appliance Washing and drying End of the programme Turn the programme selector The washing and drying ■ ■ to the desired programmes are ended programme,e.g.Cottons 60°C automatically. “Ÿš appears on – The display panel the display panel. alternately shows –...
-
Page 30: Laundry
Laundry Rinse hold Laundry If the spin function was ■ deactivated at the start of the P reparing laundry for washing wash cycle, the washing L a u n d r y programme is automatically stopped after the final rinse. Protecting your laundry and appliance The display panel shows Âþ¿... -
Page 31: Preparing Laundry For Drying
Laundry Preparing laundry for drying Sorting laundry Sort your laundry according to the care To ensure an even drying result, Note: instructions and manufacturer's sort the laundry according to the: information on the care labels, Type of fabric ■ depending on: Care symbols which are indicated on ■... -
Page 32: Detergents And Care
Detergents and care products Detergents and care products Y ou can protect your appliance and D e t e r g e n t s a n d c a r e p r o d u c t s your laundry by selecting and using the correct detergents and care products. -
Page 33: Detergent Recommendation
Detergents and care products Detergent recommendation This information is intended to help you to choose the right detergent for your items. Fabrics Detergent Programme Temperature Heat-resistant white fab- Standard detergent with optical Cottons From cold up to 90 °C rics made from cotton or brighteners linen Coloured fabrics made... -
Page 34: Selectable Programme
Overview of programmes Overview of programmes S electable programme * O v e r v i e w o f p r o g r a m m e s Washing Programmes* Name of the programme Brief explanation of the programme and for which fabrics it is suitable Cottons Suitable for hard-wearing fabrics, heat-resistant fabrics made from cottonor linen.–... - Page 35 Overview of programmes Washing Programmes* Outdoor Wash cycle followed by waterproofing of membrane-coated weatherproof and outdoor clothing or water- resistant fabrics. Notes Use special detergent that is suitable for machine washing; add the correct dosage to the dispenser in ■ accordance with the manufacturer's instructions.
-
Page 36: Drying Table
Overview of programmes Special Programmes* à+0+Spin An additional rinse cycle with a final spin. If the laundry is to be removed dripping wet, set the Spin speed toà(Rinse)before Programme start p+0Empty +Spin Drain the rinsing water following a programme with $ (Rinse hold) Turn the programme selector to p+0Empty +Spin. -
Page 37: Starching
Operating the appliance Starching Operating the appliance Laundry should not be treated Note: with fabric softener. P reparing the appliance Switch on the appliance. O p e r a t i n g t h e a p p l i a n c e Select the q Rinse programme. -
Page 38: Select Programme/Switch On The Appliance
Operating the appliance Select programme/switch on Notes Unfold and load presorted items the appliance ■ of laundry. Mix large and small items. Washing items of different If you have activated the Note: size distribute themselves better childproof lock, you must first deactivate during the spin cycle. - Page 39 Operating the appliance Filling the dispensers Notes Always follow the manufacturer's ■ Pull out the detergent drawer. instructions when dosing all detergents, cleaning aids, care Warning products and cleaning agents. Eye / skin irritation! Dilute viscous fabric softener If the detergent drawer is opened ■...
-
Page 40: Childproof Lock
Operating the appliance Childproof lock Leave the door and detergent ■ drawer open so that any residual You can lock the appliance to prevent water can evaporate. the functions you have set from being Always wait until the programme ■ changed inadvertently. -
Page 41: Unbalanced Load Detection System
Sensors Sensors Cleaning and maintenance U nbalanced load detection S e n s o r s system Warning C l e a n i n g a n d m a i n t e n a n c e Risk of death! The automatic unbalanced load There is a risk of electric shock if touch... -
Page 42: Descaling
Cleaning and maintenance Descaling Clean the detergent dispenser tray and insert with water and a brush, Descaling should not be necessary if and dry it. Clean the inside of the the detergent is measured out correctly. housing as well. However, if it is required, follow the manufacturer's instructions for the descaling agent. -
Page 43: Drain Pump Is Blocked
Cleaning and maintenance Drain pump is blocked Take the drain hose out of the retainer. Remove the sealing cap and pour Turn the water tap off to prevent Note: the water out into a suitable more water from flowing in and to container.The container for the ensure that it is drained via the pump. -
Page 44: The Drain Hose At The Siphon Is Blocked
Cleaning and maintenance The drain hose at the siphon Clean the filters: is blocked Disconnect the hose from the rear of the appliance. Set the program selector to Off. Pull out the mains plug. Loosen the hose clamp. Carefully remove the drain hose; residual water may leak out. -
Page 45: Faults And What To Do About Them
Faults and what to do about them Faults and what to do about them E mergency release F a u l t s a n d w h a t t o d o a b o u t t h e m E.g. -
Page 46: Information On The Display Panel
Faults and what to do about them Information on the display panel Fault code The door is not properly closed. Close the door. ‹˜“¯ The water control system has been activated. Disconnect the appliance from the “‚ mains, turn off the tap and advise the after-sales service. Water is not entering the appliance. - Page 47 Faults and what to do about them Fault Possible cause Remedial Action Water is not flowing in. The mains plug is not correctly plugged Plug in the mains plug correctly. The door is not properly closed. Close the door. The tap is not turned on. Turn on the tap.
- Page 48 Faults and what to do about them Fault Possible cause Remedial Action Soiling caused by ointments, grease Wash the laundry using the maximum- Grey residues on the washing. oroil. detergent dosage and the maximump- ermissible temperature – see thecare label. Programme termi- Press the Start/Pause I button Turn on the tap.
- Page 49 Faults and what to do about them Fault Possible cause Remedial Action Emergency release To release the door mechanically in the event of a power cut: turn the programme selector to Off and unplug the mains plug from thesocket ■ open the base panel and Drain out the water ■...
-
Page 50: Customer Service
Customer Service If you contact Customer Service, you Customer Service will require the product number (E-Nr.) and the production number (FD) of your I f you have any queries on use, are appliance. C u s t o m e r S e r v i c e unable to rectify faults on the appliance The contact details for Customer yourself or if your appliance needs to be... -
Page 51: Consumption Values
Consumption values Consumption values T he following information is provided in accordance with the EU-Ecodesign- C o n s u m p t i o n v a l u e s Regulation. The values given for programs other than the Eco 40-60 are indicative only and were determined in accordance with the applicable standard EN60456 and EN62512. - Page 52 Consumption values The following information is provided in accordance with the EU-Ecodesign- Regulation. The values given for programs other than the Eco 40-60 are indicative only and were determined in accordance with the applicable standard EN60456 and EN62512. Timed drying machine Programme rated energy...
-
Page 53: Technical Data
Technical data Technical data Aqua-Stop warranty D imensions: O nly for appliances with Aqua-Stop T e c h n i c a l d a t a A q u a - S t o p w a r r a n t y 820 mm x 595 mm x 584 mm In addition to warranty claims against (height x width x depth) - Page 56 01450 2655 (0.03 € per minute at peak. Off peak 0.0088 € per minute.) You can find the contact information for all countries in the attached after-sales service directory. BSH Hausgeräte GmbH Carl-Wery-Straße 34 81739 München GERMANY siemens-home.bsh-group.com *9001581144* 9001581144 (19291038000 / 0008)