HP 3PAR StoreServ 7450 Service Manual
Hide thumbs
Also See for 3PAR StoreServ 7450:
- Service manual (78 pages) ,
- Troubleshooting manual (75 pages) ,
- Planning manual (62 pages)
Table of Contents
Advertisement
Quick Links
Advertisement
Table of Contents

Related Manuals for HP 3PAR StoreServ 7450


Summary of Contents for HP 3PAR StoreServ 7450
- Page 1 HP 3PAR StoreServ 7450 and 7450c Storage Service Guide Abstract This guide provides information about maintenance and upgrading HP 3PAR StoreServ 7450 and 7450c Storage system hardware components for authorized technicians. HP Part Number: QL226-98175 Published: October 2015...
- Page 2 © Copyright 2014, 2015 Hewlett-Packard Development Company, L.P. The information contained herein is subject to change without notice. The only warranties for HP products and services are set forth in the express warranty statements accompanying such products and services. Nothing herein should be construed as constituting an additional warranty. HP shall not be liable for technical or editorial errors or omissions contained herein.
-
Page 3: Table Of Contents
SAS Port LEDs........................21 Interconnect Port LEDs......................22 Verifying Service Processor LEDs....................23 2 Servicing the Storage System..............26 Service Processor Onsite Customer Care ...................26 Accessing the HP 3PAR Management Console...............26 CSR............................26 Types of CSR........................26 Accessing Replacement Videos....................27 Parts-only Warranty Service....................27 Identifying a Replaceable Part....................27 Swappable Components.....................28... - Page 4 A Installing Storage Software Manually............50 Connecting to the Laptop......................50 Connecting the Laptop to the Controller Node...............50 Connecting the Laptop to the HP 3PAR Service Processor............50 Serial Cable Connections....................50 Manually Initializing the Storage System Software...............51 Manually Setting up the Storage System................51 Installing HP 3PAR OS Files .....................54...
- Page 5 CNA Ports........................21 SAS port LEDs.........................22 7450 Interconnect Ports LEDs.....................22 7450 Interconnect Ports LEDs.....................23 Front Panel LEDs.......................23 Rear Panel LEDs.......................24 Product label with HP Spare part number................27 Verify Drive Failure Alert....................29 Disengaging the PDU Pivot Brackets..................31 Summary Tab........................33 Filtered Table........................33 Alert Details........................34 Cage Link for Failed Drive....................34...
- Page 6 2-port CNA Adapter......................67 FC SFP Adapter.......................67 Internal Node Components....................68 Internal Node Components....................68 HP DL320e........................69 7450 2-Node - displayed as DCN1 in software output............72 7450 4 Controller Node Displayed as DCN1 in Software Output...........72 M6710 (2U24) Displayed as DCS2 in Software Output............73 M6720 (4U24) Displayed as DCS1 in Software Output............73...
- Page 7 Procedures .............................59...
-
Page 8: Understanding Led Indicator Status
1 Understanding LED Indicator Status NOTE: References to 7200 models imply 7200/7200c. References to 7400 models imply 7400/7400c/7440c. Storage system components have LEDs to indicate status of the hardware and whether it is functioning properly. These indicators help diagnose basic hardware problems. You can quickly identify hardware problems by examining the LEDs on all components using the tables and illustrations in this chapter. -
Page 9: Disk Drive Leds
Disk Drive LEDs The LEDs are located on the front of the disk drives: Figure 2 Disk Drive LEDs Table 2 Disk Drive LEDs Appearance Status Indicates 1 - Fault Amber Disk failed and is ready to be replaced. Flashing The locatecage command has been issued. -
Page 10: Pcm Leds
Figure 3 PCM LEDs The following table describes the LED states. Table 3 PCM LED Descriptions Icon Appearance Indicates No AC power or PCM fault Flashing Firmware download AC input fail Amber AC present and PCM On / OK Flashing Standby mode PCM OK Green... -
Page 11: Drive Pcm Leds
Table 3 PCM LED Descriptions (continued) Icon Appearance Indicates Present and charged Flashing Charging or disarmed Battery Good Green Drive PCM LEDs The following figure shows the drive enclosure PCM LEDs. Figure 4 Drive PCM LEDs The next table describes the drive PCM LED states. Table 4 Drive PCM LED Descriptions Icon Appearance... -
Page 12: I/O Modules Leds
Table 4 Drive PCM LED Descriptions (continued) Icon Appearance Indicates PCM fail or PCM fault Flashing Firmware download Fan Fail Amber No AC power or fault or out of tolerance Flashing Firmware download DC Output Fail Amber I/O Modules LEDs I/O modules are located on the back of the system. -
Page 13: Controller Node And Internal Component Leds
Table 5 I/O Module LEDs Icon Function Appearance State Meaning Power Green Power is on Power is off Fault Amber Fault Normal operation Flashing Locate command issued Figure 7 External Port Activity LEDs Function Appearance State Meaning External Port Activity; 4 LEDs for Green Ready, no activity Data Ports 0 through 3... -
Page 14: Controller Node Leds
Figure 8 Controller Node LEDs NOTE: Issue the locatenode command to flash the UID LED blue. Figure 9 Controller Node Indicator LEDs Table 6 Controller Node LEDs Status Green Not a Cluster member Rapid Flashing Boot Slow Flashing Cluster member Unit ID Blue OK to remove... -
Page 15: Ethernet Leds
Table 6 Controller Node LEDs (continued) Fault Amber Fault No fault Flashing Node in cluster and there is a fault Ethernet LEDs The controller node has two built-in Ethernet ports and each includes two LEDs: MGMT — Eth0 port provides connection to the public network RC-1 —... -
Page 16: 16 G Fibre Channel (Fc) Adapter Leds
Figure 1 1 FC Port LEDs Table 8 FC Port LEDs All ports No light Wake up failure (dead device) or power is not applied FC- 1 Amber Not connected 3 fast blinks Connected at 4GB/sec. 4 fast blinks Connected at 8GB/sec. FC-2 Green Normal/Connected –... -
Page 17: 10 G Ethernet Adapter Leds
Table 9 16 G FC Adapter LEDs (continued) 1 – Green LED 2 – Yellow LED State Failure in common code module One fast blink Normal (link up at 2G FC) (legacy compatibility only) Two fast blinks Normal (link up at 4G FC) Three fast blinks Normal (link up at 8G FC) Four fast blinks... -
Page 18: Ethernet Adapter Leds
1 G Ethernet Adapter LEDs Figure 14 1 G Ethernet Adapter LEDs Table 1 1 1 G Ethernet Adapter LEDs State 1 – Green LED Link speed 1Gb/s Link speed 100Mb/s 2 – Green LED Link up Blinking Link activity Link down Fibre Channel (FC) Adapter LEDs Figure 15 FC Adapter LEDs... -
Page 19: Converged Network Adapter (Cna) Leds
Converged Network Adapter (CNA) LEDs Figure 16 CNA LEDs Table 13 CNA LEDs Link down Upper Link Green Link up No activity Lower ACT (Activity) Green Activity Node FC and CNA Port Numbering Port position is displayed as Node:Slot:Port (N:S:P) in the Management Console. Figure 17 FC Ports Table 14 FC Ports Port... - Page 20 Figure 18 16G FC HBA Ports Table 15 16G FC HBA Ports Port Slot:Port Figure 19 10G Ethernet HBA Ports Table 16 10G Ethernet HBA Ports Port Slot:Port Figure 20 1G Ethernet HBA Ports Understanding LED Indicator Status...
-
Page 21: Sas Port Leds
Table 17 1G Ethernet HBA Ports Port Slot:Port Figure 21 FC Adapter Ports Table 18 FC Adapter Ports Port Slot:Port Figure 22 CNA Ports Table 19 CNA Ports Port Slot:Port SAS Port LEDs The controller node has two SAS ports and each includes four LEDs, numbered 0–3: Controller Node and Internal Component LEDs... -
Page 22: Interconnect Port Leds
Figure 23 SAS port LEDs Table 20 SAS port LEDs Appearance Indicates Green No activity on port. This LED does not indicate a Ready state with a solid On as the I/O Module External Port Activity LEDs do. Flashing Activity on port Interconnect Port LEDs The controller node has two interconnect ports and each includes two LEDs. -
Page 23: Verifying Service Processor Leds
3. Serial number mismatch between controller nodes Status Green Link established Link not yet established Verifying Service Processor LEDs The HP 3PAR SP (Proliant DL320e) LEDs are located at the front and rear of the SP. Figure 26 Front Panel LEDs Verifying Service Processor LEDs... -
Page 24: Rear Panel Leds
Table 22 Front Panel LEDs Item Appearance Description UID LED/button Blue Active Flashing Blue System is being managed remotely Deactivated Power On/Standby button and Green System is on system power Flashing Green Waiting for power Amber System is on standby, power still on Power cord is not attached or power supplied has failed Health... - Page 25 Table 23 Rear Panel LEDs (continued) Item Appearance Description Flashing Blue System is being managed remotely Deactivated Power supply Green Normal Off = one or more of the following conditions: Power is unavailable Power supply has failed Power supply is in standby mode Power supply error Verifying Service Processor LEDs...
-
Page 26: Servicing The Storage System
The defective part must be returned with the associated documentation in the provided shipping material. Failure to return the defective part could result in HP billing you for the replacement. With a CSR, HP pays all shipping and part return costs and determines the courier/carrier to be used. -
Page 27: Accessing Replacement Videos
Your HP Limited Warranty may include a parts-only warranty service. Under the terms of parts-only warranty service, HP provides replacement parts free of charge. For parts-only warranty service, CSR part replacement is mandatory. If you request HP to replace these parts, you are charged for the travel and labor costs of this service. -
Page 28: Swappable Components
Disk drives are warm swappable even though they have yellow touch points. However, they should only be removed on the advice of a qualified 3PAR administrator or HP service technician after the fault LED is turned on, and after all the data has been vacated and reconstructed to other drives. -
Page 29: Powering Off/On The Storage System
At the HP Storage Systems Guided Troubleshooting web site, follow the link for your product. At the bottom of the HP 3PAR product page, click the link for HP 3PAR Alert Messages. At the bottom of the Alert Messages page, choose the correct message code series based on the first four characters of the alert message code. -
Page 30: Powering On
Select Halt a StoreServ cluster/node. Follow the prompts to shutdown an HP 3PAR StoreServ cluster. Do not shut down individual Nodes. Allow 2-3 minutes for the node to halt, then verify that the node Status LED is flashing green and the node hotplug LED is blue, indicating that the node has been halted. For information about LEDs status, see “Understanding LED Indicator Status”... -
Page 31: Repairing A Disk Drive
Repairing a Disk Drive Verify that you have the correct drive model replacement and that the drive is supported with the current HP 3PAR operating system patch level. For example, if using CLI, use the following commands: showversion -a -b... - Page 32 HP 3PAR StoreServ under the great majority of configurations, input/output patterns, and workloads. HP 3PAR StoreServ tracks all writes to SSDs and can report the percent of the total write endurance limit that has been used. This allows any SSD approaching the write endurance limit to be proactively replaced before they are automatically spared out.
-
Page 33: Summary Tab
Identifying a Disk Drive Under the Systems tree in the left panel of HP 3PAR Management Console, select the storage system to be serviced. The Summary tab should be displayed indicating the failed drive (see Figure 31 (page 33)). Figure 31 Summary Tab... -
Page 34: Alert Details
Figure 33 Alert Details Double click the relevant alert to display the alert details. Disk Drive (Magazine) Location Execute steps 1 through 3 in the “Identifying a Disk Drive”. Select the Cage link for the Failed drive (see Figure 34 (page 34)). -
Page 35: Removing A 2.5 Inch Disk
In the Locate Cage dialog box, enter an appropriate time to allow service personnel to view the LED status of the Drive Enclosure (Cage). See Figure 36 (page 35). NOTE: If necessary, use the Stop Locate icon to halt LED flashing. Figure 36 Locate Cage Dialog Box An icon with a flashing LED will be shown next to the cage, which flashes all drives in this cage except the failed drive. -
Page 36: Installing A Disk Drive
To reinstall a new disk drive, see “Installing a Disk Drive” (page 36). Figure 38 Removing a 3.5 inch disk drive Installing a Disk Drive CAUTION: Blank disk drive carriers are provided and must be used if all slots in the enclosure are not filled with disk drives. -
Page 37: Installing A 2.5 Inch Disk Drive
Figure 39 Installing a 2.5 inch disk drive Observe the newly installed disk drive for 60 seconds to verify the amber LED turns off and remains off for 60 seconds. Installing a 3.5 inch disk drive (LFF) Press the handle latch to open the handle. Position the disk drive so the handle opens from the left and slide it into the enclosure. -
Page 38: Verifying Disk Drives
CAUTION: Alloy gray-colored latches on components like the node means that the component is warm-swappable. HP recommends that the node be shutdown (with the power remaining on) before removing this component. Contact your ASP for node diagnosis and shutdown. CAUTION: To prevent overheating, node replacement requires a maximum service time of 30 minutes. -
Page 39: Node Identification And Shutdown
Replace the node cover: While aligning the node rod with the cutout in the front, and the guide pins with the cutouts in the side, lower the node cover into place. Tighten the two thumbscrews to secure the node cover to the node. Pull the gray node rod to the extracted position, out of the component. - Page 40 If a PCIe adapter is installed in the failed node, move the SFPs from the PCIe adapter on the failed node to the PCIe adapter on the replacement node: Lift the retaining clip and carefully slide the SFP out of the slot. Carefully slide the replacement SFP into the adapter on the replacement node until fully seated.
-
Page 41: Node Verification
The SFP is located in the port on the controller node HBA/CNA and there are two to six SFPs per node. Before you begin, use either SPMAINT or the HP 3PAR Management Console to identify the failed SFP. SFP Identification Under the Systems tree in the left panel, select the storage system to be serviced. - Page 42 Typically the State is listed as Loss sync, the Mode as Initiator and the Connected Device Type as Free. Verify that the SFP has been successfully replaced by refreshing the above pane. State should now be listed as Ready, the Mode as Target and the Connected Device Type as Host.
- Page 43 - 0002AC8004BD rcip IP RCIP1 showport -sfp to verify which SFP requires replacement: cli%showport -sfp N:S:P -State- -Manufacturer- MaxSpeed(Gbps) TXDisable TXFault RXLoss DDM 0:1:1 OK HP-F 0:1:2 OK HP-F 0:2:1 OK AVAGO 10.3 0:2:2 OK AVAGO 10.3 1:1:1 OK...
-
Page 44: Port Details
HP-F 1:2:4 OK HP-F Open the HP 3PAR Management Console Under the Systems tree in the left panel, select the storage system to be serviced to connect. On the Summary tab, click the Port link to open the port's tab. -
Page 45: Replacing An Sfp
“Replacing an SFP” (page 45). In the HP 3PAR Management Console, verify that the SFP is successfully replaced. The replaced port State is listed as Ready, the Mode is listed as Target, and the Connected Device Type is listed as Host. -
Page 46: Using Strong Passwords
If you choose encrypted ciphertext passwords, you need to export the ciphertext and provide it to the HP personnel working with you. The ciphertext is pasted into a tool at HP that can unwrap and decrypt the ciphertext to recover the password. After the support activity is complete, you can change the password so that the recovered password is no longer valid. -
Page 47: Setting Or Changing The Password Mode
Setting or Changing the Password Mode To query or change the current setting of the strong service account password system, use the 3PAR CLI command controlrecoveryauth (to change the mode from time-based to encrypted ciphertext, for example). To query the current mode, use the command controlrecoveryauth status. To change the mode, use the command controlrecoveryauth setmethod [totp|ciphertext], choosing either totp (time-based passwords) or ciphertext. -
Page 48: Support And Other Resources
4 Support and Other Resources Contacting HP For worldwide technical support information, see the HP support website: http://www.hp.com/support Before contacting HP, collect the following information: Product model names and numbers Technical support registration number (if applicable) Product serial numbers Error messages... -
Page 49: Typographic Conventions
HP. Documentation feedback HP is committed to providing documentation that meets your needs. To help us improve the documentation, send any errors, suggestions, or comments to Documentation Feedback (docsfeedback@hp.com). Include the document title and part number, version number, or the URL when submitting your feedback. -
Page 50: A Installing Storage Software Manually
Node pairs are 0–1 and 2–3. Connecting the Laptop to the HP 3PAR Service Processor See the section “Connecting a Laptop to the SP” in the HP 3PAR StoreServ 7450 Storage Installation Guide. Serial Cable Connections The gray adapter for the laptop (PN 180-0055) is used on the serial port for connection to the controller node MFG port. -
Page 51: Manually Initializing The Storage System Software
NOTE: You must physically connect a laptop to the SP to complete these procedures. See the section “Connecting a Laptop to the SP” in the HP 3PAR StoreServ 7450 Storage Installation Guide. Manually Setting up the Storage System The Out-of-the-Box (OOTB) script guides you through setting up and configuring the storage system... - Page 52 If the system is ready for the system setup script, the following message appears: It appears your Cluster is in a proper manual startup state to proceed. Cluster has the following nodes: Node 0: Node 1: Is this correct? Enter < C > to continue <...
- Page 53 Create spare chunklets as directed. CAUTION: HP recommends that at least four physical disks worth of chunklets be designated as spares to support the servicemag command. The default sparing options create an appropriate number of spare chunklets for the number of disks installed.
-
Page 54: Installing Hp 3Par Os Files
Please continue with the SP moment of birth. Exiting Out-Of-The-Box Experience... Installing HP 3PAR OS Files After completing the Service Processor Setup wizard process, HP 3PAR OS files must first be installed onto the SP in order to communicate and add a storage system. NOTE: Note: If the StoreServ is previously setup before the SP, do not use the SP Setup Wizard. -
Page 55: Adding A Storage System To The Service Processor
tpdSPInFormOS3.1.2.226-3.1.2.226-12.i386.rpm Do You wish to update the SP from /mnt/cdrom? (y or n) When the installation process completes, the SPMaint main menu reappears. To verify the current software versions after installation, type 1 for SP Control/Status. SP Main 3PAR Service Processor Menu Transfer media: ethernet Transfer status: Ok Enter Control-C at any time to abort this process... - Page 56 16:57:36 Reply='<static.ip.address>' Adding <static.ip.address> to firewall rules on interface eth0 Enter a valid user credentials (CLI super-user name and password) to add the HP 3PAR StoreServ and press Enter. Please enter valid Customer Credentials (CLI super-user name and password) to add the HP 3PAR StoreServ.
-
Page 57: Exporting Test Luns
In order to define hosts and set port personas, you must access the CLI. For more information about the commands used in this section, see the HP 3PAR OS Command Line Interface Reference. To set the personas for ports connecting to host computers: In the CLI, verify connection to a host before defining a host: 192.168.46.249 cli% showhost... -
Page 58: Creating And Exporting Test Volumes
When finished setting each connected target port, verify that all ports are set correctly. 192.168.46.249 cli% showport -par Creating and Exporting Test Volumes For more information about the commands used in this section, see the HP 3PAR OS Command Line Interface Reference. To create and export test volumes: In the CLI, create a common provisioning group test to verify the system can create and export virtual volumes. -
Page 59: B Connecting To The Service Processor
Category 5 Ethernet cable with the appropriate RJ-45 to DB9 adapter to connect to the DB9 Serial port of SP. Insert a standard Category 5 Ethernet cable into the SP serial port with the DB9 crossover serial to RJ45 adapter (P/N 180–0055). Figure 48 HP DL320e SP Ports Ports Description Ethernet ports:... - Page 60 Use the following table as a guideline to adjust the serial settings of the laptop before using a terminal emulator, such as HyperTerminal, Attachmate Reflection X, SecureCRT, or TeemTalk to communicate with the SP and perform various tasks to support the storage system. Setting Value Baud Rate...
-
Page 61: C Illustrated Parts Catalog
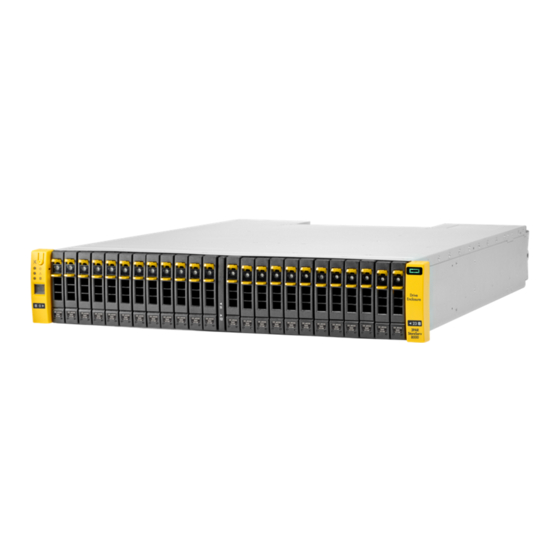
The following shows each component of the storage system for all replaceable hardware parts including the part number, full description, quantity, and CSR type. Drive Enclosure Components Figure 49 HP M6710 Drive Enclosure (2U24) Figure 50 HP M6720 Drive Enclosure (4U24) Drive Enclosure Components... -
Page 62: Drive Chassis Frus
Figure 51 2.5-inch SFF disk drive Figure 52 3.5-inch LFF disk drive Table 25 Drive Chassis FRUs Material Number Description Qty Per Chassis CSR Type 683232-001 SPS-Enclosure Midplane 2U24 Assy 683233-001 SPS-Enclosure Midplane 4U24 Assy 683234-001 SPS-Drive Carrier SFF SSD Assy 683235-001 SPS-Drive Carrier LFF HDD Assy 683236-001... - Page 63 Table 25 Drive Chassis FRUs (continued) Material Number Description Qty Per Chassis CSR Type 727395-001 HP M6710 400GB 6G SAS 2.5in MLC Mandatory SSD (7450 systems only) 727396-001 HP M6720 400GB 6G SAS 3.5in MLC Mandatory SSD (7450 systems only) 725862-002 HP M6720 400GB 6G SAS 3.5in MLC...
-
Page 64: Storage System Components
Storage System Components Figure 53 764 W Power Cooling Module without Battery Figure 54 764 W Power Cooling Module Battery Illustrated Parts Catalog... -
Page 65: I/O Module
Figure 55 580 W Power Cooling Module Figure 56 I/O Module Table 26 Storage System Components Part Number Description Qty. CSR Type 683239-001 SPS-PCM 764W Assy up to 2 727386-001 SPS-PCM 764W Assy, Gold 683240-001 SPS-Battery PCM 764W Assy up to 2 683241-001 SPS-PCM 580W Assy up to 2... -
Page 66: Controller Node And Internal Components
Controller Node and Internal Components Figure 57 Controller Node Figure 58 Node Disk Figure 59 4-port Fibre Channel Adapter Illustrated Parts Catalog... -
Page 67: Fc Sfp Adapter
Figure 60 2-port CNA Adapter Figure 61 FC SFP Adapter Table 27 Controller Node and Components Part Number Description Qty. CSR Type 727388-001 SPS-Node Module 7450 NO HBA 683248-001 SPS-Node Boot Drive (Node drive) 1 per node 683259-001 SPS-Adapter FC 4port 683237-001 SPS-Adapter CNA 2port 468508-002... -
Page 68: Internal Node Components
Figure 62 Internal Node Components Figure 63 Internal Node Components Table 28 Internal Node Components Callout Part Number Description Qty. CSR Type Node drive location 683807-001 SPS-Cable Node Drive SATA 683250-001 SPS-Cable Boot Drive (Node drive cable) 756821-001 SPS-Boot Drive SS 128GB SATA SDX1 10 683247-001 SPS-PCIe Riser Assy... -
Page 69: Service Processor
SPS-Memory VPL DIMM 32GB IC-DDR3L 4GX72 8, 9 716766-001 SPS-Memory VLP DIMM 8GB DDR2 667MHZ Service Processor Figure 64 HP DL320e Table 29 Service Processor Part Number Description 725287-001 HP DL320e Miscellaneous Cables and Parts Table 30 Storage System Cables... -
Page 70: Miscellaneous Parts
Table 30 Storage System Cables (continued) Part Number Description Qty. CSR Type 656432-001 SPS-CA 50m PREMIER FLEX Mandatory FC OM4 649991-001 SPS-Cable FC LC-LC OM3 10 M 649992-001 SPS-Cable FC LC-LC OM3 25 M 649993-001 SPS-Cable FC LC-LC OM3 50 M 649994-001 SPS-Cable FC LC-LC OM3 100 M... -
Page 71: Service Processor Parts
Adapter Set 2 RJ45/DB9 adapters 2 Ethernet cables 707989-001 SPS-Service Processor DL360e 5183-2687 Ethernet Cable 25 ft CAT5 5183-5691 Ethernet Cable 50 ft. CAT5 RJ45 M/M C7542A HP Ethernet 15.2m (50 ft) Mandatory CAT5e RJ45 M/M Cable Miscellaneous Cables and Parts... -
Page 72: D Disk Drive Numbering
D Disk Drive Numbering Numbering Disk Drives Figure 65 7450 2-Node - displayed as DCN1 in software output Figure 66 7450 4 Controller Node Displayed as DCN1 in Software Output Disk Drive Numbering... -
Page 73: M6710 (2U24) Displayed As Dcs2 In Software Output
Figure 67 M6710 (2U24) Displayed as DCS2 in Software Output Figure 68 M6720 (4U24) Displayed as DCS1 in Software Output Numbering Disk Drives...