Table of Contents
Advertisement
Available languages
Available languages
Quick Links
Advertisement
Chapters
Table of Contents

Related Manuals for Danby DUFM166A1WDB


Summary of Contents for Danby DUFM166A1WDB
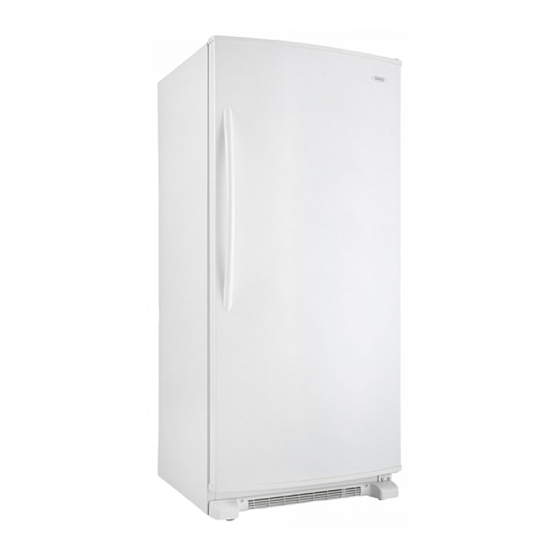
- Page 1 • Owner’s Use and Care Guide • Guide d’utilisation et d’entretien du propriétaire UPRIGHT FREEZER CONGÉLATEUR VERTICAL Model • Modèle DUFM166A1WDB Danby Products Limited, Guelph, Ontario, Canada N1H 6Z9 W10668413A Danby Products Inc. Findlay, Ohio, U.S.A. 45840...
-
Page 2: Table Of Contents
TABLE OF CONTENTS SAFETY....................2 CARING FOR YOUR FREEZER............7 Defrosting and Cleaning Your Manual Defrost Freezer....7 INSTALLING YOUR FREEZER ............3 Base Grille ..................8 Unpacking ..................3 Changing the Light Bulbs ..............8 Location Requirements..............3 Power Interruptions ................8 Electrical Requirements..............4 Moving Care ..................8 Freezer Door..................4 Freezer Leveling and Door Closing...........6 PROBLEM SOLVER ................9 Freezer Operation ................9... -
Page 3: Installing Your Freezer
PROPER DISPOSAL OF YOUR OLD FREEZER OR REFRIGERATOR WARNING Suffocation Hazard Remove doors or lid from your old freezer or refrigerator. Failure to do so can result in death or brain damage. IMPORTANT: Child entrapment and suffocation are not problems of the past. -
Page 4: Electrical Requirements
NOTE: Allow for a 3" (7.5 cm) clearance at the top and sides and a ¹⁄₄" Freezer Door (0.64 cm) clearance between the appliances. Tools Needed: ⁵⁄₁₆" hex-head socket wrench, ³⁄₈" hex-head socket wrench, Phillips screwdriver, flat 2" putty knife. IMPORTANT: All graphics referenced in the following instructions are included later in this section after “Final Steps.”... - Page 5 Handle WARNING Move the door handle from one side of the door to the other. 1. Loosen setscrews located on side of handle at each end. See Graphic 1. 2. Remove handle from grommets. 3. Using a Phillips screwdriver, remove the grommets from the door. 4.
-
Page 6: Freezer Leveling And Door Closing
Freezer Leveling and Door Closing Style 1—with Flat Front (no grille) 2. Move the freezer to its final location. 3. Lower the brake feet, by turning them clockwise, until the rollers 1. Locate the two front leveling legs taped among the packing are off the floor and both brake feet are snug against the floor. -
Page 7: Freezer Features
Adjusting the Control Refrigerated Shelves (on some models) Turn control to a higher number for colder temperatures. Your freezer is equipped with refrigerated interior shelves. Packages in direct contact with the shelves will have the best refrigeration. Fresh, Turn control to a lower number for less cold temperatures. unfrozen food packages should be stored directly on the shelves and NOTE: The small snowflake icon represents the number 1 or the least not on top of already frozen food packages. -
Page 8: Base Grille
Changing the Light Bulbs (on some models) 10. Use the appropriate cleaning method for your exterior finish. Painted metal: Wash exteriors with a clean sponge or soft cloth NOTE: Not all appliance bulbs will fit your freezer. Be sure to replace and a mild detergent in warm water. -
Page 9: Problem Solver
PROBLEM SOLVER Freezer Operation WARNING WARNING Explosion Hazard Electrical Shock Hazard Use nonflammable cleaner. Plug into a grounded 3 prong outlet. Failure to do so can result in death, explosion, or fire. Do not remove ground prong. Do not use an adapter. Do not use an extension cord. - Page 10 Nothing within this warranty shall imply that Danby will be responsible or liable for any spoilage or damage to food or other contents of this appliance, whether due to any defect of the appliance, or its use, whether proper or improper.
- Page 11 TABLE DES MATIÈRES SÉCURITÉ ....................1 ENTRETIEN DU CONGÉLATEUR ............6 Dégivrage et nettoyage du congélateur à dégivrage manuel...6 INSTALLATION DU CONGÉLATEUR ..........2 Grille de la base.................7 Déballage ...................2 Remplacement des l’ampoules d’éclairage........7 Emplacement d’installation ...............2 Pannes de courant électrique ............7 Spécifications électriques..............3 Déménagement .................7 Porte du congélateur .................3 Nivellement du congélateur et fermeture de la porte .......5...
-
Page 12: Installation Du Congélateur
MISE AU REBUT APPROPRIÉE DE VOTRE VIEUX CONGÉLATEUR OU RÉFRIGÉRATEUR AVERTISSEMENT Risque de suffoquer Enlever les portes ou le couvercle de votre vieux congélateur ou réfrigérateur. Le non-respect de cette instruction peut causer un décès ou des lésions cérébrales. IMPORTANT : Le problème des enfants trouvés enfermés ou étouffés n’est pas un problème révolu. -
Page 13: Spécifications Électriques
Laisser un espace d’au moins 3" (7,5 cm) en haut et des deux côtés du Porte du congélateur congélateur et de 1" (2,5 cm) entre l’arrière du congélateur et le mur. Si le congélateur doit être près un mur fixe, laisser un espace plus grand du côté Outillage nécessaire : Clé... - Page 14 Poignée Étapes finales Retirer la poignée et la transférer d’un côté à l’autre de la porte. 1. Inspecter tous les trous pour vérifier que tous les bouchons 1. Dégager les vis de montage situées sur le côté de la poignée à d’obturation et vis sont en place.
-
Page 15: Nivellement Du Congélateur Et Fermeture De La Porte
Nivellement du congélateur et fermeture de la porte 3. Abaisser les pieds de stabilisation en les tournant dans le sens Style 1—avec avant plat (sans grille) horaire, jusqu’à ce que les roulettes ne touchent plus le sol et que les 1. -
Page 16: Caractéristiques Du Congélateur
Ajustement de la commande de température Clayettes de réfrigération (sur certains modèles) Tourner la commande à un chiffre plus élevé pour des températures Le congélateur est muni de clayettes intérieures réfrigérées. Les plus froides. emballages en contact direct avec les clayettes auront la meilleure réfrigération. -
Page 17: Grille De La Base
5. Placer des plats d’eau chaude dans le congélateur avec la porte Remplacement des l’ampoules d’éclairage ouverte pour hâter la décongélation. L’emploi d’un ventilateur (sur certains modèles) électrique pour transmettre de l’air chaud dans le congélateur peut aussi aider. Ne pas placer le ventilateur ou tout dispositif électrique REMARQUE : Votre congélateur ne pourra pas accommoder toutes les dans le congélateur. -
Page 18: Résolution De Problèmes
RÉSOLUTION DE PROBLÈMES Fonctionnement du congélateur AVERTISSEMENT AVERTISSEMENT Risque d'explosion Risque de choc électrique Utiliser un produit de nettoyage ininflammable. Brancher sur une prise à 3 alvéoles reliée à la terre. Le non-respect de cette instruction peut causer un décès, Ne pas enlever la broche de liaison à... -
Page 19: Garantie
En vertu de la présente, Danby ne peut être tenue responsable en cas de blessures corporelles ou de dégâts matériels, y compris à l’appareil, qu'elles qu'en soient les causes. - Page 20 7/14 ® /™ ©2014. Used under license in Canada. All rights reserved. Printed in U.S.A. W10668413A Utilisé sous licence au Canada. Tous droits réservés. Imprimé aux É.-U.