Table of Contents
Advertisement
Quick Links
Advertisement
Table of Contents

Related Manuals for Mitel Rack PDM Charger

Summary of Contents for Mitel Rack PDM Charger
- Page 1 Rack PDM Charger INSTALLATION AND OPERATION MANUAL...
- Page 2 The information is subject to change without notice and should not be construed in any way as a commitment by Mitel or any of its affiliates or subsidiaries. Mitel and its affiliates and subsidiaries assume no responsibility for any errors or omissions in this document.
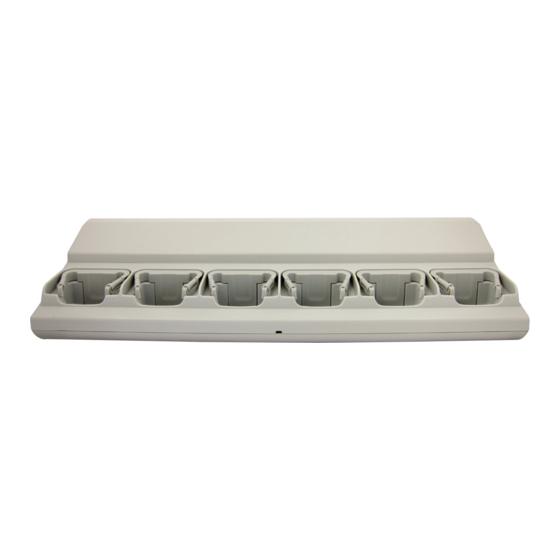
- Page 3 Each Rack PDM Charger can charge up to six handsets simultaneously. The USB port on the Rack PDM Charger is used to connect the Rack PDM Charger to a CPDM3/WSM3, or to a PC running the Portable Device Manager (WinPDM/PDM).
-
Page 4: Abbreviations And Glossary
Rack PDM Charger Installation and Operation Manual Installation Alternatives NOTE: In the USA and Canada the Rack PDM Charger can only be installed as a single unit, serial configuration is not permitted. • The Rack PDM Charger can be installed as a single unit. When installed as a single unit, the power cord with the C14 connector can be used together with a suitable extension cord, and can be plugged into a wall outlet. -
Page 5: Regulatory Compliance Statements (Usa And Canada Only)
NOTE: For PLUGGABLE EQUIPMENT, the socket-outlet shall be installed near the equipment and shall be easily accessible. In Sweden, Norway and Finland the Rack PDM Charger must be connected to a wall outlet with protective earth (safety grounding). For other countries it is recommended to use a protective earth connection. -
Page 6: Technical Solution
When using an Ethernet connection, it is possible to connect several Rack PDM Chargers serially to the LAN. If the Rack PDM Charger is connected to a PDM via both USB and Ethernet, the USB connection has higher priority. NOTE: If the Ethernet connection is used, each Rack PDM Charger needs an IP address. -
Page 7: Installation And Configuration
The unit can be mounted to a vertical wall (concrete or plaster walls only) or be placed on table if table adapters are used. • If the Rack PDM Charger is connected to a power supply via an AC wall plug, serial power supply connection is not allowed. •... - Page 8 Electrical installation. 2.1.2 PLACING ON A TABLE If the Rack PDM Charger shall be placed on table, use the table adapters included in the delivery as follows: Mount the two table adapters in the two outer holes in the bottom cover of the...
-
Page 9: Wall Mounting
2.1.4 ELECTRICAL INSTALLATION Power Supply by Power Cord to Wall Outlet The Rack PDM Charger is delivered with a cord with an IEC C14 connector (male). An extension cord IEC C13 AC connector (female, IEC60320-C13) to wall socket has to be ordered separately. - Page 10 The LED on the front of the charger should light up. NOTE: The LED is disabled on the Rack PDM Charger and will not light up. Put a handset into a charging slot and check if the handset LED lights up.
- Page 11 Open the top cover by first pressing on the sides of the top cover, then lifting it upwards. Figure 7. Opening the top cover of the Rack PDM Charger. Fixed Installation in Detail Fixed installation of the first charger or single unit with fixed electrical installation.
- Page 12 Pack Chargers if the chargers are connected to the power supply via an AC plug. IMPORTANT: Disconnect the power supply connection before working on the units. If the additional Rack PDM Charger has not yet been mounted on the wall, do this according to figure 4 on page 9.
- Page 13 Rack PDM Charger Installation and Operation Manual Figure 8. The rectangular cover that shall be removed and changed to a cable support holder with a mains power supply cord run through it. Remove the C14 connector from the additional charger. Cut and strip the mains power supply cord coming from the additional charger to the length required.
-
Page 14: Communication Cable Connection
The LED on the front of each charger should light up. NOTE: The LED is disabled on the Rack PDM Charger and will not light up. Put a handset into a charging slot and check if the handset LED lights up. -
Page 15: Software Installation
The USB connection is used for communication with a PC. Power over USB is not supported. The USB connection is used for connecting the Rack PDM Charger directly to a PC or to a LAN for the purpose of upgrading or configuring the Rack PDM Charger itself or handsets placed in the charger. - Page 16 If the Rack PDM Charger is configured to run DHCP, connect the network cable and the Rack PDM Charger will automatically receive an IP address. If the Rack PDM Charger is not configured to run DHCP the Rack PDM Charger will use the setup IP addresses.
- Page 17 Rack PDM Charger Installation and Operation Manual The following parameters exist for the Rack PDM Charger and can be changed via the WinPDM/CPDM3/WSM3. Parameter Description Ethernet Bit rate auto (default) Ethernet connector auto (default) Ethernet duplex auto (default) DHCP Enabled...
- Page 18 Go to the “Devices” tab and verify that the Charger Rack is online (it may take up to 15 sec). If you are using the WinPDM (Windows Version): Check that the Rack PDM Charger is connected to your PC. Start WinPDM (Windows Version). Go to the “Devices” tab and verify that the Charger Rack is online.
-
Page 19: Charger Operation
Rack PDM Charger Installation and Operation Manual 4. OPERATION 4.1 CHARGER OPERATION When the charger is connected to an external power supply, normal operation is done as follows: Handset charging Connect the charger to the AC power supply. Place a handset in the charging slot to start charging. -
Page 20: Maintenance
The Charger Rack supports the Easy Replacement feature. Easy replacement is performed via the handset display and does not involve WinPDM or CPDM3/WSM3. The Rack PDM Charger only needs a power connection to support easy replacement. A connection to WinPDM/CPDM3/WSM3 is not needed.... - Page 21 Rack PDM Charger Installation and Operation Manual Green, fixed Logged on to WinPDM/CPDM3/WSM3. Orange, fixed 1) Not logged on to WinPDM/CPDM3/WSM3 2) Charging of handset Orange, flashing (1000 ms on, 1000 1) Software download. ms off) 2) File transfer during Easy Replacement.
-
Page 22: Troubleshooting
The Rack PDM Charger does not appear in WinPDM/CPDM3/WSM3. Check that the communication cable (USB or Ethernet) is connected. To reset the Rack PDM Charger, press the embedded LED on the front of the charger, for example with a pen or a screw driver. -
Page 23: Related Documents
User Guide Mitel 5613 User Guide Mitel 5614 Wireless Messaging Gateway (WSM) Installation and Operation Manual Mitel 5603 Wireless Handset User Guide Mitel 5604 Wireless Handset User Guide Mitel 5607 Wireless Handset User Guide Mitel 5624 Wireless Handset User Guide...