AT&T TL86103 Quick Start Manual
Dect 6.0 2-line corded/cordless telephone/ answering system with bluetooth wireless technology
Hide thumbs
Also See for TL86103:
- User manual (166 pages) ,
- Quick start manual (2 pages) ,
- User manual (171 pages)

Related Manuals for AT&T TL86103


Summary of Contents for AT&T TL86103
- Page 1 Quick start guide TL86103 DECT 6.0 2-line corded/cordless telephone/ answering system with BLUETOOTH® wireless technology...
-
Page 2: Parts Checklist
1 (800) 222-3111 1 (866) 288-4268 or call . In Canada, dial Please refer to the online TL86103 DECT 6.0 2-line corded/cordless telephone/answering system with BLUETOOTH® wireless technology Complete user’s manual for a full set of installation and operation https://telephones.att.com/manuals... -
Page 3: Important Safety Information
Important safety information This symbol is to alert you to important operating or servicing instructions that may appear in this user’s manual. Always follow basic safety precautions when using this product to reduce the risk of injury, fire, or electric shock. Safety information Read and understand all instructions in the user’s manual. - Page 4 Important safety information CAUTIONS: Use only the power adapter provided with this product. To obtain a replacement, https://telephones.att.com visit our website at or call 1 (800) 222-3111 1 (866) 288-4268 . In Canada, dial Use only the supplied rechargeable battery or replacement battery (model BT183342/ BT283342).
- Page 5 Important safety information The RBRC Seal means that the manufacturer is voluntarily participating in an industry program to collect and recycle nickel- metal hydride rechargeable batteries when taken out of service within the United States. These batteries may be taken to a participating local retailer of replacement batteries or recycling center.
- Page 6 Install Telephone base Option 1: If you have separate wall jacks for each line, plug the telephone lines, as shown below. Notes: Plug one end of the telephone line cord into a telephone jack or a DSL filter. If you have DSL high-speed Internet service, a DSL filter (not included) is required.
- Page 7 Install Telephone base Option 2: If you have a 2-line wall jack, plug the 4-conductor black telephone line, as shown below. Charger Caution: Use only the power adapter(s) provided with this product. To obtain a replacement, visit our website at https://telephones.att.com 1 (800) 222-3111 or call...
- Page 8 Install Battery Install the battery, as shown below. Charge the cordless handset by placing it face forward in the charger. The CHARGE light on the top of the handset is on during charging. Charge your handset(s) before initial use. The battery is fully charged after 11 hours of continuous charging.
-
Page 9: Belt Clip & Optional Cordless Handset
Install Belt clip & optional cordless handset To remove the belt clip: Gently lift either of the To attach the belt clip: belt clip tabs outwards to Snap the belt clip into the remove the belt clip from slots on both sides of the the handset. -
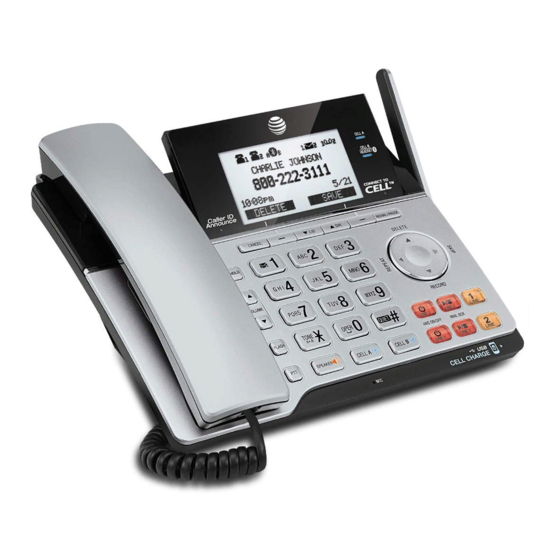
Page 10: Handset Overview
Handset overview Handset Headset jack Ì Plug a 2.5 mm headset (not included) into the jack for handsfree telephone conversations. CHARGE light Steadily on when the handset is charging in the Ì charger. Softkeys (2) Press to select the menu item displayed above the Ì... - Page 11 Handset overview Handset DIR/ Press to show directory entries when the telephone is Ì VOLUME not in use. Press to scroll up while in menus. Ì Ì While entering names or numbers in the directory, press to move the cursor to the right. Ì...
- Page 12 Handset overview Handset Press to switch to tone dialing temporarily during a call Ì TONE /a>A if you have pulse service. Press to switch between upper case and lower case Ì while entering characters. QUIET # Press repeatedly to display other dialing options when Ì...
-
Page 13: Telephone Base Overview
Telephone base overview Telephone base CANCEL While in a menu, press to exit without making Ì changes; or press and hold to return to idle mode. Press and hold while the telephone is not in Ì use to erase the missed call indicator. Softkeys (2) Press to select the menu item displayed above Ì... - Page 14 Telephone base overview Telephone base REDIAL/PAUSE Press repeatedly to view the last 10 numbers Ì dialed. While entering numbers, press and hold to Ì insert a dialing pause. CELL A light Steadily on when the telephone base is paired Ì and connected with a Bluetooth device on Cell A line.
- Page 15 Telephone base overview Telephone base /LINE 1 Press to play line 1 or line 2 messages. Ì MAILBOX Press to stop playing line 1 or line 2 messages. Ì /LINE 2 MAILBOX 1 LINE/2 LINE Ì Press to make or answer a call on line 1 or line 2. Flashes slowly when a call on line 1 or line 2 is Ì...
- Page 16 Telephone base overview Telephone base HOLD Ì During a call, press to put the current call on hold. /VOLUME/ Press to adjust the volume during message Ì playback. Press to adjust the listening volume during a Ì call. When the phone is not in use, press to adjust Ì...
-
Page 17: Line Power Mode (No Ac Power)
Initial basic settings Line power mode (no AC power) This telephone provides minimal functionality during a power failure. When AC power is not available, the screen is blank and many telephone features do not function. Only touch-tone dialing and corded handset volume adjustment are supported. - Page 18 ® Note: Your TL86103 is compatible with Bluetooth version 2.0 or above devices. To use a Bluetooth enabled cellular phone or headset with your telephone, you must first pair and connect your Bluetooth cellular phone or headset with the telephone base.
-
Page 19: Number Of Rings
Initial basic settings Record your own announcement Your outgoing announcement plays when calls are answered by the answering system. You can use the preset announcement to answer calls, or replace it with your own recorded announcement. Using the telephone base: 1. -
Page 20: Ringer Volume
Initial basic settings 3. Press q/p to highlight Line 1 or Line 2 -> Press SELECT. 4. Enter the voicemail number -> Press SAVE. To retrieve voicemail messages: 1. Press and hold 2. Press q/p to highlight Line 1 or Line 2 -> Press SELECT. Ringer volume You can set the ringer volume level to one of the six levels or turn the ringer off. - Page 21 Operate The TL86103 telephone base can be used to make or answer calls on up to two individual landlines, or on the cell lines. You can connect a maximum of 2 Bluetooth enabled cell devices to the telephone base. Both cell devices can be used on two cell lines at the same time.
- Page 22 Operate Operation Steps To end a call on Using a cordless handset: line 1 or line 2 Press OFF/CANCEL, or place the cordless handset into the charger. Using the telephone base: Press the corresponding line button, 1 LINE or 2 LINE. -OR- Press SPEAKER or return the corded handset to the...
- Page 23 Operate Operation Steps To end a cell call Using a cordless handset: Press OFF/CANCEL, or place the cordless handset into the charger. Using the telephone base: Press the corresponding cell button, CELL A CELL B -OR- Press SPEAKER or return the corded handset to the telephone base.
- Page 24 Operate Operation Steps Call waiting Call waiting on line 1 or line 2 (Requires Using a cordless handset or the telephone base: subscription from Press the corresponding line button, LINE 1/FLASH telephone) or LINE 2/FLASH on the handset, or FLASH on the telephone base to put your current call on hold and take the new call.
- Page 25 Directory The home directory stores up to 200 entries. Operation Steps Using a cordless handset or the telephone base: To add an entry in the home directory MENU -> Press q/p to Directory -> SELECT. 1. Press 2. Press OPTION to select Home.
-
Page 26: Connect To Cell
Connect to Cell™ application (consists of Caller ID manager and Alerts manager) using the Google Play® Store app to extend the flexibility of your TL86103. Scan the QR code on the right to download the application. -
Page 27: Caller Id Announce
Caller ID This product supports caller ID services offered by most telephone service providers. The telephone stores caller ID information of the last 50 incoming calls in the telephone base. This information is common to all devices. Caller ID announce When this feature is on and you have an incoming call, the handset and the telephone base speaks “Call from...”... -
Page 28: Answering System
Answering system About answering system and voicemail Your telephone has separate indicators for two different types of voice messages: those left on the built-in answering system and those left at your telephone service provider’s voicemail. To listen to messages recorded on the built-in answering system, refer to the Message playback section;... -
Page 29: Turn Answering System On Or Off
Answering system Turn answering system on or off The answering system must be turned on to answer and record messages. Using the telephone base: Press /LINE 1 ANS ON/OFF or /LINE 2 ANS ON/OFF to turn the corresponding answering system on or off. If the answering system is turned on, it announces, “Calls will be answered.”... -
Page 30: Call Screening
Answering system Call screening Use this feature to choose whether incoming messages can be heard over the speaker when they are being recorded. If you turn call screening on, you hear the incoming message. While monitoring an incoming message, you can answer the call by pressing LINE 1/FLASH, LINE 2/FLASH, or /SPEAKER on a cordless handset, or pressing 1 LINE, 2 LINE, or SPEAKER... -
Page 31: Message Playback
Answering system Message playback Using the telephone base: /LINE 1 MAIL BOX or /LINE 2 MAIL BOX on the telephone base to Press listen to the messages. CID, DIR, /RECORD, or If there are new and old messages, press /DELETE to select Play new msgs or Play old msgs, and then SELECT press Using a cordless handset:... -
Page 32: For C-Ul Compliance
For C-UL compliance In compliance with the bilingual requirements for safety, caution, and warning markings of Canadian Federal and Provincial/Territorial statutes and regulations, the French version of Important safety information is included. Mesures de sécurité importantes Ce symbole vous alertera d’informations importantes ou d’instructions d’entretien pouvant apparaître dans ce guide d’utilisation. - Page 33 For C-UL compliance Si le produit ne fonctionne pas correctement, consultez la section Dépannage (Troubleshooting) du guide d’utilisation. Si vous ne pouvez pas régler le problème, ou si le produit est endommagé, consultez la section Garantie limitée (Limited warranty) des pages 36-38. N’ouvrez pas ce produit, sauf tel qu’indiqué...
- Page 34 For C-UL compliance Spécifiquement en rapport avec les téléphones sans fil Confidentialité : Les mêmes caractéristiques qui rendent les téléphones sans fil si pratiques créent également des restrictions. Les appels téléphoniques sont transmis entre le socle du téléphone et le combiné par le biais d’ondes radio, et il se peut que vos conversations téléphoniques soient interceptées par d’autres équipements de réception d’ondes radio au sein de la portée du téléphone sans fil.
- Page 35 For C-UL compliance Mesures préventives pour les utilisateurs de stimulateurs cardiaques implantés dans l’organisme Stimulateurs cardiaques (ne s’applique qu’aux téléphones sans fil numériques) : L’organisme ‘Wireless Technology Research, LLC (WTR)’, une firme de recherche indépendante, a mené une évaluation pluridisciplinaire des interférences entre les téléphones sans fil portatifs et les stimulateurs cardiaques implantés dans l’organisme.
- Page 36 FCC Part 68 and ACTA This equipment complies with Part 68 of the FCC rules and with technical requirements adopted by the Administrative Council for Terminal Attachments (ACTA). The label on the back or bottom of this equipment contains, among other things, a product identifier in the format US:AAAEQ##TXXXX.
- Page 37 Industry Canada This device contains licence-exempt transmitter(s)/receiver(s) that comply with Innovation, Science and Economic Development Canada’s licence-exempt RSS(s). Operation is subject to the following two conditions: (1) This device may not cause interference. (2) This device must accept any interference, including interference that may cause undesired operation of the device.
-
Page 38: Limited Warranty
This device complies with Part 15 of the FCC Rules. Operation is subject to the following two conditions: (1) this device may not cause harmful interference, and (2) this device must accept any interference received, including interference that may cause undesired operation. Privacy of communications may not be ensured when using this telephone. - Page 39 3. How long is the limited warranty period? The limited warranty period for the PRODUCT extends for ONE (1) YEAR from the date of purchase. If the manufacturer repairs or replaces a materially defective PRODUCT under the terms of this limited warranty, this limited warranty also applies to repaired or replacement PRODUCT for a period of either (a) 90 days from the date the repaired or replacement PRODUCT is shipped to you or (b) the time remaining on the original one-year limited warranty;...
- Page 40 will notify you and will request that you authorize the cost of repair prior to any further repair activity. You must pay for the cost of repair and return shipping costs for the repair of products that are not covered by this limited warranty. 6.
-
Page 41: Technical Specifications
Technical specifications RF frequency band DECT frequency: 1921.536 - 1928.448 MHz Bluetooth frequency: 2402.000 - 2480.000 MHz Channels DECT channel: 5 Bluetooth channel: 79 Handset battery 2.4VDC 400mAh, AAAx2, Ni-MH battery pack Telephone base voltage 6VDC @ 600mA (AC adapter output) 5.1VDC @1000mA Charger voltage 6VAC @300mA...