Table of Contents
Advertisement
Quick Links
Advertisement
Table of Contents

Summary of Contents for Neets 4 relay box
-
Page 2: Foreword
COPYRIGHT - All information contained in this manual is the intellectual property of and copyrighted material of Neets. All rights are reserved. You may not allow any third party access to content, information or data in this manual without Neets’ express written consent. -
Page 3: Table Of Contents
Change the ID number of the relay box......................9 RS-232 protocol ............................... 10 Commands ..............................10 Controlling the relays ..........................11 Linking two relays together ......................... 12 Example ................................13 Adding additional security ........................... 15 Doc no#: 306-0003-002 REV400 Neets 4 relay Page 2... -
Page 4: Description
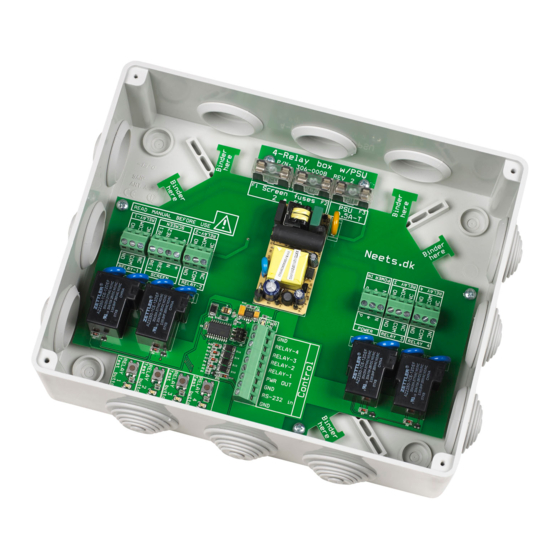
16 relays that are all controllable individually by only one RS-232 port. All Neets control systems support up to 2 relay boxes on one RS-232 port as it is. If you want more than 2 relay boxes on a RS-232 port, you have to use an active splitter and connect it as shown on page 8. - Page 5 Relay connectors. Test buttons for manual activation of a relay Control and power connector. LED for indication of the relay state Doc no#: 306-0003-002 REV400 Neets 4 relay Page 4...
-
Page 6: Technical Specification
The cap gives the wires relief and it makes it easy to detach connectors from the relay box. 302-0007 9 V Dc, 300mA power supply. 306-0006 Neets Serial splitter 1-4. Page 5 Doc no#: 306-0003-002 REV400 Neets 4 relay... -
Page 7: How To Connect It
How to connect it? This section will cover how to connect the Neets Control – EU with the Relay box 306-0003. It will also give some examples on how to connect an external device to the relay box, please note that there are several other ways to use the relay box than described in this guide. - Page 8 Page 7 Doc no#: 306-0003-002 REV400 Neets 4 relay...
-
Page 9: Relaybox In Screen High Security Mode
A standard RS-232 line only allows you to have two RS-232 devices attach. If you need more than two, you have to use the Neets Serial splitter 1-4 as well. Below you can see how it can be connected. Doc no#: 306-0003-002 REV400 Neets 4 relay... -
Page 10: Change The Id Number Of The Relay Box
Test button to press power on when changing to this ID None/0 Relay 1 + 2 + 3 + 4 Relay 1 Relay 2 Relay 3 Relay 4 This is the default settings. Page 9 Doc no#: 306-0003-002 REV400 Neets 4 relay... -
Page 11: Rs-232 Protocol
Stop bit 1 bit Flow control None Commands When entering all the commands in the Neets Control Utility software, select “Chr” as input format. To easier understand the commands below please keep this in mind. Symbol Description <X> When constructing the command, this part must be replaced with a sting or number. -
Page 12: Controlling The Relays
To do this in the Neets Configurations Utility please look below: We want to send two commands: Relay=1,Action=Set\CR and Relay=2,Action=Release\CR This character has been entered by changing to input format “Hex” and type in the value ”0D” and then change bach to input format “Chr”. -
Page 13: Linking Two Relays Together
Relay=2,Action=Set\CR When entering this command in the Neets Configurations Utility its looks like this: 2. Activate relay 3 for 20 seconds on relay box with ID unit 2. Relay=3,Action=Set,Time=20,Unit=2\CR 3. Toggle relay 4, 12 seconds after the command is send and then hold it for 5,8 seconds. -
Page 14: Example
On the hardware side, we need: 1 projector 1 Neets Control - EU Professional or Neets Control - DK 1 Neets 4 relay box Below you find the wiring diagram that shows the communication lines. The relays now have the following functions. - Page 15 Command to be used when turning off the projector: Relay=2,Action=Release\CR Relay=1,Action=Set,Time=26\CR Relay=4,Action=Release\CR Relay=3,Action=Set,Time=22\CR Command to be used when manual moving the screen down: Relay=1,Action=Release\CR Relay=2,Action=Set,Time=20\CR Command to be used when manual moving the screen up: Relay=2,Action=Release\CR Doc no#: 306-0003-002 REV400 Neets 4 relay Page 14...
-
Page 16: Adding Additional Security
The commands the must be used to achieve this function is: Group=1,Action=Lock\CR Group=2,Action=Lock,Delay=2.5\CR It is only necessary to send the two commands one time, the settings will be stored in the relay box, also after power has been removed. Page 15 Doc no#: 306-0003-002 REV400 Neets 4 relay...

