Table of Contents
Advertisement
Quick Links
Advertisement
Table of Contents

Summary of Contents for Neets 4 Relay box
-
Page 2: Foreword
Foreword: The purpose of this document is to describe how to install and configure Neets 4 relay box COPYRIGHT - All information contained in this manual is the intellectual property of and copyrighted material of Neets. All rights are reserved. You may not allow any third party access to content, information or data in this manual without Neets’... -
Page 3: Table Of Contents
Change the ID number of the relay box...................... 10 RS-232 protocol ............................... 11 Commands ..............................11 Controlling the relays ..........................12 Linking two relays together ......................... 14 Example ................................15 Adding additional security ........................... 17 Doc no#: 306-0008-002-001 Rev500 Neets 4 relay Page 2... -
Page 4: Description
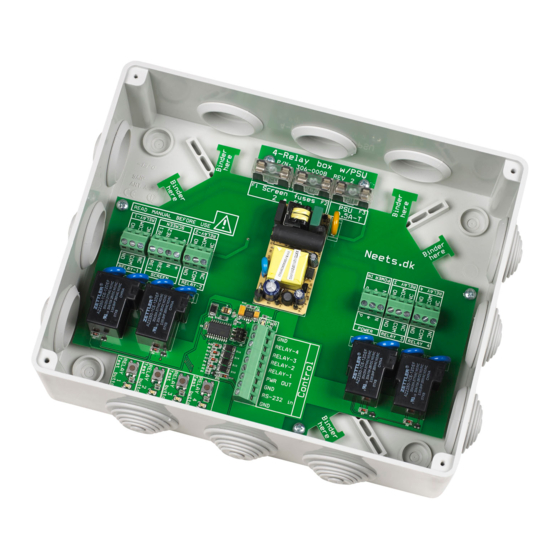
Description The Neets 4 Relay box gives you up to 4 dry contact relays that each can be controlled by a control input (Supported by all Neets Control systems) or by RS-232. The relay box can be used in ether low voltage or high voltage (230VAC) mode, and never at the same time(The applies for the Relay 1 and 2 when using the “Screen”... - Page 5 All Neets control systems support up to 2 relay boxes on one RS-232 port as it is. If you want more than 2 relay boxes on a RS-232 port, you have to use an active splitter and connect it as shown on page 9.
-
Page 6: Technical Specification
Relay max voltage: 230 VAC Maximum screen size(Recommended): 2,5 meter. Control inputs: Active when connected to ground. PWR OUT: 12 V Dc/300 mA RS-232 communication: 9600 baud rate, 8 bit, 1 stop, none parity Page 5 306-0008-002-001 Rev500 Neets 4 relay... -
Page 7: How To Connect It
How to connect it? This section will explain how to connect the Neets Control – EU with the Relay box 306-0003. It will also give some examples on how to connect an external device to the relay box. Please note that there are several other ways to use the relay box than described in this guide. -
Page 8: Controlling A Electrical Screen Or Lift
(RELAY-2) when Relay 1(RELAY-1) is “Released”. Be sure to set up the software to fit this hardware configuration. To enable the screen mode insert the fuses F1 and F2 (Screen 5A) Page 7 306-0008-002-001 Rev500 Neets 4 relay... -
Page 9: Cable In/Out Of The Box
Use the include binders to tie the cables like below or what fits your installation. Use included binders to secure the cables. Doc no#: 306-0008-002-001 Rev500 Neets 4 relay Page 8... -
Page 10: How To Connect More Than 2 Relay Boxes To One Rs-232 Line
A standard RS-232 line only allows you to have two RS-232 devices attached. If you need more than two, you have to use the Neets Serial splitter 1-4 as well. Below you can see how it can be connected. Page 9... -
Page 11: Change The Id Number Of The Relay Box
Test button to press power on when changing to this ID None/0 Relay 1 + 2 + 3 + 4 Relay 1 Relay 2 Relay 3 Relay 4 This is the default settings. Doc no#: 306-0008-002-001 Rev500 Neets 4 relay Page 10... -
Page 12: Rs-232 Protocol
Stop bit 1 bit Flow control None Commands When entering all the commands in the Neets Control Utility software, select “Chr” as input format. To easier understand the commands below please keep this in mind. Symbol Description <X> When constructing the command, this part must be replaced with a sting or number. -
Page 13: Controlling The Relays
The minimum step is 100 ms. Time=<Q> Description 0-6553.5 Set the time (in seconds) from the action is executed to the relay returns to its original state. The minimum step is 100 ms. Doc no#: 306-0008-002-001 Rev500 Neets 4 relay Page 12... - Page 14 Below you find some examples on how to control the relays. 1. Activate relay 2 on all relay boxes connected. Relay=2,Action=Set\CR When entering this command in the Neets Configurations Utility it looks like this: 2. Activate relay 3 for 20 seconds on relay box with ID unit 2. Relay=3,Action=Set,Time=20,Unit=2\CR 3.
-
Page 15: Linking Two Relays Together
2. Link relay 3 and 4 together and set the safety delay to 3,6 seconds on all units connected. Group=2,Action=Lock,Delay=3.6\CR 3. Unlink relay 1 and 2 on the relay box with ID number 3. Group=1,Action=Unlock,Unit=3\CR Doc no#: 306-0008-002-001 Rev500 Neets 4 relay Page 14... -
Page 16: Example
On the hardware side, we need: 1 projector 1 Neets Control - EU Professional or Neets Control - DK 1 Neets 4 relay box Below you find the wiring diagram that shows the communication lines. Page 15... - Page 17 Command to be used when turning on the projector: Relay=1,Action=Release\CR Relay=2,Action=Set,Time=20\CR Relay=3,Action=Release\CR Relay=4,Action=Set,Time=22\CR Command to be used when turning off the projector: Relay=2,Action=Release\CR Relay=1,Action=Set,Time=26\CR Relay=4,Action=Release\CR Relay=3,Action=Set,Time=22\CR Command to be used when manually moving the screen down: Relay=1,Action=Release\CR Doc no#: 306-0008-002-001 Rev500 Neets 4 relay Page 16...
-
Page 18: Adding Additional Security
The commands the must be used to achieve this function is: Group=1,Action=Lock\CR Group=2,Action=Lock,Delay=2.5\CR It is only necessary to send the two commands one time, the settings will be stored in the relay box, also after power has been removed. Page 17 306-0008-002-001 Rev500 Neets 4 relay...


