Advertisement
Quick Links
CVTN: Zoom H1 Handy Recorder – Basic Instructions
ON/OFF SWITCH: is a slider on the RHS of the Recorder (Fig.4)
To switch ON: slide it down and hold until screen says HI and then release
To switch OFF: slide it down and hold until screen says BYE and then release
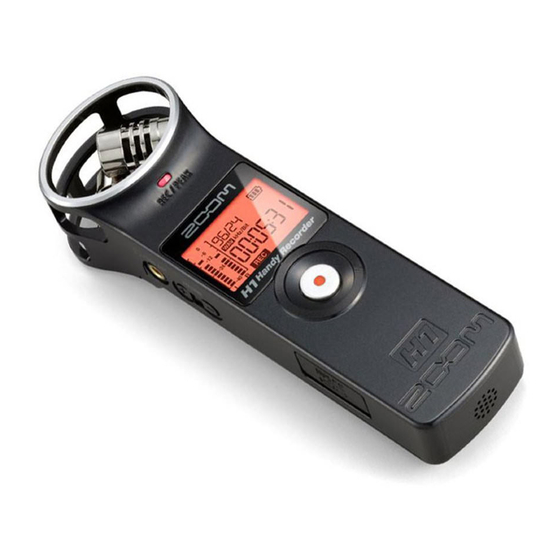
To RECORD: Press the button with the red spot (the RECORD button) on the front
of the Recorder (Fig.1)
To STOP recording: press it again.
To PLAY BACK: press the button labelled MARK on the RHS (Fig.4)– will play all the
recorded tracks in order, starting with the most recent
To STOP play back: press the same button again. Press the RECORD button to
return to the main screen
To DELETE a recording: press the button marked with a waste bin (just above the
ON/OFF switch – see Fig.4) during play-back and then press the RECORD button
Main Screen
Shows a number like 72:54:08 – this is the recording time still available on the chip
in hours: minutes: seconds
Recording-level: is shown on the left of the screen – may be adjusted using the +
and – buttons on the RHS of the Recorder labelled INPUT LEVEL (Fig.4), or
preferably you can use AUTO-LEVEL (see below). Please note – the recorded level
is quite low and will need normalising to match live studio recordings for CVTN.
Also – keep the mics pointed towards the voices (ie recorder end on to the people)
for best quality. And... use the tripod if possible to avoid handling noise.
Three other Buttons:
On the back of the Recorder (Fig.3) there are 3 other buttons:
LO CUT: switching it on reduces background noise, e.g. wind noise
AUTO-LEVEL: automatically adjusts recording-level (recommended)
REC FORMAT: can be set to record in WAV or MP3 format – we usually use MP3
Associated Equipment
The Recorder contains one AA battery and records onto a micro-SD chip.
We also have a mini-USB to standard USB lead for transferring files to a computer,
and a micro-SD to SD adapter.
Recordings may be transferred to a computer:
-
via the lead (recommended) – Recorder should be switched OFF – press
RECORD button when CARD is displayed on its screen.
-
by removing the micro-SD chip from the Recorder, inserting it into the SD
adapter (which looks like a standard SD chip), and inserting the adapter into
the SD slot in a computer (not recommended as removing the micro-chip
from the Recorder) is fiddly).
Issue 05 - David Moss – 14 Mar 2019
Advertisement

Related Manuals for Zoom H1


Summary of Contents for Zoom H1
- Page 1 CVTN: Zoom H1 Handy Recorder – Basic Instructions ON/OFF SWITCH: is a slider on the RHS of the Recorder (Fig.4) To switch ON: slide it down and hold until screen says HI and then release To switch OFF: slide it down and hold until screen says BYE and then release To RECORD: Press the button with the red spot (the RECORD button) on the front of the Recorder (Fig.1)