
Related Manuals for Delta Electronics Vivitek NovoConnect NC-X300


Summary of Contents for Delta Electronics Vivitek NovoConnect NC-X300
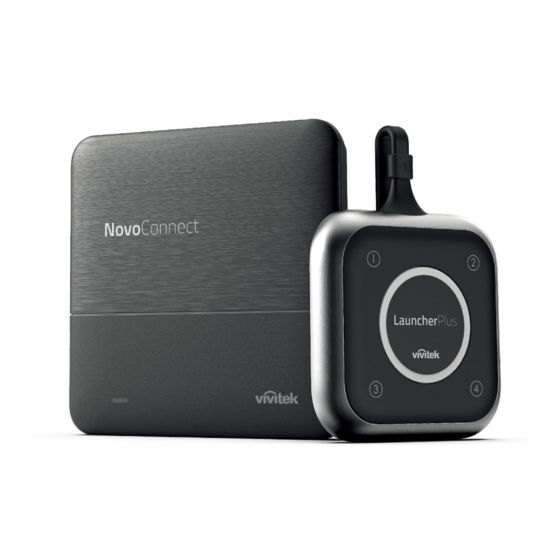
- Page 1 Wireless Collaboration Add-On Device QUICK START GUIDE To learn more about this product, visit www.vivitek.eu for user manual, software and more.
-
Page 2: Package Contents
PACKAGE CONTENTS Main Unit LauncherPlus Antenna HDMI Cable USB-to-DC Power Cable Wall Mount USB Power Adapter USB-to-Ethernet Adapter EN-1... - Page 3 OVERVIEW 5VDC Jack Antenna Connector HDMI Port USB Port Audio-Out Jack (3.5mm) Reset Button MicroSD Card Slot EN-2...
- Page 4 OVERVIEW Kensington® Security Lock SETTING UP Main Unit Hardware Installation Antenna: Attach Antenna to Antenna Connector (2). HDMI: Connect HDMI cable to an LCD monitor or projector HDMI connector. USB Port: (Optional) Connect the USB-to-Ethernet Adapter. Power Input 5VDC Jack: Connect to the USB power adapter with the supplied USB cable. EN-3...
-
Page 5: Software Installation
Software Installation To mirror content with the screen, NovoConnect offers two alternatives: Mirror with Software / App (connect main unit to the local wireless network). Mirror with LauncherPlus (for guests when software can’t be installed on PC/Mac). Both connections can be realized in hotspot or Wi-Fi mode NovoConnect Software Visit www.vivitek.eu and install the NovoConnect Software on your PC/Mac EN-4... - Page 6 Mirroring using LauncherPlus LauncherPlus in the package is paired to the main unit. Therefore, you just need to plug it into your Windows or Mac computer to start mirroring. Plug the LauncherPlus to your After the LauncherPlus finds Once the software is ready, computer.
- Page 7 Mirroring your phones or tablets Main unit supports native mirroring of your smart phones and tablets. No software or App is needed. Connect your mobile device to the same WiFi network as the main unit. Depending on your device, the steps to start mirroring slightly vary.
- Page 8 Mirroring using NovoConnect software Free software is available for Windows, MacOS, iOS and Android devices. Download and install the NovoConnect software. • Tablets/phones: Download NovoConnect App from Apple’s App Store or Google’s Play Store • Windows/Mac computers: Download NovoConnect software from NovoConnect website novoconnect.eu •...
-
Page 9: Contenu De L'emballage
CONTENU DE L’EMBALLAGE Unité principale LauncherPlus Antenne Câble HDMI Câble d’alimentation Adaptateur USB Montage mural Adaptateur secteur USB USB vers CC vers Ethernet FR-1... -
Page 10: Vue D'ensemble
Vue d’ensemble Prise 5VCC Connecteur d’antenne Port HDMI Port USB Prise de sortie audio (3,5 mm) Bouton de réinitialisation Logement pour carte microSD FR-2... -
Page 11: Mise En Place De L'unité Principale
Vue d’ensemble Verrou de sécurité Kensington® MISE EN PLACE de l’unité principale Installation matérielle Antenne : Fixez l’antenne au connecteur d’antenne (2). HDMI : Connectez le câble HDMI au connecteur HDMI d’un moniteur LCD ou d’un projecteur. Port USB: (Facultatif) Connectez l’adaptateur USB-à-Ethernet. Entrée d’alimentation Prise 5VCC : Connecter à... -
Page 12: Installation Du Logiciel
Installation du logiciel Pour effectuer la mise en miroir du contenu avec l’écran, NovoConnect propose deux alternatives : Mettre en miroir avec logiciel/application (connecter l’unité principale au réseau local sans fil). Mettre en miroir avec LauncherPlus (pour les invités lorsque le logiciel ne peut pas être installé sur PC/Mac). Les deux connexions peuvent être réalisées en mode hotspot ou Wi-Fi. - Page 13 Mise en miroir à l’aide de LauncherPlus LauncherPlus dans le paquet est couplé à l’unité principale. Il vous suffit donc de le brancher sur votre ordinateur Windows ou Mac pour lancer la mise en miroir. Branchez le LauncherPlus Une fois que le LanceurPlus Une fois que le logiciel à...
- Page 14 Mise en miroir de vos téléphones ou tablettes L’unité principale prend en charge la mise en miroir native de vos smartphones et tablettes. Aucun logiciel ou application n’est nécessaire. Connectez votre appareil mobile au même réseau WiFi que l’unité principale. Les étapes pour commencer la mise en miroir varient légèrement selon votre appareil.
- Page 15 Mise en miroir à l’aide du logiciel NovoConnect Des logiciels gratuits sont disponibles pour les appareils Windows, MacOS, iOS et Android. Téléchargez et installez le logiciel NovoConnect. • Tablettes/téléphones : Téléchargez l’application NovoConnect sur l’App Store d’Apple ou sur le Play Store de Google •...
- Page 16 LIEFERUMFANG Haupteinheit LauncherPlus Antenne HDMI-Kabel USB-auf-DC Stromkabel Wandmontagehalterung USB-Netzadapter USB-auf-Ethernet Adapter DE-1...
- Page 17 Übersicht 5VDC Buchse Antennenanschluss HDMI-Anschluss USB-Anschluss Audio-Ausgangsbuchse (3,5mm) Zurücksetzen-Taste MicroSD Karteneinschub DE-2...
- Page 18 Übersicht Kensington® Sicherheitsschloss EINRICHTUNG des Hauptgeräts Hardware Installation Antenne: Bringen Sie die Antenne am Antennenanschluss an (2). HDMI: Schließen Sie das HDMI-Kabel an den HDMI-Anschluss eines LCD-Monitors oder Projektors an. USB-Anschluss: (Optional) Anschluss des USB-auf-Ethernet Adapters. Stromanschluss 5VDC Buchse: Verbinden Sie den USB-Netzadapter mit dem beiliegenden USB-Kabel. DE-3...
-
Page 19: Installation Der Software
Installation der Software Zum Spiegeln von Inhalten mit dem Bildschirm bietet NovoConnect zwei Alternativen: Spiegeln mit Software/App (Hauptgerät mit dem lokalen drahtlosen Netzwerk verbinden). Spiegeln mit LauncherPlus (für Gäste, wenn die Software nicht auf PC/Mac installiert werden kann). Beide Verbindungen können im Hotspot- oder WLAN-Modus realisiert werden. NovoConnect Software Besuchen Sie www.vivitek.eu und installieren Sie die NovoConnect Software auf Ihrem PC/Mac DE-4... - Page 20 Spiegelung mit LauncherPlus LauncherPlus im Paket ist mit der Haupteinheit gekoppelt. Daher müssen Sie sie nur an Ihren Windows oder Mac Computer anschließen, um mit der Spiegelung zu beginnen. Schließen Sie LauncherPlus Nachdem der LauncherPlus Sobald die Software fertig an Ihren Computer an. Bei die Haupteinheit gefunden ist, beginnt der LauncherPlus der erstmaligen Verwendung...
- Page 21 Spiegelung Ihrer Telefone oder Tablets Das Hauptgerät unterstützt die native Spiegelung Ihrer Smartphones und Tablets. Es wird keine Software oder App benötigt. Verbinden Sie Ihr mobiles Gerät mit demselben WLAN Netzwerk wie das des Hauptgeräts. Abhängig von Ihrem Gerät sind die Schritte zum Starten der Spiegelung leicht unterschiedlich.
- Page 22 Spiegelung mit NovoConnect Software Die kostenlose Software ist für Windows, MacOS, iOS und Android Geräte verfügbar. Laden Sie die NovoConnect Software herunter und installieren Sie sie. • Tablets/Telefone: NovoConnect App im App Store von Apple oder im Play Store von Google herunterladen •...
-
Page 23: Contenido Del Paquete
CONTENIDO DEL PAQUETE Unidad principal LauncherPlus Antena Cable HDMI Cable de alimentación de Montaje en pared Adaptador de corriente USB Adaptador USB a Ethernet USB a CC ES-1... -
Page 24: Vista General
Vista general Conector 5 V CC Conector de antena Puerto HDMI Puerto USB Conector de salida de audio (3,5 mm) Botón de reinicio Ranura para tarjetas microSD ES-2... -
Page 25: Configuración De La Unidad Principal
Vista general Cierre de seguridad Kensington® CONFIGURACIÓN de la unidad principal Instalación del hardware Antena: conecte la antena al conector de la antena (2). HDMI: conecte el cable HDMI a un monitor LCD o al conector HDMI del proyector. Puerto USB: (Opcional) Conecte el adaptador de USB a Ethernet. Entrada de corriente Conector 5 V CC: Conectar al adaptador de alimentación USB con el cable USB incluido. -
Page 26: Instalación Del Software
Instalación del software Para duplicar el contenido en una pantalla, NovoConnect ofrece dos alternativas: Duplicar con Software/Aplicación (conecte la unidad principal a la red inalámbrica local). Duplicar con LauncherPlus (para invitados cuando el software no puede ser instalado en PC/Mac). Ambas conexiones pueden realizarse en modo hotspot o Wi-Fi. - Page 27 Duplicar usando LauncherPlus El LauncherPlus del paquete está emparejado con la unidad principal. Por lo tanto, sólo tiene que conectarlo a su ordenador Windows o Mac para empezar a duplicar. Conecte el LauncherPlus a Después de que Una vez que el software su ordenador.
- Page 28 Duplicar sus teléfonos o tabletas La unidad principal soporta la duplicación nativa de sus smartphones y tabletas. No se necesita ningún software o aplicación. Conecte su dispositivo móvil a la misma red Wi-Fi que la unidad principal. Dependiendo del dispositivo, los pasos para empezar a duplicar varían ligeramente.
- Page 29 Duplicar usando el software NovoConnect El software gratuito está disponible para dispositivos Windows, MacOS, iOS y Android. Descargue e instale el software NovoConnect. • Tabletas/teléfonos: Descargue la aplicación NovoConnect de la App Store de Apple o la Play Store de Google •...
-
Page 30: Комплект Поставки
КОМПЛЕКТ ПОСТАВКИ Главный блок LauncherPlus Антенна Кабель HDMI Montage mural USB-адаптер питания Адаптер USB—Ethernet Кабель питания USB—DC RU-1... -
Page 31: Общий Обзор
Общий обзор Гнездо питания 5В (пост.т.) Антенный штекерный соединитель Порт HDMI Порт USB Аудиовыход (гнездо 3,5 мм) Кнопка перезапуска Гнездо карты microSD RU-2... - Page 32 Общий обзор Замок безопасности Kensington® УСТАНОВКА главного блока Установка оборудования Антенна: Подсоедините антенну к разъему антенны (2). HDMI: Подсоедините кабель HDMI к разъему HDMI проектора или ЖК-монитора. Порт USB: (Дополнительно) Подсоедините адаптер USB—Ethernet. Вход питания Гнездо питания 5В (пост.т.): для подключения адаптера питания USB с помощью входящего в комплектацию...
- Page 33 Установка ПО NovoConnect поддерживает два способа отображения экрана и контента устройств: Отображение экрана через приложение/ПО (с подключением главного блока к локальной беспроводной сети). Отображение экрана через LauncherPlus (для гостей, когда на их ПК/Mac нельзя установить специализированное ПО). Оба способа подключения могут быть реализованы в режиме Wi-Fi или точки доступа. ПО...
- Page 34 Отображение экрана через LauncherPlus Выполните сопряжение прилагаемого устройства LauncherPlus с главным блоком. Для этого нужно просто подключиться к компьютеру с ОС Windows или Mac OS, чтобы запустить отображение экрана. Подсоедините LauncherPlus Когда устройство По завершении настройки к компьютеру. При первом LauncherPlus обнаружит...
- Page 35 Отображение экрана телефона или планшета Главный блок включает собственную поддержку отображения экрана смартфонов и планшетов. Специального программного обеспечения или приложения не требуется. Ваше мобильное устройство следует подключить к той же сети WiFi, что и главный блок. Для разных мобильных устройств процедура запуска отображения...
- Page 36 Отображение экрана через ПО «NovoConnect Software» Соответствующее бесплатное ПО доступно для устройств на базе Windows, MacOS, iOS и Android. Загрузите и установите ПО «NovoConnect Software». • Планшеты/телефоны: Загрузите приложение «NovoConnect App» с сайта Google Play или Apple App Store • Компьютеры...
-
Page 37: Additional Information
ADDITIONAL INFORMATION Safety & Warning Information FCC – Federal Communication Commission (USA) This device contains the following wireless device and underwent the certification process of FCC 47 CFR PART 15 SUBPART C/E under the respective FCC ID below: • FCCID: H79-18D7EA3 / H79ESSQL-300 The FCC ID is indicated as the label affixed on the bottom side of your device. -
Page 39: Contact Information
CONTACT INFORMATION Vivitek EMEA Headquarters Zandsteen 15 2132 MZ Hoofddorp The Netherlands Vivitek U.S.A. Corporate Office Customer Service & Technical Support: 46101 Fremont Blvd. Fremont, CA 94538 Monday - Friday 09:00 - 18:00 Tel: (855) 885-2378 English (UK): 0333 0031993 (855) 885-2378x1 - Sales Germany: 0231 7266 9190 (855) 885-2378x2 - General Customer Services... - Page 40 Thank you for choosing Vivitek Wireless Collaboration Connect | Show | Manage Visit www.vivitek.eu for more product info Copyright© 2020 Delta Electronics, Inc. All Rights Reserved.