Chamberlain LiftMaster Professional SW420 Manual
Light duty swing gate operator
Hide thumbs
Also See for LiftMaster Professional SW420:
- Installation and maintenance instructions manual (34 pages) ,
- Installation manual (36 pages) ,
- Owner's manual (36 pages)
Table of Contents
Advertisement
Quick Links
Advertisement
Table of Contents

Related Manuals for Chamberlain LiftMaster Professional SW420


Summary of Contents for Chamberlain LiftMaster Professional SW420
- Page 1 MODEL SW420 IGHT WING PERATOR 2 YEAR WARRANTY Serial # ________________________ (located on electrical box cover) Installation Date __________________ MODEL SW420 IS FOR VEHICULAR PASSAGE GATES ONLY AND IS NOT INTENDED FOR PEDESTRIAN PASSAGE GATE USE...
-
Page 2: Table Of Contents
T A B L E O F C O N T E N T S OPERATOR SPECIFICATIONS IMPORTANT NOTE Carton Inventory ......... .2 •... -
Page 3: Gate Weight Specifications
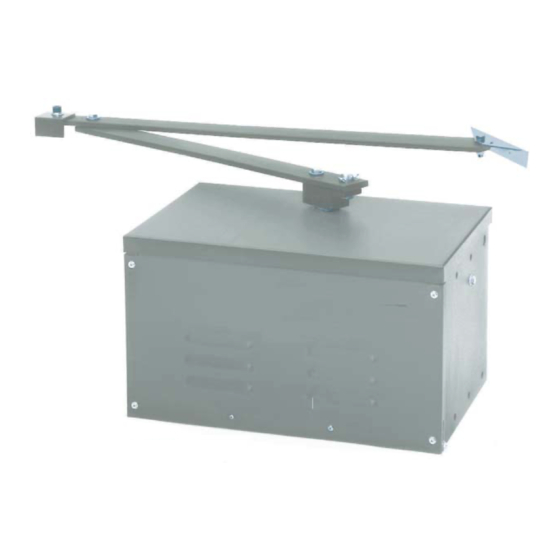
G A T E W E I G H T S P E C I F I C A T I O N S GATE WT. GATE WIDTH MAX. STARTS/HR 300 LBS. 12 FT. O P E R A T O R D I M E N S I O N S MODEL 420 11-5/8"... -
Page 4: Model Classifications
U L 3 2 5 M O D E L C L A S S I F I C A T I O N S CLASS I – RESIDENTIAL VEHICULAR GATE OPERATOR A vehicular gate operator (or system) intended for use in a home of one-to four single family dwellings, or a garage or parking area associated therewith. - Page 5 U L 3 2 5 M O D E L C L A S S I F I C A T I O N S c o n t i n u e d SAFETY ACCESSORY SELECTION UL325 ENTRAPMENT PROTECTION REQUIREMENTS All UL325 compliant LiftMaster gate operators will accept external entrapment protection devices to protect people from motorized GATE OPERATOR ENTRAPMENT PROTECTION...
-
Page 6: Gate System
G A T E S Y S T E M S COMMERCIAL SWING GATE Telephone Entry System STREET Photo eye for open cycle Run twisted wire from loop Interrupt to operator Loop Seal Loops Shadow 1-1/2" Loop Loop wire layer Interrupt Loop Photo eye for... -
Page 7: Safety Installation Information
S A F E T Y I N S T A L L A T I O N I N F O R M A T I O N 1. Vehicular gate systems provide convenience and security. Gate systems are comprised of many component parts. The gate operator is only one component. -
Page 8: Safety Label Placement
S A F E T Y L A B E L P L A C E M E N T The UL required Warning Signs must be installed in plain view and on both sides of each gate installed. Each sign is made with fastening holes in each corner and should be permanently secured in a suitable manner. -
Page 9: Post Mounting
P O S T M O U N T I N G Figure 1 NOTE: For the following instructions refer to Figures 1 & 2. Pivot Fence Line 1. Locate and anchor two posts made of 3" outer diameter heavy Gate walled pipe. -
Page 10: Pad Mounting
P A D M O U N T I N G NOTE: For the following instructions refer to Figures 1 & 2. Figure 1 Pivot Fence Line 1. Layout the concrete pad as detailed in Figure 1. Gate 6-1/2" 26-3/4" IMPORTANT NOTE: The relative location of the operator to the fence 19"... -
Page 11: Pedestal Mounting
P E D E S T A L M O U N T I N G NOTE: For the following instructions refer to Figures 1 & 2. Figure 1 Hinge Pin Pivot Fence Line 1. Locate and anchor pedestal. Pedestal should be parallel and square Gate to the gate. -
Page 12: Control Arm Assembly
C O N T R O L A R M A S S E M B L Y WARNING 1. Assemble the control arm to the operator hub. 2. Push up the manual release pin from below the hub and through the CAUTION control arm. -
Page 13: Mechanical Disconnect
M E C H A N I C A L D I S C O N N E C T The operator can be disconnected from the gate, so the gate can be manually opened or closed. Disconnect the control arm from the drive hub by removing the hairpin cotter and then the clevis pin and allowing the manual release pin to drop down through the hub. -
Page 14: Install Power Wiring & Control Station
I N S T A L L P O W E R W I R I N G & C O N T R O L S T A T I O N WARNING WARNING WARNING DISCONNECT power at the fuse box BEFORE proceeding. ANY maintenance to the operator or in the area near the CAUTION WARNING... -
Page 15: Disconnect Switch Power Wiring
D I S C O N N E C T S W I T C H P O W E R W I R I N G NOTE: Before running power wiring refer to wiring specifications on page 14 for correct wire gauges. ON/OFF Switch Cover Secure all electrical power connections inside the disconnect switch... -
Page 16: Programming The Radio Receiver
WARNING WARNING P R O G R A M M I N G T H E R A D I O R E C E I V E R SET SECURITY MODE WARNING CAUTION The Universal Receiver can be used with up to 15 rolling code transmitters or passwords in HIGH security mode. -
Page 17: Limit Switch Adjustment
L I M I T S W I T C H A D J U S T M E N T WARNING WARNING 6. Turn off power. Be sure close limit cam is freely turning. Rotate cam CAUTION in close direction. Stop when cam just clicks close limit switch. WARNING Tighten set screw. -
Page 18: Sams
S A M S ( S E Q U E N C E D A C C E S S M A N A G E M E N T S Y S T E M ) SAMS DEFINITION The Sequenced Access Management System or SAMS allows the customer more control when managing vehicular entrances to areas such as apartment complexes, businesses and gated communities. -
Page 19: Optional Control Devices
O P T I O N A L C O N T R O L D E V I C E S All inputs are normally open and momentary, except the stop (N.C.). The following instructions are based upon UL325, and include recommendations for significant increase in safety. - Page 20 O P T I O N A L C O N T R O L D E V I C E S Field Wiring Terminals 9 & 5 - Obstruction Open (Edge/ Photo OBSTRUCTION OPEN (EDGE/PHOTO EYE INPUT) Eye Input) Edge Input: See Programming Section This input will reverse an opening gate to the close limit.
-
Page 21: Control Board Illustrations
C O N T R O L B O A R D I L L U S T R A T I O N J4 Connector Master/Second J1 Connector Dip Switch #4 Master/Second Potentiometer Timer to Close Potentiometer Force Adjustment Dip Switch #2 Dip Switch #1 Diagnostic... -
Page 22: Controller Programming And Features
C O N T R O L L E R P R O G R A M M I N G A N D F E A T U R E S MOTOR LEARN FUNCTION (FORCE PROFILE) MOTOR LEARN BUTTON This function is preprogrammed at factory. -
Page 23: Program Settings
P R O G R A M M I N G S E T T I N G S ( D I P S W I T C H # 1 ) NOTE: For all S1, S2 and S4 switch settings to take effect, the Save Mode must be set to the off position. TIMER TO CLOSE ENABLE TIMER TO CLOSE This switch (S1-1) enables the auto close timer. - Page 24 P R O G R A M M I N G S E T T I N G S ( D I P S W I T C H # 2 ) c o n t i n u e d EDGE/PHOTO OPEN EDGE/PHOTO CLOSE This switch (S2-3) selects edge or photo sensor for the gate opening...
-
Page 25: Troubleshooting
T R O U B L E S H O O T I N G Symptom Possible Causes Solution No Stop Control. Check the green LED (D17) on GL board. If the green LED is off, check to Operator fails to make sure a stop control has been installed across terminals J1-3 &... - Page 26 T R O U B L E S H O O T I N G c o n t i n u e d Possible Causes Solution Symptom Failure to cycle power after The power to each unit must be cycled in order to initiate proper Master or Second setup.
-
Page 27: Hall Effect Sensor Adjustment
H A L L E F F E C T S E N S O R A D J U S T M E N T NOTE: Normally the Hall Effect sensor does not need adjustment, but WARNING may go out of alignment due to shipping vibration or rough handling. These operators use an internal entrapment protector system. -
Page 28: Operator Maintenance
O P E R A T O R M A I N T E N A N C E CHECK AT LEAST ONCE EVERY DESCRIPTION TASK 3 MONTHS 6 MONTHS 12 MONTHS Check for proper operation Internal speed sensor External entrapment Check for proper operation protection systems Gate caution signs... -
Page 29: Repair Parts
R E P A I R P A R T S Refer to the parts lists below for replacement parts available for your operator. If optional modifications and/or accessories are included with your operator, certain components may be added or removed from these lists. Individual components of each kit may not be available. Please consult a parts and service representative regarding availability of individual components. -
Page 30: Illustrated Parts
I L L U S T R A T E D P A R T S... -
Page 31: Single Phase Wiring Diagram
S I N G L E P H A S E W I R I N G D I A G R A M GL CONTROL BOARD GL CONTROL BOARD SEE NOTE 1 SEE NOTE 1 PRIM ARY PRIM ARY 24VAC-IN 24VAC-IN 24VA C... -
Page 32: Notes
N O T E S... - Page 33 N O T E S...
- Page 34 N O T E S...
-
Page 35: Warranty Policy
HOURS 8:00 a.m. TO 6:00 p.m. (Central Std. Time) SATURDAY WWW.LIFTMASTER.COM WHEN ORDERING REPAIR PARTS PLEASE SUPPLY THE FOLLOWING INFORMATION: PART NUMBER DESCRIPTION MODEL NUMBER ADDRESS ORDER TO: THE CHAMBERLAIN GROUP, INC. Electronic Parts & Service Dept. 6020 S. Country Club Road Tucson, AZ 85706... -
Page 36: Control Connection Diagrams
If these instructions are contrary to the advice given here, call for assistance. VISIT US AT WWW.LIFTMASTER.COM 01-18451D © 2004, The Chamberlain Group, Inc. All Rights Reserved...