Advertisement
Quick Links
1. LEARN ABOUT THE BASICS...
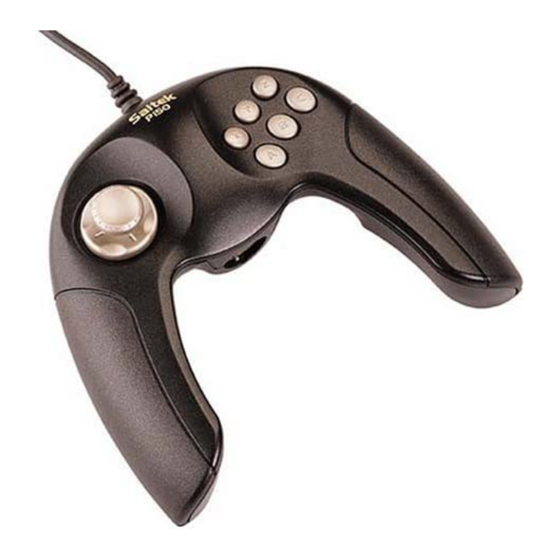
Thank you for selecting Saitek's new P150 Gamepad! Carefully
designed to be extremely versatile and ergonomically sound, this unique
gamepad offers long grips for comfortable play, making it perfect for a
wide range of hand sizes. As shown under Features and Controls , the
P150 boasts 8 buttons (6 fire buttons and 2 quick-fire triggers), all of
which are assignable in your favorite Windows
fast and responsive 8-way D-Pad, which even gives you the option of
attaching a handle for use as a mini joystick. And, you won't ever have to
worry about losing the handle, since it stores right inside the unit when not
in use! Additionally, the USB connection lets you plug this gamepad in
without even turning your computer off—allowing you to connect the
Saitek P150 and start up a game whenever you're in the mood, at a
moment's notice!
Note: To achieve optimum performance and avoid potential conflicts,
we recommend that you remove any previously loaded controllers before
adding the P150 as the active controller. To do so, select the installed
controller in the Game Controllers window (under Control Panel), click
on Remove, and click on Yes to confirm.
2. ...THEN INSTALL AND START TO PLAY!
a. Plug the Saitek P150 Gamepad into your computer's USB port.
b. When the Add New Hardware Wizard appears, simply follow the
on-screen instructions.
c. When prompted, select Search for the best driver for your device.
d. At the next screen, click on the CD-ROM drive option, insert your
®
Windows
CD, and click on Next.
Note: Some computers store device driver files on your hard drive,
rather than on a separate CD. If your computer doesn't automatically
guide you to the correct files, please check your documentation for
instructions on installing device drivers.
e. Continue to follow the on-screen instructions to complete the
installation. When you're finished, click on Next.
f. To check out the P150's set-up, click on Start on the Windows
taskbar, and then select Settings and Control Panel.
g. Under Control Panel, double-click the Game Controllers icon.
h. In the Game Controllers window, your Saitek P150 will appear as
HID Game Controller: 2 axis 8 button joystick.
i. Since your P150 Gamepad is pre-calibrated, there's no need for you
to calibrate it. However, you should test it out at this point. To do so,
first click on Properties to open the Game Controller Properties
dialog box.
®
games. Also included is a
1
®
Advertisement

Related Manuals for Saitek P150


Summary of Contents for Saitek P150
- Page 1 Additionally, the USB connection lets you plug this gamepad in without even turning your computer off—allowing you to connect the Saitek P150 and start up a game whenever you’re in the mood, at a moment’s notice! Note: To achieve optimum performance and avoid potential conflicts, we recommend that you remove any previously loaded controllers before adding the P150 as the active controller.
- Page 2 Game Controllers window (under Control Panels), clicking on Remove, and clicking on Yes to confirm. Then, add the P150 as indicated in Section 2. d. I installed the P150 and loaded my game, but the game instruc- tions say I have to calibrate it again.
- Page 3 And, while you’re there, why INFORMATION? not explore our website a little further and The Saitek website check out all the other products Saitek has might have exactly to offer, including a great variety of game what you’re looking for! Sim-...