
Related Manuals for Kawai ES520


Summary of Contents for Kawai ES520
- Page 1 Important Information Preparation ES520 Basic Operation Owner’s Manual Adjustments & Settings Appendix...
-
Page 3: Important Safety Instructions
Important Safety Instructions Important Safety Instructions SAVE THESE INSTRUCTIONS INSTRUCTIONS PERTAINING TO A RISK OF FIRE, ELECTRIC SHOCK, OR INJURY TO PERSONS WARNING CAUTION TO REDUCE THE RISK OF FIRE OR ELECTRIC SHOCK, DO NOT RISK OF ELECTRIC SHOCK EXPOSE THIS PRODUCT TO DO NOT OPEN RAIN OR MOISTURE. - Page 4 WARNING - When using electric products, basic precautions should always be followed,including the following: WARNING Indicates a potential hazard that could result in death or serious injury if the product is handled incorrectly. The product should be connected to G If you are going to use an AC power cord, 120V 230V 240V...
- Page 5 Indicates a potential hazard that could result in injury or CAUTION damage to the product or other property if the product is handled incorrectly. Do not use the product in the following areas. Using the product in such areas may result in product breakdown.
- Page 6 This device complies with Part 15 of the FCC Rules. Operation is subject to the following two conditions: (1) this device may not cause harmful interference, and (2) this device must accept any interference received, including interference that may cause undesired operation. This applies only to products distributed by Kawai America Corporation.
-
Page 7: Displayed Icons
Displayed Icons Panel lock icon Displayed when panel lock is on. USB icon Displayed when a USB memory device is connected. Headphone icon Displayed when a pair of headphones is connected. Transpose icon Displayed when key TRANSPOSE is on. Bluetooth icon Displayed when Bluetooth Audio or Bluetooth MIDI is on. -
Page 8: Table Of Contents
Welcome to the Kawai ES520 . . . . . . . . . . . . . . . . . . - Page 9 Kawai ES520 Specifications . . . . . . . . . . . . . . . . . . .
-
Page 10: Welcome To The Kawai Es520
Welcome to the Kawai ES520 Thank you for purchasing this Kawai ES520 digital piano. This owner’s manual contains important information regarding the usage and operation of the ES520 digital piano. Please read all sections carefully, keeping this manual handy for future reference. -
Page 11: Feature Highlights
Shigeru Kawai SK-EX and Kawai EX instruments reproduced with Harmonic Imaging sound technology The ES520 digital piano captures the rich, expressive sound of the Kawai SK-EX and EX grand pianos, with all 88 keys of these exceptional instruments meticulously recorded, analysed and faithfully reproduced using Progressive Harmonic Imaging™... -
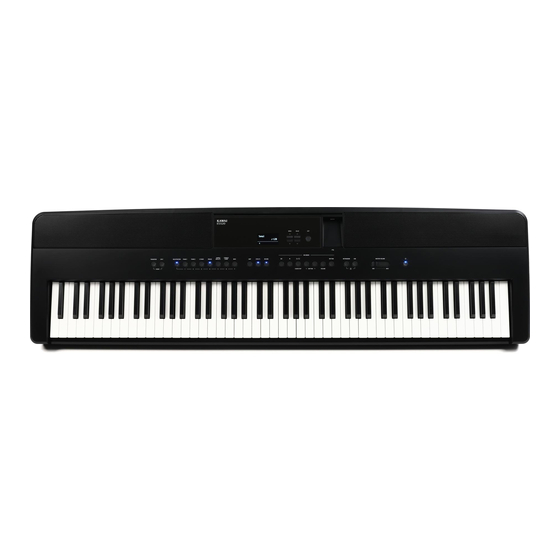
Page 12: Part Names And Functions
Part Names and Functions Part Names and Functions Part Names and Functions a Display g SPLIT button The display provides important information relating to the This button is used to select and adjust the instrument’s Split/ currently selected sound, style, function, and setting. Four Hands mode functions. - Page 13 These buttons are used to select the Rhythm style. * The ES520 digital piano features a power saving mode that can turn off the instrument automatically after a specified period of inactivity. For o VOLUME button...
-
Page 14: Setting Up The Piano
A ttaching the music rest Insert the base of the music rest into the groove located at the rear of the ES520 digital piano, taking care not to scratch the rear of the instrument. To prevent possible damage, avoid applying excessive force when attaching/detaching the music rest from the instrument. -
Page 15: Basic Operation
LED indicator on: Sound category is selected. * The ES520 digital piano features a power saving mode that can turn off the instrument automatically after a specified period of inactivity. For more information, please refer to the Auto Power Off setting on page 61. -
Page 16: Selecting Sounds
Selecting Sounds Selecting Sounds The ES520 digital piano features a wide selection of realistic instrument sounds suitable for various musical styles. Sounds are arranged into seven categories, with multiple sounds assigned to each category button. By default, the “SK ConcertGrand” sound will be selected automatically when the instrument is turned on. -
Page 17: Demo Songs
Demo Songs The Demo function provides an excellent introduction to the varied capabilities of the ES520 digital piano. There are 23 different demonstration songs available, highlighting the instrument’s rich selection of high quality sounds and powerful speaker system. For a complete listing of the available demonstration songs, please refer to page 96 of this owner’s manual. -
Page 18: Dual Mode
Dual Mode Dual Mode Dual Mode The Dual Mode function allows two sounds to be layered together, creating a more complex sound. For example, a piano sound layered with strings, or a church organ combined with a choir, etc. 1. Entering Dual mode Press and hold a SOUND button to select the main sound, then press another SOUND button to select the layered sound. - Page 19 3. Adjusting the main/layered sound volume balance While Dual mode is in use: Press the VALUE buttons to adjust the volume balance VALUE between the main and layered sounds. Increase main VALUE sound volume/ Increase layered decrease layered The volume balance will briefly be shown in the display. sound volume/ sound volume.
-
Page 20: Split Mode
Split Mode Split Mode Split Mode The Split Mode function divides the keyboard into two sections, allowing each section to be played with a different sound. For example, a bass sound in the lower section, and a piano sound in the upper section. 1. - Page 21 3. Changing the split point Press and hold the SPLIT button, then press the desired split key on the keyboard. The name of the pressed key will briefly be shown in the display, and will become the new split point. Example: To set the split point to key F4, press and hold the SPLIT button, then press the F4 key.
-
Page 22: Four Hands Mode
Four Hands Mode Four Hands Mode Four Hands Mode The Four Hands Mode function divides the keyboard into two sections in a similar way to that of the Split Mode function. However, with Four Hands Mode enabled, the octave/pitch of each section is automatically adjusted to create two separate 44-key instruments with the same playing range. - Page 23 3. Changing the Four Hands mode split point Press and hold the SPLIT button, then press the desired split key on the keyboard. The name of the pressed key will briefly be shown in the display, and will become the new Four Hands mode split point. Example: To set the split point to key C5, press and hold the SPLIT button, then press the C5 key.
-
Page 24: Enhancing The Sound
Enhancing the Sound The ES520 digital piano offers a variety of features to adjust and enhance the character of a particular sound. Some of these features (e.g. Reverb), are enabled automatically when a sound is selected, however players may also wish to change the strength or type of enhancement to suit their personal preferences or different styles of music. - Page 25 3. Adjusting the Reverb settings (type/depth/time) While the reverb settings menu is shown, to change the reverb type: Press the VALUE buttons to cycle through the different reverb types. Example: To change the reverb type from “Small Hall” to “Concert Hall”, press the VALUE button.
-
Page 26: Effects
In addition to reverb, various other effects can be applied to the selected sound, altering the tonal character and feeling of the instrument. As with reverb, some sound types enable certain effects automatically in order to enhance tonal quality. The ES520 digital piano features 16 different effect types. E ffect types... - Page 27 2. Entering the Effects settings menu, selecting the Effect type Press and hold the EFFECTS button. The first page of the effects settings menu will be shown in the display. Press the VALUE buttons to cycle through the different effect types. E ffect settings Effect type Setting 1...
- Page 28 Enhancing the Sound Enhancing the Sound 3. Selecting and adjusting the Effect settings While the effects settings menu is shown in the display: Press the MENU buttons to cycle through the different effects settings pages. Example: To select the “Delay Time” effects setting, press the MENU button twice.
-
Page 29: Amp Simulator
Amp Simulator The ES520’s Amp Simulator (Amp Sim) attempts to reproduce the sound, response, and overdrive characteristics of a typical amp/speaker combination, giving electric piano and drawbar organ sounds an authentic vintage quality. Once enabled, the amplifier type can be selected, with adjustable drive, level, and Low/Hi EQ settings. As with the Reverb and Effects functions, selecting certain sounds will enable the Amp Sim automatically. - Page 30 Enhancing the Sound 3. Adjusting the Amp Sim settings (drive/level/eq low/eq high) While the Amp Sim settings menu is shown in the display: Press the MENU buttons to cycle through the different Amp Sim settings pages, then press the VALUE buttons to adjust the value of the selected Amp Sim setting.
-
Page 31: Panel Lock
Panel Lock The Panel Lock function allows the state of all panel buttons to be temporarily locked, preventing sounds and other settings from being changed. This function may prove useful in teaching environments, ensuring that students are not distracted by changing sounds etc. 1. -
Page 32: Transpose
Transpose Transpose The Transpose function allows the pitch of the ES520 digital piano’s keyboard to be raised or lowered in semi-tone intervals. This is particularly useful when accompanying instruments tuned for different keys, or when a song learned in one key must be played in another key. -
Page 33: Metronome
Metronome The Metronome function provides a steady beat to aid practicing the piano at a consistent tempo. The time signature, volume, and tempo of the metronome can all be freely adjusted. 1. Turning the Metronome on/off Press the METRONOME button. The LED indicator for the METRONOME button will turn on to indicate that the metronome function is in use, and a 4/4 beat will start to count. - Page 34 Metronome 2. Adjusting the Metronome settings (volume) To adjust the metronome volume: Press the MENU buttons to select the “Volume” page, then press the VALUE buttons to adjust the value of the metronome volume. Example: To increase the volume of the tempo, press the MENU button to select the “Volume”...
-
Page 35: Rhythm
Rhythm As an alternative to regular metronome beats, the ES520 digital piano also features a variety of drum rhythms to accompany most playing styles and musical genres. T urning the Rhythm on/off Press the RHYTHM button. The LED indicator for the RHYTHM button will turn on to indicate that the Rhythm function is in use, and a drum pattern will start to play. - Page 36 Rhythm A djusting the Rhythm volume Press the RHYTHM button. Press the MENU button to select “Volume”, then press VALUE buttons to adjust the rhythm volume. * The volume can be adjusted within the range of 1~10. * To reset the volume to 5, press the VALUE buttons simultaneously.
-
Page 37: Registration Memories
Registration Memories The Registration function allows the current instrument setup (sound/style selection, all settings, etc.) to be stored to a registration memory, and conveniently recalled at the touch of a button. Each of the seven registration buttons contain four banks (A, B, C, and D), allowing up to 28 different registration memories to be stored. Registrations can also be loaded from/saved to USB memory devices. - Page 38 Registration Memories E xiting Registration mode (retain new settings) To return to normal playing mode with the current registration memory settings selected: Press the EXIT button. The LED indicator for the REGISTRATION button will turn off, and the instrument will return to normal playing mode. S toring a Registration memory To store a registration memory to the current banks (e.g.
-
Page 39: Song Recorder (Internal Memory)
Song Recorder (Internal memory) The ES520 digital piano allows up to 3 different songs to be recorded, stored in internal memory, and played back at the touch of a button. Recording a Song 1. Entering song recorder mode Press the (REC) button. - Page 40 Song Recorder (Internal memory) Song Recorder (Internal memory) 4. Stopping the song recorder Press the PLAY/STOP button. The LED indicators for the PLAY/STOP and (REC) buttons will turn off, the recorder will stop, and the song will be stored in internal memory.
-
Page 41: Playing A Song
Playing a Song This function is used to playback songs stored in the internal recorder. To playback a song immediately after recording, start this process from step 2. 1. Entering song play mode Press the PLAY/STOP button. The LED indicator for the PLAY/STOP button will turn on, and the Internal Song Player screen will be shown in the display. - Page 42 Song Recorder (Internal memory) Song Recorder (Internal memory) C ontrolling song playback While the song is playing: Press the PLAY/STOP button to pause and resume song playback. Press the RESET button to return to the beginning of the song. A djusting the playback tempo While the song is playing: Press the...
-
Page 43: Erasing A Song
Erasing a Song This function is used to erase songs that have been recorded incorrectly or songs that are no longer listened to. Once a song has been erased from memory it cannot be recovered. 1. Entering song erase mode Press the (REC) and PLAY/STOP buttons simultaneously. -
Page 44: Playing A Midi Or Kso File (Usb Memory)
(USB memory) The ES520 digital piano also supports the playback of Standard MIDI File (SMF) and KSO file songs stored on a USB memory device, allowing a vast selection of widely accessible music to be heard through the instrument’s exquisite Progressive Harmonic Imaging sound engine. - Page 45 C ontrolling MIDI file playback While the MIDI file is playing: Press the PLAY/STOP button to pause and resume playback. Press the RESET button to return to the beginning of the MIDI file. A djusting the MIDI file playback tempo Press the VALUE buttons to adjust the playback tempo.
-
Page 46: Usb Menu
USB Menu USB Menu USB Menu The USB Menu contains functions to load/save registration memories and recorder songs from/to a USB memory device. This menu also allows files to be renamed and deleted, and for the USB memory device to be formatted. U SB Menu functions Page no. -
Page 47: Load Registration
Load Registration The Load Registration function is used to load registration memories stored on a USB memory device into the instrument’s internal memory. There are two types of registration file: “Single” and “All”. R egistration file types Registration type Description File extension Single... -
Page 48: Save Internal Song
Save Internal Song The Save Internal Song function is used to save recorder songs stored in the instrument’s internal memory to a USB memory device in the ES520’s native song format. 1. Selecting the Save Int. Song function Connect a USB memory device, then press the USB button to enter the USB Menu. -
Page 49: Save Registration
Save Registration The Save Registration function is used to save registration memories stored in the instrument to a USB memory device. There are two types of registration file: “Single” and “All”. R egistration file types Registration type Description File extension Single A file containing a single registration memory. -
Page 50: Rename File
Rename File The Rename File function is used to rename song (KSO) files and registration (KM6/KM3) files recorded with the ES520 digital piano and now stored on a USB memory device. 1. Selecting the Rename File function Connect a USB memory device, then press the USB button to enter the USB Menu. -
Page 51: Delete File
Delete File The Delete File function is used to delete song (KSO) files and registration (KM6/KM3) files recorded with the ES520 digital piano and now stored on a USB memory device. Once a file has been deleted from the USB device it cannot be recovered. -
Page 52: Settings Menus
Settings Menus Settings Menus The Settings menus contain a variety of options to adjust the ES520’s operation and sound. Settings are grouped by category, providing convenient access to relevant controls. Once adjusted, settings can be stored to one of the instrument’s 28 registration memories, or selected as the default power-on settings with the Startup Setting function. -
Page 53: Basic Settings
Basic Settings The Basic settings menu contains settings to adjust the pitch, tuning, and general sound of the instrument. This menu also allows favourite panel settings to be stored, or reset back to the original factory configuration. * Any changes made by this operation will remain until the power is turned off. Preferred settings can be stored in a Registration memory or Startup Setting. -
Page 54: Tone Control
Tone Control The Tone Control function allows the overall sound character of the ES520 digital piano to be adjusted to ensure the best sound quality within the area that the instrument is located. There are six different preset Tone Control types available, with an additional “User”... -
Page 55: User Eq
User EQ The User EQ option allows finer control over the instrument’s sound character, allowing the volume of four frequency bands to be adjusted individually. It is also possible to adjust the frequency range of the mid-low and mid-high frequency bands. ... -
Page 56: Tuning
Basic Settings Tuning The Tuning setting allows the overall pitch of the ES520 digital piano to be raised and lowered in 0.5 Hz steps, and may therefore prove useful when playing with other pitched instruments. Adjusting the Tuning setting... -
Page 57: Four Hands
The Four Hands setting provides an alternative method to enabling the Four Hands Mode function, and may prove useful in teaching environments or situations where this function should be enabled automatically every time the ES520 digital piano is turned on. * Please refer to page 22 for information about the Four Hands Mode function. -
Page 58: Startup Setting
Startup Setting The Startup Setting function allows preferred panel settings to be stored in the instrument’s memory, and automatically recalled as the default settings every time the ES520 digital piano is turned on. S ettings stored in Startup Setting memory... -
Page 59: Factory Reset
Factory Reset The Factory Reset function clears any settings stored using the Startup Setting function above, restoring the ES520 digital piano back to its factory default settings. * This function does not clear registration memories or recorder songs stored in internal memory. -
Page 60: Auto Display Off
The Auto Display Off setting can be used to automatically turn off the display when the control panel is not being operated. * To prevent the ES520 digital piano’s display from “burn in” as a result of showing the same screen for an extended period of time, this setting is enabled by default. -
Page 61: Auto Power Off
Auto Power Off The Auto Power Off setting can be used to automatically turn off the instrument after a specified period of inactivity. This function may be enabled by default, depending on the market location. Auto Power Off settings Auto Power Off Description The Auto Power Off function is disabled. -
Page 62: Virtual Technician
The Virtual Technician settings of the ES520 digital piano simulate these refinements digitally, allowing performers to shape various aspects of the instrument’s character to suit their personal preferences. - Page 63 E ntering the Virtual Technician menu While the normal playing mode screen is shown in the display: Press the MENU buttons to select the Virtual Technician menu. Press the VALUE button to enter the Virtual Technician menu. The first page of the Virtual Technician menu will be shown in the display S electing the desired setting After entering the Virtual Technician menu:...
-
Page 64: Touch Curve
Touch Curve As with an acoustic piano, the ES520 digital piano produces a louder sound when the keys are struck with force, and a softer sound when the keys are played gently. The volume and tonal character change in relation to the strength and speed of playing –... -
Page 65: Voicing
The Voicing setting recreates various hammer properties, allowing the overall tonal character of the ES520 digital piano to be adjusted. There are six different preset voicing settings available (applied uniformly to all keys), with an additional “User”... -
Page 66: User Voicing
Virtual Technician Virtual Technician User Voicing The User Voicing function allows each of the 88 keys to be voiced individually. Selecting the note, adjusting the user voicing value After selecting the Voicing setting (page 65): Press the VALUE buttons to select the User Voicing memory. -
Page 67: Damper Resonance
The ES520 digital piano reproduces this sound, with the Damper Noise setting allowing the volume of this sound to be adjusted. The speed at which the damper pedal is pressed will also influence the prominence of the damper noise, with fast pedalling creating a very pronounced sound. -
Page 68: String Resonance
String Resonance refers to a phenomenon that exists in acoustic pianos whereby the strings of held notes resonate “sympathetically” with other notes of the same harmonic overtone series. The ES520 digital piano recreates this phenomenon, with the String Resonance setting allowing the volume of this resonance to be adjusted. -
Page 69: Key-Off Effect
(e.g. legato playing). The ES520 digital piano reproduces both characteristics, with the Key-off Effect setting allowing the volume of the key-off sound to be adjusted, and the key-off release speed detection to be turned on or off. -
Page 70: Fall-Back Noise
When playing an acoustic piano, it is often possible to hear the faint sound of the keyboard action returning (i.e. “falling back”) to the neutral position after a key is released. The ES520 digital piano reproduces this sound, with the Fall-back Noise setting allowing the volume of this sound to be adjusted. -
Page 71: Hammer Delay
When playing pianissimo passages using an acoustic piano, there may be a perceived delay between a key being pressed and the hammer striking the strings. If desired, the ES520 digital piano can recreate this delay, with the Hammer Delay setting allowing the delay length to be adjusted. -
Page 72: Topboard
The ES520 digital piano attempts to simulate these characteristics, with four different topboard positions. * This Virtual Technician setting will affect acoustic piano sounds only. -
Page 73: Decay Time
When playing an acoustic grand piano, the length of the instrument influences the speed at which held notes decay, with longer grand pianos (i.e. longer strings) characterised by longer decay times. The ES520 digital piano attempts to simulate this characteristic, with the Decay Time setting allowing the length of decay while keys are pressed to be adjusted. -
Page 74: Temperament
2-12 Temperament The Temperament setting allows the tuning system used by the ES520 digital piano to be changed from the modern “Equal Temperament” standard to one of the various temperaments popularised during the Renaissance and Baroque periods. It is also possible to create customised temperaments using the User Temperaments function. -
Page 75: Stretch Tuning
Stretch Tuning The Stretch Tuning setting specifies whether stretch tuning should be applied for acoustic piano sounds only, all sounds, or disabled entirely. Stretch tuning is a piano-specific tuning method used by acoustic piano technicians in which the lower octaves are tuned slightly flatter and the upper octaves are tuned slightly sharper to match the natural harmonics of an acoustic piano. -
Page 76: Stretch Curve
Virtual Technician Virtual Technician Stretch Curve The Stretch Curve setting specifies the degree of stretch tuning to be applied to the sound. It is also possible to create custom tuning methods using one of the four User Tuning types. * This setting is only effective when Stretch Tuning is set to On/Piano Only, and Temperament is set to Equal Temperament. ... -
Page 77: User Temperament
User Temperament The User Temperament setting allows custom temperaments to be created. * This setting is only available when User Temperament is selected. Selecting the note, adjusting the user temperament value After entering the Virtual Technician menu (page 63): Press the MENU button. -
Page 78: Half-Pedal Adjust
Virtual Technician 2-14 Half-Pedal Adjust The Half-Pedal Adjust setting allows the point at which the damper/sustain pedal becomes effective (i.e. when the dampers of the piano begin to lift from the strings) to be adjusted. This setting may be useful for pianists that habitually rest their right foot on the damper/sustain pedal, but do not necessarily wish to sustain the sound. -
Page 79: Key Settings
Key Settings The Key Settings menu contains settings to adjust the instrument’s operation when using the Dual or Split playing modes. * Any changes made by this operation will remain until the power is turned off. Preferred settings can be stored in a Registration memory or Startup Setting. Please refer to page 37 and 58 for more information. K ey Settings Page no. -
Page 80: Lower Octave Shift
Key Settings Key Settings Lower Octave Shift The Lower Octave Shift setting allows the pitch of the lower section when using Split mode to be raised in octave steps. Changing the Lower Octave Shift value After entering the Key Settings menu (page 79): The Lower Octave Shift setting will be selected automatically. -
Page 81: Lower Pedal
Lower Pedal The Lower Pedal setting determines whether or not the sustain pedal will affect (i.e. sustain) the lower sound when using Split mode. L ower Pedal settings Lower Pedal Description In Split mode, lower section sounds will not be sustained when the sustain pedal is pressed. (default) In Split mode, lower section sounds will be sustained when the sustain pedal is pressed. -
Page 82: Layer Octave Shift
Key Settings Key Settings Layer Octave Shift The Layer Octave Shift setting allows the pitch of the layered sound when using Dual mode to be raised or lowered in octave steps. Changing the Layer Octave Shift value After entering the Key Settings menu (page 79): Press the MENU buttons to select the Layer Octave Shift setting. -
Page 83: Layer Dynamics
Layer Dynamics When using Dual mode, sometimes simply adjusting the volume balance between the two layered sounds is not enough to create the desired sound character, especially if both sounds are very dynamic. Layering two equally dynamic sounds can prove difficult to control and play comfortably. The Layer Dynamics Function allows the dynamic sensitivity of the layered sound to be reduced, in order to improve the blend between the two combined sounds. -
Page 84: Phones Settings
Phones Settings Phones Settings The Phones Settings menu contains settings to select the SHS (Spatial Headphone Sound) mode, the type of headphones to be used, and the output volume of the connected headphones. * Any changes made by this operation will remain until the power is turned off. Preferred settings can be stored in a Registration memory or Startup Setting. -
Page 85: Shs Mode
SHS Mode Spatial Headphone Sound (SHS) is a special feature of the ES520 digital piano that enhances the depth and realism of the acoustic piano sound when listening through headphones or earphones. The SHS Mode setting allows the player to select from one of three different acoustic presets that adjust the spatial positioning of the sound, while also helping to reduce auditory fatigue when using earphones or headphones for extended periods of time. -
Page 86: Phones Type
Phones Settings Phones Type The Phones Type setting optimises the sound of the ES520 digital piano when listening through different types of headphones or earphones. * This setting does not affect the speaker or Line Out sound. Phones Type setting... -
Page 87: Midi Settings
MIDI Settings The MIDI Settings menu contains various functions and settings related to MIDI. * For information regarding MIDI functions and settings, please download the supplementary PDF manual from the Kawai Global website: https://www.kawai-global.com/support/manual Bluetooth Settings The Bluetooth Settings menu contains settings to enable/disable Bluetooth MIDI and Bluetooth Audio, and adjust the volume of the Bluetooth Audio input. -
Page 88: Bluetooth Audio
After enabling the Bluetooth Audio function of the ES520 digital piano, enable Bluetooth communications on the smart device. After a few seconds “ES520 Audio” should appear in the smart device’s Bluetooth settings device list. Tap the “ES520 Audio” entry to connect the instrument to the smart device. -
Page 89: Bluetooth Audio Volume
Bluetooth Audio Volume The Bluetooth Audio Volume setting is used to increase or decrease the volume level of Bluetooth Audio playback. While it’s generally preferable to adjust the audio volume level on the smart device itself, this setting may still be useful in certain situations. -
Page 90: Bluetooth Midi
It should now be possible for MIDI apps to communicate wirelessly with the ES520 digital piano. * When the ES520 digital piano is connected to a smart device via Bluetooth MIDI, the USB MIDI and MIDI IN/OUT connectors will be disabled. -
Page 91: Connecting To Other Devices
If this occurs, turn the power off and then on again to reset the amplifier protection circuit. Do not connect the LINE IN STEREO and LINE OUT jacks of the ES520 digital piano together with the same cable. An... -
Page 92: Rear Connectors
These jacks are used to connect the ES520 digital piano to external MIDI devices, and also to a computer with a MIDI This USB port is used to connect the ES520 digital piano to a interface as an alternative to the “USB to Host” port. -
Page 93: Usb Midi (Usb To Host Connector)
Other company names and product names mentioned or referenced herein are registered trademarks or trademarks of respective owners. Kawai Musical Instruments Mfg. Co., Ltd. shall have no liability for any acts in violation of the Copyright Act made by any users of this product. -
Page 94: Information About Bluetooth
▮ About Bluetooth About Bluetooth ▮ About Bluetooth The Bluetooth® word mark and logos are registered trademarks owned by the Bluetooth SIG, Inc. and any use of such marks by Kawai ▮ About Bluetooth ▮ About Bluetooth ・The Bluetooth® word mark and logos are registered trademarks owned by the Bluetooth SIG, Inc. and any use of such marks by Kawai ・The Bluetooth®... -
Page 95: Troubleshooting
Troubleshooting The table below summarises issues that may be experienced with the ES520 digital piano, explaining the typical cause(s), and recommended solution(s). Issue Possible Cause and Solution Page no. Check that the AC power adaptor is firmly attached to the instrument, The instrument does not turn on. -
Page 96: Demo Song List
– Electric Bass 3 (*) – – Wood Bass Original Kawai W. Bass & Ride Original Kawai (*) PREMIER Sound Copyright©PREMIER Engineering Inc.2018 PREMIER SOUND FACTORY ** Kawai regret that sheet music for Kawai original demo songs is not available. -
Page 97: Eu Declaration Of Conformity
Pełny tekst deklaracji zgodności UE jest dostępny pod następującym adresem internetowym: DECLARAÇÃO UE DE CONFORMIDADE SIMPLIFICADA O(a) abaixo assinado(a) Kawai Europa GmbH declara que o presente tipo de equipamento de rádio [ ES520 ] está em conformidade com a Diretiva 2014/53/UE. Portuguese O texto integral da declaração de conformidade está... -
Page 98: Kawai Es520 Specifications
Kawai ES520 Specifications Kawai ES520 Specifications Keyboard Responsive Hammer Compact II (RHC II) action 88 weighted keys Sound Source Progressive Harmonic Imaging™ (PHI), 88-key piano sampling Internal Sounds 34 voices PIANO: 8 sounds, E.PIANO: 5 sounds, ORGAN: 5 sounds HARPSI/MALLETS: 4 sounds,... -
Page 99: Owner's Manual Conventions
Owner’s Manual Conventions This owner’s manual utilises a number of illustrative conventions in order to explain the ES520’s various functions. The examples below provide an overview of the button LED indicator states and press types, and the appearance of difference kinds of text. - Page 100 ES520 Owner’s Manual 3000003423 SP00000399 R101 OW1139E-S2004 Copyright © 2020 Kawai Musical Instruments Mfg. Co.,Ltd. All Rights Reserved. Printed in Indonesia...