
Related Manuals for Yard Machines 2- Cycle Gas Cultivator


Summary of Contents for Yard Machines 2- Cycle Gas Cultivator
- Page 1 Operator’s Manual 2-Cycle Gas Cultivator IMPORTANT: Read safety rules and instructions carefully before operating equipment. PRINTED IN U.S.A. PART NO. 769-00556 (1/03)
-
Page 2: Table Of Contents
Please have your unit’s model number and serial number ready when you call. You will be asked to enter the serial number in order to process your call. This information is explained above. Visit our web site at www.yardmachines.com for more information about our quality Yard Machines products, customer service, parts, tips, literature and more. -
Page 3: Rules For Safe Operation
SPARK ARRESTOR NOTE: For users on U.S. Forest Land and in the states of California, Maine, Oregon and Washington. All U.S. Forest Land and the state of California (Public Resources Codes 4442 and 4443), Oregon and Washington require, by law that certain internal combustion engines operated on forest brush and/or grass-covered areas be equipped with a spark arrestor, maintained in effective working order, or the engine be constructed, equipped and maintained for the... - Page 4 • Be aware of risk of injury to the head, hands and feet. • Squeeze the throttle control and check that it returns automatically to the idle position. Make all adjustments or repairs before using the unit. Safety Warnings for Gas Units WARNING: Gasoline is highly flammable, and its vapors can explode if ignited.
- Page 5 SECTION 1B:SAFETY & INTERNATIONAL SYMBOLS This operator's manual describes safety and international symbols and pictographs that may appear on this product. Read the operator's manual for complete safety, assembly, operating and maintenance and repair information. SYMBOL MEANING • SAFETY ALERT SYMBOL Indicates danger, warning or caution.
-
Page 6: Know Your Unit
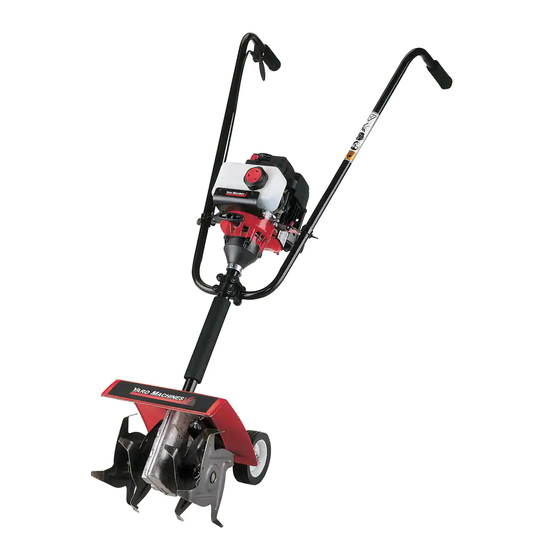
SECTION 2: KNOW YOUR UNIT Applications On/Off Stop START/ON (I) Control • Cultivating sod and light to medium soil • Cultivating in garden areas, around trees, etc. Handgrip Handgrip Fuel Cap Handlebar Throttle STOP/OFF (O) Control Throttle Starter Rope Grip Cable Mounting Bracket and... -
Page 7: Assembly Instructions
SECTION 3: ASSEMBLY INSTRUCTIONS Your yard and garden cultivator has been completely assembled except for the handlebar, throttle cable and wheel bracket assembly. A large phillips screwdriver is needed for assembly. Removing Unit From Carton 1. Carefully unpack the contents and insure that nothing is damaged. - Page 8 SECTION 3: ASSEMBLY INSTRUCTIONS Installing The Handlebar 1. Position the mounting brackets by rotating them until the foot on the bracket rests against the engine. See Figure 4. 2. Place the handlebar between the bottom and middle clamp pieces. See Figure 5. 3.
- Page 9 SECTION 3: ASSEMBLY INSTRUCTIONS Throttle Cable Assembly 1. Wrap the throttle wire once around the handlebar. See Figure 9. 2. Depress the throttle trigger and locate hole for the throttle wire. See Figure 10. 3. With the throttle trigger depressed, place the barrel end of the throttle wire inside the hole of the trigger.
-
Page 10: Oil And Fuel Information
SECTION 4: OIL AND FUEL INFORMATION Oil and Fuel Mixing Instructions Old and/or improperly mixed fuel is the main reason for improper unit performance. Be sure to use fresh, clean unleaded fuel. Follow the instructions carefully for the proper fuel/oil mixture. Definition of Blended Fuels Today's fuels are often a blend of gasoline and oxygenates such as ethanol, methanol, or MTBE (ether). -
Page 11: Starting/Stopping Instructions
SECTION 5: STARTING/STOPPING INSTRUCTIONS Starting Instructions WARNING: Operate this unit only in a well- ventilated outdoor area. Carbon monoxide exhaust fumes can be lethal in a confined area. WARNING: Avoid accidental starting. Make sure you are in the starting position when pulling the starter rope. -
Page 12: Operating Instructions
SECTION 6: OPERATING INSTRUCTIONS Using Your Cultivator WARNING: Dress properly to reduce the risk of injury when operating this unit. Do not wear loose clothing or jewelry. Wear eye and ear/hearing protection. Wear heavy, long pants, boots and gloves. Do not wear short pants, sandals or go barefoot. -
Page 13: Maintenance And Repair Instructions
SECTION 7: MAINTENANCE AND REPAIR INSTRUCTIONS Maintenance Schedule Perform these required maintenance procedures at the frequency stated in the table. These procedures should also be a part of any seasonal tune-up. NOTE: Some maintenance procedures may require special tools or skills. If you are unsure about these procedures take your unit to any non-road engine repair establishment, individual or authorized service dealer. - Page 14 SECTION 7: MAINTENANCE AND REPAIR INSTRUCTIONS Air Filter Maintenance Removing the Air Filter/Muffler Cover WARNING: To avoid serious personal injury, always turn your unit off and allow it to cool before you clean or service it. 1. Place the choke lever in the PARTIAL choke position (B). NOTE: The choke lever must be in the PARTIAL choke position (B) to remove the air filter/ muffler cover.
- Page 15 SECTION 7: MAINTENANCE AND REPAIR INSTRUCTIONS Spark Arrestor Maintenance 1. Remove air filter/muffler cover. See Removing the Air Filter/Muffler Cover. 2. Locate muffler front and the two (2) bolts securing it to the engine. See Figure 27. Remove the two (2) bolts using a flatblade screwdriver or 5/16-inch socket or nut driver.
-
Page 16: Carburetor Adjustment
SECTION 7: MAINTENANCE AND REPAIR INSTRUCTIONS Carburetor Adjustment The idle speed of the engine is adjustable through the air filter/muffler cover. See Figure 29. NOTE: Careless adjustments can seriously damage your unit. An authorized service dealer should make carburetor adjustments. Check Fuel Mixture Old and/or improperly mixed fuel is usually the reason for improper unit performance. -
Page 17: Cleaning And Storage
SECTION 7: MAINTENANCE AND REPAIR INSTRUCTIONS Cleaning WARNING: To avoid serious personal injury, always turn your unit off and allow it to cool before you clean or service it. Use a small brush to clean off the outside of the unit. Do not use strong detergents. -
Page 18: Troubleshooting
SECTION 8: TROUBLESHOOTING GUIDE Trouble Possible Cause(s) ENGINE WILL • On/Off control in the STOP position NOT START • Empty fuel tank • Primer bulb wasn’t pressed enough • Engine is flooded • Old or improperly mixed fuel • Fouled spark plug •... -
Page 19: Specifications
SECTION 9: SPECIFICATIONS Engine* Engine Type... Air-Cooled, 2-Cycle Displacement ... 31 cc Idle Speed RPM ... 2,800 - 3,600 rpm Operating RPM... 7,700+ rpm Clutch Type ... Centrifugal Ignition Type... Electronic On/Off Stop Control ... Toggle Switch Spark Plug Gap ... 0.020 inch (0.5 mm) Lubrication ... - Page 20 NOTES...
- Page 21 • Repair or replacement of warranted part will be performed at no charge to the owner at an Authorized Yard Machines Service Center. For the nearest location please contact Yard Machines at: 1-800-345-8746.
-
Page 22: Warranty
MANUFACTURER’S LIMITED WARRANTY FOR: The limited warranty set forth below is given by MTD LLC (“MTD”) with respect to new merchandise purchased and used in the United States, its possessions and territories. MTD warrants this product against defects in material and workmanship for a period of two (2) years commencing on the date of original purchase and will, at its option, repair or replace, free of charge, any part found to be defective in... - Page 23 Manuel de l'utilisateur Cultivateur de Jardin à 2-temps IMPORTANT : lisez soigneusement les règles et consignes de sécurité avant de faire fonctionner cet équipement. IMPRIME AUX ÉTATS-UNIS. PARTIE NUMÉRO. 769-00556 (1/03)
- Page 24 Contenu ............Page Consignes de sécurité...
-
Page 25: Consignes De Sécurité
PARE-ÉTINCELLES REMARQUE à l'intention des utilisateurs opérant dans les terres forestières des États-Unis et dans les états de Californie, du Maine, de l'Orégon et de Washington. Toutes les terres forestières des États-Unis et de l'état de Californie (Codes sur les ressources publiques 4442 et 4443), de l'Orégon et de Washington exigent de par la loi que certains moteurs à... - Page 26 AVERTISSEMENTS DE SÉCURITÉ CONCERNANT LES CULTIVATEURS À GAZ • Ne stockez le carburant que dans des contenants spécialement conçus et homologués pour le stockage de ce type de matières. • Arrêtez toujours le moteur et laissez-le refroidir avant de remplir le réservoir de carburant. N'enlevez jamais le bouchon du réservoir et n'ajoutez jamais de carburant pendant que le moteur est chaud.
- Page 27 SECTION 1A: SYMBOLES DE SÉCURITÉ ET INTERNATIONAUX Ce manuel de l'utilisateur décrit les symboles et pictogrammes de sécurité et internationaux pouvant apparaître sur ce produit. Consultez le manuel de l'utilisateur pour les informations concernant la sécurité, le montage, le fonctionnement, l'entretien et les réparations.
- Page 28 SECTION 2 : FAMILIARISEZ-VOUS AVEC L’APPAREIL Usage Commande Marche/Arrêt DÉMARRAGE/ALLUMAGE (I) Cet appareil sert à travailler le sol avant de le gazonner Stop ainsi que des sols à texture légère ou moyenne. Il peut aussi être utilisé pour cultiver dans les jardins, autour des arbres, etc.
-
Page 29: Instructions De Montage
SECTION 3: INSTRUCTIONS DE MONTAGE MONTAGE DE L’APPAREIL Votre cultivateur de jardin est entièrement monté sauf le guidon, le câble de la manette des gaz et le support de roue. Vous aurez besoin d'un grand tournevis à embout cruciforme pour le montage. Déballage 1. - Page 30 SECTION 3: INSTRUCTIONS DE MONTAGE INSTALLER LE GUIDON 1. Placez le guidon entre les brides inférieure et médiane (Fig. 4). 2. Tenez les trois pièces ensemble, puis positionnez le guidon sous le tube de l'arbre en l’alignant avec la bride supérieure. REMARQUE : Les trous de bride ne sont alignés que si l’assemblage est correct.
- Page 31 SECTION 3: INSTRUCTIONS DE MONTAGE ENSEMBLE DU CÂBLE DE LA MANETTE DES GAZ 1. Enroulez le câble de la manette des gaz une fois autour des poignées (Fig. 8). 2. Appuyez sur la manette et repérez le trou du câble (Fig.
-
Page 32: Informations Sur L'huile Et Le Carburant
SECTION 4 : INFORMATIONS SUR L'HUILE ET LE CARBURANT MÉLANGE D'HUILE ET DE CARBURANT En général, si l'appareil ne fonctionne pas correctement, c'est que le carburant est vieux ou mal mélangé. Prenez soin d'utiliser de l’essence sans plomb fraîche et propre. Suivez à... - Page 33 SECTION 5: INSTRUCTIONS DE DÉMARRAGE ET ARRÊT INSTRUCTIONS DE DÉMARRAGE AVERTISSEMENT : faites marcher l’appareil dans un lieu extérieur bien aéré uniquement. Les fumées d'échappement d'oxyde de carbone peuvent être fatales dans un lieu confiné. AVERTISSEMENT : évitez tout démarrage accidentel.
- Page 34 SECTION 6: MODE D’EMPLO CONSEILS D'UTILISATION AVERTISSEMENT : Portez des vêtements appropriés pour diminuer les risques de blessures durant l'utilisation de l'appareil. 1. Déplacez le cultivateur vers le lieu de travail avant de démarrer le moteur. Vous pouvez le transporter sur ses roues.
- Page 35 SECTION 7: INSTRUCTIONS D’ENTRETIEN ET RÉPARATIONS REMARQUE : certaines procédures d'entretien nécessitent des compétences ou des outils particuliers. Si vous n'êtes pas sûr de pouvoir les entreprendre, emmenez votre appareil dans un atelier, chez un technicien ou un concessionnaire agréé spécialisé dans les réparations de moteurs d’outils mécaniques de plein air.
- Page 36 SECTION 7: INSTRUCTIONS D’ENTRETIEN ET RÉPARATIONS ENTRETIEN DU FILTRE À AIR Retrait du couvercle du filtre à air/silencieux AVERTISSEMENT : pour éviter des blessures graves, éteignez toujours l'appareil et laissez-le refroidir avant tout nettoyage ou entretien. 1. Mettez le levier d'étrangleur en position d'étranglement PARTIEL (B).
- Page 37 SECTION 7: INSTRUCTIONS D’ENTRETIEN ET RÉPARATIONS ENTRETIEN DU PARE-ÉTINCELLES 1. Retirez le couvercle du filtre à air/silencieux. Voir Retrait du couvercle du filtre à air/silencieux. 2. Repérez le devant du silencieux et les deux (2) boulons qui le retiennent au moteur (Fig. 26). Retirez les deux (2) boulons à...
-
Page 38: Instructions De Démarrage Et D'arrêt
SECTION 7: INSTRUCTIONS D’ENTRETIEN ET RÉPARATIONS RÉGLAGE DU CARBURATEUR Le régime ralenti du moteur est réglable par le couvercle du filtre à air/silencieux (Fig. 28). REMARQUE : des réglages non soigneux peuvent endommager sérieusement l'appareil. Les réglages de carburateur doivent être faits par un concessionnaire agréé. - Page 39 SECTION 7: INSTRUCTIONS D’ENTRETIEN ET RÉPARATIONS NETTOYAGE DE L’APPAREIL AVERTISSEMENT : Pour éviter des blessures graves, éteignez toujours l’appareil et laissez-le refroidir avant tout nettoyage ou entretien. • Nettoyez les évents ou l’extérieur de l’appareil avec une petite brosse. • N'employez pas de détergents concentrés ou de nettoyants à...
-
Page 40: Depannage
SECTION 8 : GUIDE DE DÉPANNAGE Problème Causes possibles LE MOTEUR • La commande Marche/Arrêt Stop est en REFUSE DE position STOP DÉMARRER • Réservoir de carburant vide • La poire d'amorçage n'a pas été pressée assez fort • Moteur noyé •... -
Page 41: Caracteristiques
SECTION 9: CARACTERISTIQUES Moteur* Type de moteur... Refroidi par air, 2-temps Cylindrée ... 31 cc Régime ralenti ... 2.800-3.600 tr/min Régime de fonctionnement ... 7,700+ tr/min Type d'embrayage ... Centrifuge Type d'allumage... Électronique Commande Marche/Arrêt Stop ... Interrupteur à bascule Écartement de la bougie... - Page 42 REMARQUES...
- Page 43 • Toute réparation ou remplacement d'une pièce garantie devra être effectué sans aucun frais au compte du propriétaire par un centre de service Yard Machines agréé. Pour connaître le centre le plus proche de vous, veuillez contact Yard Machines à : 1- 800-345-8746.
-
Page 44: Garantie
GARANTIE LIMITÉE DU FABRICANT POUR: La garantie limitée énoncée ci-après est accordée par MTD LLC (« MTD ») et concerne les marchandises neuves achetées et utilisées aux États-Unis, ainsi que dans leurs possessions et territoires. MTD garantit ce produit contre tout vice de matière ou de façon pendant une période de deux (2) ans à... - Page 45 Manuel del Dueño/Operador Cultivador para Jardines de 2 Ciclos IMPORTANTE: Lea las instrucciones y normas de seguridad detenidamente antes de usar el equipo. IMPRESO EN LOS EE.UU No. de catálogo 769-00556 (1/03)
- Page 46 Visite nuestro sitio en el Internet en www.yardmachines.com para que obtenga mayor información sobre nuestros productos Yard Machines de calidad, servicio al consumidor, piezas, consejos útiles, documentación y más. ÍNDICE Copie el número del modelo/...
-
Page 47: Normas Para Una Operacion Segura
PARACHISPAS NOTA: Para los usuarios en tierras forestales de los EE.UU. y en los estados de California, Maine, Oregon y Washington. Todos los terrenos forestales de los EE.UU. y en el estado de California (Códigos de Recursos Públicos 4442 y 4443), Oregon y Washington requieren, por ley, que ciertos motores de combustión interna operadas en zonas boscosas y /o zonas cubiertas por pastizales, estén equipados con un parachispas, que sean mantenidos en... - Page 48 ADVERTENCIAS DE SEGURIDAD PARA GASOLINA ADVERTENCIA: La gasolina es muy inflamable y sus gases pueden explotar si se encienden. Tome las siguientes precauciones: • Guarde el combustible en envases que hayan sido diseñados y aprobados para el almacenamiento de dichos materiales. •...
- Page 49 SECCIÓN 1B: SÍMBOLOS DE SEGURIDAD E INTERNACIONALES Este manual del operador describe los símbolos y figuras de seguridad e internacionales que pueden aparecer en este producto. Lea el manual del operador para obtener información completa acerca de la seguridad, ensamble, operación y mantenimiento y reparación.
- Page 50 SECCIÓN 2: CONOZCA SU UNIDAD Applications Use esta unidad para cultivar tierra herbosa y tierra negra ligera a mediana. También se utiliza para cultivar áreas de jardines, alrededor de árboles, etc. Mango Mango Control del regulador Cable del regulador Soporte de montaje Control del Bombilla de...
- Page 51 SECCIÓN 3: INTRUCCIONES DE ENSAMBLE ENSAMBLE DE LA UNIDAD Su cultivador para jardines ha sido completamente ensamblado excepto por el manubrio, el cable del regulador y el ensamble del soporte de la rueda. Se necesita un destornillador Phillips grande para el ensamble.
- Page 52 SECCIÓN 3: INTRUCCIONES DE ENSAMBLE INSTALACION DEL MANUBRIO 1. Coloque el manubrio entre la abrazadera media y la abrazadera inferior (Fig. 4). 2. Mientras sostiene las tres piezas juntas, coloque el manubrio debajo del tubo del eje y alinee con la abrazadera superior.
- Page 53 SECCIÓN 3: INTRUCCIONES DE ENSAMBLE ENSAMBLE DEL CABLE DEL REGULADOR 1. Envuelva el cable del regulador una vez alrededor de las barras del manubrio (Fig. 8). 2. Oprima el gatillo del regulador y localice el orificio para el cable del regulador (Fig. 9). 3.
- Page 54 SECCIÓN 4: INFORMACION DEL ACEITE Y DEL COMBUSIBLE INSTRUCCIONES PARA MEZCLAR EL ACEITE Y EL COMBUSTIBLE El combustible viejo o mal mezclado son los motivos principales del mal funcionamiento de la unidad. Asegúrese de usar combustible nuevo, limpio y sin plomo.
- Page 55 SECCIÓN 5: INSTRUCCIONES DE ARRANQUE Y APAGADO INSTRUCCIONES DE ARRANQUE ADVERTENCIA: Use esta unidad sólo en un área exterior bien ventilada. Los gases de escape de monóxido de carbono pueden ser letales en un área cerrada. ADVERTENCIA: Evite los arranques accidentales.
- Page 56 SECCIÓN 6: INSTRUCCIONES DE OPERACIÓN CONSEJOS PARA LA OPERACION ADVERTENCIA: Vista en forma adecuada para reducir el riesgo de lesiones cuando opere esta unidad. No use ropa holgada ni alhajas. Use protección ocular y auditiva. 1. Transporte el cultivador hacia el área de trabajo antes de arrancar el motor.
- Page 57 SECCIÓN 7: INSTRUCCIONES DE MANTENIMIENTO Y REPARACIÓN NOTA: Algunos procedimientos de mantenimiento pueden requerir el uso de herramientas o habilidades especiales. Si no está seguro acerca de estos procedimientos, lleve su unidad a un establecimiento de reparación, persona o distribuidor de servicio autorizado que arregle motores para uso fuera de la carretera.
- Page 58 SECCIÓN 7: INSTRUCCIONES DE MANTENIMIENTO Y REPARACIÓN MANTENIMIENTO DEL FILTRO DE AIRE Remoción de la cubierta del silenciador / filtro de aire ADVERTENCIA: Para evitar graves lesiones personales, apague siempre su recortador y espere que se enfríe antes de limpiarlo o realizar todo tipo de mantenimiento.
- Page 59 SECCIÓN 7: INSTRUCCIONES DE MANTENIMIENTO Y REPARACIÓN ajústelos. No los ajuste demasiado. MANTENIMIENTO DEL PARACHISPAS 1. Quite el filtro de aire / tapa del silenciador. Ver Remoción de la Tapa del Filtro / Silenciador. 2. Ubique el frente del silenciador y los dos (2) pernos que lo sujetan al motor (Fig.
-
Page 60: Instrucciones De Arranque Y Apagado
SECCIÓN 7: INSTRUCCIONES DE MANTENIMIENTO Y REPARACIÓN AJUSTE DEL CARBURADOR La velocidad lenta del motor puede ser ajustada por la cubierta del silenciador / filtro de aire (Fig. 28). NOTA: Los ajustes realizados sin cuidado pueden dañar seriamente su unidad. Los ajustes del carburador deben ser realizados por un proveedor de servicio autorizado. - Page 61 SECCIÓN 7: INSTRUCCIONES DE MANTENIMIENTO Y REPARACIÓN LIMPIEZA ADVERTENCIA: Para evitar graves lesiones personales, apague siempre su recortador y espere que se enfríe antes de limpiarlo o realizar cualquier tipo de mantenimiento. Use un cepillo pequeño para limpiar la parte exterior de la unidad.
- Page 62 SECCIÓN 8: GUÍA PARA SOLUCIÓN DE DESPERFECTOS Problema Causas posibles EL MOTOR NO • El control de encendido/apagado está en ARRANCA la posición apagado (OFF) • El tanque de combustible está vacío • La bombilla de cebado no fue oprimida lo suficiente •...
-
Page 63: Especificaciones
SECCIÓN 9: ESPECIFICACIONES Motor* Tipo de motor... Enfriado por aire, de 2 ciclos Desplazamiento ... 31 cm (1,9 pulg R.P.M. de velocidad mínima ... 2.800 - 3.600 r.p.m. R.P.M. de operación ... 7.700+ r.p.m. Tipo de embrague ... Centrífugo Tipo de encendido ... Electrónico Control de encendido y apagado...Interruptor de palanca acodada Separación de la bujía de encendido... - Page 64 Yard Machines recomienda que conserve todos los comprobantes que cubren el mantenimiento de su pequeño motor para uso fuera de la carretera, pero Yard Machines no puede negar garantía exclusivamente por la falta de comprobantes o por que usted no haya realizado todos los mantenimientos programados.
- Page 65 NOTAS...
-
Page 66: Parts List
791-180317 Fuel Tank Guard Assembly 791-181079 Pull Handle 791-613103 Rope 791-181912 Housing Screw Item ENGINE PARTS 2-Cycle Yard Machines Cultivator PPN 21C-120R000 Part No. Description 791-182776 Starter Housing Assembly (includes 27-30, 32-34 & 40) 791-182368 Clutch Washer 791-182369 Clutch Rotor Assembly... - Page 67 PARTS LIST CULTIVATOR PARTS Yard Machines Cultivator PPN 21C-120R000 Item Part No. Part Description 791-181573 Throttle Trigger and Cable Assembly 791-180942 Handle Bar w/Clamp Assemblies (includes 3-5) 791-612831 Grip 791-612021 Tube Closure 791-181503 Clamp Assembly 791-147501 Engine Bracket Mounting Hardware 791-181574 Engine Mount Bracket, R.H.
-
Page 68: Garantía
GARANTÍA LIMITADA DEL FABRICANTE PARA: La garantía limitada establecida a continuación es dada por MTD LLC (“MTD”) con respecto a mercancía nueva que sea comprada y usada en los Estados Unidos, sus posesiones y territorios. MTD garantiza este producto contra defectos en el material y la mano de obra durante un período de dos (2) años, a partir de la fecha de compra original y a su entera opción, arreglará...