Table of Contents
Advertisement
1
2
3
DISC
DISC
DISC
3–DISC CD CHANGER
STANDBY
STANDBY
/ON
TIMER
INPUT
PRESET/TUNING/BAND
A/B/C/D/E
/
DOWN
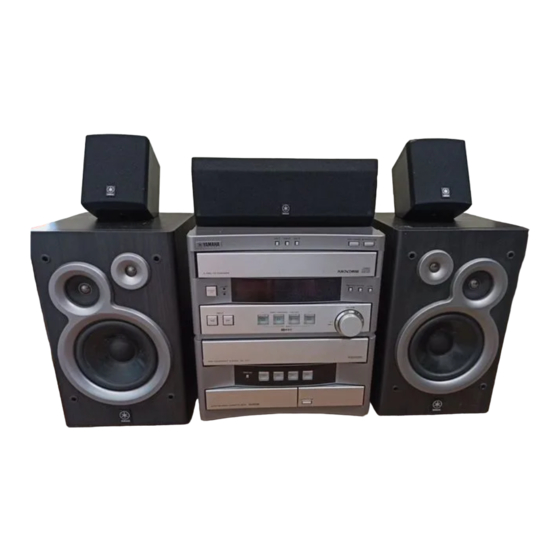
MINI COMPONENT SYSTEM GX–707
DIRECTION
OPEN/CLOSE
AUTO REVERSE CASSETTE DECK
DOLBY B NR
DISC CHANGE
OPEN/CLOSE
DIGITAL AUDIO
PROGRAM
B.BOOST
MUSIC
VOLUME
UP
DOLBY SURROUND
P R O • L O G I C
UCA
Advertisement
Table of Contents

Related Manuals for Yamaha GX-707


Summary of Contents for Yamaha GX-707
- Page 1 DISC DISC DISC DISC CHANGE OPEN/CLOSE DIGITAL AUDIO 3–DISC CD CHANGER STANDBY PROGRAM B.BOOST MUSIC STANDBY TIMER VOLUME INPUT PRESET/TUNING/BAND A/B/C/D/E DOWN DOLBY SURROUND MINI COMPONENT SYSTEM GX–707 P R O • L O G I C DIRECTION OPEN/CLOSE AUTO REVERSE CASSETTE DECK DOLBY B NR...
-
Page 2: Safety Instructions
CAUTION RISK OF ELECTRIC SHOCK DO NOT OPEN CAUTION: TO REDUCE THE RISK OF ELECTRIC SHOCK, DO NOT REMOVE COVER (OR BACK). NO USER-SERVICEABLE PARTS INSIDE. REFER SERVICING TO QUALIFIED SERVICE PERSONNEL. IMPORTANT Please record the serial number of this system in the space below. - Page 3 FCC INFORMATION (for US customers only) Since hearing damage from loud sounds is often undetectable until it is too late, YAMAHA and the Electronic Industries Association’s Consumer Electronics Group recommend you to avoid prolonged exposure from excessive volume levels.
- Page 4 Unpacking After unpacking, check that the following parts are contained. Déballage Après le déballage, vérifier que les pièces suivantes sont incluses. Main unit 3–DISC CD CHANGER Appareil principal STANDBY MINI COMPONENT SYSTEM GX–707 AUTO REVERSE CASSETTE DECK Remote control Télécommande Batteries (size AA, UM/SUM-3, R6, HP-7) Piles (format AA, UM/SUM-3, R6, HP-7) Mounting brackets...
- Page 5 Setting this system DISC DISC DISC DISC CHANGE 3–DISC CD CHANGER STANDBY PROGRAM STANDBY TIMER VOLUME INPUT PRESET/TUNING/BAND A/B/C/D/E DOWN MINI COMPONENT SYSTEM GX–707 DIRECTION OPEN/CLOSE AUTO REVERSE CASSETTE DECK DOLBY B NR 20 cm 1 cm English Set this system by allowing enough spaces around and behind the main unit to assure good ventilation. Be sure not to place another unit or any object on top of the main unit to prevent the ventilation holes from being obstructed.
- Page 6 Front panel Panneau avant Front panel 3–DISC CD CHANGER STANDBY INPUT R, B Q, A PHONES AUTO REVERSE CASSETTE DECK DISC DISC DISC STANDBY TIMER PRESET/TUNING/BAND A/B/C/D/E BASS TREBLE REC/ AUTO/ MODE DOLBY NR PAUSE MANUAL TIMER DIRECTION DOLBY B NR DISC CHANGE OPEN/CLOSE DIGITAL AUDIO...
- Page 7 Amplifier/tuner Display Panneau d'affichage Remote control sensor Capteur de télécommande TIMER STANDBY [p. 13] B. BOOST [p. 32] PROGRAM [p. 35] PHONES [p. 33] CD player Lecteur de disque compact Disc tray Plateau de disque [p. 13] DISC (1, 2, 3) [p. 14] DISC CHANGE [p.
-
Page 8: Remote Control
Remote control POWER + I0 TUNER PRESET PRESET TIME PROG R.TIME EDIT DISC SKIP MODE DIRECTION TAPE REC/ PAUSE TEST CENTER/ — LEVEL REAR/ DELAY PROGRAM MUSIC SLEEP VOLUME Telecommande INPUT POWER + I0 TUNER PRESET PRESET TIME PROG R.TIME EDIT DISC SKIP MODE... -
Page 9: Table Of Contents
Amplifier/tuner Transmission window Fenêtre de transmission [p. 5] Numeric buttons Touches numériques [p. 22] A, B, C, D, E [p. 22] TEST [p. 11] CENTER/REAR/DELAY [p. 36] LEVEL (–/+) [p. 36] CD player Lecteur de disque compact Numeric buttons Touches numériques [p. - Page 10 Thank you for purchasing this YAMAHA product. We hope it will give you many years of trouble-free enjoyment. For the best performance, read this manual carefully. It will guide you in operating your YAMAHA product. Precautions ... 1 Features ... 4 Preparations and connections ...
-
Page 11: Transmission Window
Using this system with a higher voltage than specified is dangerous and may result in a fire or other types of accidents causing damage. YAMAHA will not be held responsible for any damage resulting from use of this system with a voltage other than specified. - Page 12 Precautions: Read this before operating your system This system is not disconnected from the AC power source as long as it is connected to the wall outlet, even if this system itself is turned off. This state is called the standby mode. In this state, this system is designed to consume a certain amount of power.
-
Page 13: Notes About Discs
Precautions: Read this before operating your system NOTES ABOUT DISCS To prevent a malfunction of this system: • Do not use any nonstandard shaped disc (heart etc.) available on the market because it might damage the system. • Do not use a disc with tape, seals, or paste on it. -
Page 14: Features
General • 5-Speaker Multi-Channel Audio System (Two Front, One Center and Two Paralleled Rear Speakers) • High Power Output Front L, R: 80W + 80W (6 ) RMS, 0.9% THD, 1 Center: 80W (6 ) RMS Output Power, 0.9% THD, 1 kHz Rear: 25W (6 ) RMS Output Power, 0.9% THD, 1 kHz... -
Page 15: Preparations And Connections
Preparations and connections Installing batteries in the remote control Remote control operation range DISC DISC DISC DISC CHANGE OPEN/CLOSE 3–DISC CD CHANGER DIGITAL AUDIO STANDBY PROGRAM B.BOOST MUSIC STANDBY TIMER VOLUME INPUT PRESET/TUNING/BAND A/B/C/D/E DOWN MINI COMPONENT SYSTEM GX–707 DOLBY SURROUND P R O •... -
Page 16: Setting Up The Speakers
Preparations and connections Setting up the speakers Center Front L Dialogue Rear L Center Front R (Subwoofer) Front L (TV set) Rear L TV set 4 channel 5 speaker configuration Front R This system employs a 5 speaker configuration: 2 front speakers, 2 rear paralleled speakers and a center speaker. - Page 17 60 mm Mounting the rear speakers Mount the rear speakers on a shelf, rack or on the floor, or hang them on the wall. To mount the rear speakers by using commercially available speaker stands The provided mounting bracket has 1 pair of screw holes (at an interval of 60 mm).
-
Page 18: Connections
When connecting a subwoofer to this system, connect the SUBWOOFER OUT terminal of this system to the INPUT terminal of the subwoofer. * Ordinary subwoofers, including the Yamaha Active Servo Processing Subwoofer System, are designed so that both the amplifier and subwoofer are contained in the same unit. -
Page 19: Connecting External Components
ANTENNA UNBAL. ANTENNA UNBAL. FREQUENCY STEP DIGITAL OUT OPTICAL ANTENNA UNBAL. FREQUENCY STEP DIGITAL OUT OPTICAL TV monitor SUBWOOFER VIDEO SIGNAL MONITOR LD/DVD player, etc. AUX/MD MD recorder, etc. Preparations and connections Antenna connection (1) Supplied FM antenna Connect the FM antenna wire to the corresponding terminal and direct it to the direction where the strongest signal can be received. -
Page 20: Setting The Clock
Preparations and connections Setting the clock DISC DISC DISC 3–DISC CD CHANGER STANDBY STANDBY TIMER PRESET/TUNING/BAND A/B/C/D/E INPUT BASS TREBLE REC/ AUTO/ PHONES MODE DOLBY NR PAUSE MANUAL MEMORY RANDOM TIMER TIME ADJ HOUR DIRECTION OPEN/CLOSE AUTO REVERSE CASSETTE DECK DOLBY B NR DISPLAY MEMORY RANDOM... -
Page 21: Speaker Balance Adjustment
Speaker balance adjustment You can adjust the sound output level balance between the front, center, and rear speakers using the built-in test tone generator. This is important for the best performance of the built-in Dolby Pro Logic surround decoder. You can adjust the sound output level of center and rear speakers from –21 to +10 and the balance of the sound output levels of the left and right front speakers from L–6 to R–6. -
Page 22: Cd Player Operation
Display information Each indicator mentioned with a number on pages 13–18 corresponds to the indicator with the same number on this page. TRACK 100 350 1K 3.5K 10K TOTAL REM MUSIC PROGRAM TRACK (track number) Time display Disc indicator The number on the top of this indicator shows the currently selected disc. -
Page 23: Basic Play
DISC (1, 2, 3) STANDBY indicator DISC DISC DISC DISC CHANGE DIGITAL AUDIO 3–DISC CD CHANGER STANDBY PROGRAM B.BOOST STANDBY TIMER VOLUME INPUT PRESET/TUNING/BAND A/B/C/D/E DOWN BASS TREBLE REC/ AUTO/ PHONES MODE DOLBY NR PAUSE MANUAL MEMORY RANDOM REPEAT TIME DISPLAY / (play/pause) (stop) -
Page 24: Numeric Buttons
CD player operation DISC (1, 2, 3) DISC DISC DISC PRESET/TUNING/BAND A/B/C/D/E DOWN REC/ AUTO/ DOLBY NR PAUSE MANUAL MEMORY RANDOM REPEAT TIME TIMER TIME ADJ HOUR Numeric buttons POWER + I0 TUNER PRESET PRESET DISC SKIP TIME PROG R.TIME EDIT DISC SKIP MODE... -
Page 25: To Play The Desired Track (Skip)
DISC (1, 2, 3) DISC CHANGE DISC DISC DISC DISC CHANGE OPEN/CLOSE DIGITAL AUDIO PROGRAM B.BOOST VOLUME PRESET/TUNING/BAND A/B/C/D/E DOWN TREBLE REC/ AUTO/ MODE DOLBY NR PAUSE MANUAL MEMORY RANDOM REPEAT TIME DISPLAY (Skip forward) (play/pause) (Search forward) (Skip backward) (Search backward) POWER + I0... -
Page 26: Program Play
CD player operation DISC DISC DISC OPEN/CLOSE DISC CHANGE DIGITAL AUDIO PROGRAM B.BOOST MUSIC VOLUME ET/TUNING/BAND A/B/C/D/E DOWN REC/ AUTO/ DOLBY NR PAUSE MANUAL MEMORY RANDOM REPEAT TIME DISPLAY TIMER TIME ADJ HOUR POWER + I0 TUNER PRESET PRESET TIME PROG R.TIME TIME... -
Page 27: Repeat Play
OPEN/CLOSE DISC CHANGE DIGITAL AUDIO PROGRAM B.BOOST MUSIC VOLUME DOWN REPEAT MEMORY RANDOM REPEAT TIME DISPLAY TIME ADJ HOUR /CLOSE CD player operation Repeat play All discs, a disc, a single track or a programmed sequence can be repeated continuously. Press REPEAT once or more to select the desired repeat play mode so that the S REP or F REP indicator (0) is illuminated. -
Page 28: Random Play
CD player operation DISC CHANGE OPEN/CLOSE DIGITAL AUDIO PROGRAM B.BOOST MUSIC VOLUME DOWN MEMORY RANDOM REPEAT TIME DISPLAY TIME ADJ HOUR DISC CHANGE OPEN/CLOSE DIGITAL AUDIO PROGRAM B.BOOST MUSIC VOLUME DOWN MEMORY RANDOM REPEAT TIME DISPLAY NUAL TIME ADJ HOUR POWER + I0 TUNER... -
Page 29: Tuning Operation
Display information Each indicator mentioned with a number on pages 20–22 corresponds to the indicator with the same number on this page. PRESET 100 350 1K 3.5K 10K MUSIC PROGRAM Preset station group and number indicator Multi-information display STEREO AUTO Tuning operation STEREO TUNER... -
Page 30: Tuner [P
Tuning operation DISC 3–DISC CD CHANGER STANDBY STANDBY TIMER INPUT PRESET/TUNING/BAND BASS TREBLE PHONES MODE DOLBY NR POWER + I0 TUNER PRESET PRESET TIME PROG R.TIME EDIT DISC SKIP MODE DIRECTION TAPE REC/ PAUSE TEST CENTER/ — LEVEL REAR/ DELAY PROGRAM MUSIC SLEEP... -
Page 31: Automatic Preset Tuning
DISC DISC DISC 3–DISC CD CHANGER STANDBY STANDBY TIMER PRESET/TUNING/BAND A/B/C/D/E INPUT BASS TREBLE REC/ AUTO/ PHONES MODE DOLBY NR PAUSE MANUAL TIMER POWER + I0 TUNER PRESET PRESET TIME PROG R.TIME EDIT DISC SKIP MODE DIRECTION TAPE REC/ PAUSE TEST CENTER/ —... -
Page 32: Manual Preset Tuning
Tuning operation DISC DISC 3–DISC CD CHANGER STANDBY STANDBY TIMER INPUT PRESET/TUNING/BAND BASS TREBLE PHONES MODE DOLBY NR POWER + I0 TUNER PRESET PRESET TIME PROG R.TIME EDIT DISC SKIP MODE DIRECTION TAPE REC/ PAUSE TEST CENTER/ — LEVEL REAR/ DELAY PROGRAM MUSIC SLEEP... -
Page 33: Playing Back A Tape
Playing back a tape Display information Each indicator mentioned with a number on pages 24–30 corresponds to the indicator with the same number on this page. 100 350 1K 3.5K 10K MUSIC PROGRAM Tape counter NR (DOLBY NR) Tape direction indicator General information Dolby B Type Noise Reduction Dolby noise reduction is an extremely effective method of... -
Page 34: Basic Operation
Playing back a tape 3–DISC CD CHANGER STANDBY STANDBY TIMER PRESET/TUNING/BAND A/B/C/D/E INPUT BASS TREBLE REC/ AUTO/ PHONES MODE DOLBY NR PAUSE MANUAL (stop) TIMER DIRECTION 3, 4 OPEN/CLOSE AUTO REVERSE CASSETTE DECK DOLBY B NR POWER + I0 TUNER PRESET PRESET TIME... -
Page 35: Winding The Tape
DISC DISC DISC DISC CHANGE OPEN/CLOSE DIGITAL AUDIO 3–DISC CD CHANGER STANDBY PROGRAM B.BOOST MUSIC STANDBY TIMER VOLUME INPUT PRESET/TUNING/BAND A/B/C/D/E DOWN BASS TREBLE REC/ AUTO/ PHONES MODE DOLBY NR PAUSE MANUAL MEMORY RANDOM REPEAT TIME DISPLAY TIMER TIME ADJ HOUR DIRECTION OPEN/CLOSE... -
Page 36: Recording
DISC DISC 3–DISC CD CHANGER STANDBY STANDBY TIMER INPUT PRESET/TUNING/BAND A/B/C/D/E BASS TREBLE REC/ PHONES MODE DOLBY NR PAUSE DIRECTION AUTO REVERSE CASSETTE DECK DOLBY B NR POWER + I0 TUNER PRESET PRESET TIME PROG R.TIME EDIT DISC SKIP MODE DIRECTION TAPE REC/ PAUSE... -
Page 37: To Stop Recording
DISC DISC DISC 3–DISC CD CHANGER STANDBY STANDBY TIMER INPUT PRESET/TUNING/BAND A/B/C/D/E DOWN BASS TREBLE REC/ AUTO/ PHONES MODE DOLBY NR PAUSE MANUAL MEMORY RANDOM REPEAT TIMER TIME ADJ HOUR DIRECTION OPEN/CLOSE AUTO REVERSE CASSETTE DECK DOLBY B NR REC/PAUSE Numeric buttons POWER + I0... -
Page 38: Recording From Cds Utilizing The Edit Function
DISC 3–DISC CD CHANGER STANDBY STANDBY TIMER INPUT PRESET/TUNING/BAND BASS TREBLE PHONES MODE DIRECTION AUTO REVERSE CASSETTE DECK DOLBY B NR Numeric buttons POWER + I0 TUNER PRESET PRESET TIME PROG R.TIME EDIT DISC SKIP MODE DIRECTION TAPE REC/ PAUSE TEST CENTER/ —... - Page 39 POWER + I0 TUNER PRESET PRESET TIME PROG R.TIME EDIT DISC SKIP MODE Auto-EDIT recording This recording automatically changes the order of tracks so that the unrecorded space of side A is minimized. Follow steps 1–5 on the previous page. Press PROG.
- Page 40 Recording STANDBY STANDBY TIMER PRESET/TUNING/BAND A/B/C/D/E INPUT BASS TREBLE REC/ AUTO/ PHONES MODE DOLBY NR PAUSE MANUAL MEMORY RANDOM TIMER TIME ADJ HOUR DIRECTION POWER + I0 TUNER PRESET PRESET TIME PROG R.TIME TIME EDIT DISC SKIP MODE DIRECTION TAPE REC/ PAUSE TEST CENTER/...
-
Page 41: Operating An External Unit Connected To This System
Operating an external unit connected to this system DISC DISC DISC DISC CHANGE 3–DISC CD CHANGER DIGITAL AUDIO STANDBY PROGRAM STANDBY TIMER VOLUME INPUT PRESET/TUNING/BAND A/B/C/D/E DOWN BASS TREBLE REC/ AUTO/ PHONES MODE DOLBY NR PAUSE MANUAL MEMORY RANDOM REPEAT TIME DISPLAY TIMER... -
Page 42: Various Sound Control
Various sound control BASS BOOST 100 350 1K 3.5K 10K MUSIC PROGRAM ROCK POPS PRO LOGIC HALL JAZZ 3 STEREO YMERSION Spectrum analyzer The spectrum of the input source which is divided into five bands will be indicated in real time. BASS BOOST 3–DISC CD CHANGER STANDBY... -
Page 43: Music [P
PHONES PHONES DISC DISC DISC DISC DISC DISC DISC CHANGE DISC CHANGE OPEN/CLOSE OPEN/CLOSE DIGITAL AUDIO DIGITAL AUDIO 3–DISC CD CHANGER 3–DISC CD CHANGER STANDBY STANDBY YMERSION PROGRAM B.BOOST B.BOOST MUSIC MUSIC STANDBY STANDBY TIMER TIMER VOLUME VOLUME PRESET/TUNING/BAND PRESET/TUNING/BAND A/B/C/D/E A/B/C/D/E INPUT... -
Page 44: Sound Field Processor
YMERSION YMERSION is Yamaha’s proprietary technology that enhances the spread of a normal stereo source play sound, creating three-dimensional acoustics using only two speakers. HALL This program presents you with an ambience of actual concert hall by adding effects as sonic reflections or reberverations that create sound environment of a hall. -
Page 45: Program [P
DISC CHANGE OPEN/CLOSE DIGITAL AUDIO PROGRAM B.BOOST PROGRAM VOLUME CENTER/REAR/DELAY TAPE REC/ PAUSE TEST CENTER/ LEVEL- / + — LEVEL REAR/ DELAY PROGRAM MUSIC PROGRAM SLEEP INPUT VOLUME Listening to the music with a sound field effect Play a source. Press PROGRAM repeatedly until the name of the desired program lights up on the sound field program indicator (5). - Page 46 Various sound control POWER + I0 TUNER PRESET PRESET TIME PROG R.TIME EDIT DISC SKIP MODE DIRECTION TAPE REC/ PAUSE TEST CENTER/ — LEVEL REAR/ DELAY LEVEL- /+ PROGRAM MUSIC SLEEP INPUT VOLUME If desired, you can adjust the sound output level of the center and/ or rear speakers even if the output level is already set in “Speaker balance adjustment”...
-
Page 47: Using The Built-In Timer
Using the built-in timer STANDBY/ON INPUT DISC DISC DISC DISC CHANGE OPEN/CLOSE 3–DISC CD CHANGER DIGITAL AUDIO STANDBY PROGRAM B.BOOST STANDBY TIMER VOLUME INPUT PRESET/TUNING/BAND A/B/C/D/E DOWN BASS TREBLE REC/ AUTO/ PHONES MODE DOLBY NR PAUSE MANUAL MEMORY RANDOM REPEAT TIME DISPLAY TIMER... -
Page 48: Timer Recording
Using the built-in timer DISC DISC DISC 3–DISC CD CHANGER STANDBY STANDBY TIMER INPUT PRESET/TUNING/BAND A/B/C/D/E BASS TREBLE REC/ AUTO/ PHONES MODE DOLBY NR PAUSE MANUAL MEMORY RANDOM TIMER TIME ADJ REC/PAUSE TIMER TAPE REC/ PAUSE REC/PAUSE — LEVEL PROGRAM SLEEP SLEEP VOLUME... -
Page 49: Appendix
Refer to the chart below when this system does not function properly. If the problem you are experiencing is not listed below or if the instruction below does not help, disconnect the supply lead and contact your authorized YAMAHA dealer or service center. - Page 50 Appendix Problem A disc cannot be played The disc is not a standard type. normally, or there is a noise during play. Play will not begin even if Disc is upside down. disc is loaded. Disc is dirty. No sound. The input source selection is incorrect.
-
Page 51: Specifications
Specifications Amplifier section Minimum RMS Output Power per Channel FRONT 6 ohm, 1 kHz, 0.9% THD ... 80W+80W 6 ohm, 1 kHz, 10% THD ... 100W+100W CENTER 6 ohm, 1 kHz, 0.9% THD ... 80W 6 ohm, 1 kHz, 10% THD ... 100W REAR 6 ohm, 1 kHz, 0.9% THD ... - Page 52 YAMAHA ELECTRONICS (UK) LTD. YAMAHA HOUSE, 200 RICKMANSWORTH ROAD WATFORD, HERTS WD1 7JS, ENGLAND YAMAHA SCANDINAVIA A.B. J A WETTERGRENS GATA 1, BOX 30053, 400 43 VÄSTRA FRÖLUNDA, SWEDEN YAMAHA MUSIC AUSTRALIA PTY, LTD. 17-33 MARKET ST., SOUTH MELBOURNE, 3205 VIC., AUSTRALIA...