Table of Contents
Advertisement
Quick Links
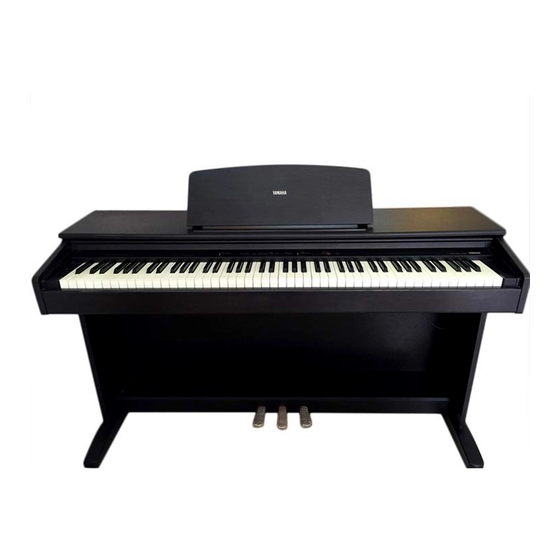
Digital Piano
Digital Piano
88 II
YDP-
IMPORTANT
Check Your Power Supply
Make sure that your local AC mains
voltage matches the voltage speci-
fied on the name plate on the bottom
panel. In some areas a voltage se-
lector may be provided on the rear
panel of the main keyboard unit near
the power cord. Make sure that the
voltage selector is set for the voltage
in your area. The voltage selector is
set at 240V when the unit is initially
shipped. To change the setting use a
"minus" screwdriver to rotate the se-
lector dial so that the correct voltage
appears next to the pointer on the
panel.
Advertisement
Table of Contents

Related Manuals for Yamaha YDP-88II


Summary of Contents for Yamaha YDP-88II
- Page 1 Digital Piano Digital Piano 88 II YDP- IMPORTANT Check Your Power Supply Make sure that your local AC mains voltage matches the voltage speci- fied on the name plate on the bottom panel. In some areas a voltage se- lector may be provided on the rear panel of the main keyboard unit near the power cord.
- Page 2 SAVING USER DATA • Save all data to an external device such as the Yamaha DOU-10 Disk Or- chestra Unit, in order to help prevent the loss of important data due to a malfunction or user operating error.
-
Page 3: Table Of Contents
Dual play mode allows 2 voices to be played simultaneously. In order to make the most of your YDP-88II’s performance potential and features, we urge you to read this Owner’s Manual thoroughly, and keep it in a safe place for later reference. -
Page 4: The Control Panel
E. PIANO 2 CHORD ORGAN MASTER VOLUME (See page 7) The YDP-88II also has a DUAL mode in which two voices can be played simultaneously across the full range of the keyboard — see page 7 for details. NOTE 5 [METRONOME] Button Turns the metronome sound on and off. - Page 5 The Music Stand If you will be using sheet music with your YDP-88II, raise the music stand built into its top panel by lifting the rear edge of the music stand, then flip down the music stand braces and engage them with the corresponding recesses.
-
Page 6: Connections
YDP-88II for connection to an instrument amplifier, mixing console, PA system, or recording equipment. If you will be connecting the YDP-88II to a monaural sound system, use only the L/L+R jack. When a plug is inserted into the L/L+R jack only, the left- and right- channel signals are combined and delivered via the L/L+R jack so you don’t lose any of the YDP-88II’s sound. -
Page 7: Selecting & Playing Voices
ORGAN Turn Power On After making sure that the YDP-88II’s AC cord is properly plugged into a convenient AC wall outlet, press the [POWER] switch located to the left of the keyboard to turn the power ON. In some areas a plug adaptor may be provided to match the pin configuration of the AC wall outlets in your area. -
Page 8: Playing The Demonstration Tunes
Playing the Demonstration Tunes The YDP-88II includes five demo tunes that effectively demonstrate its sound capabilities. Here’s how you can select and play the demo tunes: DEMO HARPSI- PIANO E. PIANO 1 E. PIANO 2 CHORD ORGAN MASTER VOLUME DEMO Engage the Demo Mode Press the [DEMO] button to engage the demo mode —... -
Page 9: The Dual Mode
The Dual Mode The DUAL mode makes it possible to play two voices simultaneously across the entire range of the keyboard. To activate the DUAL mode simply press two voice selectors at the same time (or press one voice selector while holding another). -
Page 10: The Pedals
The Pedals The YDP-88II has three foot pedals that produce a range of expressive effects similar to those produced by the pedals on an acoustic piano. Soft pedal Damper pedal Sostenuto pedal Transposition The YDP-88II’s TRANSPOSE function makes it possible to shift the pitch of the entire keyboard up or down in semitone intervals up to a maximum of six semitones. -
Page 11: Pitch Control
Pitch Control Pitch control makes it possible to tune the YDP-88II over a 50-cent range (approximate) in approximately 1.6-cent intervals. A hundred “cents” equals one semitone, so the tuning range provided allows fine tuning of overall pitch over a range of approximately a semitone. Pitch control is useful for tuning the YDP- 88II to match other instruments or recorded music. -
Page 12: The Metronome & Tempo Control
The Metronome & Tempo Control The YDP-88II built-in metronome is a convenient feature for practice, and it can also provide a solid rhythmic guide when recording using the Recorder feature, described below. METRONOME TEMPO METRONOME HARPSI- CHORD METRONOME ANO 1 E. -
Page 13: Using The Recorder
Using the Recorder The YDP-88II recorder lets you record what you play on the keyboard and then play it back. This is a useful adjunct to any keyboard study program, since it lets you hear exactly how you sound from the listener’s perspective. It can also be just plain fun. -
Page 14: Changing The Initial Settings
• All recorder data will be erased when the YDP-88 II power is turned off. It is possible to store recorded data to an external MIDI storage device such as the Yamaha DOU-10 Disk Orchestra Unit by using the Bulk Dump function described on page 16. -
Page 15: Midi Functions
YDP-88II automatically “plays” the recorded performance in precise detail. The examples given above really only scratch the surface. MIDI can do much, much more. The YDP-88II offers a number of MIDI functions that allows it to be used in fairly sophisticated MIDI systems. -
Page 16: Midi Transmit & Receive Channel Selection
This function allows the MIDI note data transmitted by the YDP- 88II to be transposed up or down in semitone increments by up to plus or minus 6 semitones. The pitch of the YDP-88II itself is not affected. Setting the MIDI Transpose Function... -
Page 17: Local Control On/Off
MIDI control change information when one of its pedals are operated. This function makes it possible to cancel control change data reception and transmission if you do not want the YDP-88II voices to be affected by control change data received from an external device or vice versa. -
Page 18: The Multi-Timbre Mode
The MIDI Split & Left Local OFF Mode In the MIDI split mode one section of the YDP-88II keyboard is used to play a YDP-88II voice in the normal way, while the remaining section is used to play a second MIDI keyboard or tone generator such as the Yamaha DOU-10 Disk Orchestra Unit. -
Page 19: Troubleshooting
6. Distorted Sound When the YDP-88II is Connected to An External Amplifier/Speaker System If the YDP-88II is connected to a stereo system or instrument amplifier and the sound is distorted, reduce the setting of the YDP-88II volume control to a level at which the distortion ceases. -
Page 20: Keyboard Stand Assembly
• Bundled pedal cord inside Keyboard Stand Assembly • Be careful not to confuse parts, and be sure to install all parts in the correct direction. Please assemble in accordance with the se- quence given below. • Assembly should be carried out by at least two persons. •... - Page 21 • Use the vinyl tie attached to the bottom of the pedal box to secure the cord. • The other vinyl tie will be used later in step N. Untie the two vinyl ties. Untie both vinyl ties and straighten out the bundled cord attached to the bottom of the pedal box.
- Page 22 • 4 x 10 mm round-head screws 2 • Rough surface outward. • 4 x 20 mm tapping screws 3 Attach the rear panel (B). With the rear panel’s rough surface facing outward and the panel slightly angled as shown in the illustration, lower it onto the feet’s protruding edge at the rear of the pedal box.
-
Page 23: Connect The Pedal Cord
• 6 x 16 mm flat-head screws 4 Align the holes on the bottom panel of the main unit with the holes in the brackets on the side panels (also center the main unit to produce equal clearance on the left and right sides, as shown in the illustration), then screw in and securely tighten the four 6 x 16 millimeter flat-head screws 4. - Page 24 VOLTAGE 130V SELECTOR • A voltage selector is provided in some areas. < Voltage Selector Before connecting the AC power cord, check the setting of the voltage selector which is provided in some areas. To set the selector for 110V, 130V, 220V or 240V main voltages, use a “minus”...
- Page 25 • Is the YDP-88II clear of doors and other movable fixtures? Move the YDP-88II to an appropriate location. • Does the YDP-88II make a rattling noise when you shake it? Tighten all screws. • Does the pedal box rattle or give way when you step on the ped- als? Turn the adjuster so that it is set firmly against the floor.
-
Page 26: Midi Data Format
2 7CH Panel Data Send occurs when this data received. 2 7DH Name Data Send occurs when this data received. * This message is effective only when the channel number “n” is set to the same as the YDP-88II receive channel number. PANEL DATA SEND FORMAT... -
Page 27: Midi Implementation Chart
YAMAHA [Digital Piano] Model: YDP-88II Function Basic Default Channel Changed 1~16 Default Mode Messages ***************** Note 15~114 Number : True voice ***************** O 9nH, v=1~127 Velocity Note on X 9nH, v=0 Note off After key’s Touch Ch’s Pitch Bender Control Change... -
Page 28: Specifications
WEIGHT • Specifications and descriptions in this owner’s manual are for information purposes only. Yamaha Corp. reserves the right to change or modify prod- ucts or specifications at any time without prior notice. Since specifications, equipment or options may not be the same in every locale, please check with your Yamaha dealer. - Page 29 For details of products, please contact your nearest Yamaha or the authorized distributor listed below. Pour plus de détails sur les produits, veuillez-vous adresser à Yamaha ou au distributeur le plus proche de vous figurant dans la liste suivante. NORTH AMERICA CANADA Yamaha Canada Music Ltd.
- Page 30 M.D.G., EMI Division © 1997 Yamaha Corporation VZ40090 706POCP5.2-01A0 Printed in Japan...