
Related Manuals for Yamaha P-140


Summary of Contents for Yamaha P-140
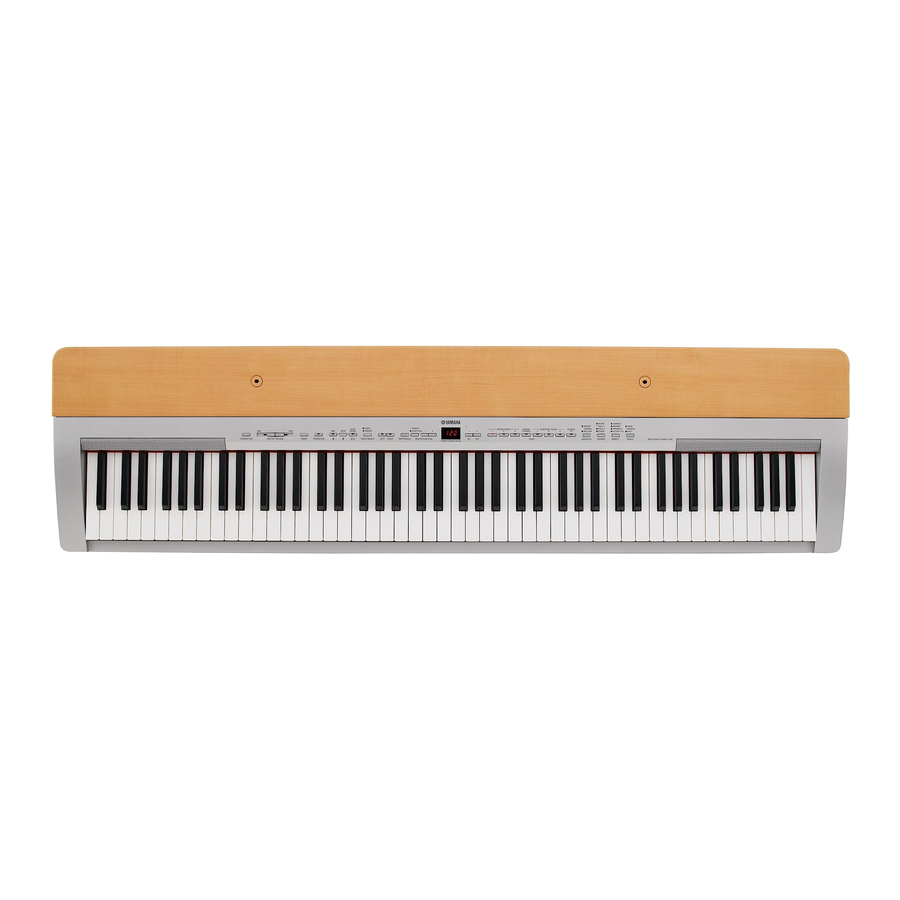
- Page 1 Electronic Piano P-140/P-140S Owner’s Manual Bedienungsanleitung Mode d’emploi Manual de instrucciones lectronic iano...
-
Page 2: Special Message Section
For longer extension cords, consult a local electrician. This product should be used only with the components supplied or; a cart, rack, or stand that is recommended by Yamaha. If a cart, etc., is used, please observe all safety markings and instructions that accom- pany the accessory product. -
Page 3: Important Safety Instructions
Do NOT connect this type of product to any power supply or adapter other than one described in the owners manual, on the name plate, or specifically recommended by Yamaha. WARNING: Do not place this product or any other... - Page 4 • Use the specified adaptor (PA-5D, PA-150, or an equivalent recommended by Yamaha) only. Using the wrong adaptor can result in damage to the instrument or overheating. • Check the electric plug periodically and remove any dirt or dust which may have accumulated on it.
- Page 5 fluids, or chemical-impregnated wiping cloths. Yamaha cannot be held responsible for damage caused by improper use or modifications to the instrument, or data that is lost or destroyed. Always turn the power off when the instrument is not in use.
-
Page 6: Main Features
(page 43) that samples the unique resonance of an acoustic grand piano’s soundboard and strings when the sus- tain pedal is pressed, and Keyoff Samples that add the subtle sound produced when the keys are released. The P-140 comes much closer to the sound of a true acoustic piano. -
Page 7: About This Owner's Manual
* The models P-140/P-140S will be referred to as the P-140 in this Owner’s Manual. This product incorporates and bundles computer programs and contents in which Yamaha owns copyrights or with respect to which it has license to use others’ copyrights. Such copyrighted materials include, without limitation, all computer software, style files, MIDI files, WAVE data, musical scores and sound recordings. -
Page 8: Table Of Contents
Main Features... 6 About this Owner’s Manual ... 7 Accessories ... 7 Application Index ... 9 Panel Controls and Terminals... 10 Before Using the P-140 ... 12 Turning the Power On ...12 Setting the Volume ...12 Using the Pedals...13 Using Headphones ...13 Music Rest...13... -
Page 9: Application Index
Playing an accompaniment that matches pitch... Transposition – [TRANSPOSE] on page 26 Selecting a touch sensitivity type...Touch Sensitivity – [TOUCH] on page 25 Fine tuning the pitch of the entire instrument when you play the P-140 along with other instruments or CD music ...Fine Tuning of the Pitch on page 39 Changing voices Viewing the list of voices ... -
Page 10: Panel Controls And Terminals
Panel Controls and Terminals Panel Controls and Terminals Rear panel ™ & º ¡ Front panel P-140 Owner’s Manual... - Page 11 FC4/5 foot switch or an FC7 foot controller. º AUX OUT [L] [R] (LEVEL FIXED) jacks ...page 48 For outputting the sound of the P-140 to an external audio system, or connecting it to another device (MD recorder, etc.) to record your performance.
-
Page 12: Before Using The P-140
Yamaha) only. The use of other adaptors may result in irreparable damage to both the adaptor and the P-140. CAUTION Unplug the AC Power Adaptor when not using the P-140, or during electrical storms. Press the [STANDBY/ON] switch to turn the power on. -
Page 13: Using The Pedals
Do not use the P-140 at a high volume level for a long period of time, or your hearing may be damaged. Music Rest The P-140 includes a music rest that can be attached to the instrument by inserting it into the holes at the top of the con- trol panel. On front panel [PHONES] jacks. -
Page 14: Reference
Listening to the Demo Songs Reference Listening to the Demo Songs Demo songs are provided that effectively demonstrate each of the P-140’s voices. 2 3 4 Press the [STANDBY/ON] switch to turn the power When the power is turned ON, one of the voice button indicators will light. -
Page 15: Using The 50 Piano Preset Songs
Using the 50 Piano Preset Songs Listening to the 50 Piano Preset Songs The P-140 provides performance data of 50 piano songs. You can simply listen to these songs (page 58) or use them for practice (page 16). Press the [SONG SELECT] button a few times until the “PRESET”... -
Page 16: Practicing A One-Hand Part Using The 50 Preset Songs (Part Cancel Function)
Stop playback. When playback is complete, it automatically stops and the P-140 locates the top of the song. If you wish to stop playback in the middle of a song, press the ton. You can also pause playback by pressing the PAUSE] button. - Page 17 AUX Pedal function described on pages 37, [STOP] Sync Start standby connector can be assigned to play and Using the 50 Piano Preset Songs TERMINOLOGY Sync: Synchronized; occurring at the same time. P-140 Owner’s Manual...
-
Page 18: A-B Repeat For The 50 Preset Songs
A-B repeat playback will resume if you press the button. PAUSE] To cancel the A and B points, press the P-140 Owner’s Manual will appear on the display). will appear on the display). Repeat A through B [PLAY/ button once. -
Page 19: Selecting & Playing Voices
Voice List” on page 53 for more information on the characteristics of each preset voice. TERMINOLOGY Voice: On the P-140, the term “voice” means “instrument sound.” NOTE You can control the loudness of a voice by adjusting the force with... -
Page 20: Combining Voices (Dual)
Voice 2). Voice numbering priority The P-140 Function provides access to a number of other Dual functions, such as volume balance setting and octave setting (pages 37, 41). (If you do not set the Dual functions, the appropriate setting will be set in each voice by default.) Press any single voice button to return to the nor- mal single-voice play. -
Page 21: Splitting The Keyboard Range And Playing Two Different Voices (Split)
37, 42. (The split point is initially set at the F#2 key by default. If you do not need to change the split point, skip this step.) Split point (default setting: F#2) Melody Selecting & Playing Voices P-140 Owner’s Manual... - Page 22 BASS & CYMBAL E.BASS 1 E.BASS 2 Press any single voice button to exit Split and return to normal play. P-140 Owner’s Manual NOTE [REVERB] in Split The reverb type assigned to the right voice will take priority over the other. (If the reverb is set to OFF, the left voice’s reverb type...
-
Page 23: Adding Variations To The Sound - [Variation]
NOTE When the VARIATION is set to BRIGHT, the overall sound will be slightly louder. If the MASTER VOLUME is set at a high level the sound may become distorted. If so, lower the MASTER VOLUME level. P-140 Owner’s Manual... -
Page 24: Selecting A Reverb/Effect Type - [Reverb]/[Effect]
Default depth settings are different for each voice. The depth range is from 0 (no effect) through 20 (maximum effect depth). The current depth setting appears on the display while the [EFFECT] button is held. P-140 Owner’s Manual [–/NO][+/YES] buttons button is pressed. When all [REVERB] [–/NO] [+/YES] button. -
Page 25: Touch Sensitivity - [Touch]
NOTE Releasing the [TOUCH] button changes the touch type. If you are changing the volume by holding the [TOUCH] button, releasing the [TOUCH] button will not change the touch sensitivity type. (FIXED will remain selected.) P-140 Owner’s Manual... -
Page 26: Transposition - [Transpose]
“5,” playing key C produces pitch F. In this way, you can play a song as though it were in C major, and the P-140 will transpose it to the key of F. [TRANSPOSE] button Use the [–/NO]... -
Page 27: Using The Metronome
Using the Metronome The P-140 features a built-in metronome for convenience in practicing and use with the Recording features. Press the [METRONOME] button to start the metro- nome. The metronome sound is turned on. Adjusting the tempo The tempo of the metronome and user song recorder playback (the recorder is... -
Page 28: Recording Your Performance
TERMINOLOGY Recording vs. Saving: The format of performance data recorded on an MD differs from that of data recorded on the P-140. An MD records audio signals. The P-140 “saves” information regarding note timing, voices, and a tempo value, but not audio signals. When you play back recorded songs, the P-140 produces sound based on the saved information. -
Page 29: Start Recording
The amount of memory available for recording is shown on the display in approximate kilobytes. You can record up to a maximum of about 11,000 notes on the P-140 depending on pedal usage and other factors. The indicator will flash at the current METRONOME tempo setting. -
Page 30: Re-Recording A Previously Recorded Song
Ready mode. The selected part’s indicator lights in red. Follow the procedure from step mance quickly” on page 29 to re-record. P-140 Owner’s Manual in “Recording a perfor- NOTE If you want to change the tempo, time signature, reverb type, or... -
Page 31: Recording To Right/Left
This value is expressed in kilobytes and indicates how much space remains available for recording on the P-140. You can record up to a maximum of about 11,000 notes on the P-140 depending on pedal usage and other factors. - Page 32 • Dual detune (F3) • Dual octave shift (F3) • Split voices (F4) • Split balance (F4) • Split octave shift (F4) Entire Song • Tempo • Time signature (beat) • [REVERB] type (including OFF) • [EFFECT] type (including OFF) P-140 Owner’s Manual...
-
Page 33: Changing The Initial Settings (Data Recorded At The Beginning Of A Song)
You can cancel changes made to the initial settings by selecting a different part after step 2, then exiting Record mode by pressing the [REC] button. (Changes made to the data shared by two parts are also canceled.) P-140 Owner’s Manual... -
Page 34: Playing Back Songs
If the song cannot be transferred from a computer, you may need to rename the file. Sequence formats that can be played on the P-140 • SMF (Standard MIDI File) Formats 0 and 1 The SMF format is one of the most common and widely compatible sequence for- mats used for storing sequence data. -
Page 35: Turning Part Playback On And Off
The current measure number appears on the display during playback. • You can play the keyboard while the P-140 is playing back a song. You can also play the notes with a voice different from the playback voice by selecting a voice from the panel. -
Page 36: Detailed Settings - [Function]
Detailed Settings – [FUNCTION] Detailed Settings – [FUNCTION] You can set various parameters to make the best use of P-140 functions, such as fine tuning the pitch or selecting a scale, etc. The following parameters are available. The P-140 has nine main functions. -
Page 37: Basic Procedure In Function
Functions cannot be selected during Demo/Song Select or when the user song recorder is in operation. NOTE To cancel the function in step 2, 3, or 4, press the [TEMPO/FUNC- TION –, +] button any time to exit Function. P-140 Owner’s Manual... - Page 38 Use the [–/NO] and [+/YES] buttons to change the ON/OFF setting, select the type, or change the value. The default setting (which is used when you first turn on the power to the P-140) is recalled by pressing the buttons simultaneously. [–/NO] [+/YES] Press the [TEMPO/FUNCTION] to exit the Function.
-
Page 39: About Each Function
F1. Fine Tuning of the Pitch You can fine tune the pitch of the entire instru- ment. This function is useful when you play the P-140 along with other instruments or CD music. Use the [–/NO] and [+/YES] buttons to lower or raise the pitch of the A3 key in approxi- mately 0.2 Hz increments. -
Page 40: F2. Selecting A Scale
Bach and Beethoven, and even now it is often used when performing period music on the harpsichord. P-140 Owner’s Manual F2.2: Base Note If you select a scale other than Equal Temperament, you need to specify the root. -
Page 41: F3. Dual Functions
This function resets all Dual functions to their default values. Press the button to reset the values. [+/YES] NOTE SHORTCUT: You can jump directly to the Dual functions the [TEMPO/FUNCTION] button while holding the two Dual voice buttons. P-140 Owner’s Manual [EFFECT] can be [EFFECT] by pressing... -
Page 42: F4. Split Functions
Default setting: Different for each voice combina- tion. The volume level of the two voices combined in Split can be adjusted as required. You can make this setting for each combination of voices individually. P-140 Owner’s Manual F4.3: Right Voice Selection Setting range: Default setting: 1 Set the right voice. -
Page 43: F5. Other Functions
• If the SUSTAIN PEDAL type is set to “2”, disconnecting the sustain pedal while the power is switched on may leave the sustain active, causing notes to sustain indefinitely. In this case, switch the power off, then back on. P-140 Owner’s Manual [E.CLAVI-... -
Page 44: F6. Metronome Volume
1&2: “1&2” Receive. This allows simultaneous reception on chan- nels 1 and 2 only, enabling the P-140 to play 1 and 2 channel song data received from a music computer or sequencer. • Program change and other like channel messages received will not affect the P-140’s panel settings or the notes you play... - Page 45 • See page 61 for a list of the Panel Data Contents transmitted by this function. • Receiving the transmitted data: 1. Connect the P-140 via MIDI to the device to which the setup data was transmitted previously. 2. Start sending the setup data from the device.
-
Page 46: F9. Backup Functions
• Song Part Cancel Volume ( F9.2: MIDI Setting range: ON/OFF Default setting: ON The MIDI functions ( (expect for P-140 Owner’s Manual F9.3: Setting range: Default setting: ON • Transpose • Tuning ( • Scale (including base note) ( F9.4: Others... -
Page 47: Connections
CAUTION Before connecting the P-140 to other electronic components, turn off the power to all the components. Before turning the power on or off to all components, set all volume levels to minimum (0). Otherwise, electrical shock or damage to the components may result. - Page 48 Use the Function settings to assign the function. (page 43) 4 AUX OUT [R] [L] Pin jacks (LEVEL FIXED) You can connect these jacks to a stereo system to amplify the P-140 or to a cassette tape recorder to record your performance. Refer to the diagram below and use audio cables to make the connections.
-
Page 49: Connecting A Personal Computer
For more information, see below. CAUTION When connecting the P-140 to a computer, first turn off the power to both the P-140 and the computer before connecting any cables. After making connections, turn on the power to the computer first, then to the P-140. -
Page 50: Data Backup Using A Computer
Data Backup Using a Computer Data Backup Using a Computer For maximum data security Yamaha recommends that you save your important data to your com- puter by using the Musicsoft Downloader (MSD) software. This provides a convenient backup if the internal memory is damaged. -
Page 51: Message List
Confirms whether each operation is executed or not. CAUTION Never attempt to turn off the power while “CLr” or “FCL” appears in the display. Turning the power off in this state may cause the system to freeze. Comment P-140 Owner’s Manual Message List... -
Page 52: Troubleshooting
This is normal when electrical current is being applied to the instrument. The noise may be due to interference caused by the use of a mobile phone in close proximity to the P-140. Turn off the mobile phone, or use it further away from the P- 140. -
Page 53: Preset Voice List
Split lets you play two parts at the same time a bass part with the left hand, and a melody with the right hand. Preset Voice List : Yes : No Voice Descriptions P-140 Owner’s Manual... - Page 54 E. BASS 2 *1. Dynamic Sampling provides multiple velocity-switched samples to accurately simulate the timbral response of an acoustic instrument. *2. Contains a very subtle sample that is produced when the keys are released. P-140 Owner’s Manual Touch Dynamic Key-Off...
-
Page 55: Index
MIDI Functions ... 44 MIDI Implementation Chart ... 64 Music Rest ... 13 n y (display)... 51 Other Functions ... 43 [OTHERS] button ... 19 Part Cancel ... 16 Part Playback On and Off... 35 Pedal Type ... 43 P-140 Owner’s Manual Index... - Page 56 Sustain Pedal...42, 43 [SUSTAIN PEDAL] jack ...13, 47 Sync ...17 Sync Start ...17 TEMPO...15, 35 TEMPO (METRONOME) ...27 P-140 Owner’s Manual [TEMPO/FUNCTION] button... 27, 37 [TOUCH] button... 25 Touch Sensitivity... 25 [TRANSPOSE] button... 26 Troubleshooting... 52 Tuning ➝ Fine Tuning of the Pitch... 39 [VARIATION] button...
- Page 57 MEMO P-140 Owner’s Manual...
-
Page 58: Appendix
Tango (España) The Entertainer Maple Leaf Rag La Fille aux Cheveux de Lin Arabesque 1 Clair de lune Rêverie Golliwog’s Cakewalk P-140 Owner’s Manual / Bedienungsanleitung / Mode d’emploi / Manual de instrucciones Title J.S.Bach J.S.Bach J.S.Bach J.S.Bach No.1) J.S.Bach L-C.Daquin... -
Page 59: Factory Setting List
Local Control F8.4 Program Change Send & Receive F8.5 Control Change Send & Receive Backup P-140 Owner’s Manual / Bedienungsanleitung / Mode d’emploi / Manual de instrucciones Default GRAND PIANO 1 GRAND PIANO 1 WOOD BASS NORMAL Preset for each voice... -
Page 60: Midi Data Format
Si vous êtes très familier avec l’interface MIDI ou si vous utilisez un ordinateur pour commander votre matériel de musique au moyen de messages MIDI générés par ordinateur, les données suivantes vous seront utiles et vous aideront à commander le P-140. - Page 61 • Caution: If an error occurs during MIDI reception, the Sustain, Sostenuto, and Soft effects for all channels are turned off and an All Note Off message occurs. P-140 Owner’s Manual / Bedienungsanleitung / Mode d’emploi / Manual de instrucciones 7. SYSTEM EXCLUSIVE MESSAGES (Yamaha MIDI Format) Panel Data Transmit Data format: [F0H] ->...
- Page 62 Only the top address of the block (00H, 00H, 00H) is valid as a bulk data address. P-140 Owner’s Manual / Bedienungsanleitung / Mode d’emploi / Manual de instrucciones 10. SYSTEM EXCLUSIVE MESSAGES (P-140 MIDI Format) Data format: [F0H] ->...
- Page 63 STAGE EFFECT CHORUS PHASER TREMOLO ROTARY SP P-140 Owner’s Manual / Bedienungsanleitung / Mode d’emploi / Manual de instrucciones Parameter Description MASTER TUNE -50 - +50[cent] 1st bit 3 - 0 ➝ bit 15 - 12 2nd bit 3 - 0 ➝ bit 11 - 8 3rd bit 3 - 0 ➝...
-
Page 64: Midi Implementation Chart
Active Sense : Reset Notes: Mode 1 : OMNI ON , POLY Mode 3 : OMNI OFF, POLY P-140 Owner’s Manual / Bedienungsanleitung / Mode d’emploi / Manual de instrucciones Transmitted 1 - 16 ˛ ************** 0 - 127... -
Page 65: Specifications
Gerät selbst oder Sonderzubehör nicht in jedem Land gleich sind, setzen Sie sich im Zweifel bitte mit Ihrem Yamaha-Händler in Verbindung. * Les caractéristiques techniques et les descriptions du mode d’emploi ne sont données que pour information. Yamaha Corp. se réserve le droit de changer ou modifier les produits et leurs caractéristiques techniques à... - Page 66 * This applies only to products distributed by YAMAHA CORPORATION OF AMERICA. OBSERVERA! Apparaten kopplas inte ur växelströmskällan (nätet) så länge som den ar ansluten till vägguttaget, även om själva apparaten har stängts av.
- Page 67 For details of products, please contact your nearest Yamaha representative or the authorized distributor listed below. Pour plus de détails sur les produits, veuillez-vous adresser à Yamaha ou au distributeur le plus proche de vous figurant dans la liste suivante.
- Page 68 Este documento se ha impreso en papel sin cloro alguno, con tinta de soja. Yamaha Home Keyboards Home Page (English Only) http://music.yamaha.com/homekeyboard Yamaha Manual Library http://www.yamaha.co.jp/manual/ U.R.G., Pro Audio & Digital Musical Instrument Division, Yamaha Corporation © 2005 Yamaha Corporation WE98590 612POCP5.3-03C0 Printed in Japan...