Table of Contents
Advertisement
IMPORTANT
Check your power supply
Make sure that your local AC mains voltage
matches the voltage specified on the name
plate on the bottom panel. In some areas a
voltage selector may be provided on the rear
of the main unit near the power cord. Make
sure that the voltage selector is set for the
voltage in your area. The voltage selector is
set at 240V when the unit is initially shipped.
To change the setting use a "minus"
screwdriver to rotate the selector dial so that
the correct voltage appears next to the
pointer on the panel.
WICHTIG
Überprüfung der Stromversorgung
Vergewissern Sie sich vor dem Anschließen an
das Stromnetz, daß die örtliche Netzspannung
den Betriebsspannungswerten auf dem
Typenschild an der Unterseite des Instruments
entspricht. In bestimmten Regionen ist auf der
Rückseite des Instruments in der Nähe des
Netzkabels ein Spannungswähler angebracht.
Falls vorhanden, muß der Spannungswähler
auf die örtliche Netzspannung eingestellt
werden. Der Spannungswähler wurde
werkseitig auf 240 V voreingestellt. Zum
Verstellen drehen Sie den Spannungsregler
mit einem Schlitzschraubendreher, bis der
Zeiger auf den korrekten Spannungswert
weist.
IMPORTANT
Contrôler la source d'alimentation
Vérifiez que la tension spécifiée sur le
panneau inférieur correspond à la tension du
secteur. Dans certaines régions, l'instrument
peut être équipé d'un sélecteur de tension à
l'arrière de l'unité principale, à côté du cordon
d'alimentation.
Vérifiez que ce sélecteur est bien réglé en
fonction de la tension secteur de votre région.
Le sélecteur de tension est réglé sur 240 V au
départ d'usine. Pour modifier ce réglage,
utilisez un tournevis à lame plate pour tourner
le sélecteur afin de mettre l'indication
correspondant à la tension de votre région vis
à vis du repère triangulaire situé sur le
panneau.
IMPORTANTE
Verifique la alimentación de corriente
Asegúrese de que tensión de alimentación de
CA de su área corresponde con la tensión
especificada en la placa de características del
panel inferior. Es posible que en algunas
zonas se suministre un selector de tensión en
la parte posterior de la unidad principal, junto
al cable de alimentación.
Asegúrese de que el selector de tensión esté
ajustado a la tensión de su área. El selector
de tensión se ajusta a 240V cuando la unidad
sale de fábrica. Para cambiar el ajuste,
emplee un destornillador de cabeza "recta"
para girar el selector de modo que aparezca
la tensión correcta al lado del indicador del
panel.
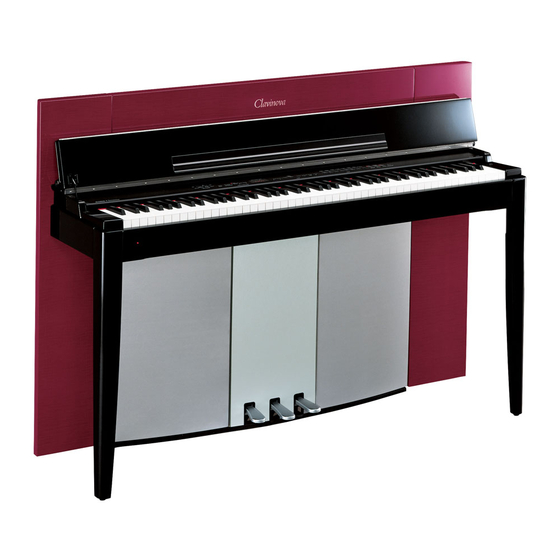
CLP-F01
Owner's Manual
Bedienungsanleitung
Mode d'emploi
Manual de instrucciones
For information on assembling the
keyboard stand, refer to the instructions at
the end of this manual.
Weitere Informationen über die Montage
des Keyboard-Ständers erhalten Sie in den
Anweisungen am Ende dieses Handbuchs.
Pour obtenir les détails sur l'assemblage du
pupitre du clavier, reportez-vous aux
instructions figurant à la fin de ce manuel.
Para información sobre el montaje del
soporte del teclado, consulte las
instrucciones al final de este manual.
EN
DE
FR
ES
Advertisement
Table of Contents

Related Manuals for Yamaha Clavinova CLP-F01


Summary of Contents for Yamaha Clavinova CLP-F01
- Page 1 Para cambiar el ajuste, emplee un destornillador de cabeza "recta" para girar el selector de modo que aparezca la tensión correcta al lado del indicador del panel. CLP-F01 Owner's Manual Bedienungsanleitung Mode d'emploi Manual de instrucciones For information on assembling the keyboard stand, refer to the instructions at the end of this manual.
-
Page 2: Special Message Section
SPECIFICATIONS SUBJECT TO CHANGE: information contained in this manual is believed to be correct at the time of printing. However, Yamaha reserves the right to change or modify any of the specifications without notice or obligation to update existing units. - Page 3 The instrument contains no user-serviceable parts. If it should appear to be malfunctioning, discontinue use immediately and have it inspected by qualified Yamaha service personnel. CAUTION Always follow the basic precautions listed below to avoid the possibility of physical injury to you or others, or damage to the instrument or other property.
- Page 4 Yamaha cannot be held responsible for damage caused by improper use or modifications to the instrument, or data that is lost or destroyed. Always turn the power off when the instrument is not in use.
- Page 5 Thank you for purchasing the Yamaha Clavinova! We recommend that you read this manual carefully so that you can fully take advantage of the advanced and convenient functions of the Clavinova. We also recommend that you keep this manual in a safe and handy place for future reference.
-
Page 6: Table Of Contents
Recording to [TRACK 2]...34 Changing the Initial Settings (Data recorded at the beginning of a song) ...36 Table of Contents CLP-F01 Playing Back Recorded Songs ... 37 Playing Back a Song... 37 Useful Playback Functions ... 38 Detailed Settings – [FUNCTION]... 39 Basic Procedure in Function Mode ... -
Page 7: Application Index
Outputting other instruments’ sound from the Clavinova... “AUX IN jacks” on page 53 Connecting a computer ...“Connecting a Personal Computer” on page 54 Assembling Assembling and disassembling the Clavinova ... “Keyboard Stand Assembly” on pages page 59–61 Application Index CLP-F01... -
Page 8: Accessories
(assembled) or you can disassemble the unit. Transport the keyboard horizontally. Do not lean it up against a wall or stand it up on its side. Do not subject the instrument to excessive vibration or shock. Accessories CLP-F01... -
Page 9: Features
(page 88) that samples the unique resonance of an acoustic grand piano’s soundboard and strings when the damper pedal is pressed, and “Keyoff Samples” that add the subtle sound produced when the keys are released. The CLP-F01 comes much closer to the sound of a true acoustic piano. -
Page 10: Before Using The Clavinova
Be careful to avoid catching fingers (yours or others, and especially those of children) in folding portion or between the cover and main unit. Before Using the Clavinova CLP-F01 To close the key cover: 1. If the music rest (page 11) is raised, lift it up and against the cover. -
Page 11: Music Rest
The music rest is attached to the inside of the key cover. To position the music rest for use: Pull the music rest on the cover down and toward yourself. To replace the music rest: Lift the music rest up and against the cover. Before Using the Clavinova CLP-F01... -
Page 12: Turning The Power On
Power indicator If you close the key cover without turning the power off, the power indicator remains lit, indicating that the power is still on. Before Using the Clavinova CLP-F01 (The shape of plug differs depending on locale.) Power indicator [POWER] [POWER] button again. -
Page 13: Setting The Volume
ON ... The speakers always produce sound. OFF ... The speakers produce no sound. control to the most comfortable listening level. MASTER VOLUME The level increases. jacks. [PHONES] bottom surface standard stereo phone plug Before Using the Clavinova CLP-F01... - Page 14 MEMO Before Using the Clavinova CLP-F01...
- Page 15 F8. MIDI Functions... 47 F9. Backup Functions... 50 About MIDI... 51 Connections ... 52 Connectors ... 52 Connecting a Personal Computer ... 54 Troubleshooting ... 58 Keyboard Stand Assembly ... 59 Preset Voice List... 62 Demo Song List... 64 Index ... 65 CLP-F01...
-
Page 16: Panel Controls And Terminals
[USER 1] [USER 2] [USER 3] [TRACK 1] [TRACK 2] SONG [START/STOP] [REC] ...P19–22, P32–38 9 Voice buttons ... P23 0 [SPLIT]... P29 A [REVERB]... P24 Panel Controls and Terminals CLP-F01 TEMPO/OTHER VALUE TEMPO FUNCTION START/STOP METRONOME TEMPO/FUNCTION TEMPO/OTHER VALUE... - Page 17 • The display indicates different values, as shown below, depending on the operation. Tempo (Normal indication) “50 Greats for the Piano” ROOM CHORUS HALL 1 PHASER HARD HALL 2 TREMOLO MEDIUM STAGE DELAY SOFT SPLIT REVERB EFFECT TOUCH TRANSPOSE A song number of Function number Parameter value Panel Controls and Terminals CLP-F01...
-
Page 18: Listening To The Demonstration Tunes
Listening to the Demonstration Tunes Demonstration tunes are provided that effectively demonstrate each of the CLP-F01’s voices. MASTER VOLUME TEMPO FUNCTION MELLOW BRIGHT START/STOP BRILLIANCE DEMO METRONOME TEMPO/FUNCTION Procedure Turn the power on. (In case the power is not turned ON) Press the When the power is turned ON, one of the voice button LEDs will light. -
Page 19: Listening To 50 Piano Preset Songs
(page 37), or when the user song recorder (page 32) is in use. TERMINOLOGY Song: On the CLP-F01, performance data is called a “Song.” This includes demonstration tunes and piano preset tunes. You can play the keyboard along with the preset song. -
Page 20: Practicing A One-Hand Part Using 50 Preset Songs (Part Cancel Function)
• Pressing the buttons repeatedly toggles playback between on and off. Start playback and playing. Press the SONG [START/STOP] turned off. Listening to 50 Piano Preset Songs CLP-F01 GRAND PIANO 1 TEMPO/OTHER VALUE USER 1 USER 2 CHURCH... - Page 21 [START/STOP] button, that song number track will be turned ON and the synchro start mark unit will engage Synchro Start mode. NOTE Both parts are automatically turned ON whenever a new song is selected. Listening to 50 Piano Preset Songs CLP-F01...
-
Page 22: A-B Repeat For 50 Preset Songs
A and B points. A-B repeat playback will resume if you press the button again. [START/STOP] To cancel the A and B points, press the Listening to 50 Piano Preset Songs CLP-F01 GRAND PIANO 1 TEMPO/OTHER VALUE USER 1... -
Page 23: Selecting & Playing Voices
(damps) any sustained notes. When you select the GRAND PIANO 1 or 3 CLP-F01, pressing the damper pedal activates the instru- ment’s special “Sustain Samples” to accurately recreate the unique resonance of an acoustic grand piano’s soundboard and strings. -
Page 24: Adding Variations To The Sound - [Variation]/[Brilliance]/ [Reverb]/[Effect]
HALL 2: For a truly spacious reverb sound, use the HALL 2 setting. This effect simu- lates the natural reverberation of a large concert hall. STAGE: Simulates the reverb of a stage environment. Selecting & Playing Voices CLP-F01 When you press the sostenu- to pedal here while holding the note, the note will sustain as long as you hold the pedal. - Page 25 If you are changing the depth settings by holding the [EFFECT] button, pressing the [EFFECT] button will not change the effect type. depth 0: no effect depth 20: maximum effect depth Default depth settings are differ- ent for each voice. Selecting & Playing Voices CLP-F01...
-
Page 26: Touch Sensitivity - [Touch]
[TOUCH] ume level appears on the display. The volume range is from 1 through 127. The default setting is 64. Selecting & Playing Voices CLP-F01 [–/NO] [+/YES] TEMPO/OTHER VALUE USER 1 USER 2 USER 3... -
Page 27: Transposition - [Transpose]
The transposition range: –12: –12 semitones (down one octave) normal pitch 12: 12 semitones (up one octave) Notes below and above the A-1 …. C7 range of the CLP-F01 sound one octave higher and lower, respectively. Selecting & Playing Voices CLP-F01... -
Page 28: Combining Two Voices (Dual Mode)
1 (the other voice will be desig- nated as Voice 2). The CLP-F01 Function mode provides access to a number of other Dual mode functions, such as volume balance setting or octave setting (page 44). (If you do not set Dual mode functions, the appropriate setting will be set in each voice by default.) -
Page 29: Splitting The Keyboard Range And Playing Two Different Voices (Split Mode)
NOTE Dual (page 28) and Split modes cannot be engaged simulta- neously. A specified “split point” key is included in the left-hand range. The split point can also be set via Function 4 (page 45). Selecting & Playing Voices CLP-F01... - Page 30 [VARIATION] Exit Split mode and return to normal play mode. Press the button again so that its indicator goes out. [SPLIT] Selecting & Playing Voices CLP-F01 [SPLIT] button is pressed.) [SPLIT] [SPLIT] button or the currently-selected voice button. [VARIATION] in Split Mode You can turn the variation on or off for Split mode voices.
-
Page 31: Using The Metronome
[FUNCTION#] indicator is lit, press the [TEMPO/FUNC- TION#] button to light the [TEMPO] indicator. The volume of the metronome can be adjusted via the Metro- nome Volume function in Func- tion mode (page 47). button. Selecting & Playing Voices CLP-F01... -
Page 32: Recording Your Performance
Recording Your Performance The ability to record and play back what you’ve played on the CLP-F01 keyboard can be an effective practice aid. You can, for example, record just the left-hand part, and then practice the right-hand part while playing back the recorded left-hand part. Or, since you can record up... -
Page 33: Start Recording
(All recorded data up to that point will be retained.) NOTE Pressing the SONG [START/ STOP] button to start recording, then pressing it again to stop recording will erase all previ- ously-recorded data on the selected track. Recording Your Performance CLP-F01... -
Page 34: Re-Recording Track 1
You can record new sounds and notes on each pass while listening to the recorded track. Follow the procedure from Step 5 on page 33 to record. Recording Your Performance CLP-F01 If you want to change the tempo, time signature, reverb type, or effect type when re-... - Page 35 • Dual octave shift (F3) • Split mode voices • Split balance (F4) • Split octave shift (F4) Entire Song • Tempo • Time signature (beat) • [REVERB] type (including OFF) • [EFFECT] type (including OFF) Recording Your Performance CLP-F01...
-
Page 36: Changing The Initial Settings (Data Recorded At The Beginning Of A Song)
3. Press the [REC] button to exit Record mode. Be careful not to press the either of which will start recording and erase all previously-recorded data on the selected track. Recording Your Performance CLP-F01 [E. PIANO 1] button. SONG [START/STOP] button or a key on the keyboard,... -
Page 37: Playing Back Recorded Songs
If the EFFECT type is changed via the panel controls during playback, the playback effect may be switched off in some cases. Playing Back Recorded Songs CLP-F01... -
Page 38: Useful Playback Functions
Stop” (page 46). This is convenient for starting playback of the recorded part anytime after you have started playing. Playing Back Recorded Songs CLP-F01 or both) are lit in green. While the Clavinova is button while SONG [START/STOP] Tracks can be turned on or off before or during playback. -
Page 39: Detailed Settings - [Function]
You can set various parameters to make the best use of Clavinova functions, such as fine tuning the pitch, selecting a voice for the metronome, repeating playback, etc. The following parameters are available. The CLP-F01 has nine main functions. Some of these main functions consist of a set of sub-modes. Parameter List... -
Page 40: Basic Procedure In Function Mode
Depending on the setting, the default setting (which is used when you first turn on the power to the Clavinova) is recalled by pressing the [+/YES] Detailed Settings – [FUNCTION] CLP-F01 TEMPO/OTHER VALUE USER 1 USER 2 USER 3... - Page 41 [TEMPO] TEMPO FUNCTION TEMPO/FUNCTION Select a desired function. LCD indication LCD indication TEMPO FUNCTION TEMPO/FUNCTION Select a desired function. LCD indication TEMPO FUNCTION TEMPO/FUNCTION Select a desired sub-mode. LCD indication button so that its [TEMPO/FUNCTION#] CLP-F01 Detailed Settings – [FUNCTION]...
-
Page 42: About Each Function
Hz < … dure, the display returns to the previous indication.) Detailed Settings – [FUNCTION] CLP-F01 You can also tune in about 1Hz steps (in any mode other than Function mode). To tune down or up, respectively, in approximately 1 Hz... -
Page 43: F2. Selecting A Scale
The base note setting is effective for tunings other than the Equal Temperament tuning.) Setting range: Normal setting: • Root indication example (F ) (A ) followed by followed by a high bar if sharp a low bar if flat Detailed Settings – [FUNCTION] CLP-F01... -
Page 44: F3. Dual Mode Functions
Normal setting: Different for each voice combina- tion. Detune Voice 1 and Voice 2 for Dual mode to create a thicker sound. Detailed Settings – [FUNCTION] CLP-F01 F3.3: Voice 1 Octave Shift F3.4: Voice 2 Octave Shift Setting range: Normal setting: Different for each voice combina- You can shift the pitch up and down in octave steps for Voice 1 and Voice 2 independently. -
Page 45: F4. Split Mode Functions
[TEMPO/FUNCTION#] button while holding the [SPLIT] button. To exit Function mode, you still need to press the [TEMPO/ FUNCTION#] button so that the TEMPO indicator lights up. CLP-F01 –1, 0, 1 0 – 20 [EFFECT] ALL (for both voices) -
Page 46: F5. Other Functions
This function lets you adjust the depth of this effect. Detailed Settings – [FUNCTION] CLP-F01 F5.4 Keyoff Sample Volume Setting range: Normal setting: 10 You can adjust the volume of the keyoff sound (the sub-... -
Page 47: F6. Metronome Volume
In either mode, no data is transmitted if the transmit channel is set to “OFF”. Demo/preset song data and recorder playback data are not transmitted via MIDI. CLP-F01 NOTE NOTE Detailed Settings – [FUNCTION]... - Page 48 1 and 2 channel song data received from a music com- puter or sequencer. Program change and other like channel messages received will not affect the CLP-F01’s panel settings or the notes you play on the keyboard. NOTE No MIDI reception occurs when Demo/Preset Song mode is engaged.
- Page 49 No MIDI note/panel data transmission or data reception occurs during a bulk data dump transmit operation. Receiving (returning) the transmitted data: 1. Connect the CLP-F01 via MIDI to the device to which the data was previously transmitted. 2. Start sending the data from the device.
-
Page 50: F9. Backup Functions
F9.3: Tuning F9.4: Others Setting range: ON/OFF Normal setting: OFF (all groups) Detailed Settings – [FUNCTION] CLP-F01 Description of sub-modes F9.1: Voice • Voice (Keyboard, Dual, and Split) • Dual (ON/OFF, Voice, and Dual Functions for each voice combination) • Split (ON/OFF, Voice, and Split Functions for each voice combination) •... -
Page 51: About Midi
When you are using the [TO HOST] connector, set the [HOST SELECT] switch, according to the type of com- puter you are using (page 56). You can also obtain detailed information about MIDI from various music books and other publications. About MIDI CLP-F01... -
Page 52: Connections
When these are connected (with RCA pin plug; LEVEL FIXED), the sound is output to the external device at a fixed level, regardless of the [MASTER VOLUME] control setting. Connections CLP-F01 L/L+R L/L+R AUX OUT AUX IN TO HOST... - Page 53 [REVERB] and [EFFECT] settings do not. If you connect the Clavinova to a monaural device, use only the AUX IN [L/L+R] jack or AUX OUT [L/L+R] jack. phone plug (standard) AUX OUT Tone Generator NOTE NOTE Connections CLP-F01...
-
Page 54: Connecting A Personal Computer
Clavinova and a personal computer and how to set up a Clavinova-Computer system (the manual is not written for any specific models). The document is available as a PDF file (in English) at the following Internet address. Yamaha Manual Library: http://www2.yamaha.co.jp/manual/english/ There are three methods by which to connect the Clavinova to a personal computer: 1. - Page 55 (regarding the MIDI driver) To transfer data via the computer’s serial port and the Clavinova’s TO HOST jack, you need to install a specific MIDI driver (the Yamaha CBX-MIDI driver for Windows). You can download this driver from the following Yamaha web site: http://music.yamaha.com/...
- Page 56 2. Using a MIDI interface and the Clavinova’s MIDI connectors Connection Use a MIDI interface device to connect a computer to the Clavinova using special MIDI cables. Clavinova HOST SELECT switch setting Set the Clavinova HOST SELECT switch to “MIDI.” Connections CLP-F01 Clavinova MIDI THRU PC-1 PC-2...
- Page 57 TEMPO USER 2 CHURCH JAZZ GUITAR/ WOOD HALL 2 TREMOLO MEDIUM START/STOP FUNCTION PRESET USER 3 TRACK TRACK START/STOP ORGAN ORGAN STRINGS CHOIR CLAVI. BASS E.BASS SPLIT STAGE DELAY SOFT METRONOME REVERB EFFECT TOUCH TRANSPOSE TEMPO/FUNCTION SONG VOICE Connections CLP-F01...
-
Page 58: Troubleshooting
The overall volume is low, or no sound is heard. The speakers do not switch off when a pair of headphones is connected. appears on the display, an internal malfunction has occurred. In this case, contact your Yamaha dealer. Troubleshooting Troubleshooting CLP-F01... -
Page 59: Keyboard Stand Assembly
(center) from the front or rear. Doing so may dam- age the projections of the rear panel (center), allowing it to fall or be damaged. Fixing pad Stack two packing pads. Keyboard Stand Assembly CLP-F01... - Page 60 Be careful not to permit mis- aligned levels on the front surface, or a gap on the top surface of rear panels (center, left, and right). Keyboard Stand Assembly CLP-F01 10mm Position the bracket to the rear of the rear panel (left).
- Page 61 CAUTION Do not hold the key cover. Improper handling can result in damage to the instrument or personal injury. Key cover Hold here. Do not hold here. Keyboard Stand Assembly CLP-F01...
-
Page 62: Preset Voice List
CHURCH ORGAN VARIATION JAZZ ORGAN VARIATION STRINGS VARIATION CHOIR VARIATION Preset Voice List CLP-F01 Touch Dynamic Key-Off Response Sampling Sampling Recorded samples from a full concert grand piano. Also includes three levels of dynamic sampling, sustain samples, and key-off samples for exceptionally realistic acoustic grand piano sound. - Page 63 Adds a cymbal voice to the bass sound. Ideal for walking bass lines in jazz tunes. Electric bass for a wide range of music styles, jazz, rock, popular, and more. A fretless bass good for styles such as jazz, fusion, etc. Voice Descriptions Preset Voice List CLP-F01...
-
Page 64: Demo Song List
GRAND PIANO 1 Consolation No.3 HARPSICHORD Gavotte The demonstration pieces listed above are short rearranged excerpts the original compositions. All other songs are original (©2004 Yamaha Corporation). Piano Voice Demo Description Voice Name GRAND PIANO 1 GRAND PIANO 2 GRAND PIANO 3 E.PIANO 1... -
Page 65: Index
Metronome Volume ...47 MIDI ... 51 MIDI [IN] [OUT] [THRU] ... 16, 53 MIDI cables ... 51, 56, 57 MIDI connectors... 51, 56 MIDI Data Format...69 MIDI driver ...55 MIDI Functions ... 47 Music Rest ... 11 Normal setting ...24 Index CLP-F01... - Page 66 Start/Stop recording...33 Sustain Pedal...46 Synchro Start 50 Piano Preset Songs...21 Recorded Songs ...38 Index CLP-F01 TEMPO... 16, 19, 37 TEMPO (METRONOME) ... 31 TO HOST ... 16, 51 TOUCH ... 16, 26 Touch Sensitivity... 26 TRACK 1/2 (50 Piano Preset Songs) ...20 TRACK 1/2 (Recording)...
- Page 67 MIDI Data Format / MIDI-Datenformat / Format des données MIDI / Formato de datos MIDI ... 69 MIDI Implementation Chart / MIDI Implementierung stabelle / Feuille d’implantation MIDI / Gráfica de implementación MIDI ... 73 Specifications / Technische Daten / Caractéristiques techniques / Especificaciones ... 74 CLP-F01...
-
Page 68: Factory Setting List
Program Change Send & Receive F8.5 Control Change Send & Receive F8.6 MIDI Transmit Transpose Backup Appendix CLP-F01 GRAND PIANO 1 WOOD BASS Preset for each voice Preset for each voice Preset for each voice Preset for each voice MEDIUM... -
Page 69: Midi Data Format
MIDI messages, the data provided in this section can help you to control the CLP-F01. Falls Sie bereits mit MIDI vertraut sind oder einen Computer zur Erzeugung von MIDI-Steuermeldungen für die Instrumente verwenden, können Sie sich zur Steuerung des... - Page 70 All Note Off occurs. Appendix CLP-F01 6. SYSTEM EXCLUSIVE MESSAGES (Yamaha MIDI Format) Panel Data Transmit Data format: [F0H] -> [43H] -> [0nH] -> [7CH] -> ... -> [F7H] P.C.#=Program Change number F0H, 43H, 0nH, 7CH (n: channel number) 00H, 2DH (data length) P.C.#...
- Page 71 Control Change values. Allow sufficient time for processing to execute (about 50 msec) before sending the CLP-F01 another message. • XG Native Parameter Change message may contain two or four bytes of parameter data (depending on the parameter size).
- Page 72 REVERB ROOM HALL 1 HALL 2 STAGE Sound board 03H EFFECT CHORUS PHASER TREMOLO DELAY Appendix CLP-F01 Data (H) Parameter 020C - 05F4(*1) MASTER TUNE 00 - 7F MASTER VOLUME — — 34 - 4C(*2) TRANSPOSE XG SYSTEM ON RESET ALL PARAMETERS...
-
Page 73: Midi Implementation Chart
MIDI Implementation Chart YAMAHA [ Clavinova ] Model CLP-F01 MIDI Implementation Chart Function... Basic Default Channel Changed 1 - 16 Mode Default Messages ˛ Altered ************** Note 9 - 120 Number : True voice ************** Velocity Note ON Ø Note OFF ˛... -
Page 74: Specifications
* Specifications and descriptions in this owner’s manual are for information purposes only. Yamaha Corp. reserves the right to change or modify products or specifications at any time without prior notice. Since specifications, equipment or options may not be the same in every locale, please check with your Yamaha dealer. - Page 75 MEMO MEMO Appendix CLP-F01...
- Page 76 MEMO Appendix CLP-F01...
-
Page 77: Important Safety Instructions
Do NOT connect this type of product to any power supply or adapter other than one described in the owners manual, on the name plate, or specifically recommended by Yamaha. WARNING: Do not place this product or any other... - Page 78 * This applies only to products distributed by YAMAHA CORPORATION OF AMERICA. IMPORTANT NOTICE FOR THE UNITED KINGDOM Connecting the Plug and Cord IMPORTANT.
-
Page 79: D [Transpose]
For details of products, please contact your nearest Yamaha representative or the authorized distributor listed below. Pour plus de détails sur les produits, veuillez-vous adresser à Yamaha ou au distributeur le plus proche de vous figurant dans la liste suivante. - Page 80 Clavinova Web site (English only) http://www.yamahaclavinova.com/ Yamaha Manual Library http://www2.yamaha.co.jp/manual/english/ U.R.G., Pro Audio & Digital Musical Instrument Division, Yamaha Corporation ©2004 Yamaha Corporation WC51170 409APZC?.?-01A0 Printed in Indonesia...